
The Best Millionaire's Shortbread (Easy and Irresistibly Good!) 1 hr 15 mins 12

This post may contain affiliate links. Where I make a small commission on purchased items, at no extra cost to you. See my disclosure for details.
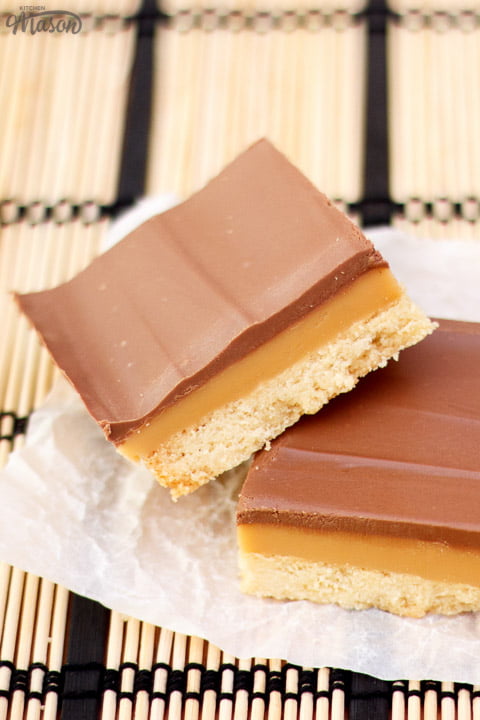
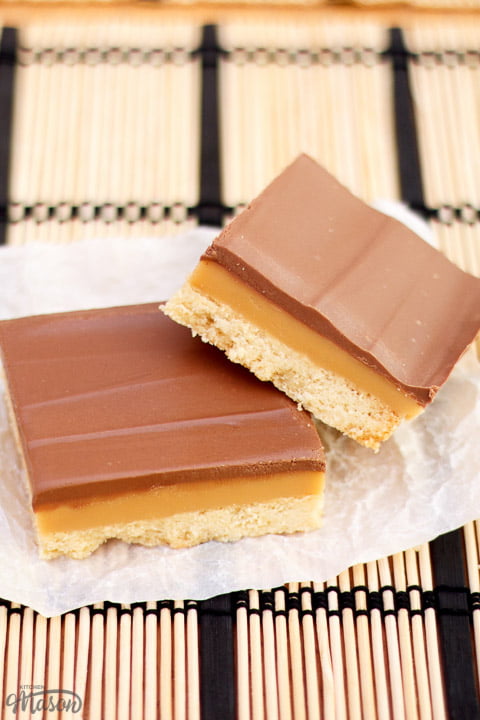
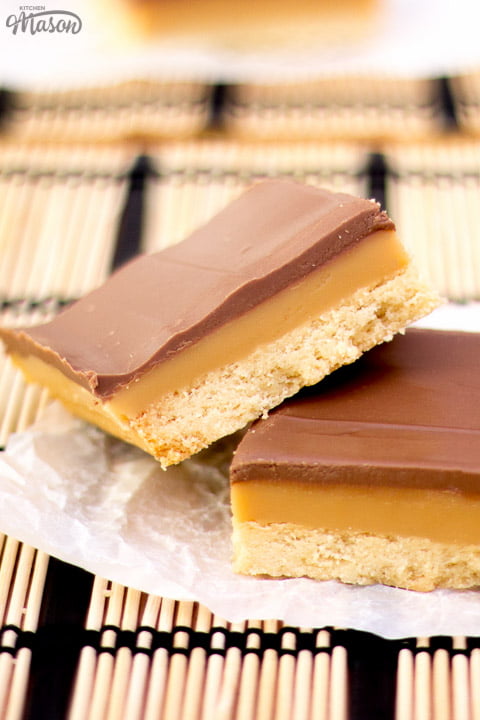
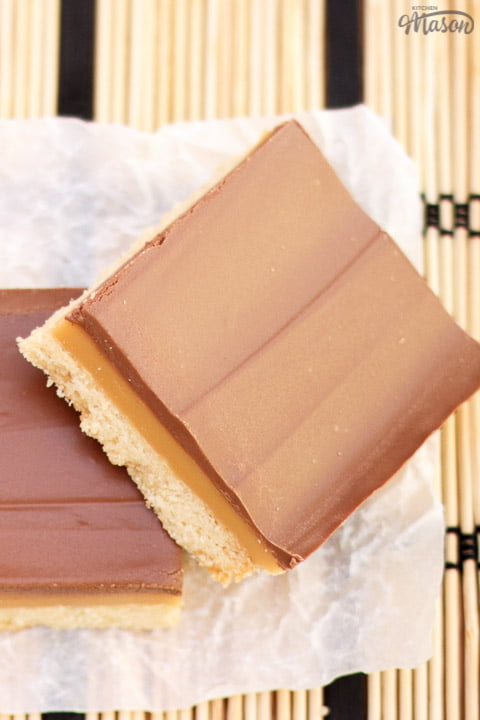
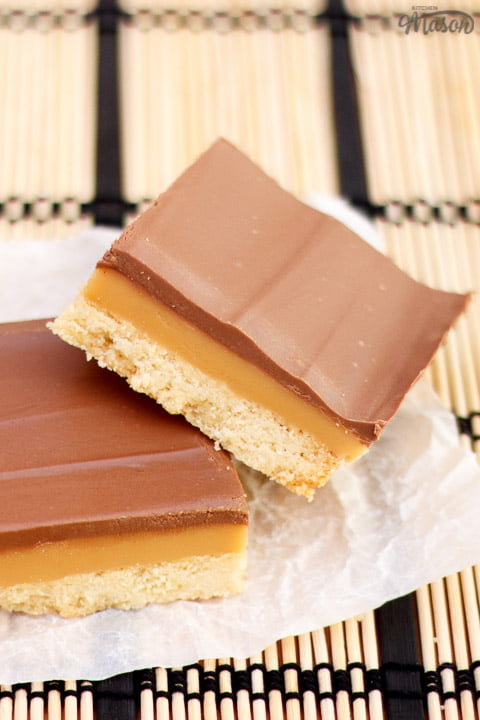
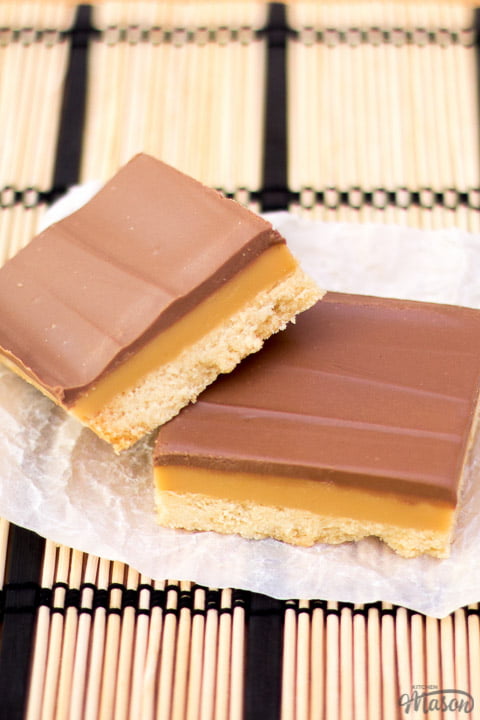
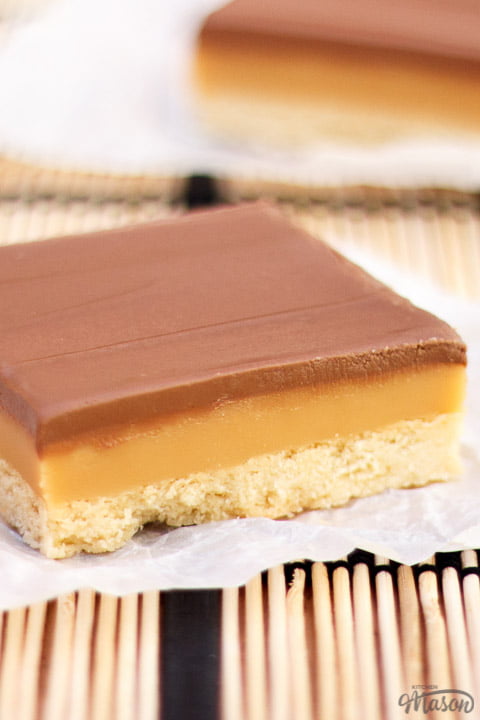
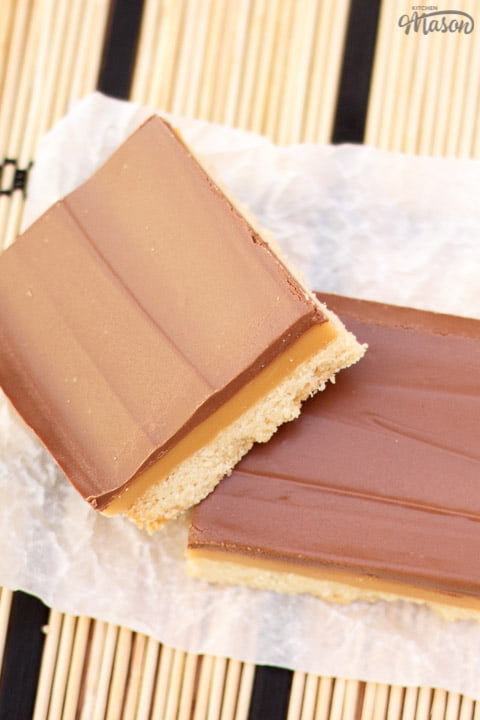
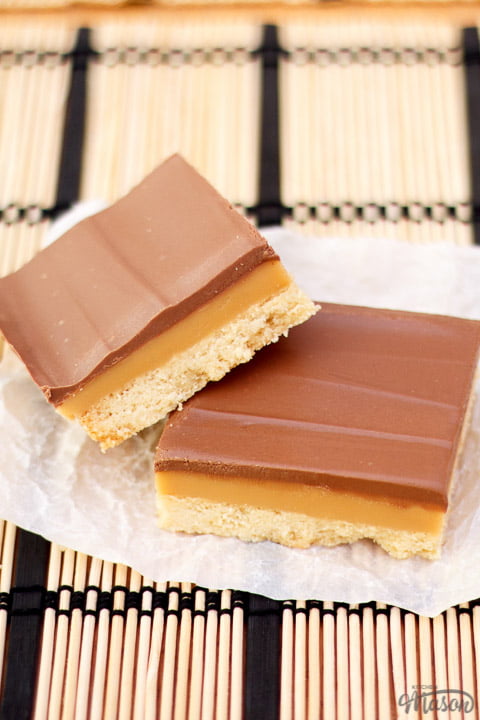
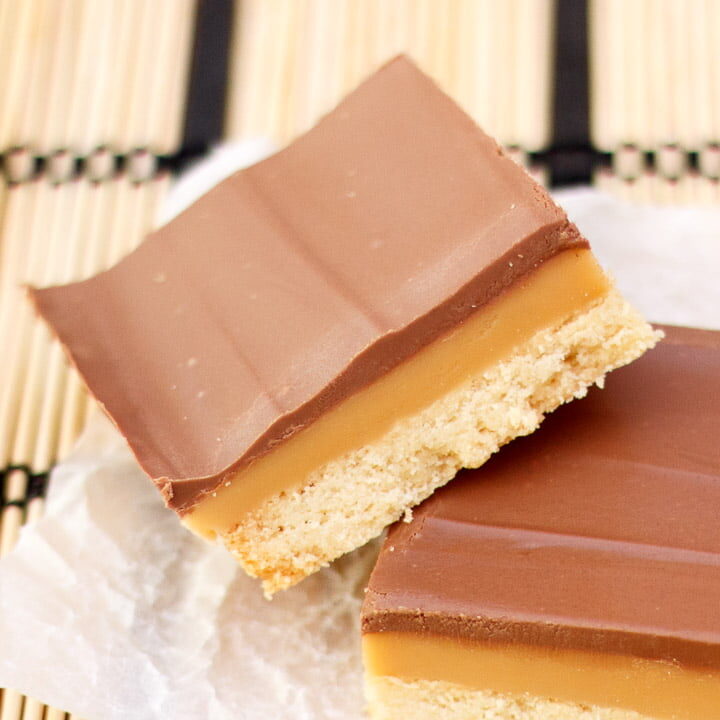
Ever seen millionaire's shortbread in a cafe and thought, I wish I could make that at home? This easy foolproof recipe is for YOU! Buttery crumbly shortbread, thick golden caramel, and glossy chocolate... This beauty is guaranteed to taste better than shop bought varieties!
Jump to:
Why you'll love it 💛
Millionaire shortbread is one of those bakes I never get tired of. Whether I'm making this classic version, or one of my favourite twists (like chocolate orange caramel shortbread or millionaire brownie bars), it always disappears embarrassingly fast!
What I love most about this recipe is that it genuinely delivers, even if you don't bake very often. The steps are straightforward, the tips cover everything that could go wrong, and the results look like something from a cafe counter. Except made from scratch, at home, by you. And that never gets old!
Ingredient notes
Confused about what ingredients to buy? Not sure about a substitution? Here's everything you might need to know...
- Butter - Always use unsalted butter in baking as it gives you control of the salt content/flavour. Ensure this is at room temperature for the biscuit layer.
- Sugar - My favourite is golden caster sugar as it adds a slight caramel flavour. Regular caster sugar will work great too.
- Flour - Plain flour works best in this recipe, don't substitute it for others varieties.
- Salt - No need for fancy types here, regular table salt will work fine. We want flavour not texture.
- Condensed Milk - In my experience, any brand will work. Make sure it's the sweetened variety though.
- Golden Syrup - Brand doesn't matter, but golden syrup gives the best flavour. Avoid swapping for honey.
- Vanilla - A good brand (like Little Pod or Nielsen Massey) works well here. Supermarket versions seem flavourless in comparison.
- Chocolate - This is a prominent flavour, so worth investing in one that you know you will love, rather than using a cheaper alternative.
Emma's top tips
- Leave an overhang when you line your tin with baking paper. This will make it much easier to remove later.
- Don't be tempted to increase the heat to speed up making the caramel. It will likely catch on the bottom and burn.
- When making the caramel, stir constantly and right into the edges. If you don't, you may get burnt bits running through it.
- Allow each layer to cool completely before moving onto the next step. Especially the caramel, as that can cause your chocolate to bloom.
- Use room temperature butter for the biscuit dough. (Ingredients blend better when they're all at the same temperature.)
- Treat yourself to a sugar thermometer. They're cheap and worth the investment. It is possible to make caramel without one, but it's trickier.
- Don't know what to do with the remaining condensed milk? You could make another batch, or check out the More Recipes Like This section at the end of this post for more inspiration.
If I could offer any other words of advice, it would be to take your time, read the recipe all the way through and prepare your ingredients before you start. There's nothing worse than getting to a critical part of a recipe, realising you have to weigh an ingredient, then returning to the pan to discover it's ruined.
Not a confident baker yet? You might like to read through baking for beginners first. It'll really boost your knowledge and confidence!
Troubleshooting
- My chocolate bloomed (has white streaks) - Your chocolate was exposed to dramatic temperature changes. This could be that you didn't allow the biscuit or caramel layers to cool before topping, you heated the chocolate too much on a cold day, or even that you chilled the caramel and poured warm chocolate on top.
- The chocolate set too quickly and didn't spread - This could happen if you chilled the caramel first. Allow it to set at room temperature to avoid this.
- The caramel has burnt bits - Either your heat was too high and/or you weren't stirring often and thoroughly enough. Make sure you stir vigorously and right into the edges. Worst case scenario, you can sieve the burnt bits out if you're quick enough.
- My caramel didn't set - Your mixture didn't reach 107°C (225ºF) and/or you used incorrect measurements of ingredients. Use weighing scales and a thermometer next time to remove the guess work and avoid disappointment.
- My caramel was hard - Your caramel got hotter than 107°C (225ºF) and likely reached the hard crack stage. Use a thermometer to ensure this doesn't happen.
Timings
Have limited time? Struggle with recipe timings? Or juggling around other things? Here's some time managing info to make your life easier!
- It will take approximately 10 minutes to make the biscuit dough, and 15-20 minutes to bake it.
- The caramel layer will take somewhere between 10-20 minutes to make.
- The chocolate will only take a few minutes to melt and spread over the caramel.
- IMPORTANT: You will need to allow time for each layer to cool completely before beginning the next. This time can vary depending on how warm your kitchen is, or even what season it is.
Product suggestions
Life in the kitchen is SO much easier when you have the right equipment! Here are the tools I used and recommend...
- A sugar thermometer removes all the guesswork.
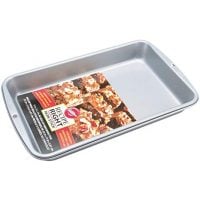
- Having the right size baking tin for the recipe helps keep things in proportion.
- Electric hand whisks save you some elbow grease. Always worth having one of these in your cupboards!
- If you're going to be baking regularly, adding a Kenwood stand mixer to your Birthday or Christmas list is a must.
- When it comes to saucepans, you get what you pay for. I've owned my heavy bottom Stellar saucepans for over 15 years, and they're still going strong!
Step by step picture recipe
(For a printer friendly version, see the recipe card at the end of this post)
Please note, this recipe includes both UK metric and US Cup measurements.
Ingredients
Here is what you will need to make 12 pieces.
Biscuit base
- 125g (½ Cup) Unsalted Butter, Room Temp
- 50g (¼ Cup) Golden Caster Sugar
- 175g (1 + ⅓ Cup) Plain Flour
- Pinch Salt
Caramel
- 200g (⅔ Cup) Condensed Milk
- 125g (½ Cup) Unsalted Butter
- 125g (⅔ Cup) Golden Caster Sugar
- 2 tablespoon Golden Syrup
- 1 teaspoon Vanilla Extract
- Pinch Salt
Chocolate topping
- 200g (7 oz) Good Quality Milk Chocolate
Essential equipment
- 18 x 28cm (7 x 11") Baking Tray
- Electric Stand Mixer or Large Bowl With Electric Hand Whisk
- Fork
- Large Heavy Based Saucepan
- Sugar Thermometer (optional but very handy)
- Glass Bowl
- Wooden Spoon
Biscuit base instructions
Lightly grease and line the base and sides of your baking tray, and preheat your oven to 180°C/Fan 170°C/356°F.
First, either in a stand mixer or a large bowl using an electric hand whisk, cream together the butter (125g | ½ cup) and sugar (50g | ¼ cup) until light and fluffy.
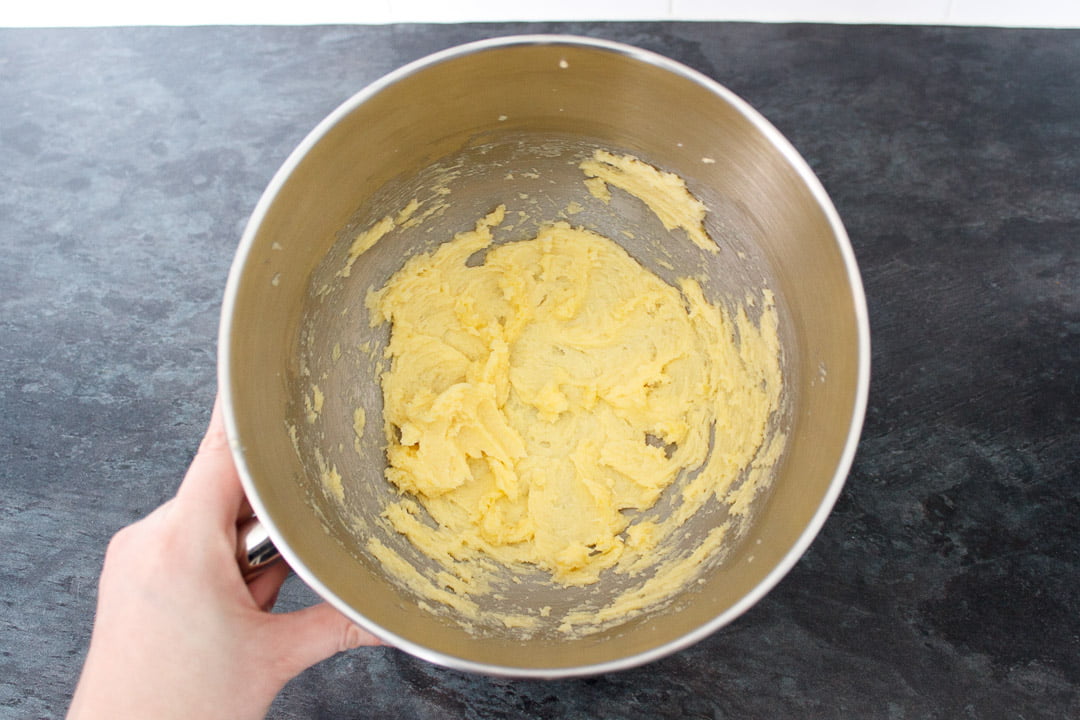
Then sift in the flour (175g | 1 + ⅓ cup) and add the salt (pinch). Beat until you get a crumbly dough.
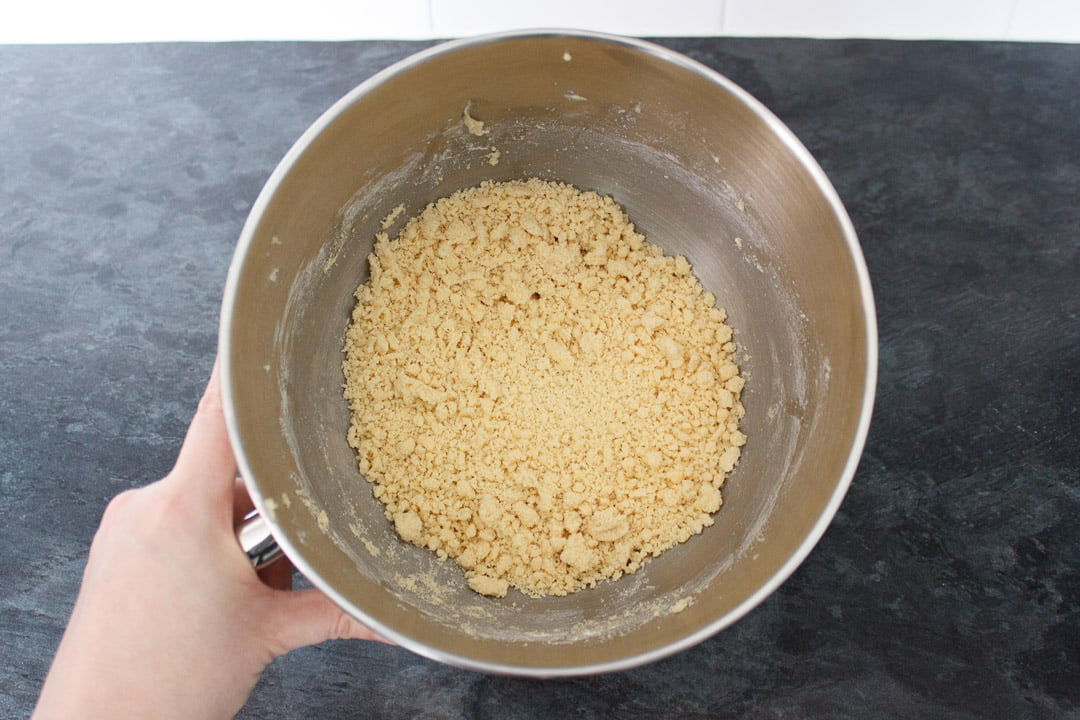
Next, tip the dough straight out into the prepared tray, and flatten out as evenly as you can. (Try not to over work it though.)
Prick the base all over with a fork (this will stop it rising too much) then pop it into the preheated oven and bake for 15-20 mins, until just turning golden.
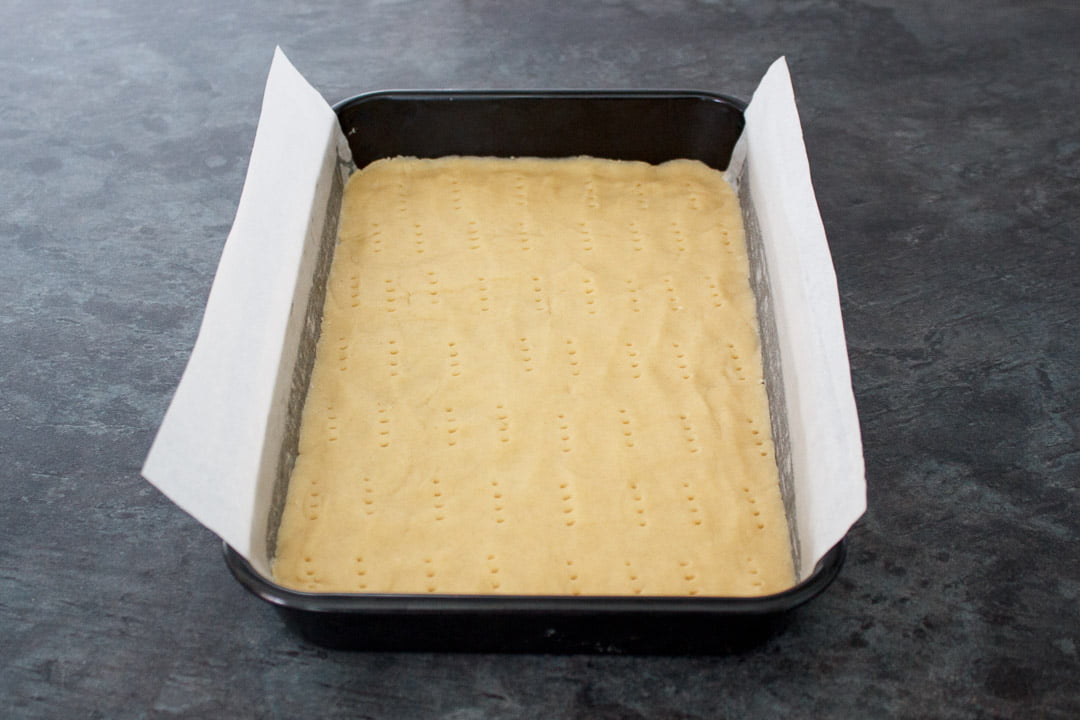
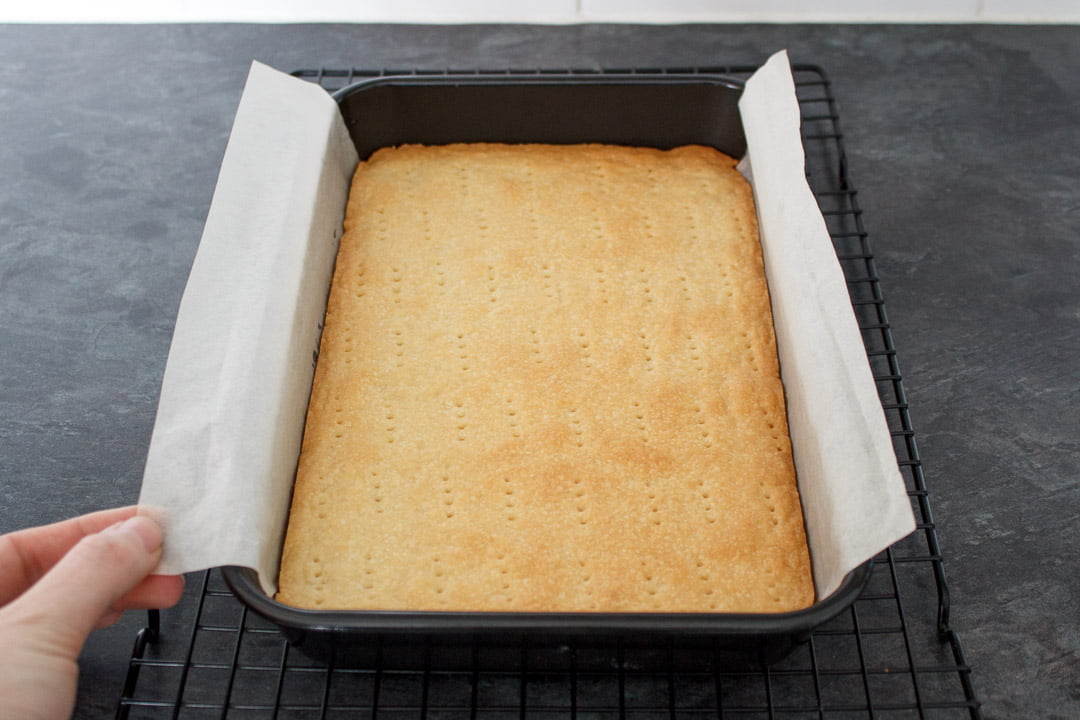
Leave the biscuit to one side to cool completely while you make the caramel.
Caramel instructions
Add all the caramel ingredients into a large, heavy based saucepan, and set over a low/medium heat.
(200g | ⅔ cup condensed milk, 125g | ½ cup unsalted butter, 125g | ⅔ cup golden caster sugar, 2 tablespoon golden syrup, 1 teaspoon vanilla extract, pinch of salt.)
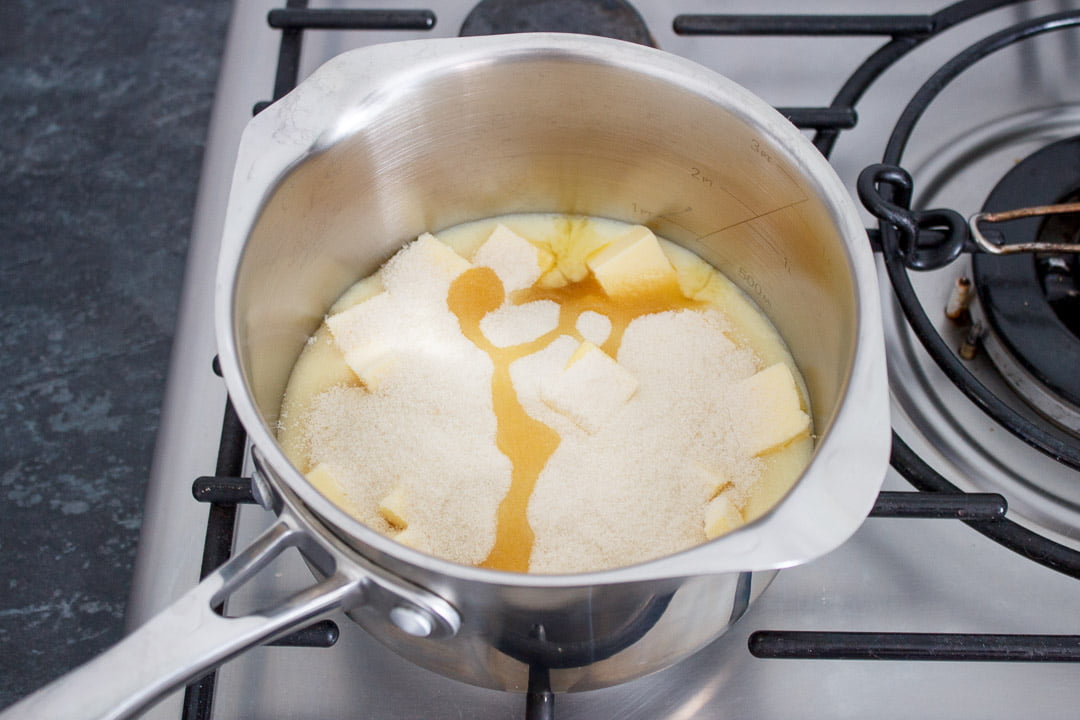
Stir everything gently until all the ingredients have dissolved, then bring the mixture up to the boil.
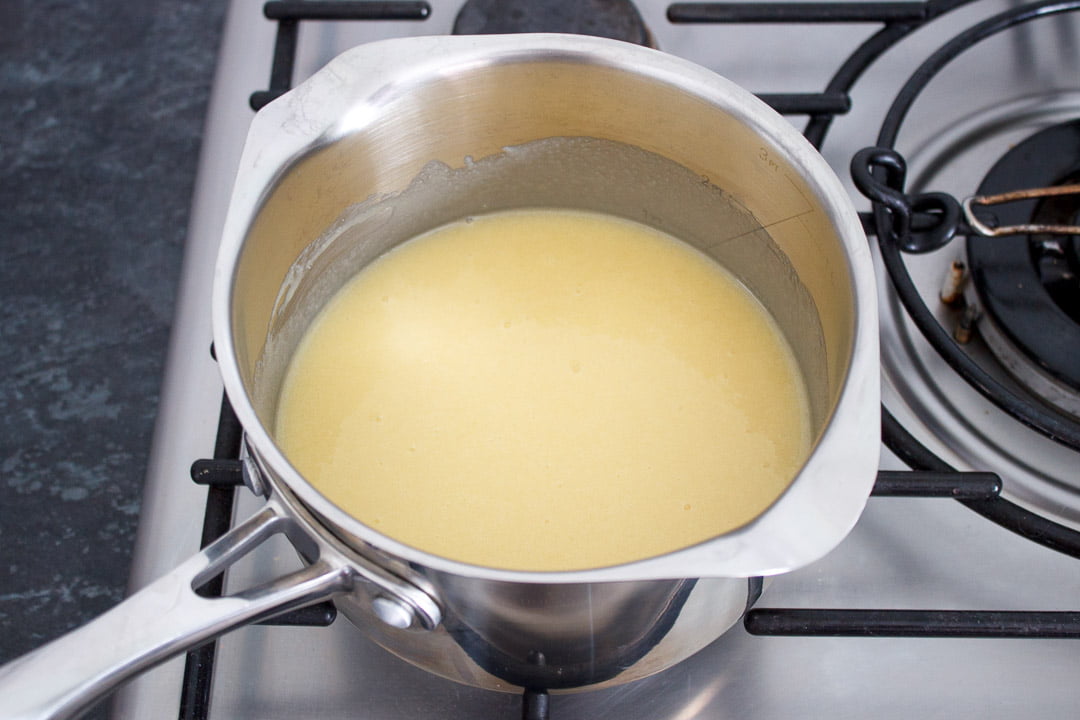
As soon as it's boiling, you must stir often and vigorously. Don't leave this unattended or you will get lumps of burnt caramel running through the mixture.
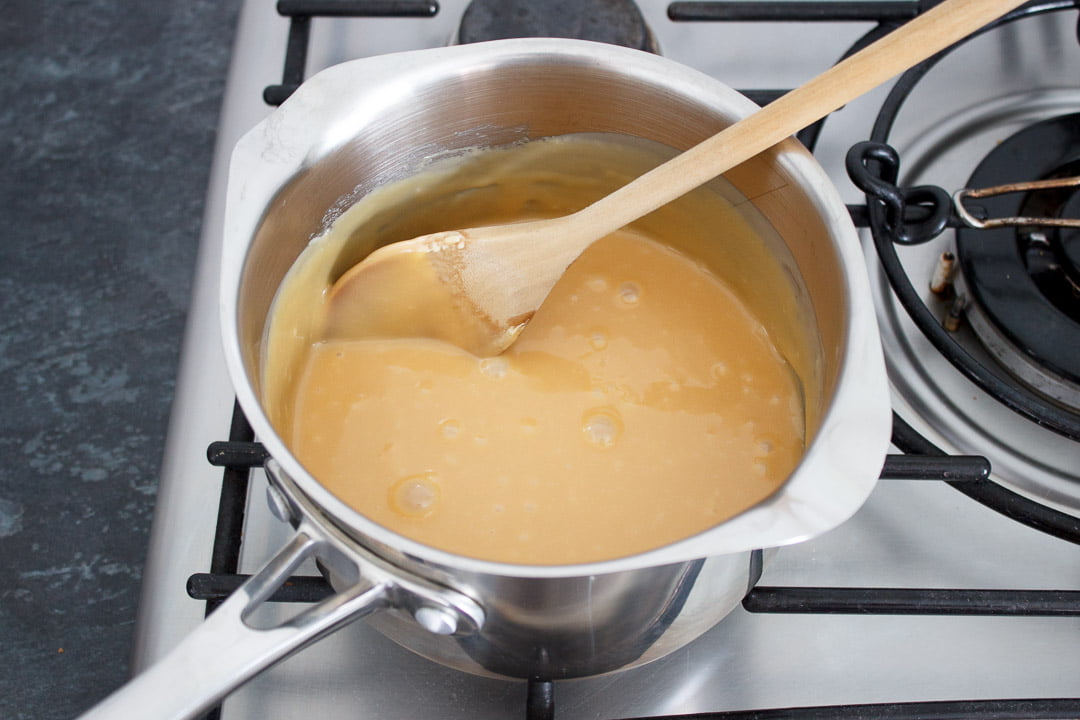
When it turns a light caramel colour and becomes thick, (or reaches 107°C/225ºF on a sugar thermometer) remove from the heat and continue stirring for a minute or two, to stop it from catching on the bottom, as the pan will still be very hot.
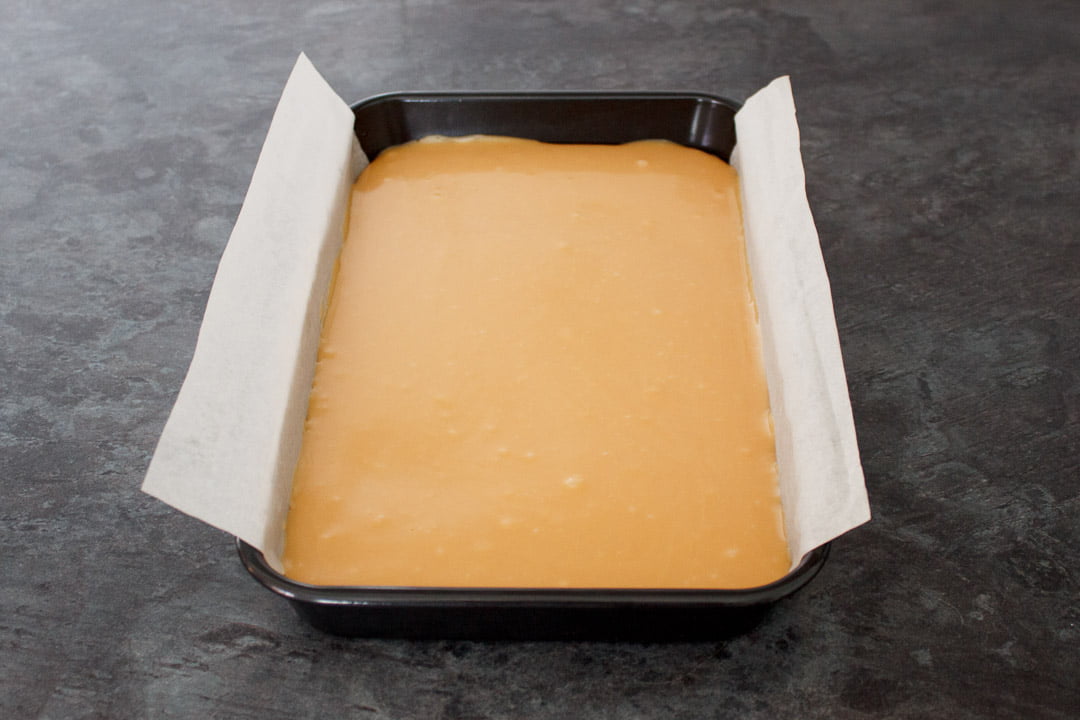
Then pour the caramel over the biscuit base, spread out evenly, and set aside to cool completely.
Chocolate topping instructions
Break the milk chocolate (200g | 7 oz) into pieces and place into a glass bowl.
To melt using the stove, set the bowl over a pan of barely simmering water and stir until melted, smooth and shiny. If you want to temper the chocolate, only melt three quarters of the chocolate then remove the bowl from the heat, add the remaining chocolate and stir until melted.
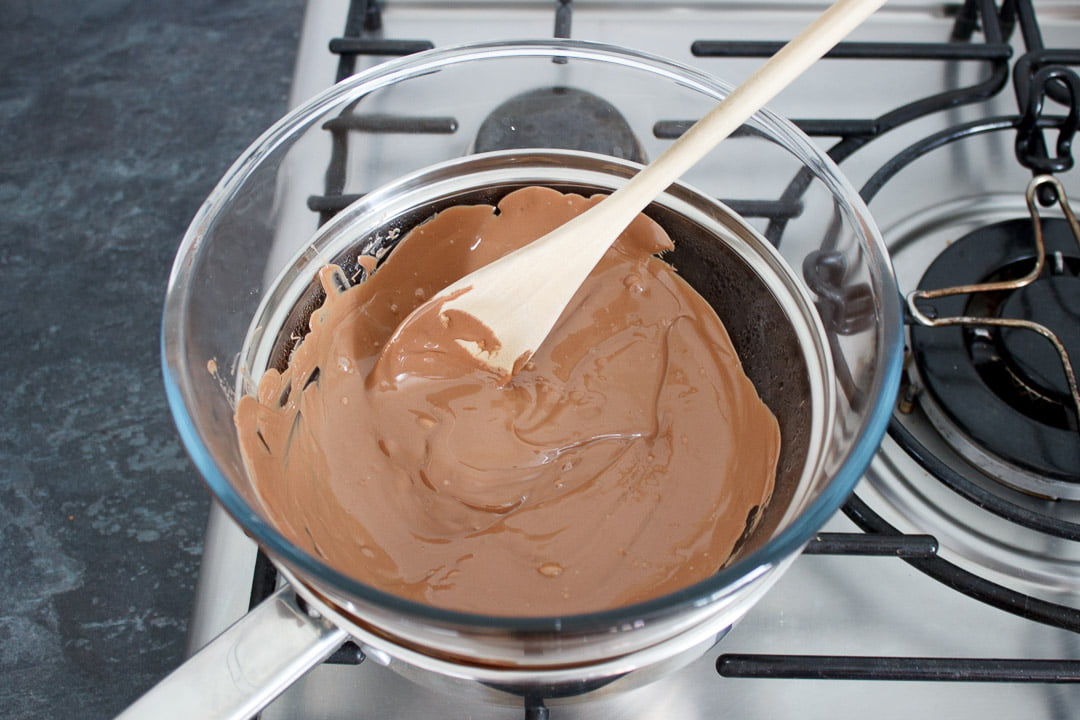
To achieve this in a microwave, heat the chocolate in 10 second intervals, stirring well between each time, until it's two thirds melted. Once it's reached this stage, stir the rest of the way until it's completely melted (don't heat anymore). The trick is not to get the chocolate too hot.
Pour your melted chocolate over the caramel layer and smooth out evenly using the back of a wooden spoon.
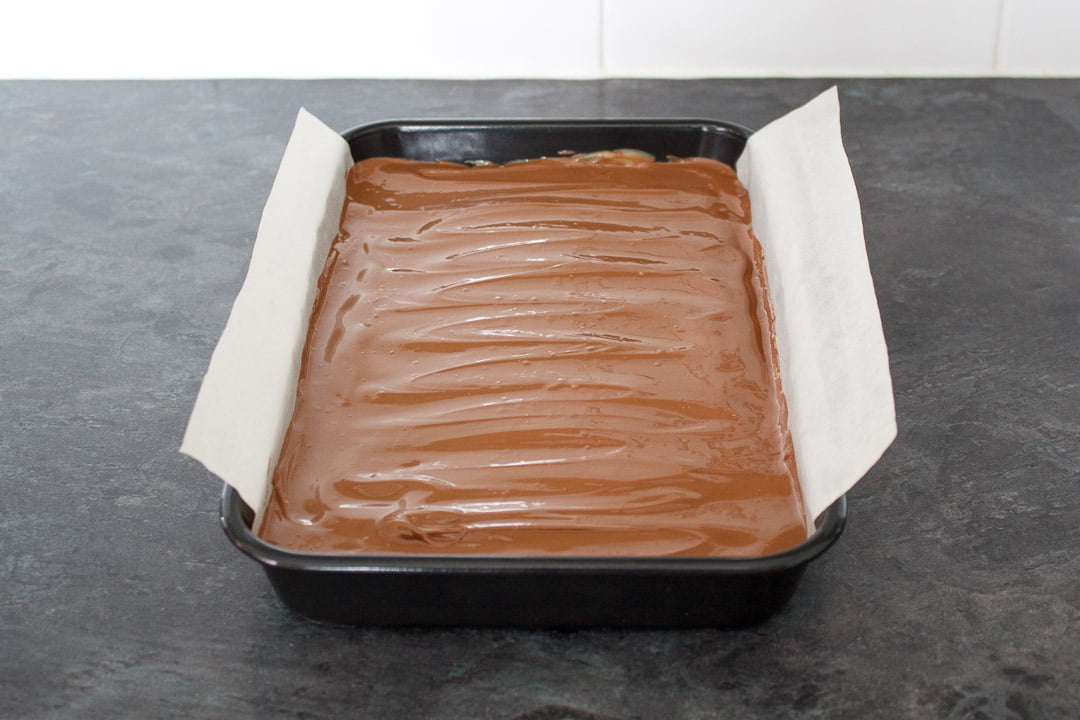
Finally, allow your millionaire shortbread to set completely at room temperature.
If you temper chocolate then place it in the fridge, you will lose that lovely shine you worked so hard to get.
Once your millionaire shortbread is fully set, slice into 12 evenly sized bars.
How to store
Millionaire shortbread is best stored in an airtight container at room temperature, and consumed within 5 days. (As if it's going to last that long though!)
FAQs
Millionaire's shortbread is made with a standard caramel (condensed milk, butter, golden syrup and sugar). Billionaire's shortbread takes it a step further with a salted caramel layer and is typically topped with a more premium chocolate. Same indulgent concept, just a fancier version!
Yes, of course! Dark chocolate would work very well, as the caramel is quite sweet. I would be cautious of using white chocolate though, as that could make it too sweet overall.
The easiest way to do this is to heat a sharp knife in hot water, dry it off, then cut your slices.
Yes, but it's more difficult to know exactly when it's ready. You want the caramel to be a light golden colour, and quite thick in texture. This can be tricky to judge by eye without experience, so using a thermometer is always easier.
The name is thought to originate from Scotland, where it was used to describe how rich and indulgent this treat is compared to plain shortbread. So luxurious, it's fit for a millionaire! Though nobody knows exactly who came up with the name.
Loved it? Pin it! 💛
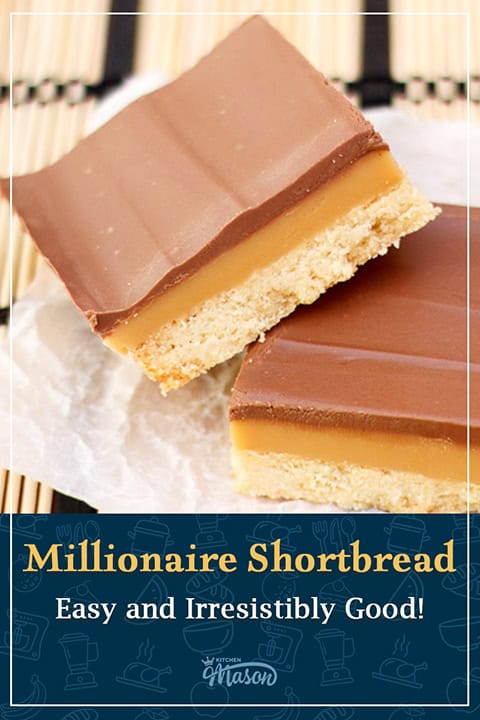
Easy Millionaire's Shortbread Recipe
Three layers of PURE indulgence... Buttery shortbread, thick golden caramel, and glossy chocolate. This foolproof millionaire shortbread recipe is WAY easier than you think!
Ingredients
Biscuit Base
- 125g (½ Cup) Unsalted Butter, Room Temp
- 50g (¼ Cup) Golden Caster Sugar
- 175g (1 + ⅓ Cup) Plain Flour
- Pinch Salt
Caramel
- 200g (⅔ Cup) Condensed Milk
- 125g (½ Cup) Unsalted Butter
- 125g (⅔ Cup) Golden Caster Sugar
- 2 tablespoon Golden Syrup
- 1 teaspoon Vanilla Extract
- Pinch Salt
Topping
- 200g (7 oz) Good Quality Milk Chocolate
Equipment
- 18 x 28cm (7 x 11″) Baking Tray
- Electric Stand Mixer or Large Bowl With Electric Hand Whisk
- Fork
- Large Heavy Based Saucepan
- Sugar Thermometer (optional but very handy)
- Glass Bowl
- Wooden Spoon
Instructions
To make the biscuit base
- Grease and line the baking tin then preheat your oven to 180°C/Fan 170°C/356°F. Beat together the butter and sugar in a stand mixer (or large bowl with an electric hand whisk) until light and fluffy.
- Sift in the flour and add the salt. Mix until a dough forms.
- Press the dough evenly into the prepared tin, then prick all over with a fork.
- Bake in the oven for 15-20 mins until just golden on top. Cool completely.
To make the caramel
- Put all the ingredients into a large saucepan and set over a low/medium heat.
- Stir until everything has dissolved then bring to the boil. STIR OFTEN AND VIGOROUSLY. Once boiling, stir continuously so it doesn't catch and burn on the bottom/in the edges of the pan.
- When it becomes thick and is a light caramel colour (or hits 107°C/225ºF on a thermometer), take off the heat and keep stirring for a minute or two.
- Pour the caramel over the biscuit base, spread evenly, and allow to cool completely.
To make the chocolate topping
- Break the chocolate into a glass bowl. To melt on the hob, set the bowl over a pan of barely simmering water and stir until melted. To melt in the microwave, heat in 10 second intervals stirring well each time until two thirds melted. Then stir well until completely melted.
- Pour the melted chocolate over the caramel and smooth out using the back of a spoon. Allow to fully set at room temperature, then cut into 12 slices.
Notes
If you would rather use a more in depth picture recipe, please see the main body of this post. Where you’ll also find lots of extra FAQs and helpful tips, should you need them.
Please note, this recipe includes both UK metric and US Cup measurements.
Storage
Store in an airtight container at room temperature, and consume within 5 days.
Tips
- Leave an overhang when you line your tin with baking paper. This will make it much easier to remove later.
- Don't be tempted to increase the heat to speed up making the caramel. It will likely catch on the bottom and burn.
- When making the caramel, stir constantly and right into the edges. If you don't, you may get burnt bits running through it.
- Allow each layer to cool completely before moving onto the next step. Especially the caramel, as that can cause your chocolate to bloom.
- Use room temperature butter for the biscuit dough. (Ingredients blend better when they're all at the same temperature.)
- Treat yourself to a sugar thermometer. They're cheap and worth the investment. It is possible to make caramel without one, but it's trickier.
- Don't know what to do with the remaining condensed milk? You could make another batch, or check out the More Recipes Like This section at the end of this post for more inspiration.
Recommended Products
As an Amazon Associate and member of other affiliate programs, I earn from qualifying purchases at no extra cost to you.
Nutrition Information:
Yield: 12 Serving Size: 1Amount Per Serving: Calories: 411Total Fat: 23gSaturated Fat: 15gTrans Fat: 0gUnsaturated Fat: 7gCholesterol: 54mgSodium: 61mgCarbohydrates: 47gFiber: 1gSugar: 34gProtein: 4g
Nutritional information on kitchenmason.com should only be used as a general guideline, I am not a certified nutritionist. Please always check labels for allergens where applicable.
More recipes like this
- Red velvet millionaire brownies
- Salted caramel cake
- Shortbread cookies
- Millionaire brownie bars
- No bake caramel chocolate tart
- Chocolate orange caramel shortbread
Share your baking! 💛
Have you made this classic millionaire's shortbread? I’d love to know if you have! Tag me in your pics on Instagram and Facebook. Or email me at emma@kitchenmason.com.

Emma is a British recipe writer, home cook, and founder of Kitchen Mason. For over 15 years, she has been creating simple, comforting recipes and practical kitchen tips that help tired, everyday people make dinner feel easier and more enjoyable again. Passionate about British home cooking, Emma shares reliable recipes, comforting classics, and realistic kitchen guidance designed for real life. Her work has also been featured in publications including Food Network, Cosmopolitan, and The Huffington Post.
Knowledgeable On: British home cooking, Easy dinner ideas, Comfort food recipes, Recipe writing


Hi does it have to be unsalted butter?thanks
Hi Isobell. I personally always use unsalted butter when I bake because I like to control the amount of salt used. You could try regular salted butter and omit the pinches of salt in the recipe but it may still taste a little too salty. Emma x
look amazing....
just like costa coffee and i love costa coffee do anything to have one of those right now!
Hahaha I love it! Thank you so much for your kind words Indiana 🙂 Emma x
wow they look gorgeous.
will try them soon
Yay!! So happy you like my recipe. Hope you get to try it out soon 🙂 Emma x
Hey,
I tried your recipe!
Because they don't really sell golden syrup in the Netherlands I replaced it with some honey.
It's delicious ! Probably be making this more often!
Thanks a lot !
Hi Rachelle. I'm SO happy that you loved the recipe and thank you so much for sharing with me! (It literally made my day!) Honey is a great replacement for golden syrup. Emma x
I'm 14 and I just made this with my cousin it is amazing thanks
Aww that's fantastic Emily, I'm so glad you liked my recipe! Thank you so much for sharing with me! Emma x
Oh wow, this is my faorite treat ever. and this recipe turned out just perfect for us. Thanks for sharing.
Simon
Fantastic! So glad you liked it Simon 🙂
Do i have to add the golden syrup?
Yes, you do really. Do you not have any where you're from?
I do its just i like to keep it as simple as possible thats all : )
This looks sooo good and your pictures are gorgeous!
Thank you so much! That's very sweet if you to say 🙂
Made this tonight... It's chilling in the refrigerator right now. Since I don't have some of the ingredients, I had to sub a few things, but each part tasted amazing by itself. I'll report back if it's good 😉
Fantastic Dave! X
That's looks so perfect!
Thank you so much! <3
I absolutely love caramel slice. Millionaire's Shortbread sounds so much classier though. Looking forward to giving it a go on the weekend. 🙂
Aww thank you! You'll have to let me know how you get on 🙂
I've always wanted to try this. it looks so good!
You should totally give it a go! And thank you very much 🙂 x
Reblogged this on Mother Cunning and commented:
We're back from Parkes and looking at a cold and dreary end to school holidays, so it's going to be a special treat bake day! Some people call caramel slice "Millionaire's Shortbread", in any country it's freakin; delicious and we're going to make some today!
Looks like perfection to me! Love the step-by-step images. Happy birthday to your mum!
Awww thank you very much!
These look amazing! Thanks for the recipe! 🙂
Thank you so much! And you're very welcome 🙂