

This post may contain affiliate links. Where I make a small commission on purchased items, at no extra cost to you. See my disclosure for details.
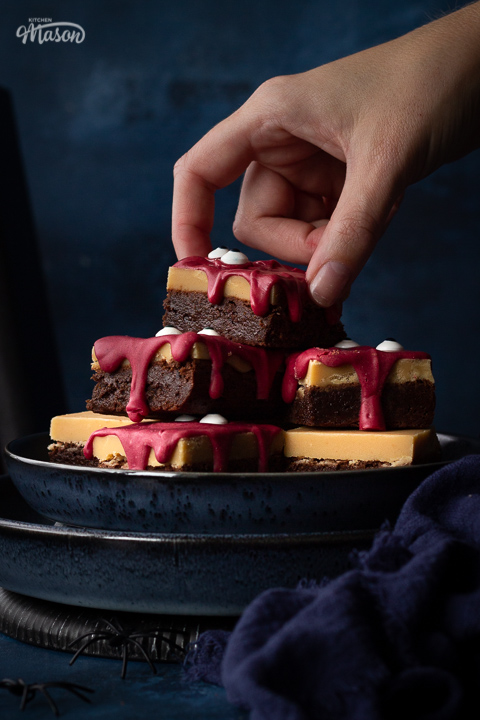
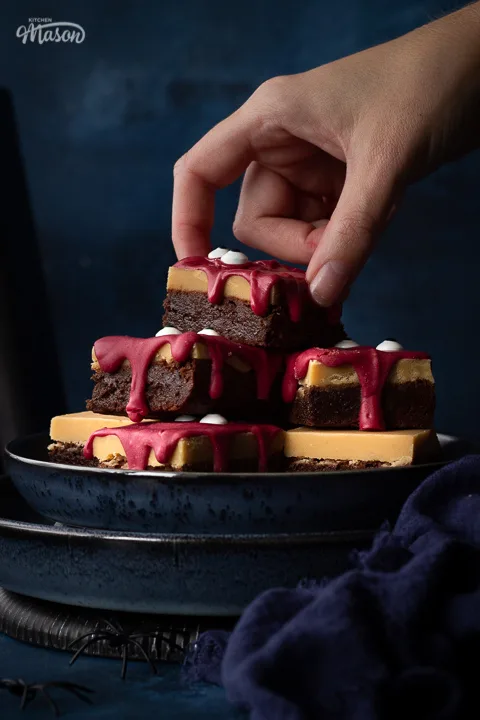
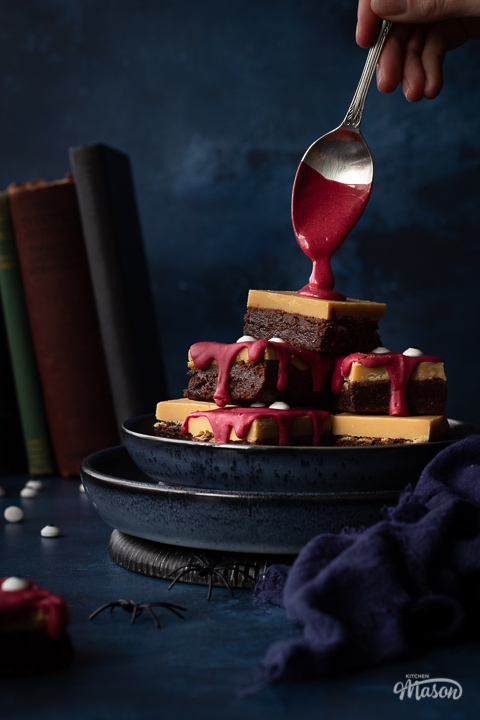
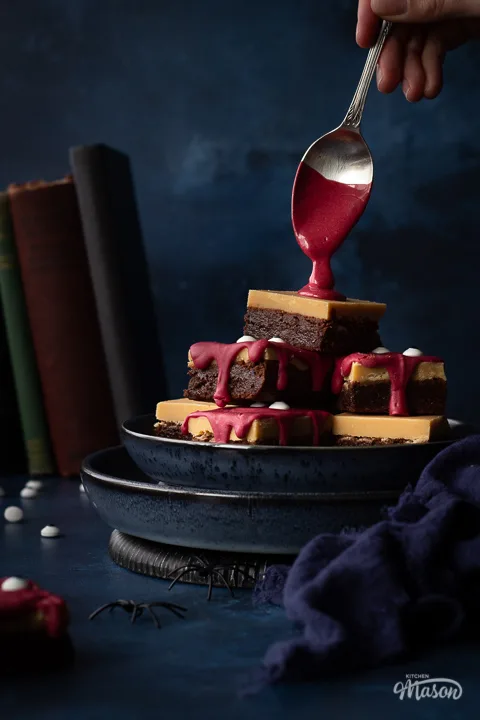
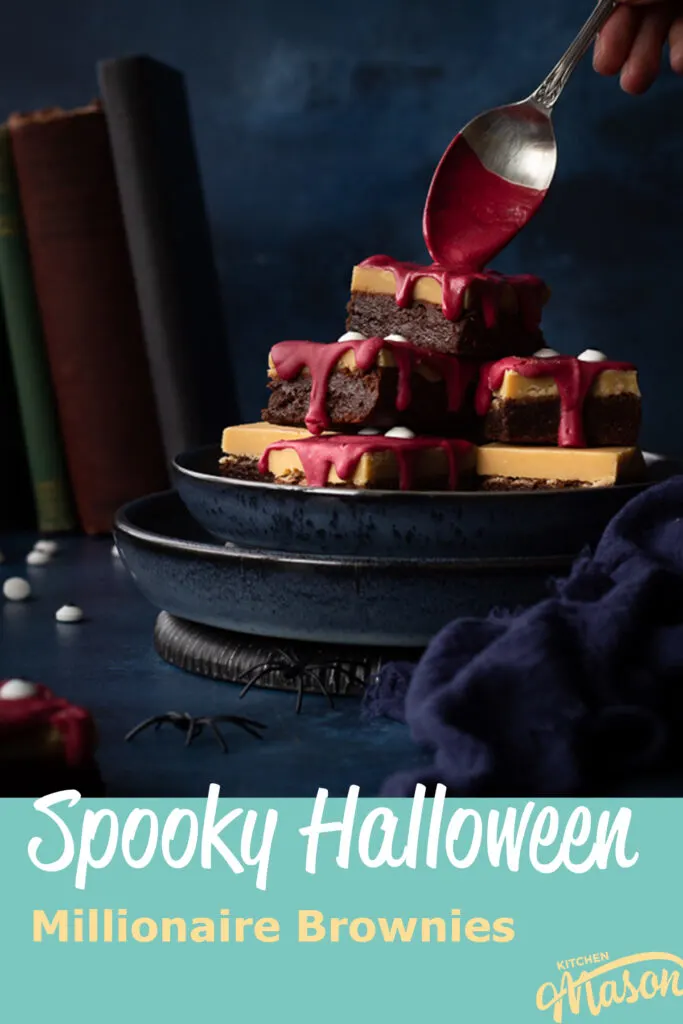
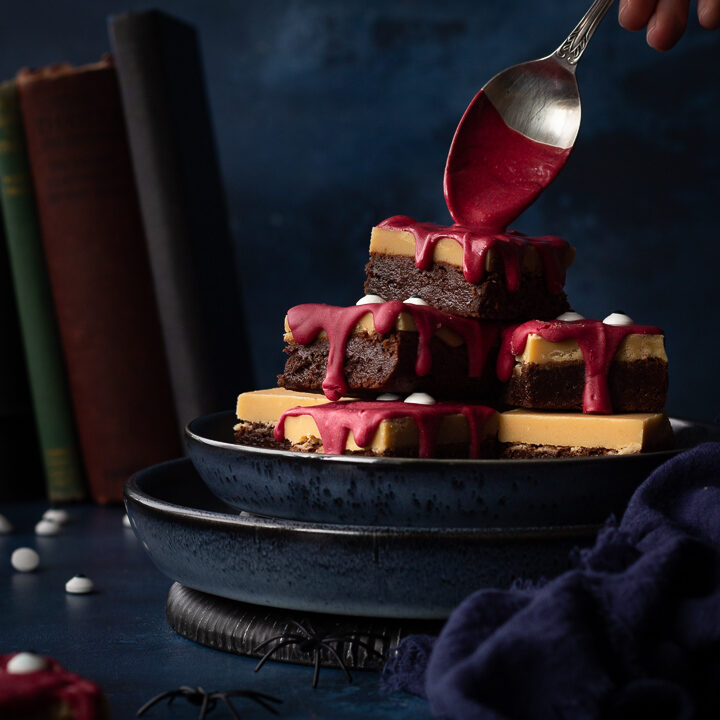
These eye catching Halloween millionaire brownies are gruesomely DELICIOUS! Just like my blood spatter Halloween cookies – they’re perfect for trick or treaters and Halloween parties.


A spooky twist on my millionaire brownie bars recipe, these horrifying Halloween treats are so much fun to make!
With a simple, one bowl brownie recipe, an effortless all in one caramel method and a straightforward but very effective decoration – it couldn’t be easier for you to recreate these beauties at home!
Can't face cooking dinner on Fridays? 😩
Imagine a guilt free Friday night dinner, without the exhausting mental load. BYOD Fridays are a fun and supportive Friday night community for tired people who still need to cook, but really cba 💛
Join The Community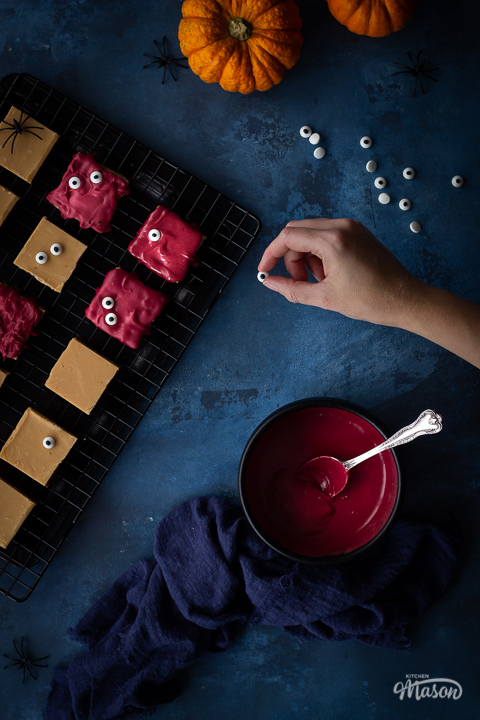

Still don’t feel confident enough to try making them? Work through baking for beginners first. You’ll be bursting with baking knowledge by the end!
Imagine how fun these would be at a Halloween party or gift wrapped and handed out to those spooky trick or treaters? You’d be the talk of the town!!!

How to make Halloween millionaire brownies – recipe summary
Brownie
- Melt butter and dark chocolate together.
- Beat in the eggs then the sugar.
- Stir through vanilla and salt.
- Fold through flour and cocoa powder then smooth into a tin.
- Bake.
Caramel
- Put all caramel ingredients into a saucepan.
- Bring to the boil then simmer until it reaches 107ºC/224ºF.
- Stir for a few minutes to cool then pour over the brownie.
- Cool completely then cut into bars.
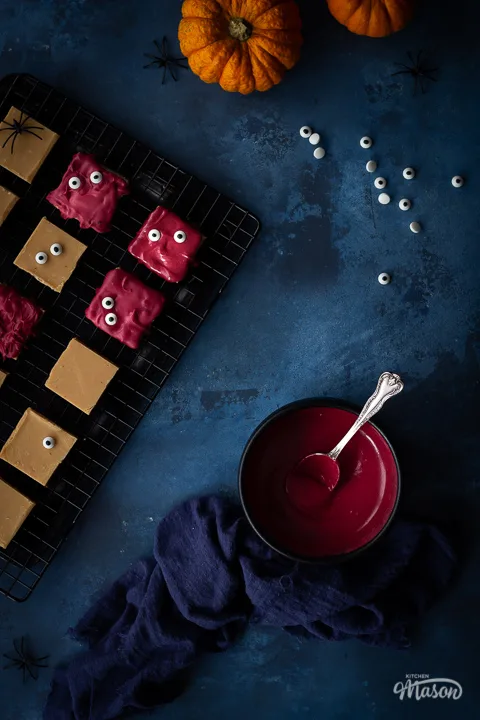
Topping
- Melt white chocolate with red food colouring.
- Spoon over each bar, let drip down the sides.
- Top with edible eyes.

Ingredients
Here’s everything you should know about the ingredients needed to make Halloween millionaire brownies.
Brownie
- Unsalted Butter – Unsalted butter is best here as it gives you full control over the salt content. It doesn’t matter if it’s straight out the fridge as you will be melting it anyway.
- Dark Chocolate – Don’t sub this for milk chocolate or your brownies will be too sweet! Use a good quality dark chocolate if you can afford it as you will taste this in the end result.
- Eggs – Free range organic are my go to but any you have will work. A medium size is perfect.
- Golden Caster Sugar – I like to use golden caster sugar as it gives a slight caramel flavour. Regular white caster sugar (superfine in the US) will work great too though.
- Vanilla Extract – Always use a good quality vanilla, you really do taste the difference!! My favourite is Nielsen Massey (affiliate link) as it gives a wonderfully strong vanilla flavour.
- Salt – Salt is salt. Table salt will work fine! No need to get fancy here.
- Plain Flour – Plain flour (all purpose in the US) is ideal for this. Don’t sub for self raising as we want gooey brownies not cakey ones!
- Cocoa Powder – Make sure you use baking cocoa powder and NOT drinking chocolate as that already has added sugars.
Caramel
- Condensed Milk – Sweetened condensed milk here please! The brand doesn’t matter, all kinds I’ve tried have worked just fine.
- Unsalted Butter – As said above, using unsalted gives you control over the salt content. It’s a no brainer.
- Golden Caster Sugar – See above.
- Golden Syrup – Golden syrup gives a unique and wonderful flavour to your caramel. You can use corn syrup in the US but it won’t taste the same.
- Vanilla Extract – As mentioned before, use a good quality vanilla as you will taste the difference!
- Salt – Again, table salt is fine here. No need for fancy sea salts or anything.
Topping
- White Chocolate – You can get away with using a cheaper brand of white chocolate here if you wanted to. A good quality brand will obviously taste a little nicer, but no one will notice if you don’t as there’s a lot going on in the 3 layers!
- Red Food Colouring – This is important. Use an extra strong food colouring gel like this sugar flair one (affiliate link). Liquids will change the consistency too much and regular strength gels won’t give you a dark enough colour.
- Edible Eyes – You can usually buy these in most supermarkets around Halloween. Failing that, you can easily buy them off Amazon or eBay.
Recipe tips
Here are some tips I think you will find helpful when making this recipe. I make the mistakes so you don’t have to!
- Use actual baking measuring spoons (affiliate link). The teaspoon you use to make your cuppa is not the same!!
- Allow the brownie to cool COMPLETELY before continuing with the recipe. Trapped heat can effect the consistency of the caramel in a negative way.
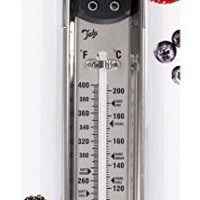
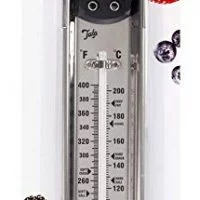
- When making the caramel, use a thermometer to take out any guess work. It makes is SO much easier!
- Ensure you stir the caramel constantly, getting right into the edges of the pan. Otherwise your caramel might burn and you’ll get horrible dark bits floating through it.
- Do NOT use liquid food colouring when making the chocolate topping. It will affect the consistency too much. Instead use an extra strong red food colouring gel like this sugar flair one (affiliate link). It won’t affect the consistency and will give you a lovely deep red colour.
- Don’t heat the white chocolate/red colouring gel for longer than 10 seconds at a time. The colouring gel could burn and the white chocolate could overheat, leading to unsightly ‘bloomed’ chocolate.
- It’s important to melt the white chocolate with the food colouring. If you add it after – the chocolate could seize due to the temperature difference.
- Decorate each bar one at a time. This will prevent the chocolate from setting too quickly ensuring you can still push the edible eyes into the top.

Spooky Halloween Millionaire Brownies – Step by Step Picture Recipe
(For a printer friendly version, see the recipe card at the end of this post)
Please note, this recipe includes both UK metric and US Cup measurements.
Ingredients
Here is what you will need to make 16 bars.
Brownie
- 110g (1/2 Cup) Unsalted Butter, cubed
- 110g (3.9 oz) Dark Chocolate
- 2 Eggs
- 225g (1 + 1/8 Cup) Golden Caster Sugar
- 1 tsp Vanilla Extract
- 1/4 tsp Salt
- 60g (1/2 Cup) Plain Flour
- 2 tbsp Cocoa Powder
Caramel
- 200g (2/3 cup) Condensed Milk
- 125g (1/2 cup) Unsalted Butter, cubed
- 125g (2/3 cup) Golden Caster Sugar
- 2 tbsp Golden Syrup
- 1 tsp Vanilla Extract
- Pinch Salt
Topping
- 200g (7oz) White Chocolate
- 1 tsp Red Food Colouring Gel *
- 32 x Edible Eyes
*I used Sugar Flair Extra Strong Red Food Colouring Gel (affiliate link)
Essential equipment
- 20cm (8″) Square Baking Tin
- Large Microwavable Bowl
- Medium Saucepan
- Sugar Thermometer (Optional but recommended)
Brownie instructions
Firstly, grease and line your baking tin and preheat the oven to 180°C/Fan 170°C/356ºF.
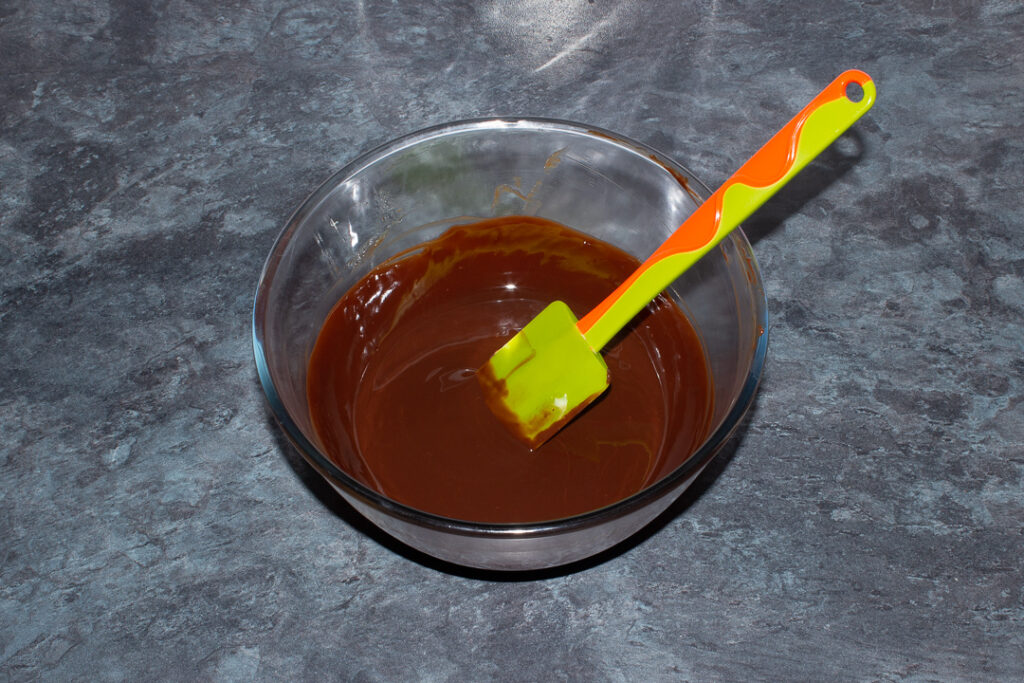
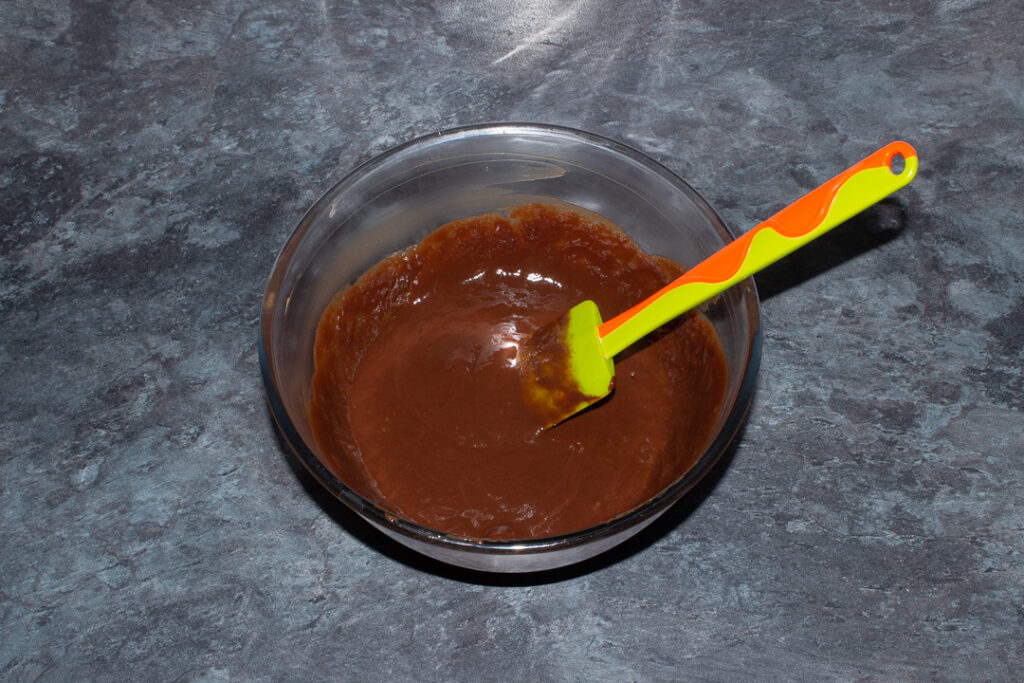
Then put the unsalted butter (110g | 1/2 Cup) into a microwavable bowl and break in the dark chocolate (110g | 3.9 oz). Heat in the microwave in 10 second intervals, stirring well after each time.
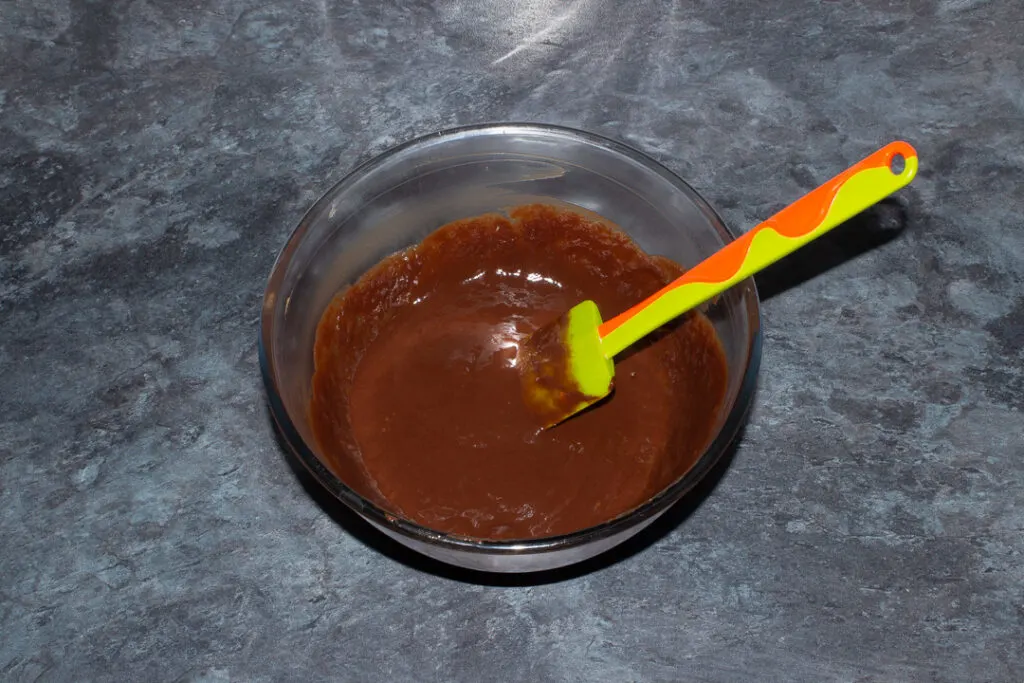
Once it’s two thirds melted, stir the rest of the way until completely melted.

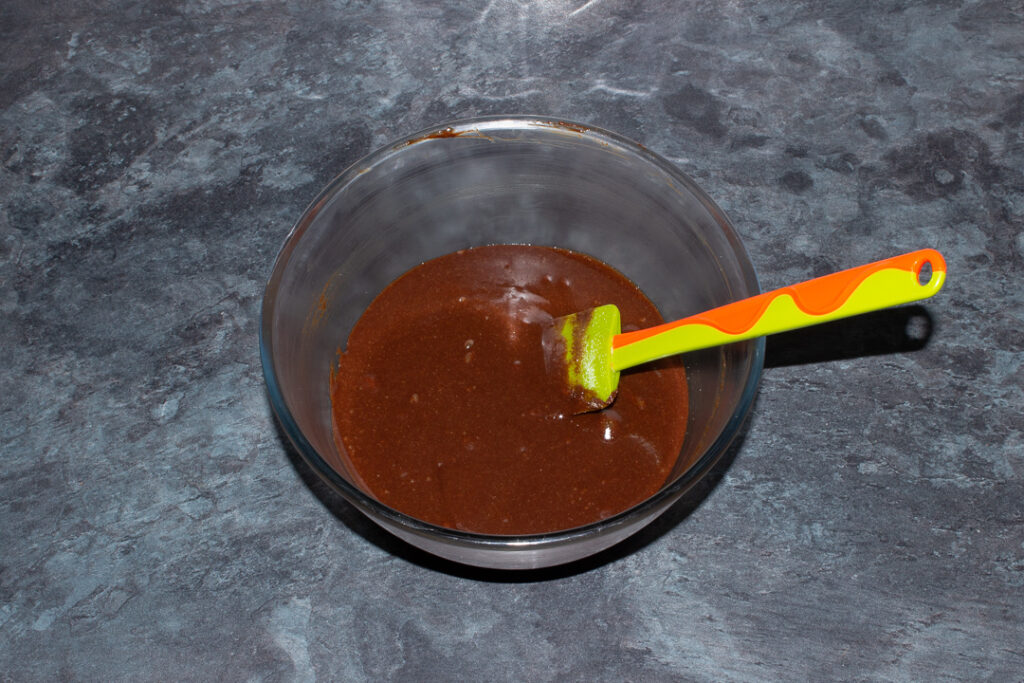
Next add in the eggs (x2) one at a time, beating well after each one.
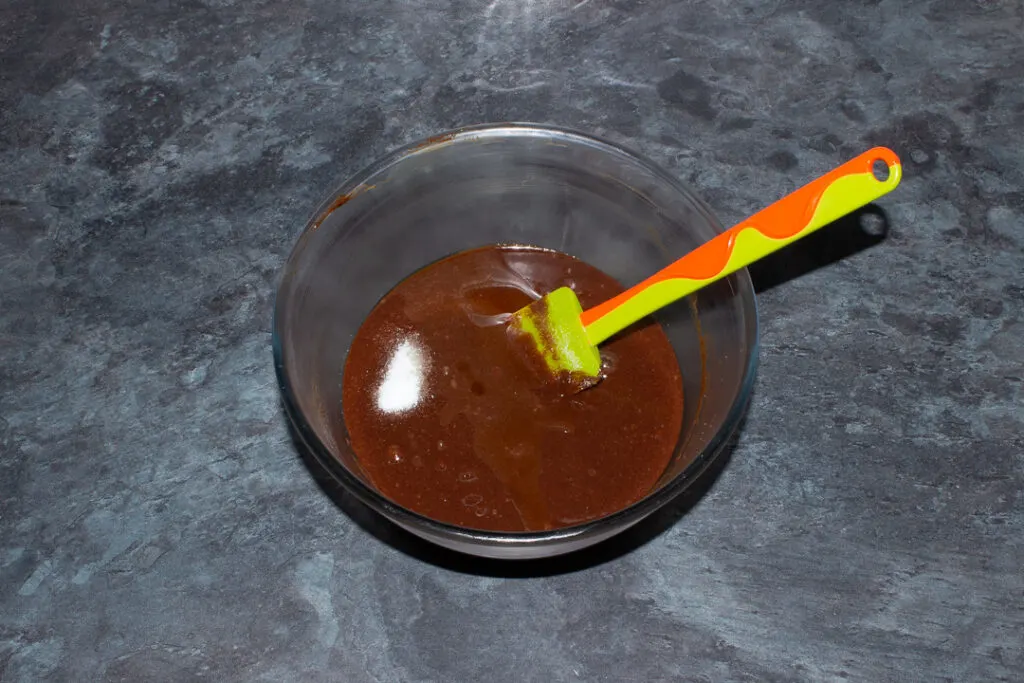
Now add in the sugar (225g | 1 + 1/8 Cup) and beat thoroughly until it no longer feels grainy on the bottom of the bowl anymore.

Time to add in the vanilla (1 tsp) and salt (1/4 tsp) and give it a brief stir.

Finally, fold through the plain flour (60g | 1/2 Cup) and cocoa powder (2 tbsp) and fold gently, just until you can no longer see any streaks left in the batter.

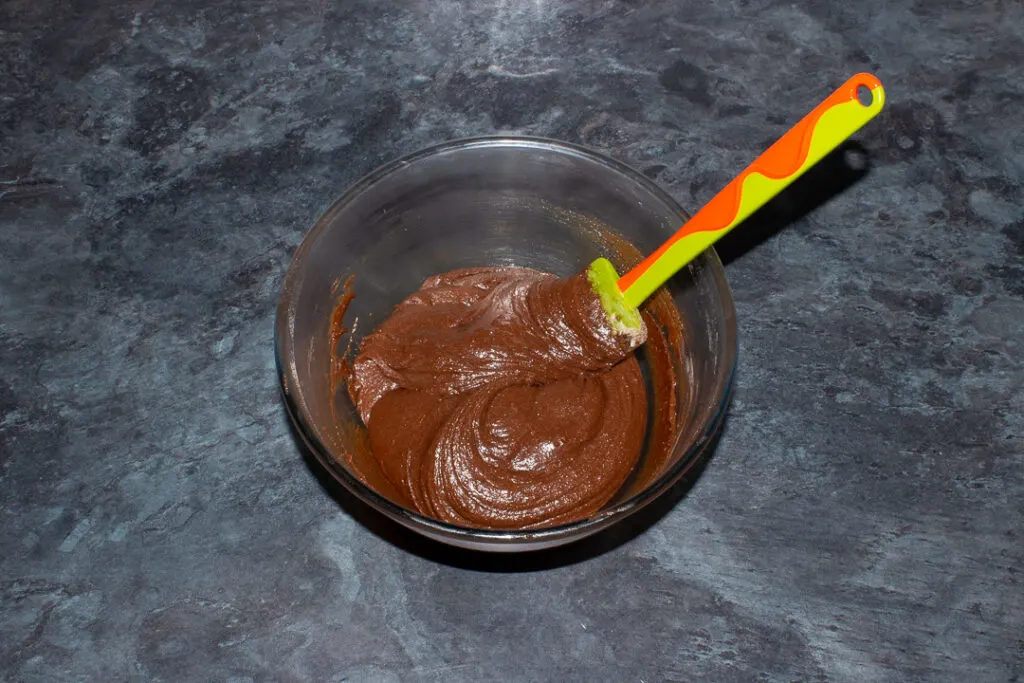
Smooth the batter into your prepared tin. Oh the pegs? Yeah – I’m a very lazy liner, hahaha!
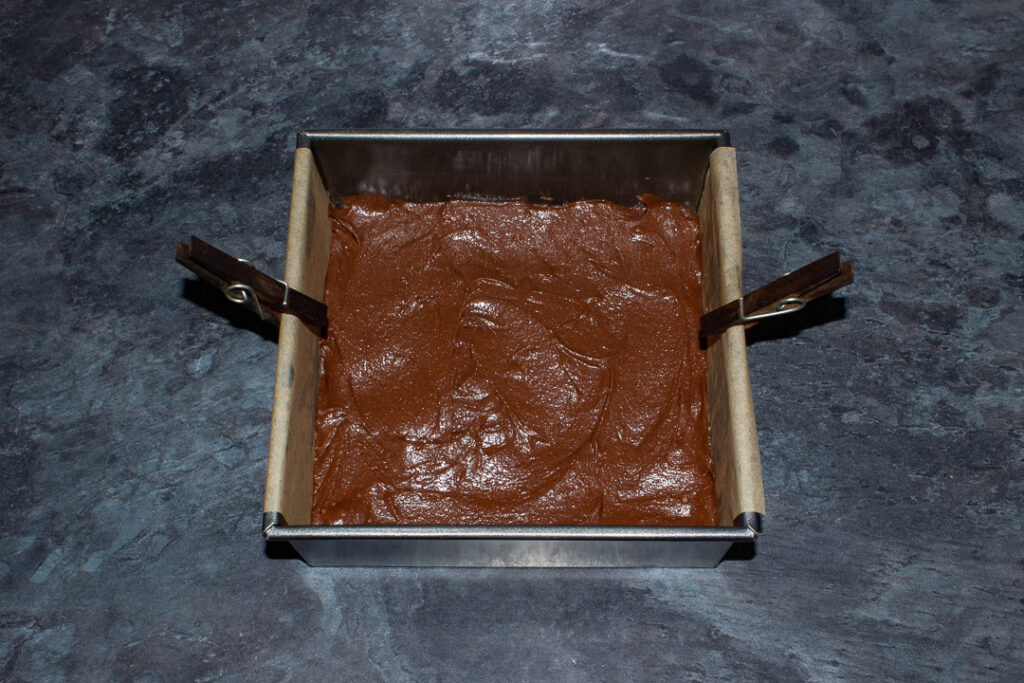
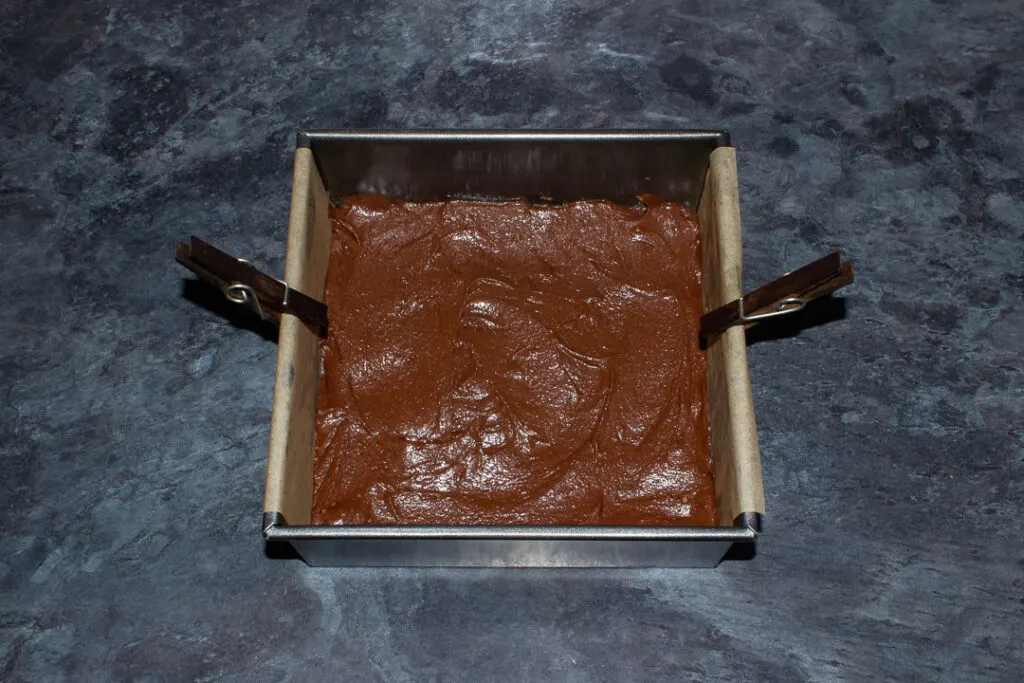
Bake in the preheated oven for 21-25 mins until the top is crispy on top.
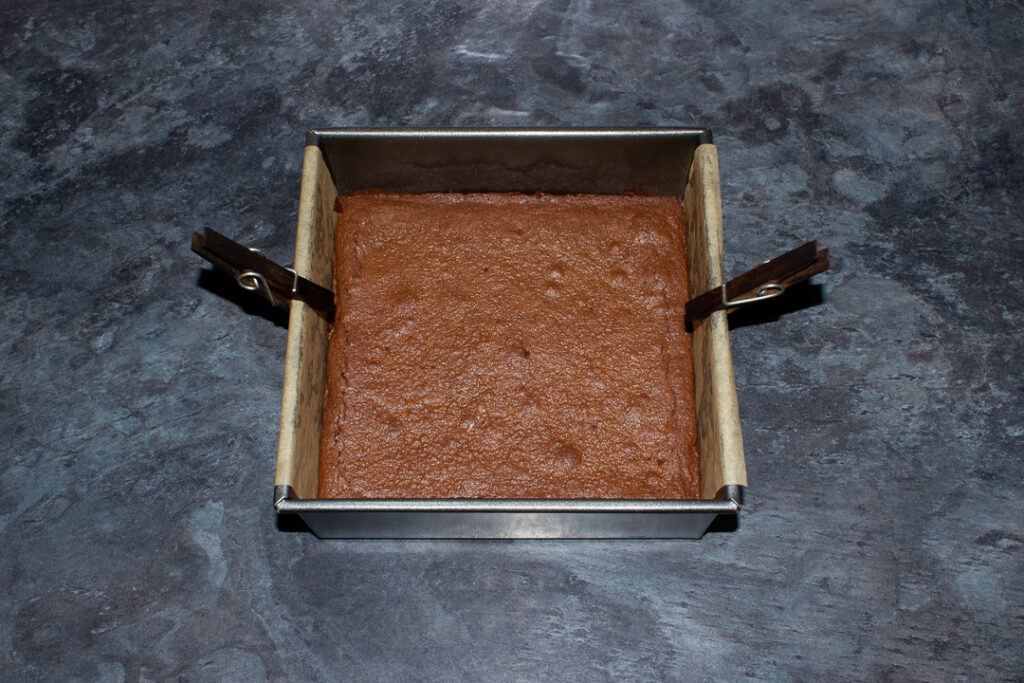
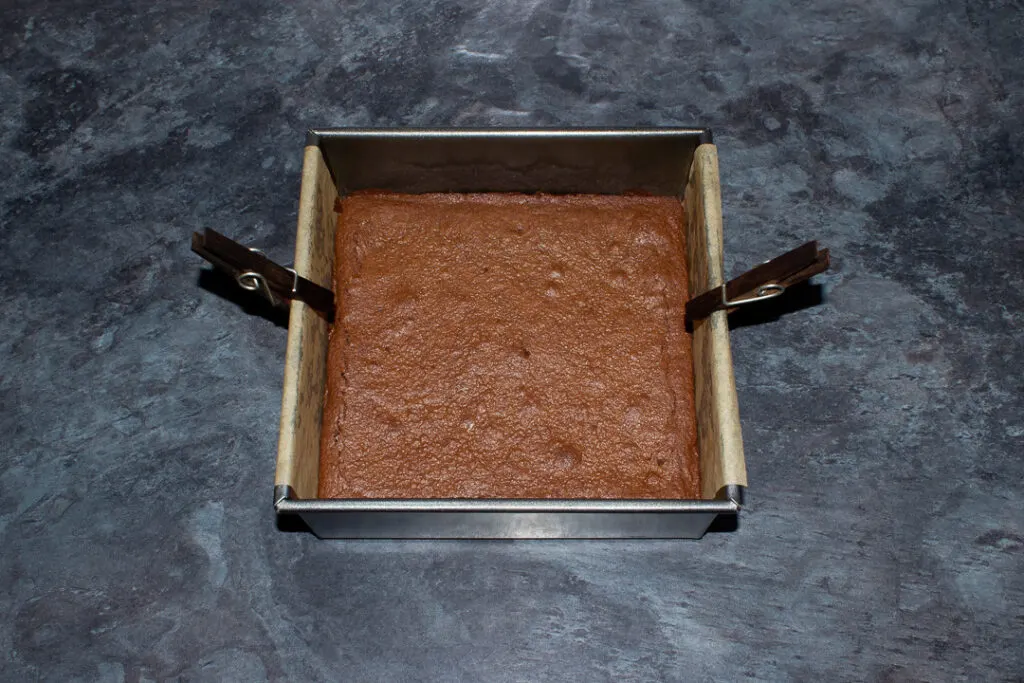
Leave in the tin and allow to cool completely before moving on to the next step.
Caramel instructions
Place all the caramel ingredients into a medium saucepan and set over a low-ish heat. (200g | 2/3 cup condensed milk, 125g | 1/2 cup unsalted butter, 125g | 2/3 cup golden caster sugar, 2 tbsp golden syrup, 1 tsp vanilla extract, pinch of salt).
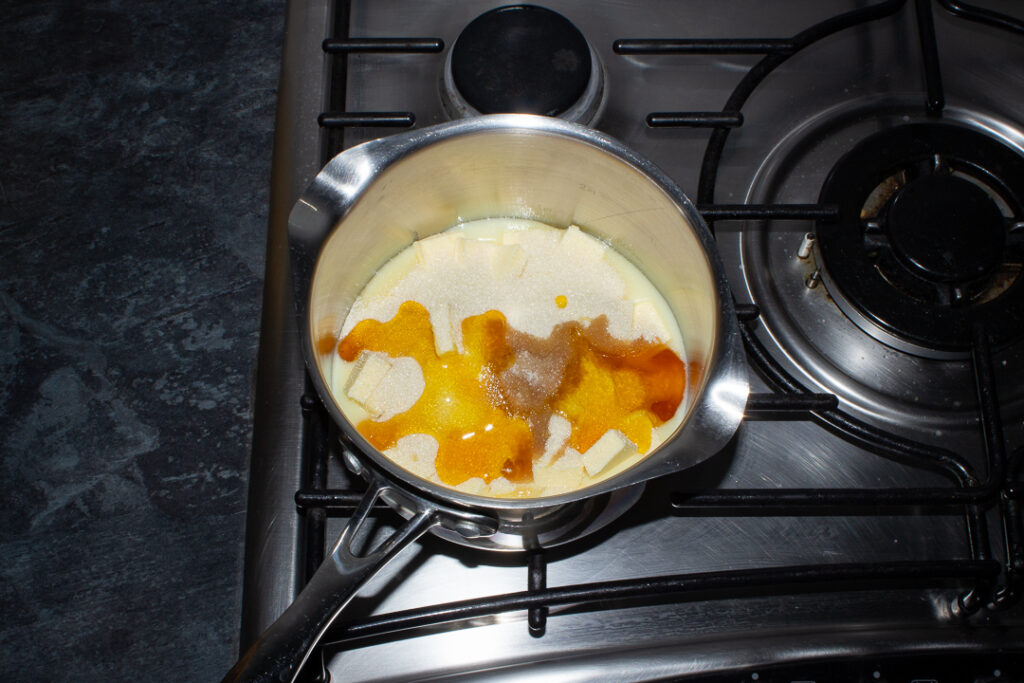

Bring to the boil, stirring constantly. This is important – you need to stir all the time, right into the edges of the pan, to ensure your caramel doesn’t burn.
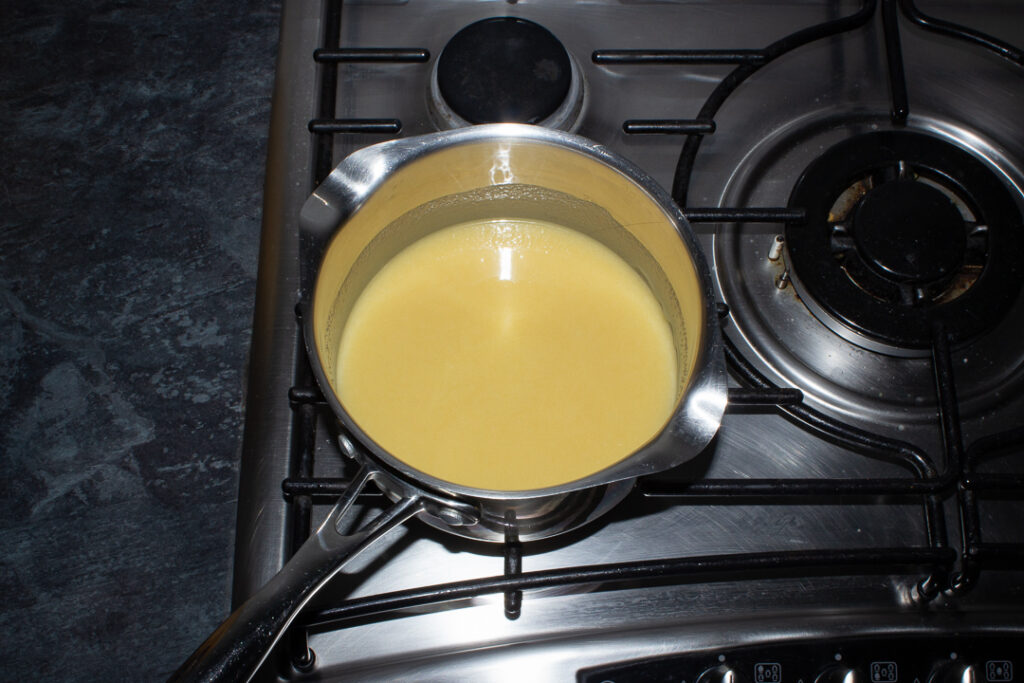
Once boiling, simmer (still stirring constantly!) until the mixture thickens, darkens in colour and hits 107ºC/224ºF on your thermometer. It will take roughly 10-15 mins.
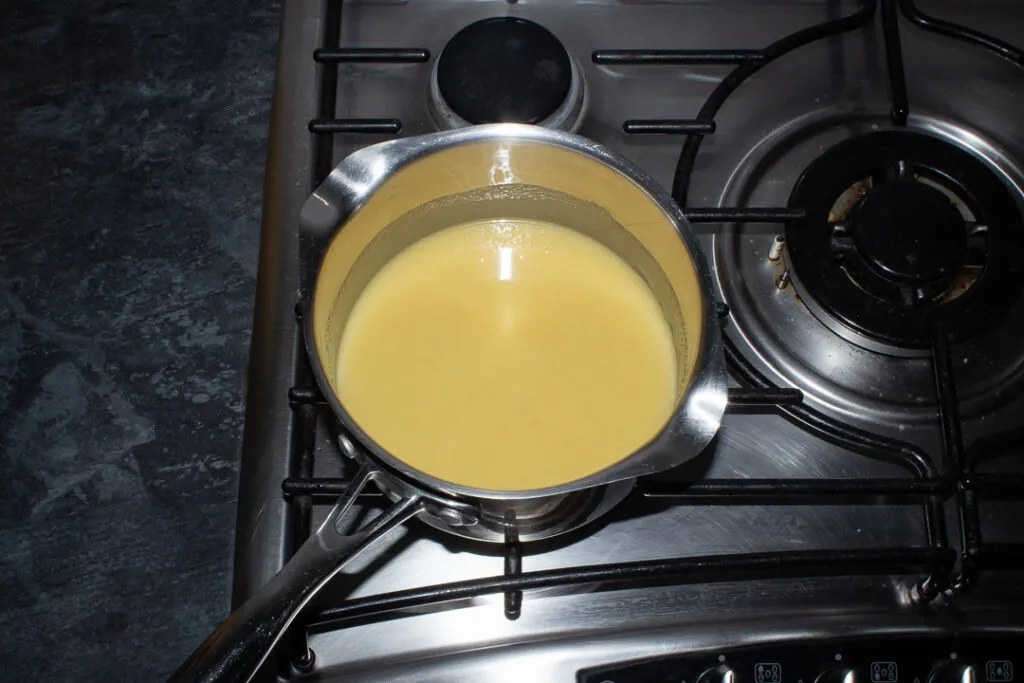

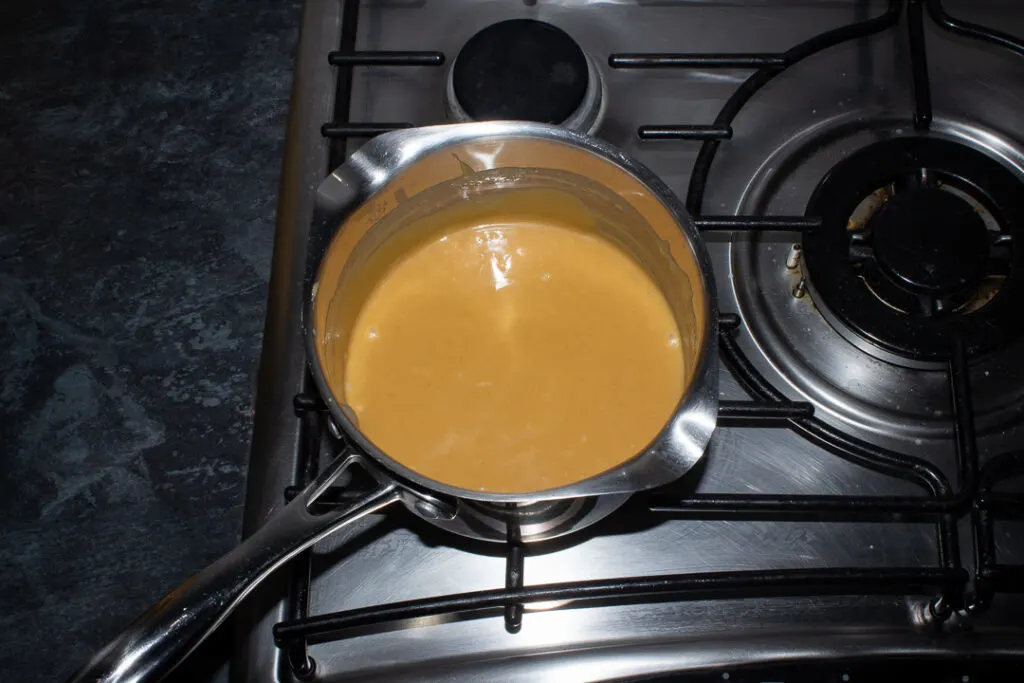
Turn off the heat and continue to stir for a few minutes to help cool the mixture, then pour over the brownie base and smooth out.
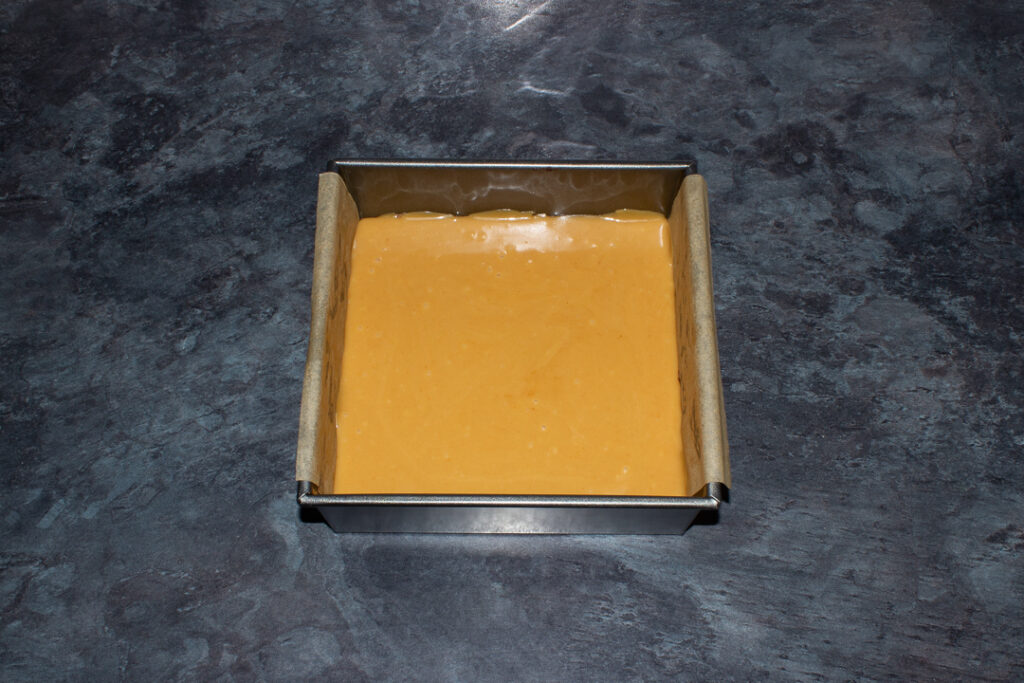

Allow to cool completely at room temperature, then slice into 16 bars, before moving on to the next step.
Topping instructions
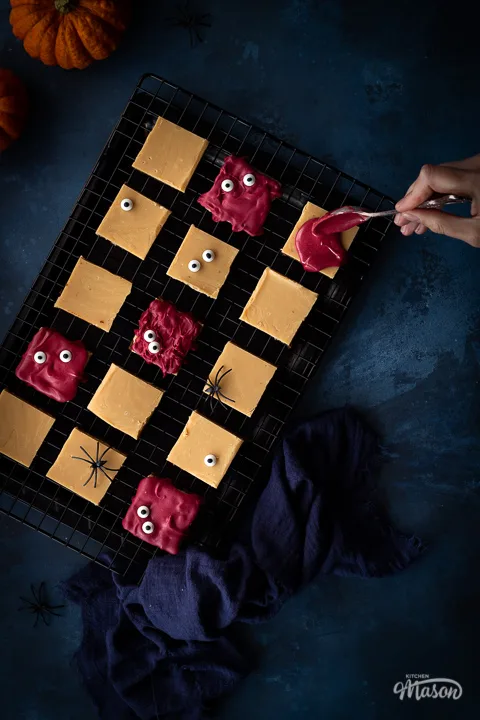
Break the white chocolate (200g | 7oz) into a microwavable bowl and add the red food colouring gel (1 tsp). Heat in 10 second intervals in the microwave and make sure you stir well after each time.
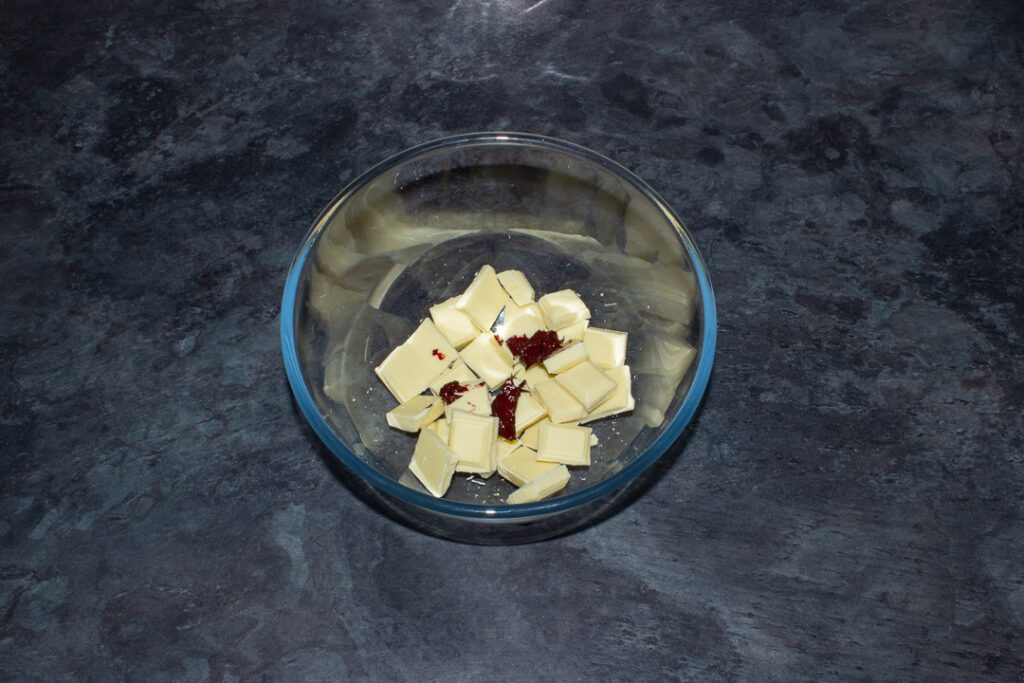

When it’s two thirds melted, stir continuously (don’t reheat) until it’s completely melted.

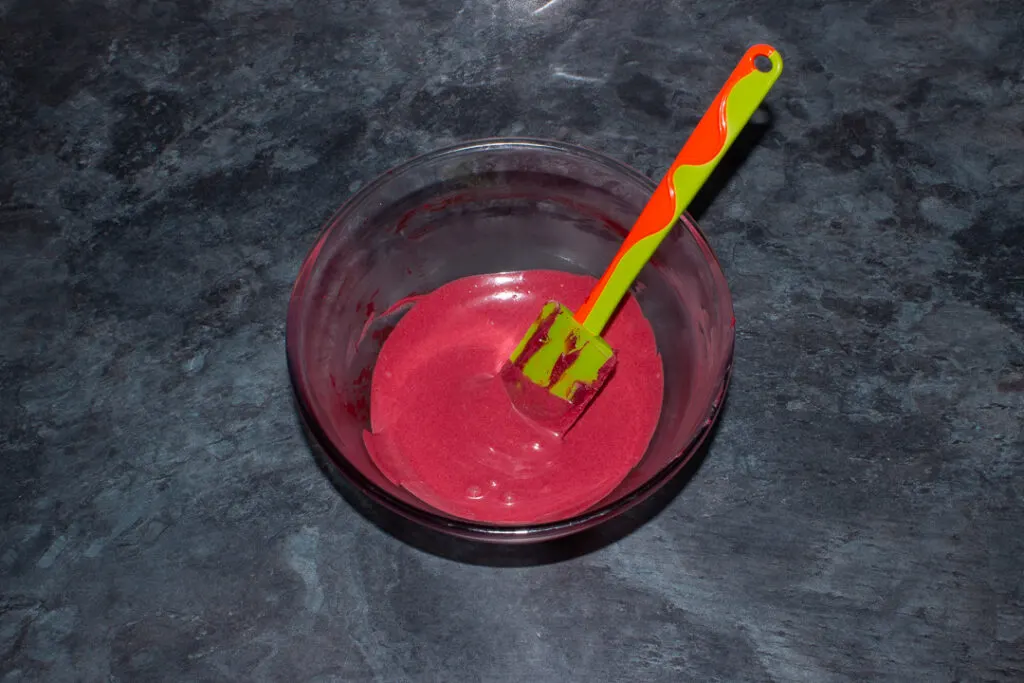
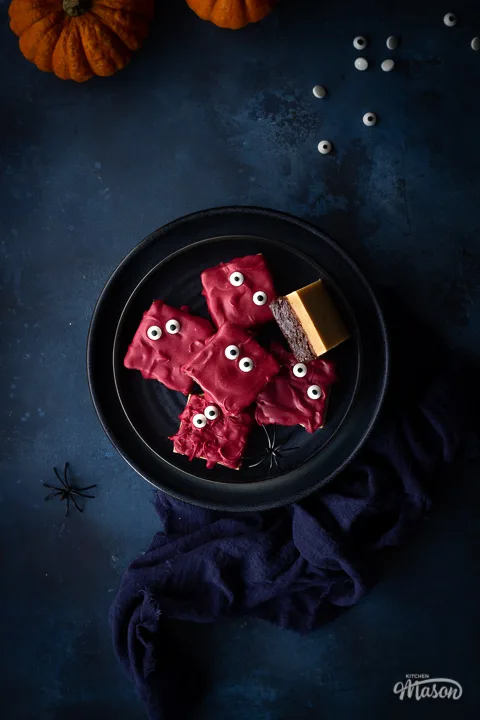
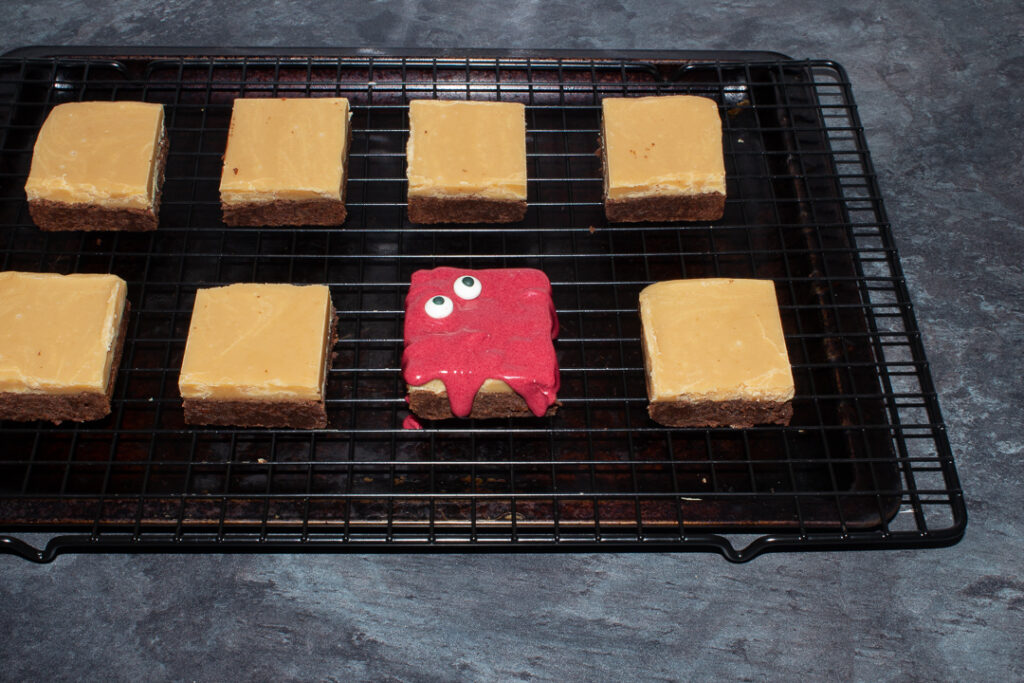
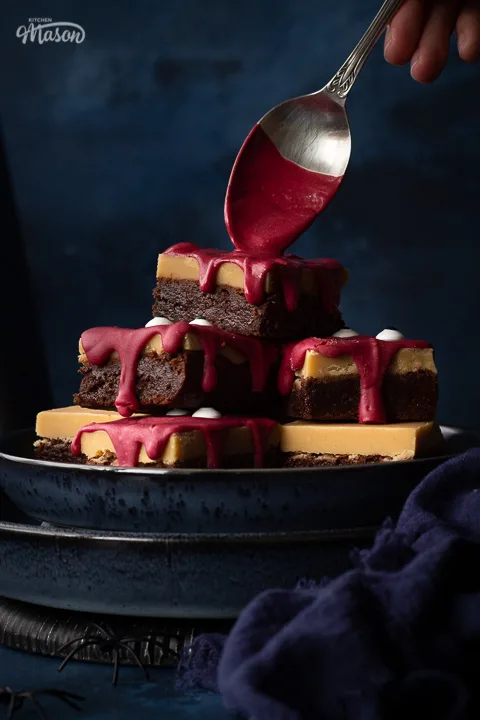
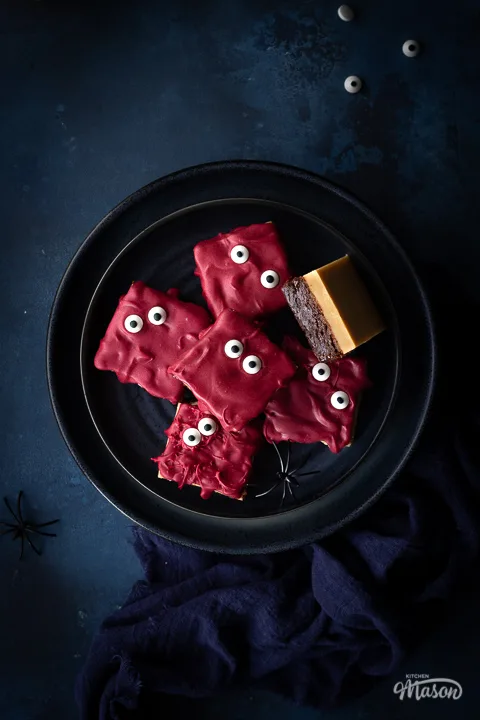
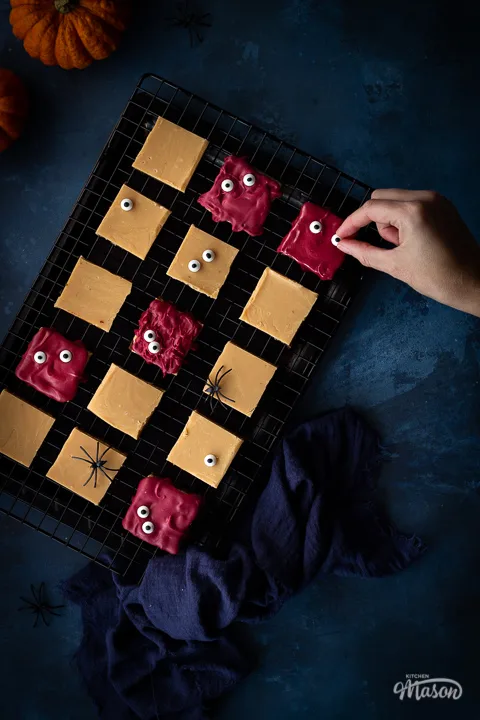
Spoon the chocolate onto a few of the bars, allowing it to drip down the sides here and there. Then top each one with two edible eyes. Repeat until all your bars are decorated.

How to store Halloween millionaire brownies
Allow the chocolate to completely set then transfer them to an airtight container (I prefer metal) and store at room temperature. Consume within 5 days.

What makes brownies more fudgy than cakey?
Usually fudgy brownies contain a higher fat to flour ratio. In this brownie recipe – I melt chocolate and butter into the batter. This gives it quite a high fat content and a lovely fudgy texture. Cakey brownies tend to have more flour.

What is the best way to melt chocolate?
There are many different ways to melt chocolate. I’ve found the easiest to be in the microwave – heating in 10 second intervals and stirring well after each time.
Once the chocolate is two thirds melted, stir until it’s completely melted. This method ensures the chocolate doesn’t get too hot, which can have all kinds of annoying consequences!

What do I do if I burned my caramel?
If the whole thing is completely burnt, there’s not much you can do I’m afraid. It’s back to the drawing board!
Have burnt bits running through your caramel? If you act quickly, you can run the caramel through a sieve. This should get most of it out and leave a nice caramel to for you to work with.
To prevent your caramel from burning, make sure you stir constantly and right into the edges of the pan throughout the whole cooking time. If it’s getting a bit much, turn the heat down a little too.
Loved this recipe? Pin it!

Have you made this recipe?
Have you made these AMAZING Halloween millionaire brownies? I’d love to know if you have! Send me your pics, comments and questions on Facebook, Twitter and Instagram or email me at emma@kitchenmason.com.

Spooky Halloween Millionaire Brownies Recipe
These eye catching Halloween millionaire brownies are gruesomely DELICIOUS! Perfect for trick or treaters and Halloween parties!
Ingredients
For the brownie
- 110g (1/2 Cup) Unsalted Butter, cubed
- 110g (3.9 oz) Dark Chocolate, broken into pieces
- 2 Eggs
- 225g (1 + 1/8 Cup) Golden Caster Sugar
- 1 tsp Vanilla Extract
- 1/4 tsp Salt
- 60g (1/2 Cup) Plain Flour
- 2 tbsp Cocoa Powder
For the caramel
- 200g (2/3 cup) Condensed Milk
- 125g (1/2 cup) Unsalted Butter, cubed
- 125g (2/3 cup) Golden Caster Sugar
- 2 tbsp Golden Syrup
- 1 tsp Vanilla Extract
- Pinch Salt
For the topping
- 200g (7oz) White Chocolate, broken into pieces
- 1 tsp Red Food Colouring Gel *
- 32 x Edible Eyes
Essential Equipment
- 20cm (8″) Square Baking Tin
- Large Microwavable Bowl
- Medium Saucepan
- Sugar Thermometer (Optional but recommended)
Instructions
For the brownie
- Grease and line your tin and preheat the oven to 180°C/Fan 170°C/356ºF. Place the butter and dark chocolate into a microwavable bowl and heat in 10 second intervals, stirring well each time, until melted.


- Thoroughly beat the eggs in one at a time.
- Add the sugar and beat vigorously until it no longer feels grainy on the bottom of the bowl.

- Stir the vanilla and salt through the batter.
- Carefully fold the flour and cocoa powder through until there are no more visible streaks. It should be quite thick.

- Smooth into the tin then bake in the oven for 21-25 mins until the top is crispy. Cool completely.


For the caramel
- Weigh all the caramel ingredients into the saucepan and set over a low-ish heat.

- Bring to the boil then simmer until it reaches 107ºC/224ºF on a thermometer. It will be thicker and darker in colour. Important: you must stir continuously and right into the edge of the pan or your caramel will burn.

- Remove from the heat and continue to stir for a few minutes to help cool, then pour over the brownie and smooth out. Cool completely then cut into 16 bars.


For the topping
- Place the white chocolate and red food colouring gel into a microwavable bowl. Heat in the microwave in 10 second intervals stirring well each time.

- Once two thirds melted, stir until it's completely melted.

- Spoon some chocolate over 2-3 bars, allow to drip over the sides a little. Then top each one with 2 edible eyes. Repeat until all your bars are decorated. Set at room temperature.


Notes
Make sure you allow enough time to cool each layer between stages.
* Use a strong red food colouring gel, NOT liquid colouring. See recommended products below for the one I used.
If you would rather use a more in depth picture recipe, please see the main body of this post. Where you’ll also find lots of extra FAQs and helpful tips, should you need them.
Please note, this recipe includes both UK metric and US Cup measurements.
Storage
Store in a metal container at room temperature, and consume within 5 days.
Tips
- Use actual baking measuring spoons (affiliate link). The teaspoon you use to make your cuppa is not the same!!
- Allow the brownie to cool COMPLETELY before continuing with the recipe. Trapped heat can effect the consistency of the caramel in a negative way.
- When making the caramel, use a thermometer to take out any guess work. It makes is SO much easier!
- Ensure you stir the caramel constantly, getting right into the edges of the pan. Otherwise your caramel might burn and you’ll get horrible dark bits floating through it.
- Do NOT use liquid food colouring when making the chocolate topping. It will affect the consistency too much. Instead use an extra strong red food colouring gel like this sugar flair one (affiliate link). It won’t affect the consistency and will give you a lovely deep red colour.
- Don’t heat the white chocolate/red colouring gel for longer than 10 seconds at a time. The colouring gel could burn and the white chocolate could overheat, leading to unsightly ‘bloomed’ chocolate.
- It’s important to melt the white chocolate with the food colouring. If you add it after – the chocolate could seize due to the temperature difference.
- Decorate each bar one at a time. This will prevent the chocolate from setting too quickly ensuring you can still push the edible eyes into the top.
Recommended Products
As an Amazon Associate and member of other affiliate programs, I earn from qualifying purchases at no extra cost to you.
Nutrition Information:
Yield: 16 Serving Size: 1Amount Per Serving: Calories: 368Total Fat: 20gSaturated Fat: 12gTrans Fat: 0gUnsaturated Fat: 7gCholesterol: 62mgSodium: 86mgCarbohydrates: 45gFiber: 1gSugar: 40gProtein: 4g
Nutritional information on kitchenmason.com should only be used as a general guideline, I am not a certified nutritionist. Please always check labels for allergens where applicable.

Emma is a British recipe writer, home cook, and founder of Kitchen Mason. For over 15 years, she has been creating simple, comforting recipes and practical kitchen tips that help tired, everyday people make dinner feel easier and more enjoyable again. Passionate about British home cooking, Emma shares reliable recipes, comforting classics, and realistic kitchen guidance designed for real life. Her work has also been featured in publications including Food Network, Cosmopolitan, and The Huffington Post.
Knowledgeable On: British home cooking, Easy dinner ideas, Comford food recipes, Recipe writing