


This post may contain affiliate links. Where I make a small commission on purchased items, at no extra cost to you. See my disclosure for details.
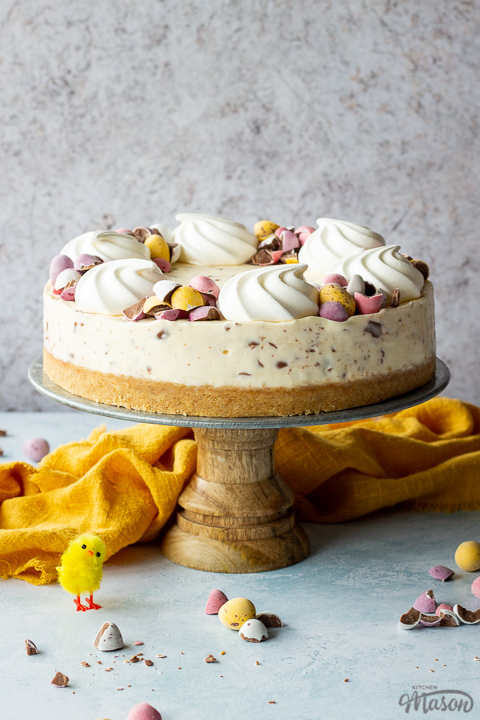
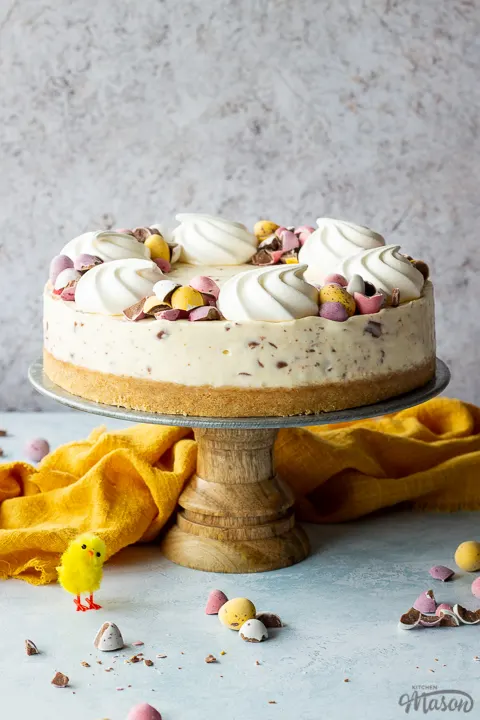
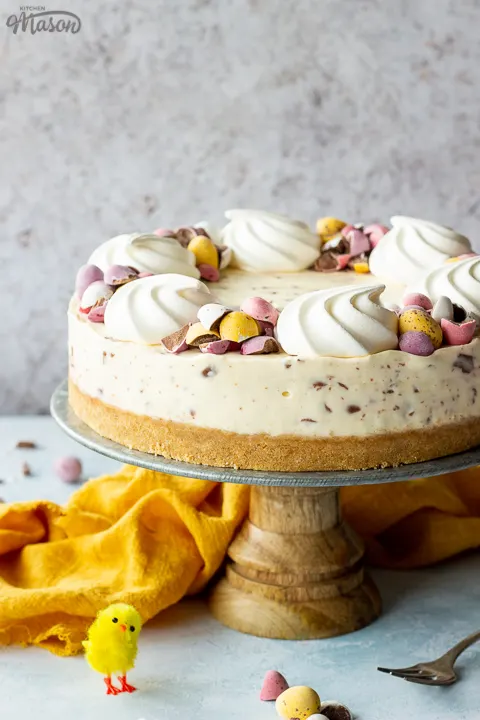
Looking for an Easter dessert that will really impress, but don’t have time for complicated? You need this super easy no bake Mini Egg cheesecake recipe!! It’s light, creamy, and filled to the brim with delicious Cadbury’s Mini Eggs. Keep reading for lots of FAQs, a step by step picture recipe, a printable recipe, and LOTS of helpful tips!
Why you’ll love this recipe
Now I do love a baked cheesecake, but no bake cheesecakes will always be my favourite. They’re so light and creamy, and much easier to make! Which has always served me well over the years.
Just like a no bake Malteser cheesecake, this recipe uses cream cheese and whipped cream to set it. No baking or gelatine required. Meaning it’s also suitable for vegetarians.
This gorgeous cheesecake encapsulates everything good about Easter. Celebrating, enjoying time with loved ones, sharing wonderful food, and of course… Mini Eggs!!

How to make Mini Egg cheesecake
Making a Mini Egg no bake cheesecake is really very simple. Mix crushed biscuits with melted butter and press it into the base of a tin. Then make the filling by combining whipped sweetened cream with softened cream cheese, vanilla and chopped Mini Eggs. And finally, spread the filling over the base and set in the fridge for a few hours.
Keep reading for a more detailed recipe!

Ingredients
Confused about what ingredients to buy? Not sure about a substitution? Here’s everything you need to know…
Base
- Biscuits – Digestive biscuits are a go to here in the UK. I do recommend using the original brand though – cheaper versions often absorb the filling more easily, and can go a bit soggy. You can substitute these for graham crackers in the US.
- Butter – Unsalted butter is best, but you could use salted in a pinch if that’s all you have.
Cheesecake filling
- Cream – This needs to be whippable, so use double cream in the UK, and heavy cream in the US.
- Icing Sugar – Also known as confectioners sugar, this dissolves easily into the cream, so don’t substitute it for granular sugars.
- Cream Cheese – Important! Only use full fat original Philadelphia cream cheese. It’s the only one I’ve found to be stable enough to set a cheesecake without gelatine. Cheaper and lighter versions may not set.
- Caster Sugar – (Superfine sugar in the US) Don’t substitute for granulated sugar, as it’s crystals are bigger and it might not dissolve as easily.
- Vanilla – Always use a good quality brand of vanilla like Nielsen Massey or Little Pod. I promise, you will taste the difference! You can use either extract or paste.
- Cadbury’s Mini Eggs – The originals are best, however they are getting increasingly more expensive. So if you find a tasty cheaper alternative? Go for it!
To Decorate
- Cadbury’s Mini Eggs – See above.
- Mini Meringue Nests – Struggle to pipe those perfect swirls of whipped cream on top? Mini meringue nests are the answer! My hack for a beautiful looking cheesecake without all the hassle!

Emma’s top tips
Here are tips you’ll find helpful when making no bake Mini Egg cheesecakes.
- Really press the biscuit crumbs into the base to ensure they’re packed down well. This will help prevent a soggy buttery biscuit base!
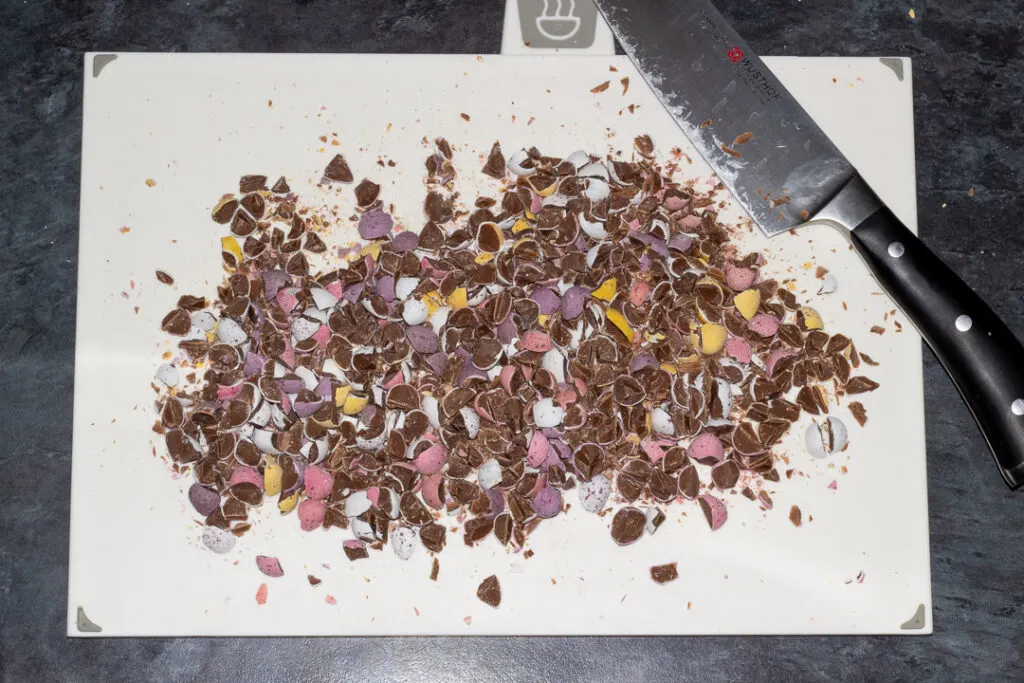
- Be careful when chopping the Mini Eggs. You need a really sharp knife, and to take your time so you don’t hurt yourself! (Alternatively, put them in a bag and hit with a rolling pin.)
- Chop the Mini Eggs finely. When those crispy sugar coatings hit the ‘wet’ cheesecake mixture, they start to sweat. Meaning you get little pockets of liquid sugar forming inside your cheesecake. Which isn’t great for setting!
- Make sure you whip the cream to stiff peaks. As in, you can turn the bowl upside down and nothing falls out. Anything less and it could prevent your cheesecake from setting.
- Decorate just before serving. Remember I said the sugar coating on the Mini Eggs sweats when it hits the wet cheesecake? The same will happen with the topping. So it’s best to do it just before serving.
Timings
Have limited time? Struggle with recipe timings? Or juggling around other things? Here’s some time managing info to make your life easier.
- The biscuit base will only take about 5 minutes to make.
- It will then need 10-15 minutes to chill in the freezer. (Although this can be happening while you make the cheesecake filling.)
- The cheesecake filling should take around 20 minutes to make.
- Your Mini Egg cheesecake needs at least 4 hours to set in the fridge. Ideally overnight if you have the time available.
- Removing the cheesecake from the tin and decorating should only take about 5-10 minutes.

If you like this recipe…
…you might also like:
Love a showstopper? Check out this funny Easter bunny cake!
No Bake Mini Egg Cheesecake – Step by Step Picture Recipe
(For a printer friendly version, see the recipe card at the end of this post)
Please note, this recipe includes both UK metric and US Cup measurements.
Ingredients
Here is what you will need to serve 10-12 people.
Base
- 250g (2 + 1/2 Cups) Digestive Biscuits
- 85g (1/3 Cup + 1 tbsp) Unsalted Butter
Cheesecake filling
- 210g (7.4 oz) Cadbury’s Mini Eggs, finely chopped
- 300ml (2 + 1/4 Cups) Double Cream
- 60g (1/2 Cup) Icing Sugar
- 450g (2 Cups) Philadelphia Full Fat Original Cream Cheese *
- 110g (1/2 Cup) Golden Caster Sugar
- 1 tsp Vanilla Extract
*Do NOT use cheaper or light alternatives as it may not set.
To decorate
- 6 x Mini Meringue Nests
- 80g (2.8 oz) Cadbury’s Mini Eggs, some whole/some chopped
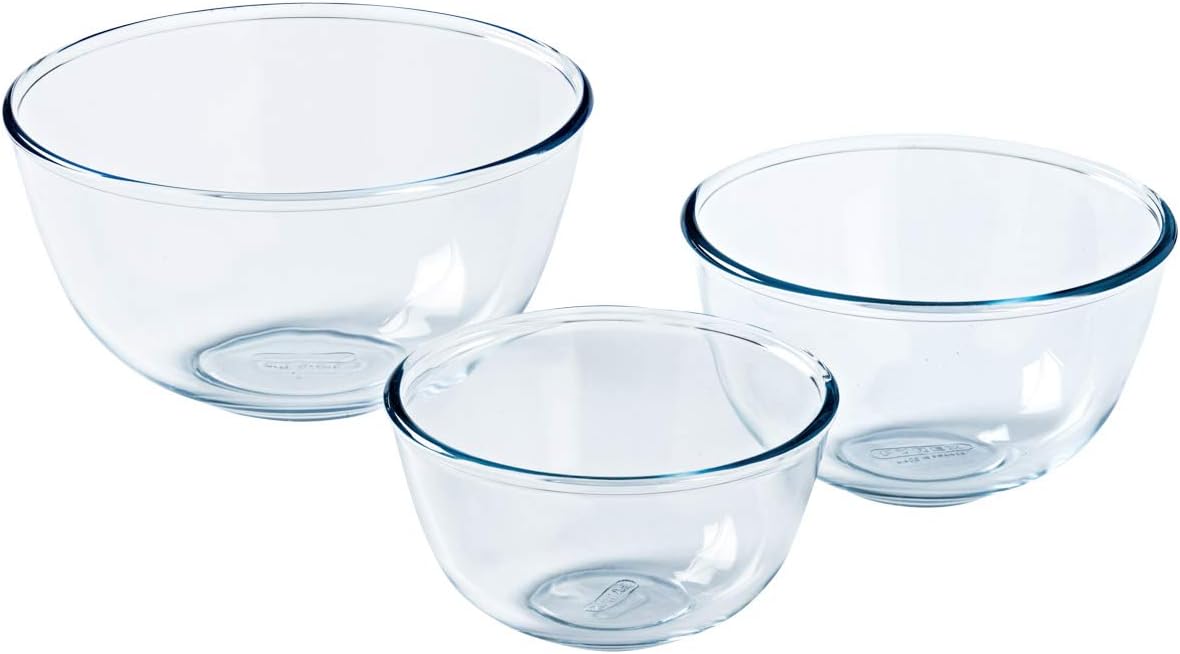
Essential equipment
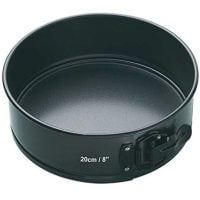
- 20cm (8″) Springform Baking Pan
- Baking Paper
- Food Processor
- Small Bowl
- Metal Spoon
- Chopping Board
- Sharp Knife
- 2 x Mixing Bowls
- Electric Hand Whisk
- Spatula
Base instructions
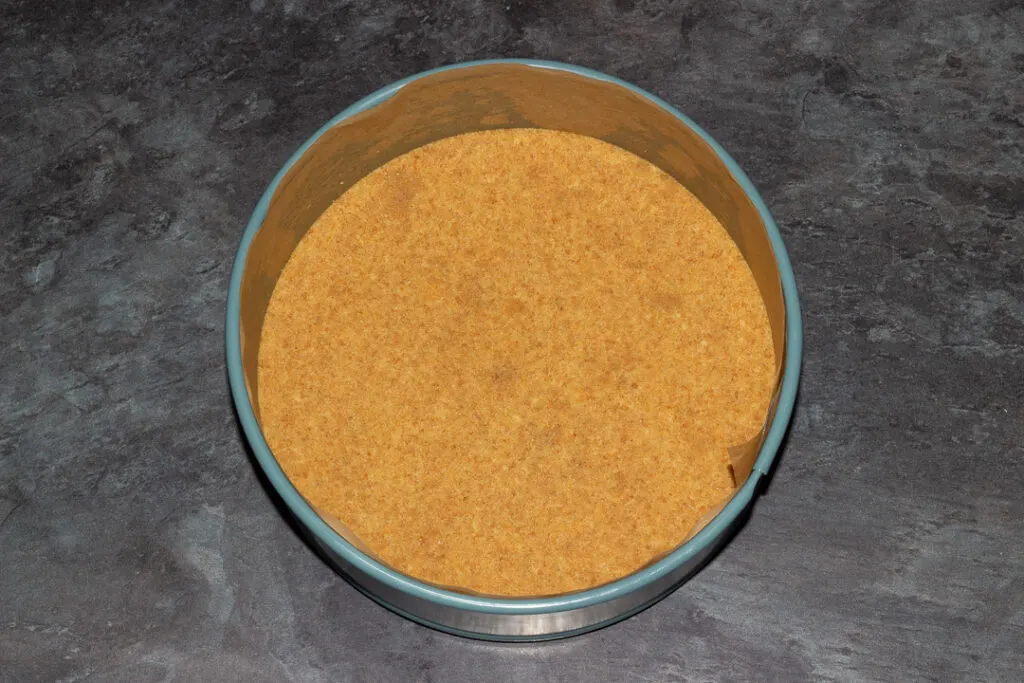
First line the base and sides of your springform baking pan with baking paper and set to one side.
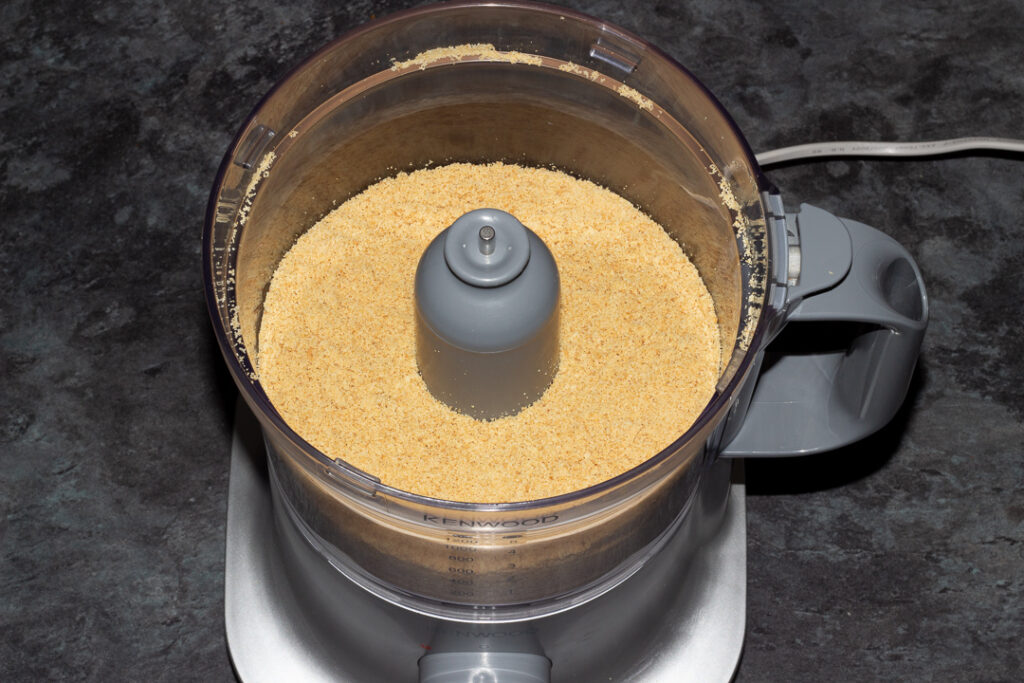
Then add the digestive biscuits (250g | 2 + 1/2 Cups) into a food processor and blitz until they become fine crumbs.

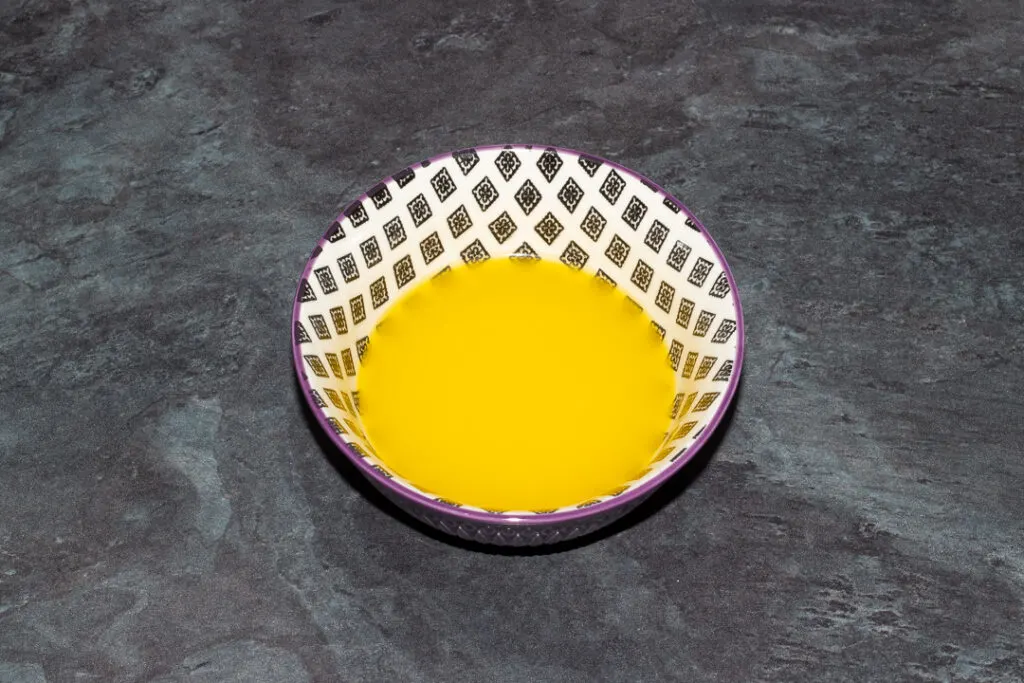
Melt the butter (85g | 1/3 Cup + 1 tbsp) in a small bowl in 10 second intervals in the microwave.

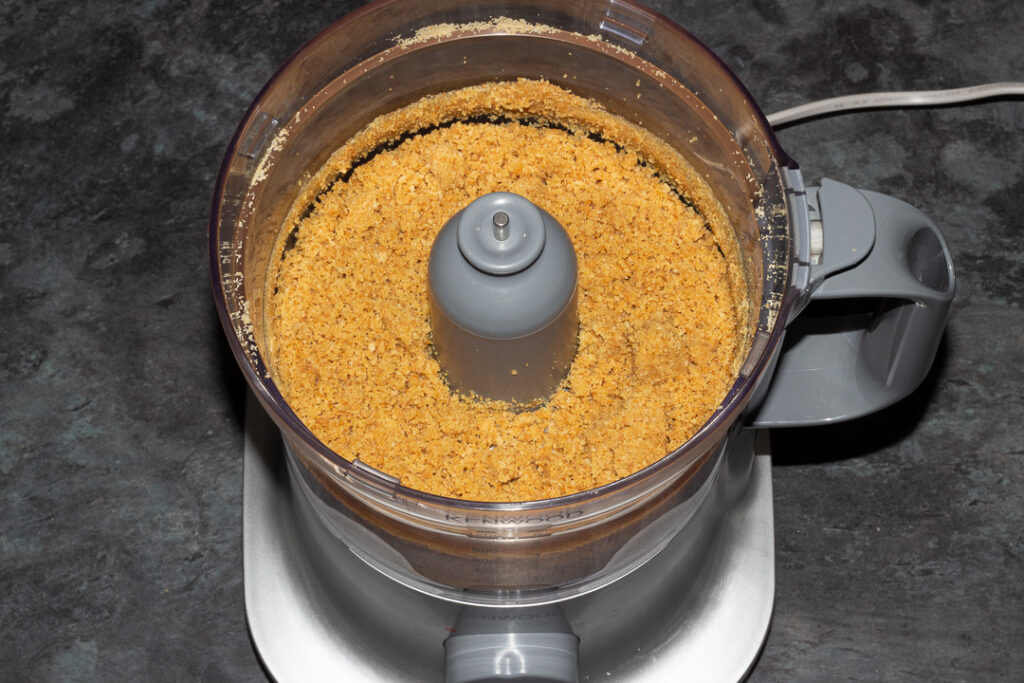
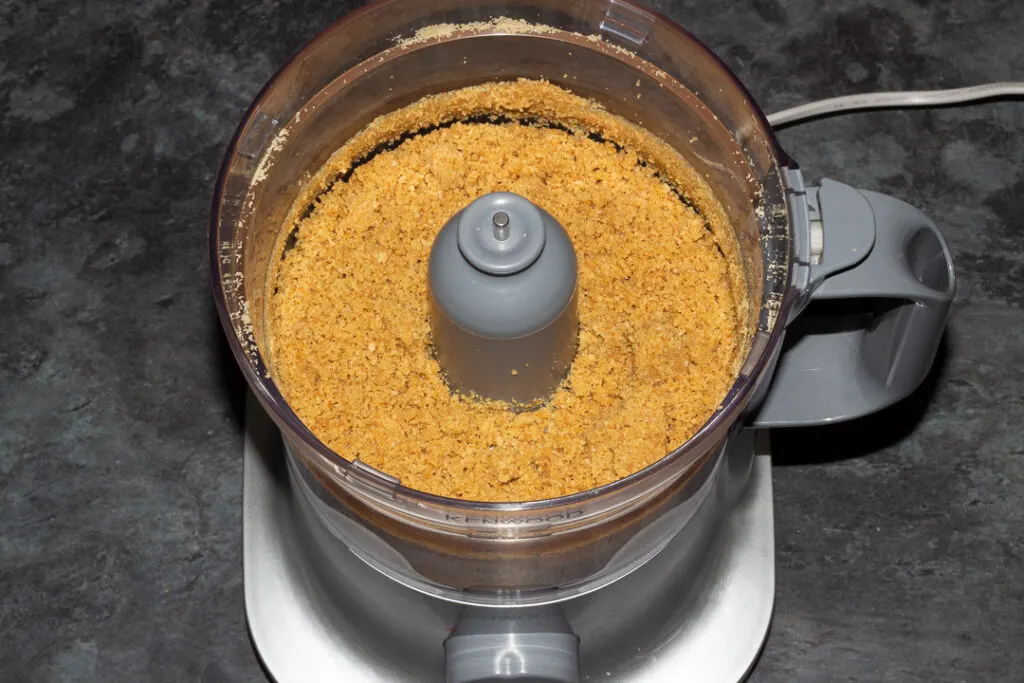
Then pour the melted butter into the processor along with the biscuit crumbs and pulse briefly until it starts to clump together.
Finally, tip the mixture into your prepared tin and press in firmly with the back of a metal spoon. Then pop it into the freezer to firm up until needed.

Cheesecake filling instructions
If you haven’t already, finely chop the Mini Eggs (210g | 7.4 oz) on a chopping board using a sharp knife. Please take care though, it can be fiddly and a little tricky! (See Recipe Tips for more help.)

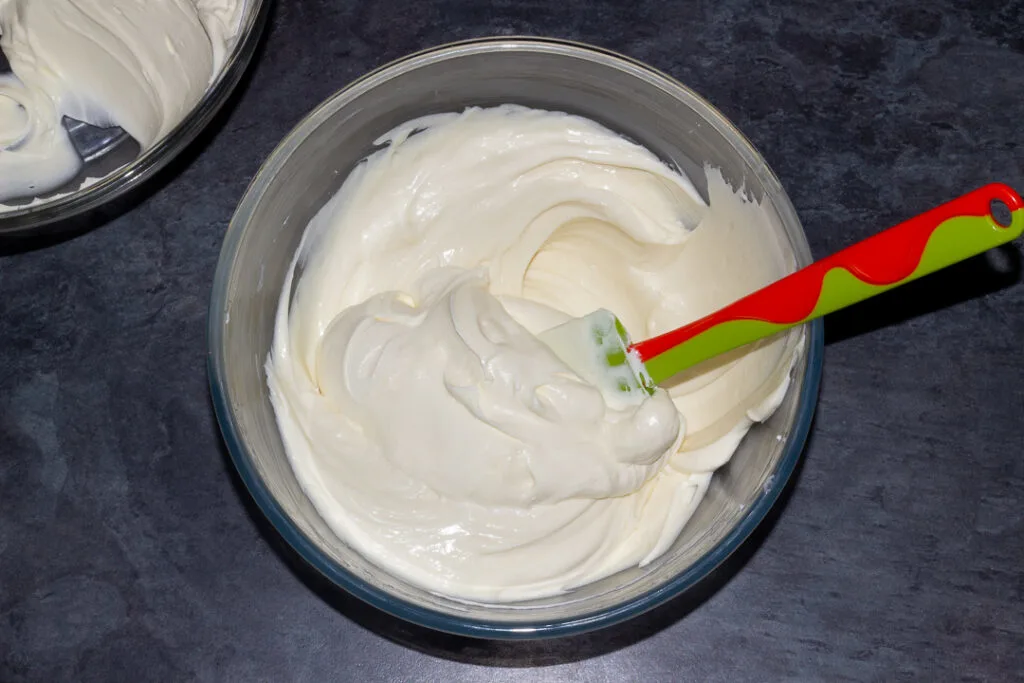
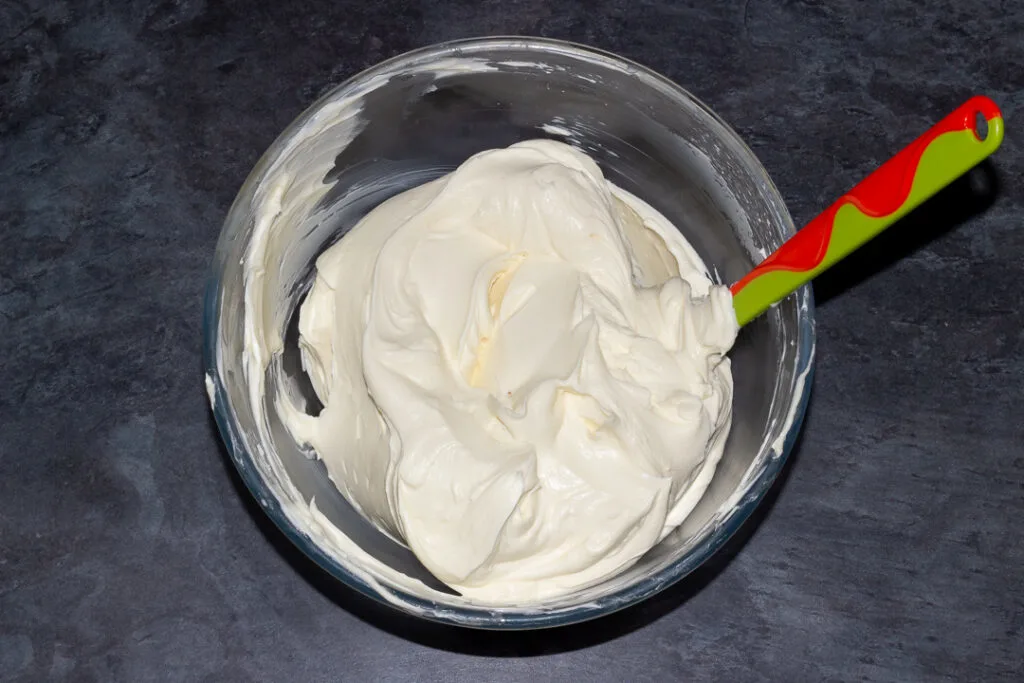
Now pour the cream (300ml | 2 + 1/4 Cups) and icing sugar (60g | 1/2 Cup) into a mixing bowl and whisk to stiff peaks using an electric hand whisk. And I do mean stiff peaks – you should be able to turn the bowl upside down and nothing falls out!


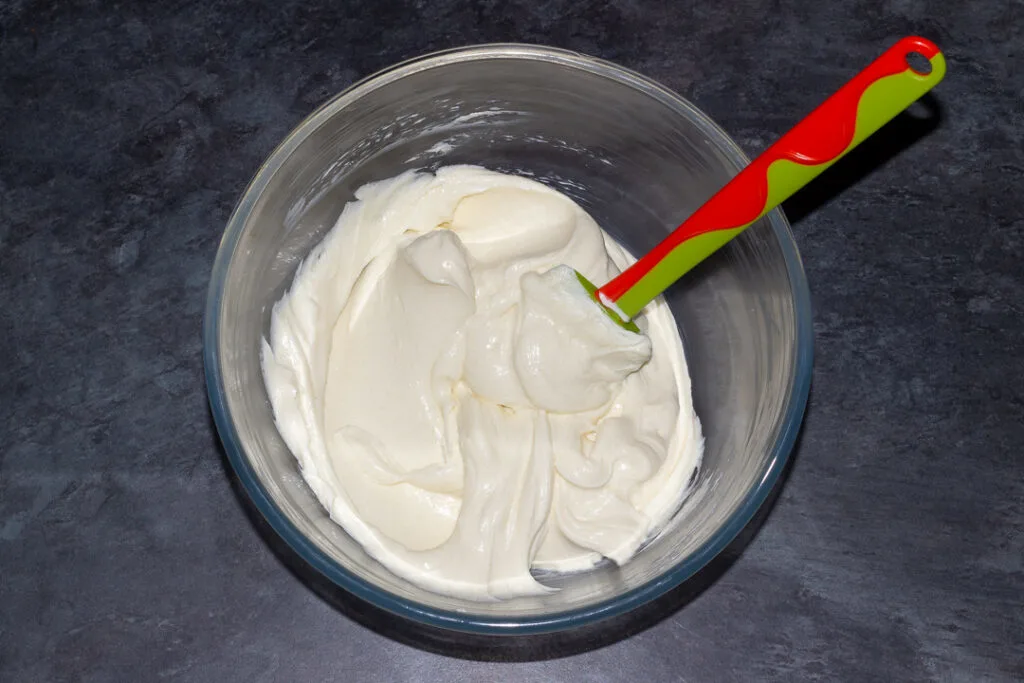
In another mixing bowl, beat the cream cheese (450g | 2 Cups) with a spatula until it’s softened.

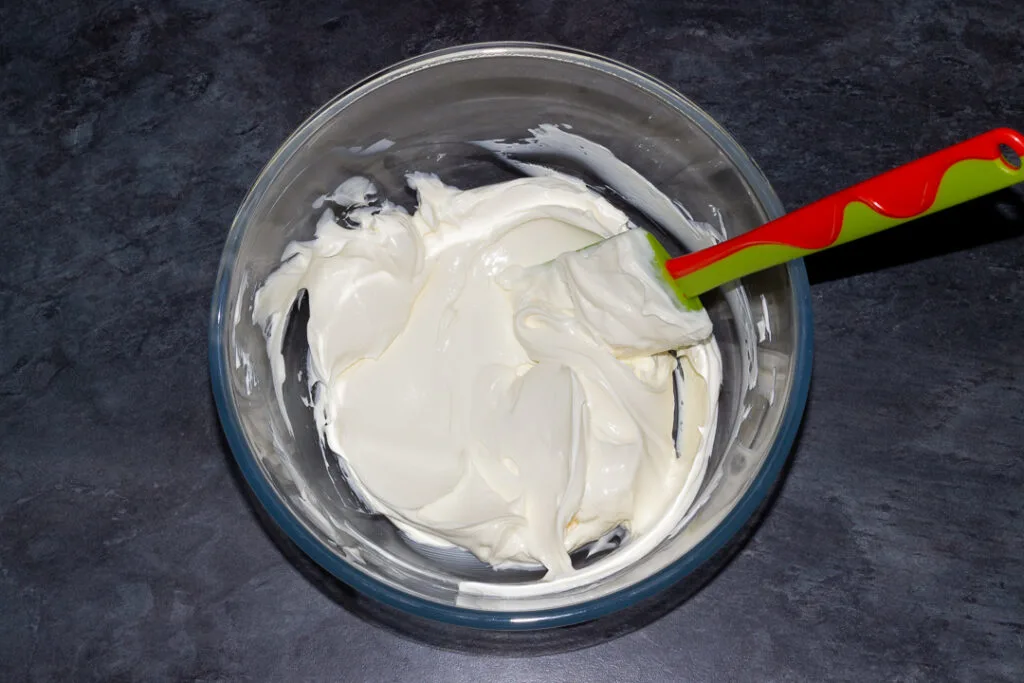
Add the caster sugar (110g | 1/2 Cup) to the bowl and beat again until the sugar has dissolved. It shouldn’t feel grainy on the bottom of the bowl anymore when you’re done.
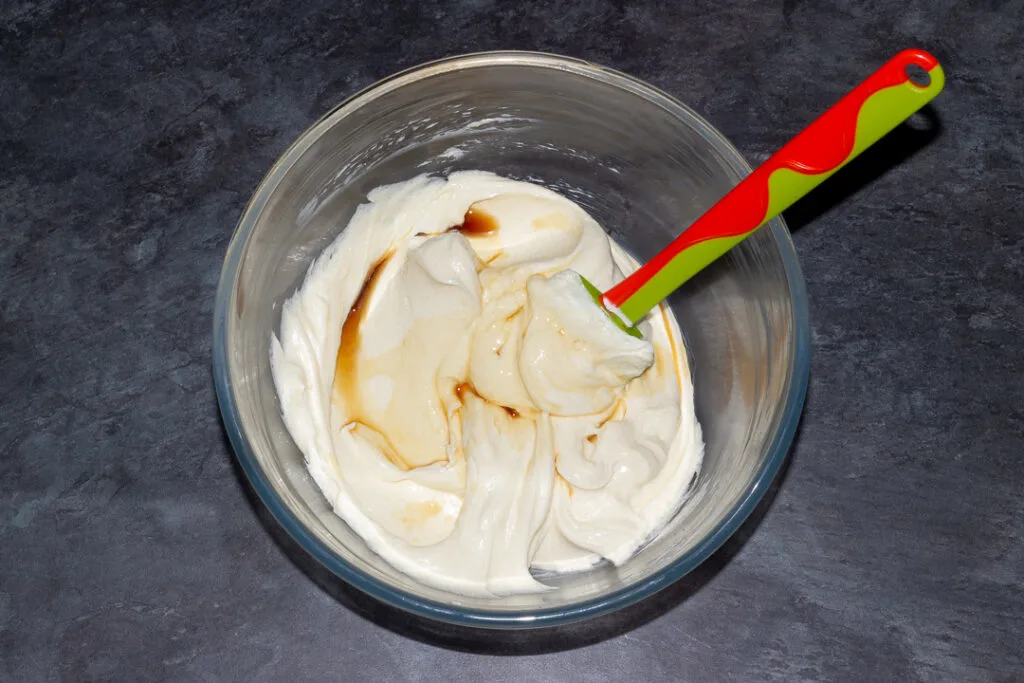
Next add in the vanilla (1 tsp) for a bit of extra flavour, and mix until blended in.

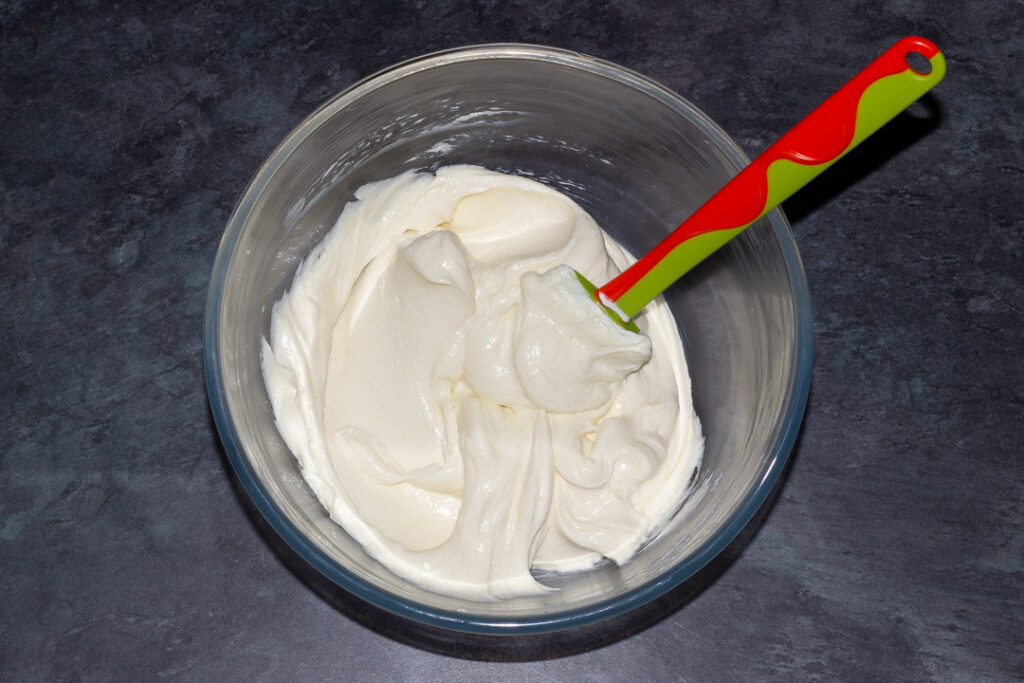
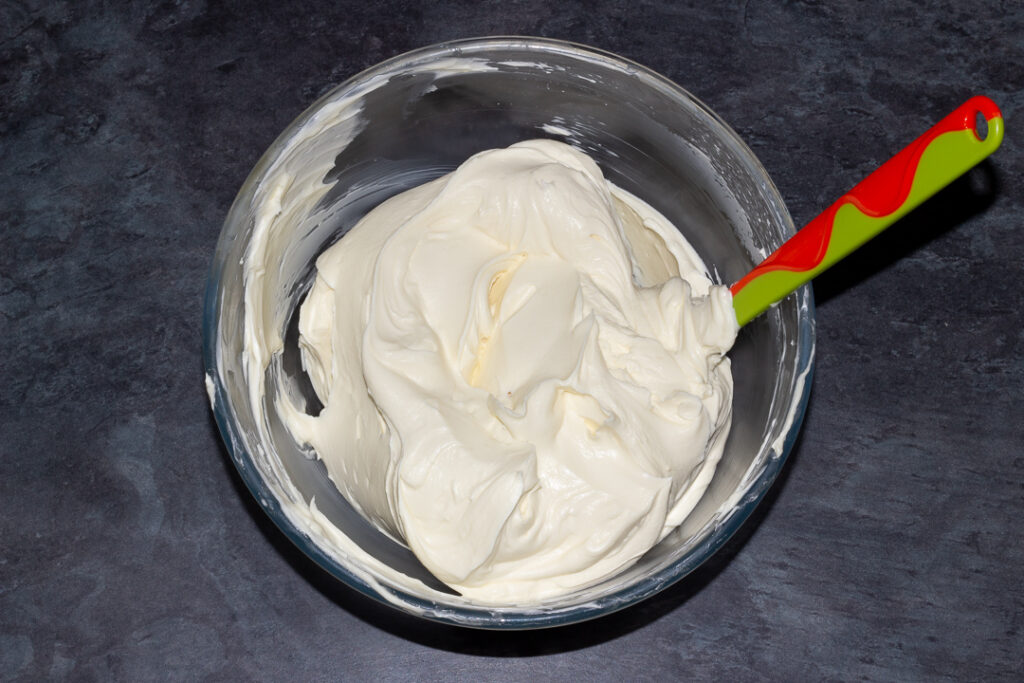
Then, in thirds, carefully fold the whipped cream into the cream cheese mixture.

Take your time – you don’t want to knock out all the air you spent ages putting into that cream!
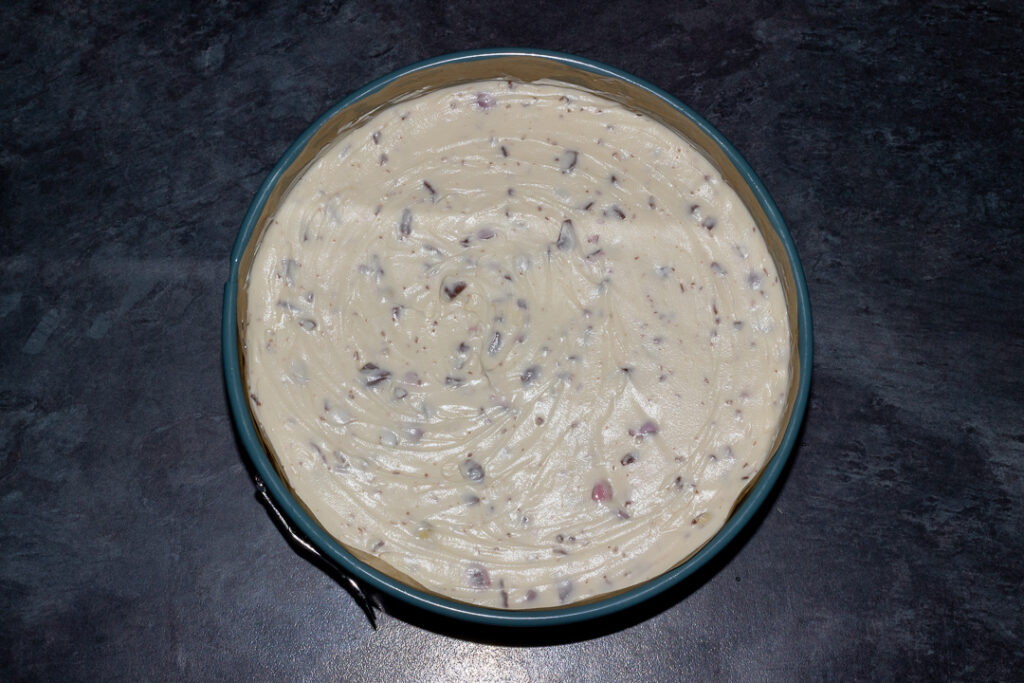
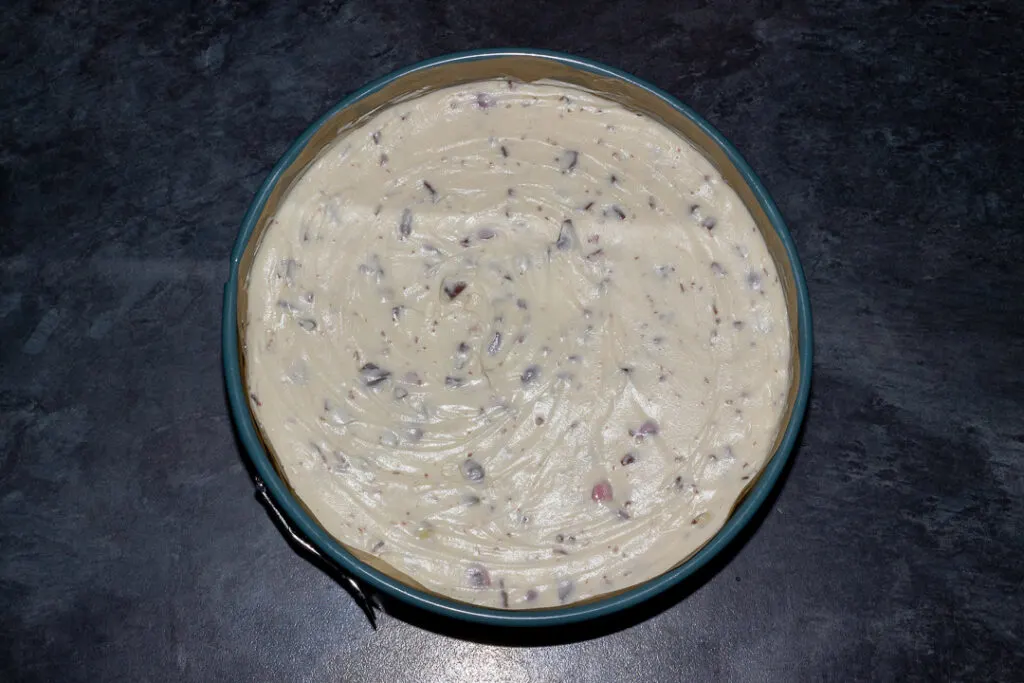
Now your cheesecake filling is ready, it’s time to add the good stuff! Pour in all those gloriously chopped Mini Eggs…
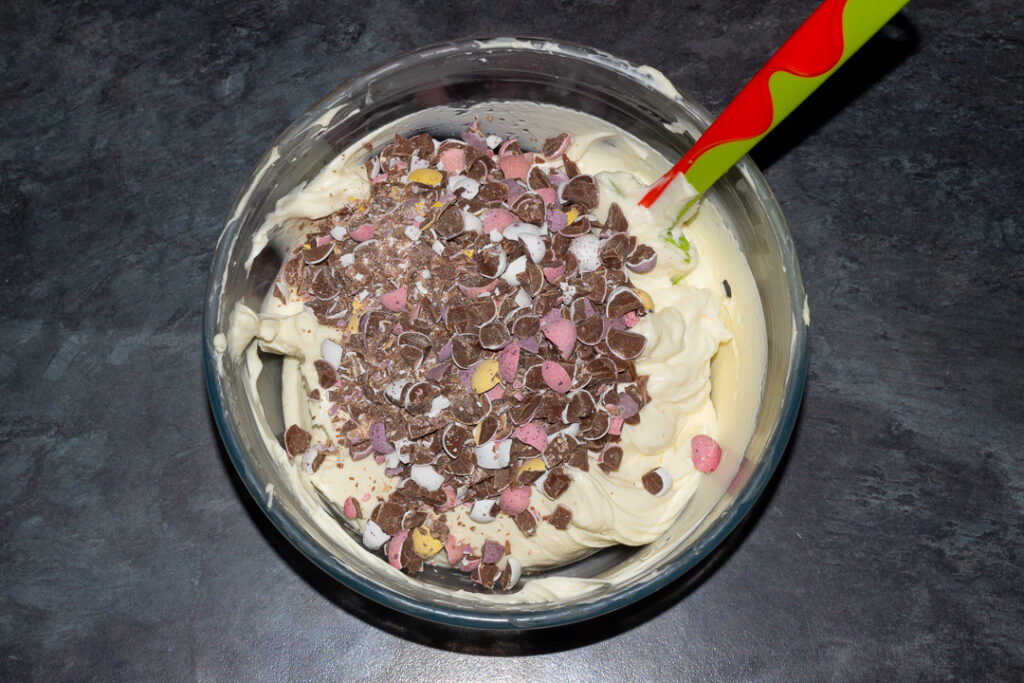

…and gently fold them in. Again, being careful not to knock out all the air.

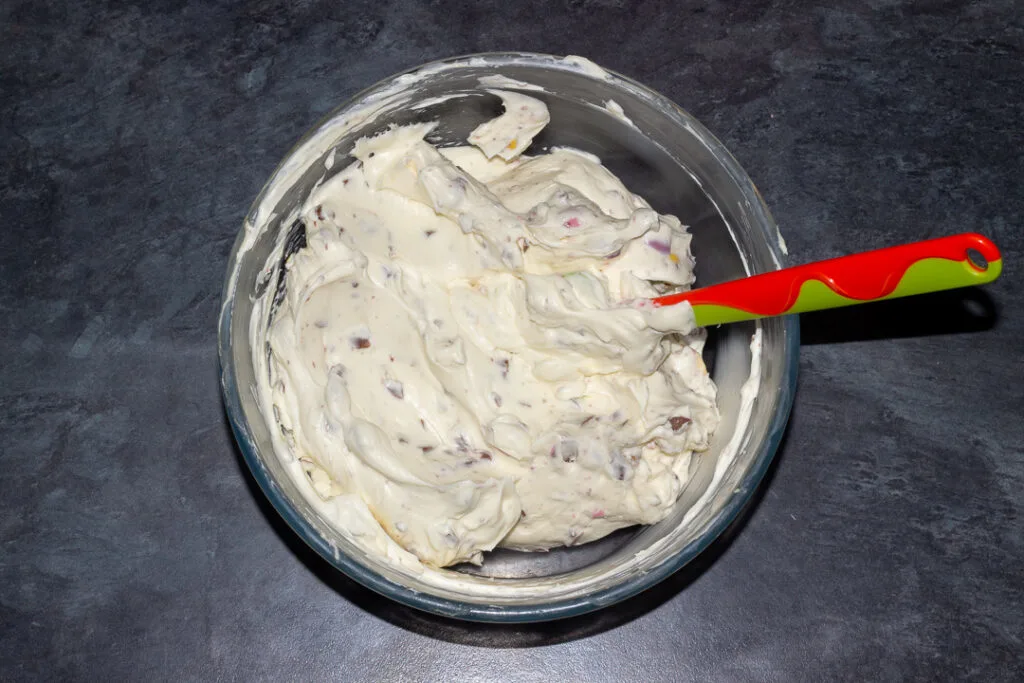
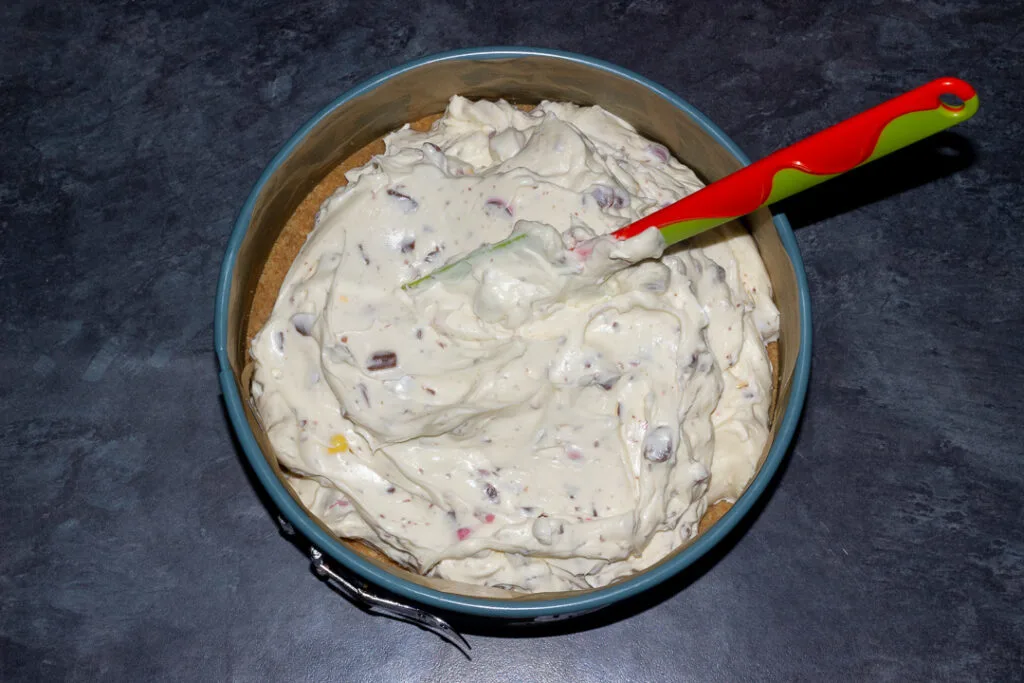
Finally, tip the mixture over your prepared base and smooth it out with a spatula. Then place into the fridge to set for a minimum of 4 hours, overnight is best.

Decorating instructions
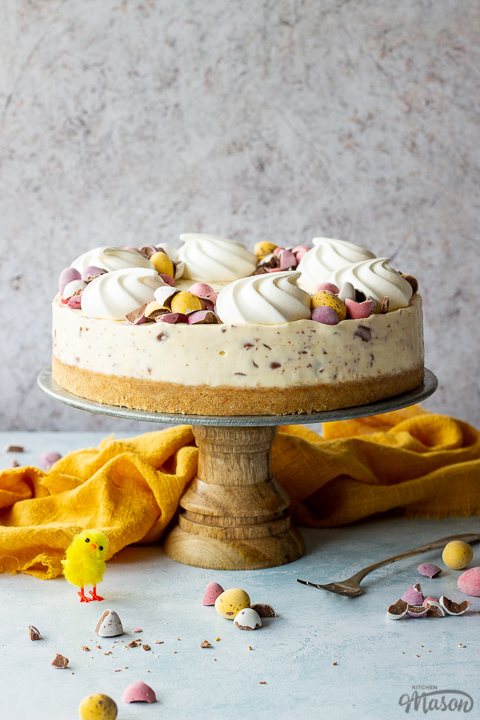
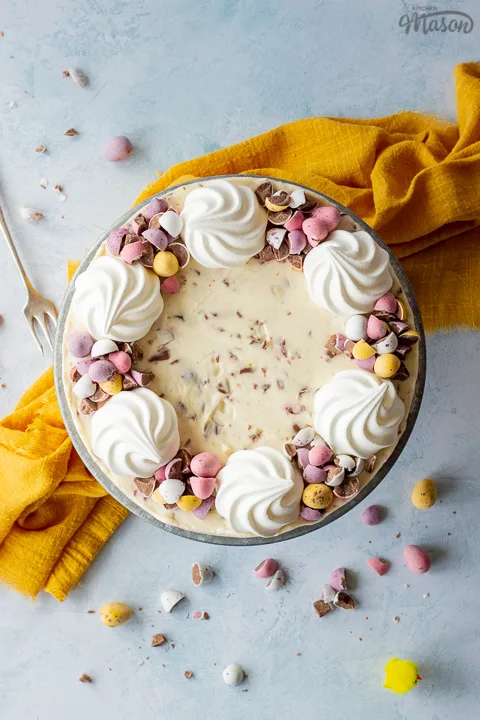
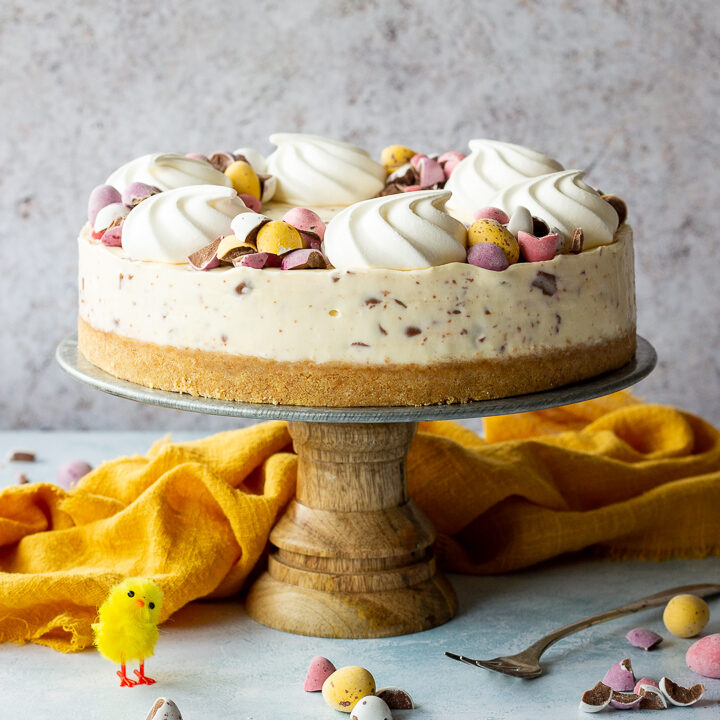
When your cheesecake has set, carefully remove it from the tin, pull away the baking paper, and place it on a cake stand or serving plate.
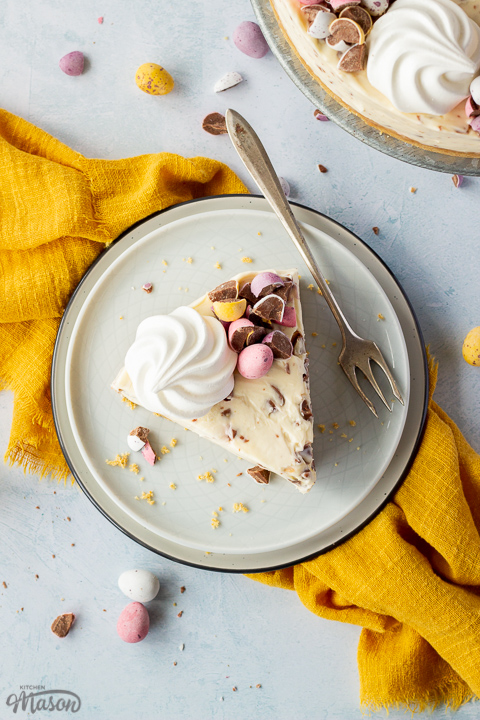
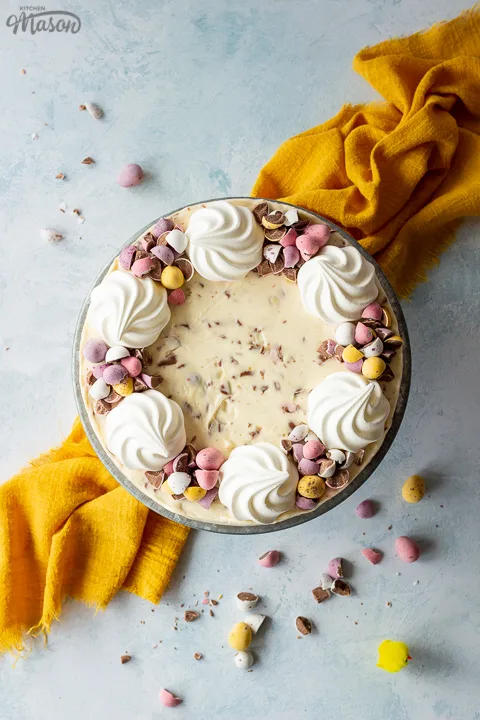
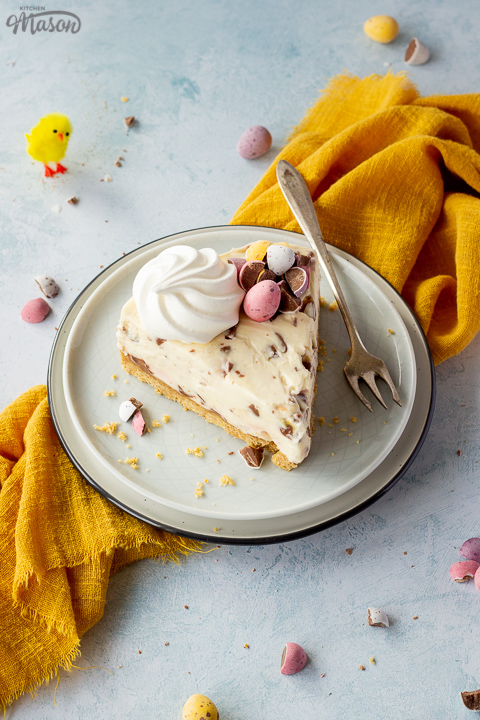
Just before serving, top with mini meringues (x 6) and Cadbury’s Mini Eggs (80g | 2.8 oz). I think it looks nice with some whole ones and some chopped ones.

How to store no bake Mini Egg cheesecake
Store any leftover Mini Egg cheesecake covered in the fridge, and consume within 4 days.
FAQs
In this recipe I decorate my Mini Eggs cheesecake with a combination of whole Mini Eggs, and crushed Mini Eggs. And my ultimate cheesecake decoration hack… mini meringue nests!
(Piping whipped cream can be really faffy and temperamental!)
Of course, you can go off recipe here and use whatever takes your fancy. Grated chocolate or chocolate curls always look great. And chocolate ganache, or even white chocolate sauce would also work lovely on a Mini Egg cheesecake too.
This depends on how long you want it to last for, as a lot of ingredients will either sweat or go soggy when they come into contact with the cheesecake.
Over time, Mini Eggs will leak their colour into the cheesecake filling, which can look unsightly.
To avoid this, you can either top your cheesecake with items that aren’t affected too much by moisture (like melted chocolate, ganache, chocolate curls etc.), or decorate your cheesecake just before serving.
Mini Egg cheese cake can be made the day before you need it, which may help ease the stress of hosting. (If you need a Mini Egg treat that you can make more than 1 day in advance, this easy Mini egg rocky road may be what you need.) Your no bake Easter cheesecake is best eaten within the first 2 days of being made. But any leftovers will keep well for up to 4 days, if covered and kept refrigerated.
Not really, no. Especially if you made your Easter Mini Egg cheesecake during the hotter months of the year. Cheesecake is always best kept refrigerated to help it last as long as possible.
You can freeze no bake Mini Egg cheesecake, but know that you may alter the texture in doing so. (Baked cheesecakes tend to freeze better, and are less liable to splitting.)
First you must let your cheesecake fully set in the fridge beforehand. Then wrap well with at least 2 layers of cling film and a layer of thick foil. You can freeze whole, or in individual slices.
Defrost overnight in the fridge, decorate with any toppings, and consume within 1-2 days.
This depends on the recipe. Some no bake cheesecakes use gelatine to set them, whereas others use the combination of full fat cream cheese and whipped double cream to set them. Exactly like in a no bake chocolate cheesecake, and this Mini Egg cheesecake.
If you are using the cream cheese/whipped cream method, it’s very important to use full fat cream cheese. And a good quality one like Philadelphia. Low fat cheaper alternatives won’t set properly.
Baked cheesecakes tend to have eggs in the filling, and are then baked to set them. No bake cheesecakes, as their name suggests, aren’t baked. Instead they use either gelatine, or a combination of good quality full fat cream cheese and whipped cream to set them.
Which one is better? It’s all relative. I’ve eaten incredible versions of both, and I honestly believe it’s all down to personal preference.
Loved this recipe? Pin it!


Easy No Bake Mini Egg Cheesecake Recipe
Easy to make and guaranteed to impress, this no bake Mini Egg cheesecake is light, creamy and outrageously YUM!
Ingredients
For the biscuit base
- 250g (2 + 1/2 Cups) Digestive Biscuits/Graham Crackers in the US
- 85g (1/3 Cup + 1 tbsp) Unsalted Butter
For the cheesecake filling
- 210g (7.4 oz) Cadbury’s Mini Eggs, finely chopped
- 300ml (2 + 1/4 Cups) Double Cream/Heavy Cream in the US
- 60g (1/2 Cup) Icing Sugar
- 450g (2 Cups) Philadelphia Full Fat Original Cream Cheese *
- 110g (1/2 Cup) Golden Caster Sugar
- 1 tsp Vanilla Extract
For the decoration
- 6 x Mini Meringue Nests
- 80g (2.8 oz) Cadbury’s Mini Eggs, some whole/some chopped
Essential equipment
- 20cm (8″) Springform Baking Pan
- Baking Paper
- Food Processor
- Small Bowl
- Metal Spoon
- Chopping Board
- Sharp Knife
- 2 x Mixing Bowls
- Electric Hand Whisk
- Spatula
Instructions
For the biscuit base
- Grease and line the base and sides of your springform pan with baking paper. Blitz the biscuits in a food processor to fine crumbs.


- Melt butter in a small bowl in the microwave in 10 second intervals, then pour it in with the biscuit crumbs. Pulse until it starts to clump together.

- Tip the crumbs into the prepared tin and press down firmly with the back of a metal spoon. Freeze until needed.


For the cheesecake filling
- Finely chop the Mini eggs on a chopping board with a sharp knife.

- Whisk the double cream and icing sugar to stiff peaks in a mixing bowl with an electric hand whisk.

- Soften the cream cheese in a separate mixing bowl with a spatula. Add the caster sugar and beat again until it's no longer grainy on the bottom of the bowl (the sugar has dissolved).

- Stir through the vanilla.

- In thirds, gently fold the whipped cream into the cream cheese mixture. Be careful not to knock out the air.

- Carefully fold through the chopped mini eggs then pour into the tin and smooth the mixture out over the biscuit base. Chill in the fridge for at least 4 hours, overnight is better.


For the decoration
- Once set, remove the cheesecake from the tin and place on a cake stand/serving plate. Top with mini meringues and Mini Eggs. I like to use some whole and some chopped.

Notes
*Do NOT use cheaper or light alternatives as it may not set.
If you would rather use a more in depth picture recipe, please see the main body of this post. Where you’ll also find lots of extra FAQs and helpful tips, should you need them.
Please note, this recipe includes both UK metric and US Cup measurements.
Storage
Store any leftover Mini Egg cheesecake covered in the fridge, and consume within 4 days.
Tips
- Really press the biscuit crumbs into the base to ensure they’re packed down well. This will help prevent a soggy buttery biscuit base!
- Be careful when chopping the Mini Eggs. You need a really sharp knife, and to take your time so you don’t hurt yourself! (Alternatively, put them in a bag and hit with a rolling pin.)
- Chop the Mini Eggs finely. When those crispy sugar coatings hit the ‘wet’ cheesecake mixture, they start to sweat. Meaning you get little pockets of liquid sugar forming inside your cheesecake. Which isn’t great for setting!
- Make sure you whip the cream to stiff peaks. As in, you can turn the bowl upside down and nothing falls out. Anything less and it could prevent your cheesecake from setting.
- Decorate just before serving. Remember I said the sugar coating on the Mini Eggs sweats when it hits the wet cheesecake? The same will happen with the topping. So it’s best to do it just before serving.
Recommended Products
As an Amazon Associate and member of other affiliate programs, I earn from qualifying purchases at no extra cost to you.

Nutrition Information:
Yield: 12 Serving Size: 1Amount Per Serving: Calories: 580Total Fat: 41gSaturated Fat: 24gTrans Fat: 0gUnsaturated Fat: 13gCholesterol: 84mgSodium: 191mgCarbohydrates: 53gFiber: 2gSugar: 44gProtein: 6g
Nutritional information on kitchenmason.com should only be used as a general guideline, I am not a certified nutritionist. Please always check labels for allergens where applicable.
I want to see YOUR no baking!
Have you made this gorgeous no bake Mini Egg cheesecake? I’d love to know if you have! Tag me in your pics on Facebook, Twitter and Instagram or email me at emma@kitchenmason.com.
Other tasty Mini Egg recipes


Experienced British Online Publisher, recipe writer, and home cook, Emma has a background of over 20 years in British cuisine and cooking. Born and bred in the UK, she excels in classic British dishes, is passionate about air frying, and loves sharing her Gran’s old school recipes. She has been featured in popular publications such as Food Network, Cosmopolitan, and The Huffington Post.
Knowledgeable On: Traditional British Cuisine, Recipe Writing, Air Frying, Home Cooking.