

This post may contain affiliate links. Where I make a small commission on purchased items, at no extra cost to you. See my disclosure for details.
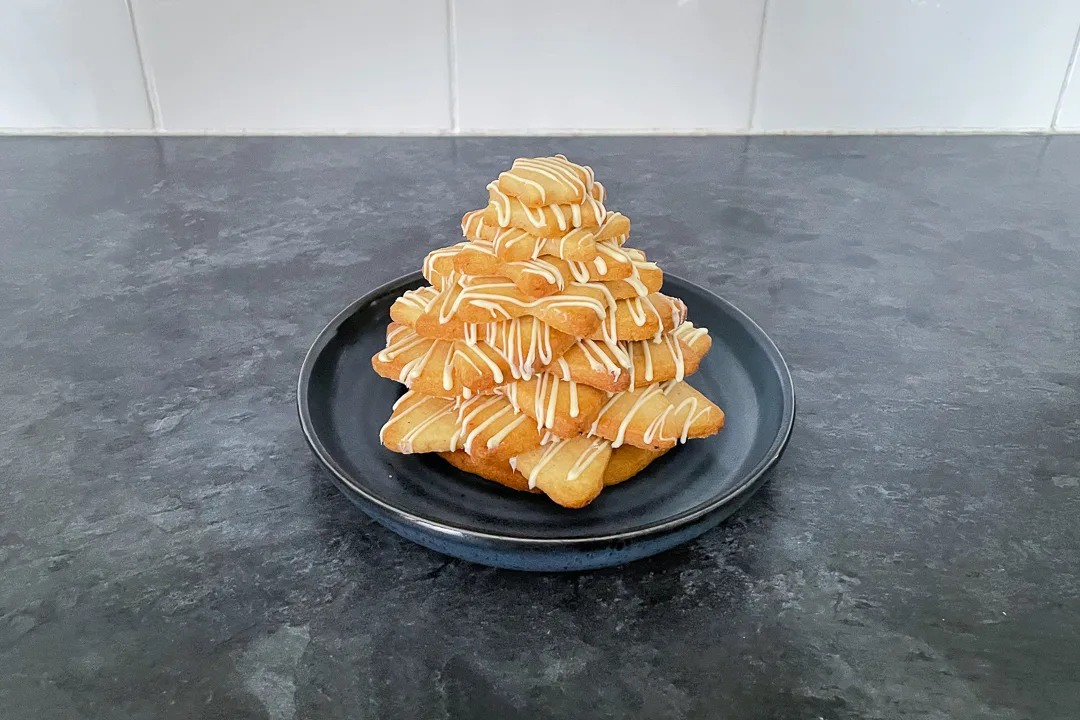
Looking for something different this Christmas? Want to make something special, but don’t have the time for complicated? Try this glorious lemon and ginger Christmas cookie tree! It’s the picture of festive elegance, made very VERY simple. Keep reading for the easy step by step recipe, lots of helpful tips and more!


Why you’ll love this recipe
Imagine this gorgeous lemon and ginger Christmas cookie tree in the centre of a festive buffet! It would be the star of the show, surrounded by Mincemeat tarts, gingerbread biscuits and puff pastry Christmas trees!
What’s really great about this Christmas treat, is that it’s nowhere near as complicated to make as it looks. I promise, if I can make it (and I have… multiple times), anyone can make it!
Can't face cooking dinner on Fridays? 😩
Imagine a guilt free Friday night dinner, without the exhausting mental load. BYOD Fridays are a fun and supportive Friday night community for tired people who still need to cook, but really cba 💛
Join The CommunityEven if you’re a beginner baker, you’ll still be able to create a truly stunning Christmas centre-piece!


Ingredients
Confused about what ingredients to buy? Not sure about a substitution? Here’s everything you might need to know…
- Butter – I personally prefer to use unsalted butter in baking, but salted butter would be absolutely fine in this particular recipe.
- Sugar – Caster (or superfine) sugar is my go to when making biscuits. Don’t use granulated, as it doesn’t dissolve as easily with the crystals being much larger.
- Lemon – You can either use a large lemon, or 2 smaller lemons here. You’ll be using both the zest and juice, so don’t skip fresh and buy bottled.
- Ginger – Ground ginger works perfectly. Just be sure to check the use by date on yours if it’s been in your cupboard for a while. The strength tends to weaken over time.
- Flour – Plain/all purpose flour is best for biscuits. Don’t substitute it for self raising, or it will completely change the texture.
- Chocolate – This is optional of course, as it’s purely for decoration, but white chocolate does pair very nicely with lemon and ginger!
- Icing sugar – Also known as confectioners sugar, this is entirely optional but does make your Christmas cookie tree look a little snowy and more festive.


Emma’s Top Tips
Here are tips you’ll find helpful when making a Christmas cookie tree.
- Forgot to take your butter out the fridge to come to room temperature? Learn how to soften butter quickly.
- Make sure you roll this dough out between two sheets of baking paper. It is a little sticky, so rolling without paper can lead to unnecessary mess.
- Allow the biscuits to cool completely before attempting to decorate and/or stack. Otherwise things can fall apart/get messy very easily!
- Try to find a tall metal storage tin BEFORE you make this Christmas cookie tree. Taking the time to make it then realising you have nowhere to store it can be very frustrating.
- Be careful when transferring your biscuits from the tray to the cooling rack. I find it helpful to use a large flat spatula to make this easier.
Why not try serving these with a naughty elf cocktail to get everyone into the festive spirit?!


Timings
Have limited time? Struggle with recipe timings? Or juggling around other things? Here’s some time managing info to make your life easier.
- Make sure you have room temperature butter. Whether that’s leaving it on the side for a few hours, or using a quicker method.
- Making the dough will take around 15 minutes.
- Rolling out the dough and cutting the shapes should take about 10 minutes.
- You will need to allow 10 minutes to chill the biscuits before baking, but this can be done while the oven is preheating.
- Depending on the sizes, baking will take somewhere between 7-14 minutes. See below for the specific times.
- Cooling can take anywhere between 20 and 60 minutes, depending on the time of year and how warm your kitchen is.
- If decorating with melted white chocolate, this will take about 10 minutes.
- Stacking should only take around 5 minutes.
Cookie star baking times according to size
Baked as per the recipe, here is approximately how long each size star took to bake:
| SIZE | BAKE TIME |
| 10 cm base circle | 13 mins |
| 14 cm star | 13 mins |
| 13 cm star | 13 mins |
| 12 cm star | 12 mins |
| 10.5 cm star | 11 mins |
| 9 cm star | 11 mins |
| 7 cm star | 11 mins |
| 6 cm star | 10 mins |
| 4.5 cm star | 9 mins |
| 3 cm star | 8 mins |


Lemon and Ginger Christmas Cookie Tree – Step by Step Picture Recipe
(For a printer friendly version, see the recipe card at the end of this post)
Please note, this recipe includes both UK metric and US Cup measurements.
Ingredients
Here is what you will need to make 1 Christmas tree (plus a few spares for taste testing!)
- 170g (3/4 Cup) Unsalted Butter, room temperature
- 90g (1/3 Cup + 1 tbsp) Caster Sugar
- Zest of 1 x Large Lemon *
- 1 + 1/2 tbsp Fresh Lemon Juice
- 2 tsp Ground Ginger
- 255g (1 + 3/4 Cup) Plain Flour
- 80g (2.8 oz) White Chocolate
- Icing Sugar, to dust (optional)
*if you can’t get a large lemon, use 2 small lemons
Essential equipment
- Electric Stand Mixer OR Large Mixing Bowl and Electric Hand Whisk
- Spatula
- Baking Paper
- Rolling Pin (This is my favourite one, as you can adjust the sizes!)
- Star Cookie Cutters in Various Sizes (I used these ones)
- 13cm Circle Cookie Cutter (optional)
- Small Baking Tray or Plate
- Baking Tray
- Wire Rack
- Small Bowl
- Piping Bag (optional)
- Serving Plate
Cookie instructions
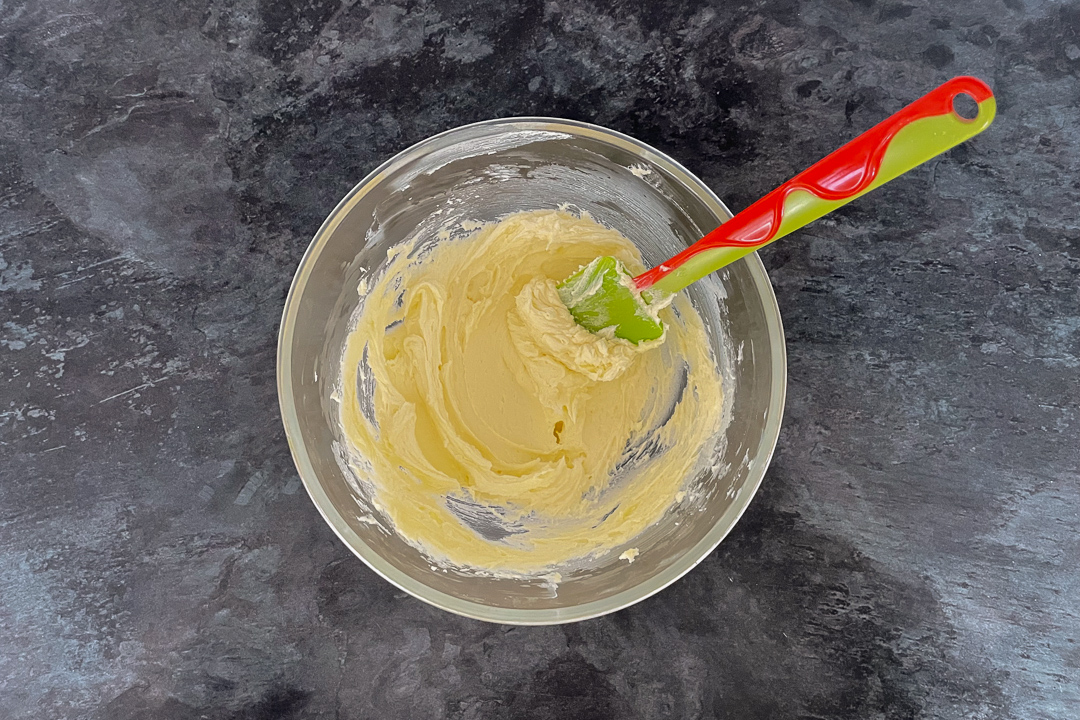
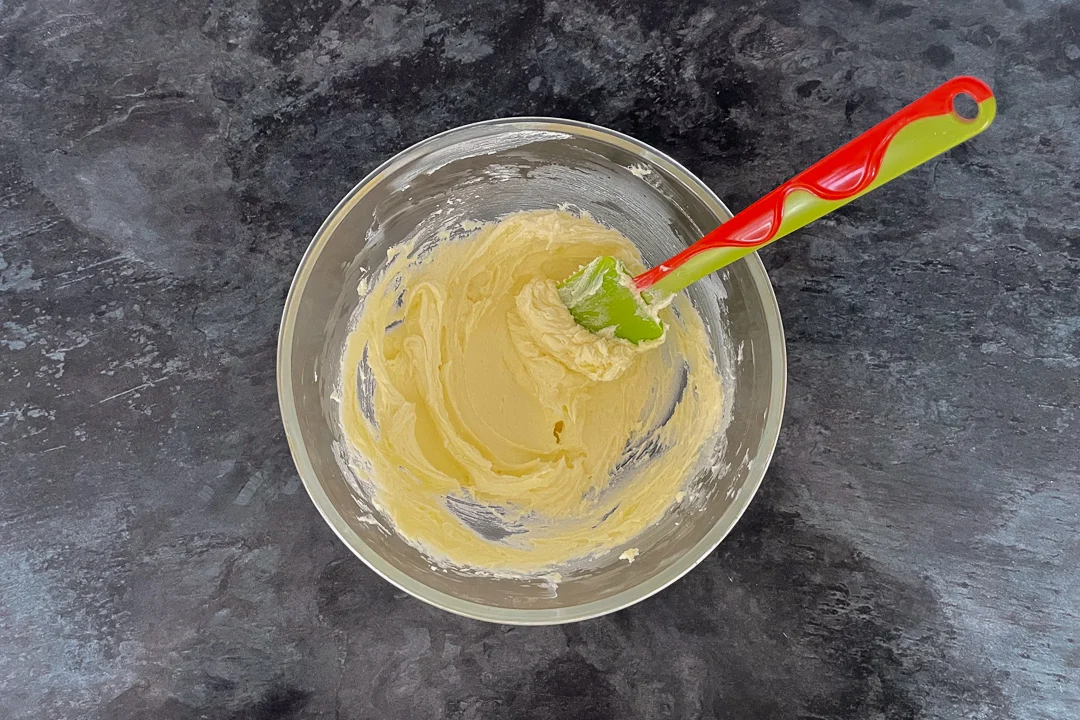
First, cream the butter (170g | 3/4 Cup) and sugar (90g | 1/3 Cup + 1 tbsp) together in a bowl with an electric hand whisk (or in a stand mixer). Whisk for at least 2-3 minutes, until it’s very light and fluffy, and pale in colour.


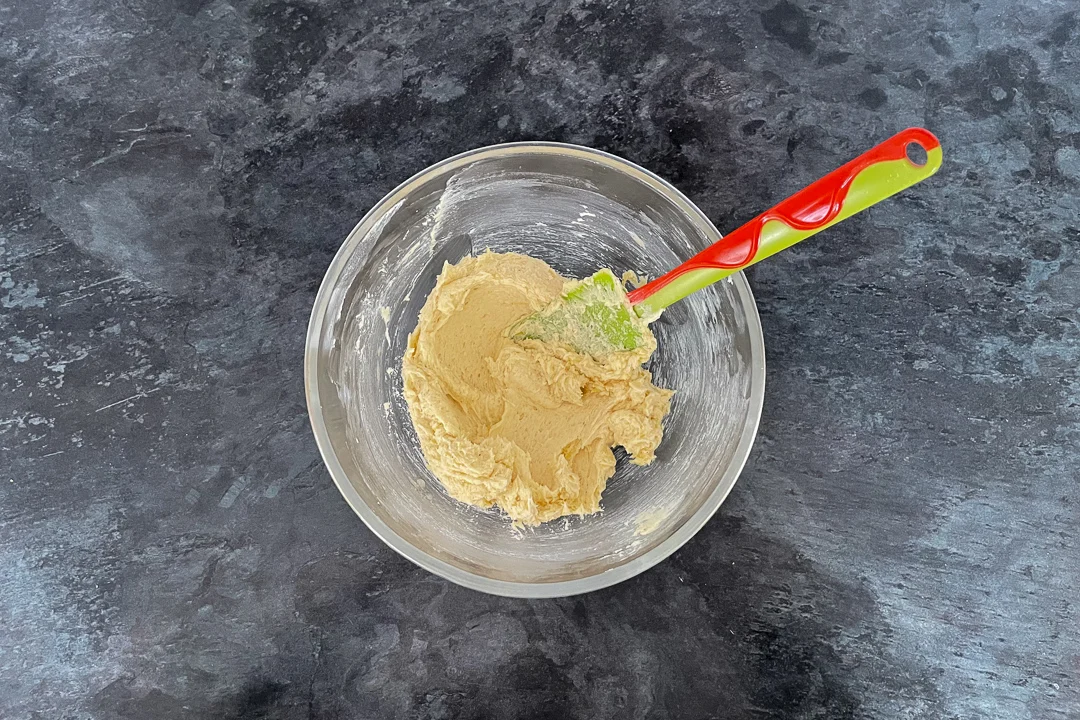
Next, add the zest (of 1 x large or 2 small lemons), the lemon juice (1 + 1/2 tbsp freshly squeezed) and ground ginger (2 tsp).
Then beat it into the creamed butter and sugar until everything is evenly mixed.


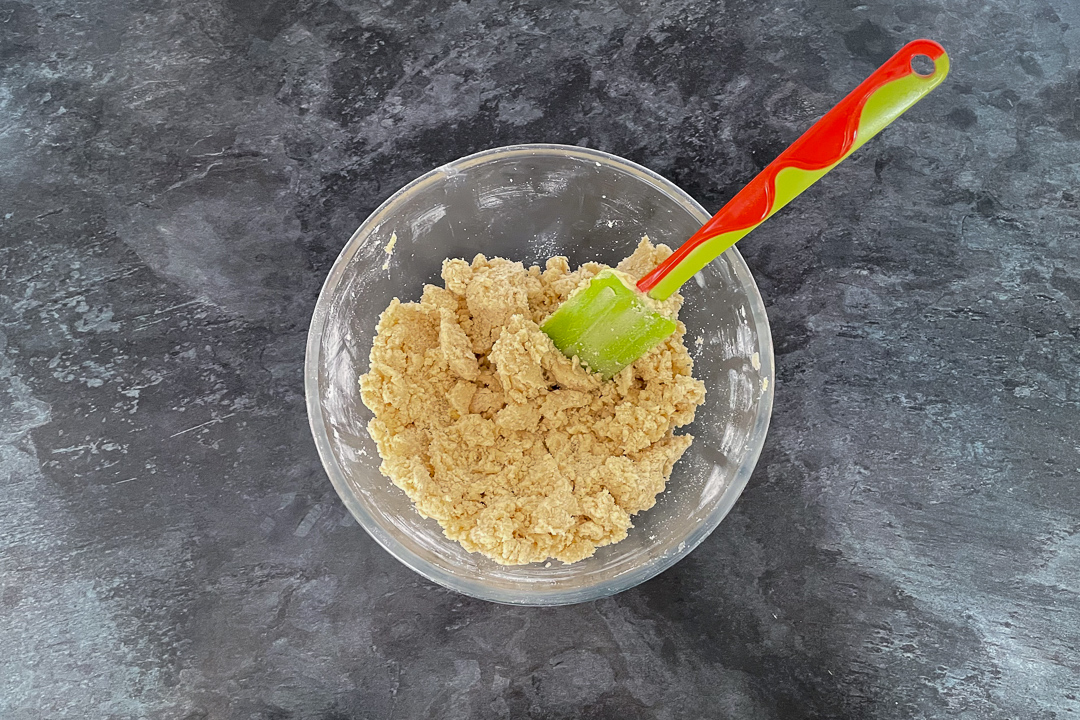
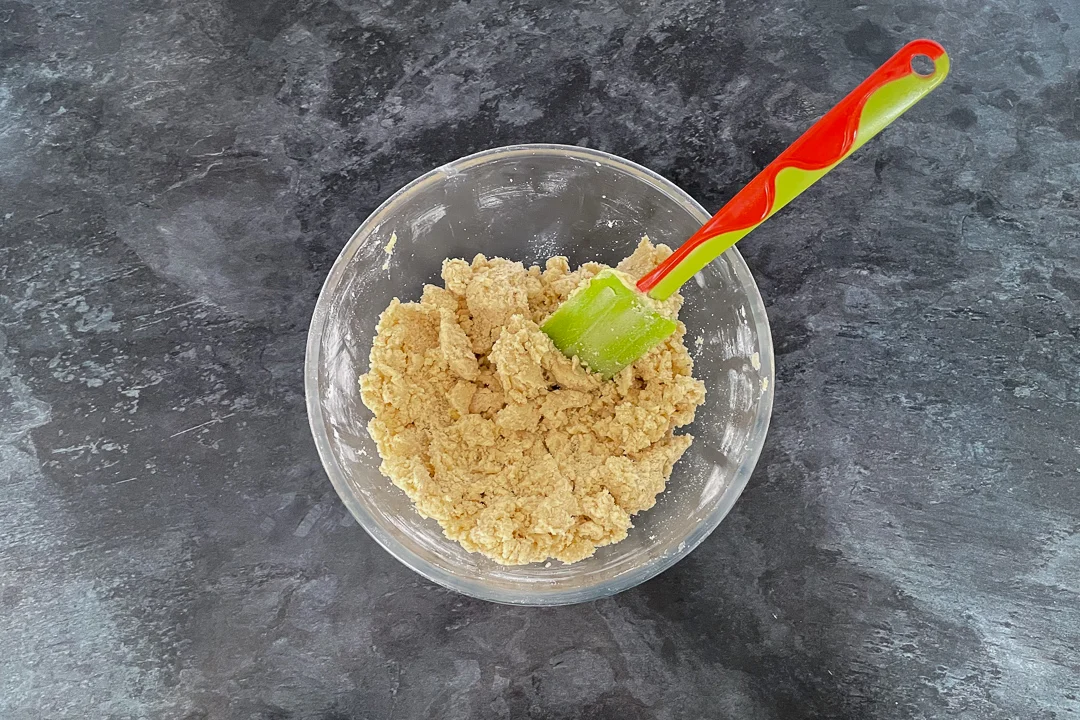
Now add in the flour (255g | 1 + 3/4 Cup) and slowly mix with the spatula. It will look quite scrappy at first, but keep going, and it’ll come together to form a dough.


Shape cutting instructions
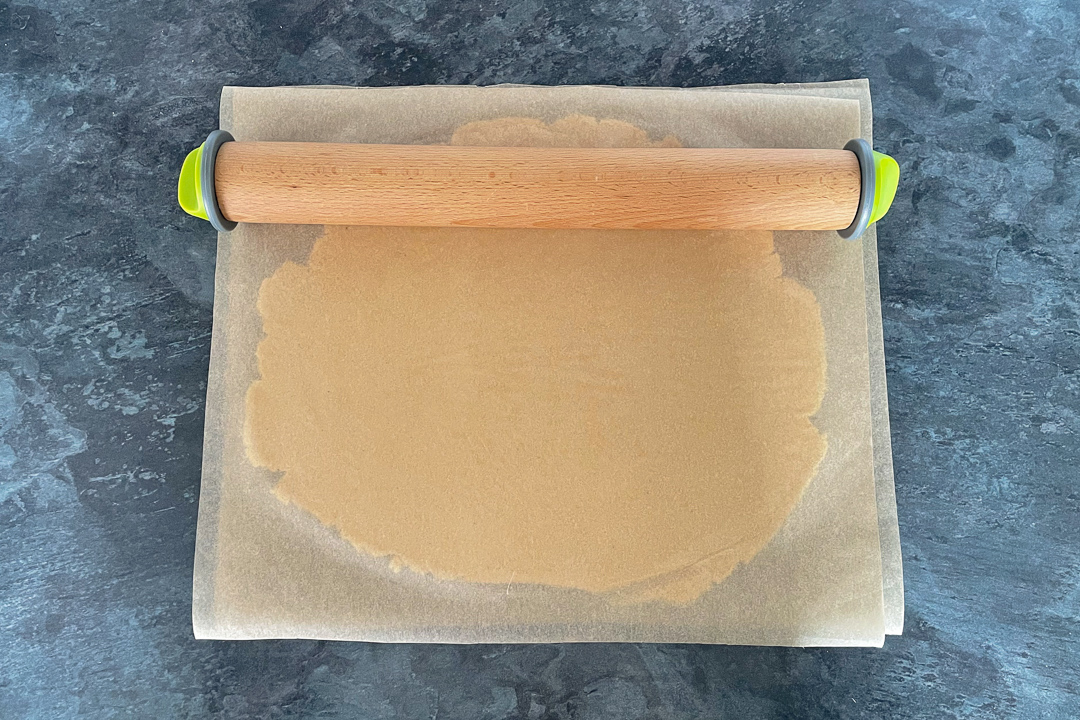
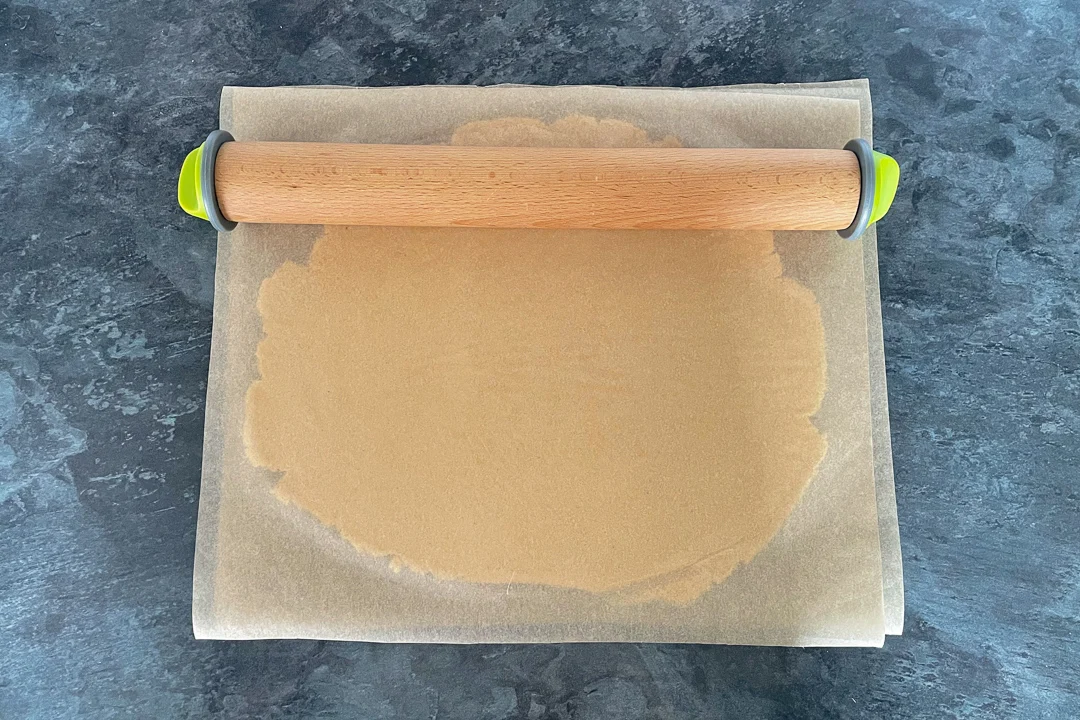
Place the dough on a large sheet of baking paper…


…Top it with another sheet of baking paper, then roll out to 6mm thick using a rolling pin.
(I like this Joseph Joseph rolling pin, as you can adjust the sizes and it’s super accurate!)


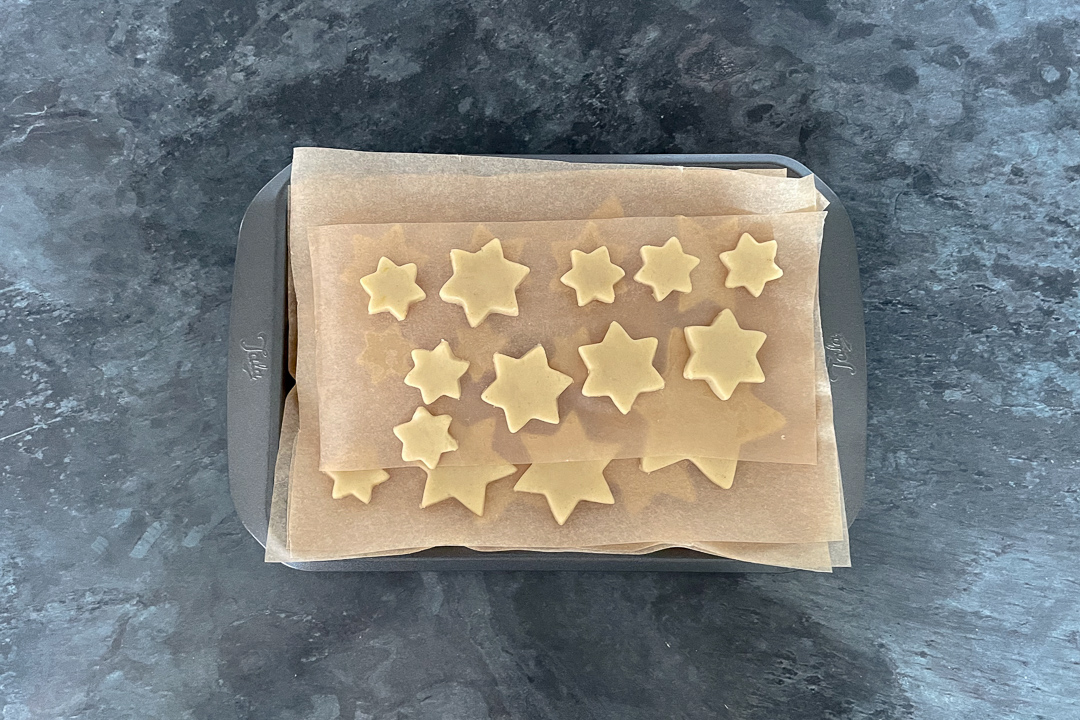
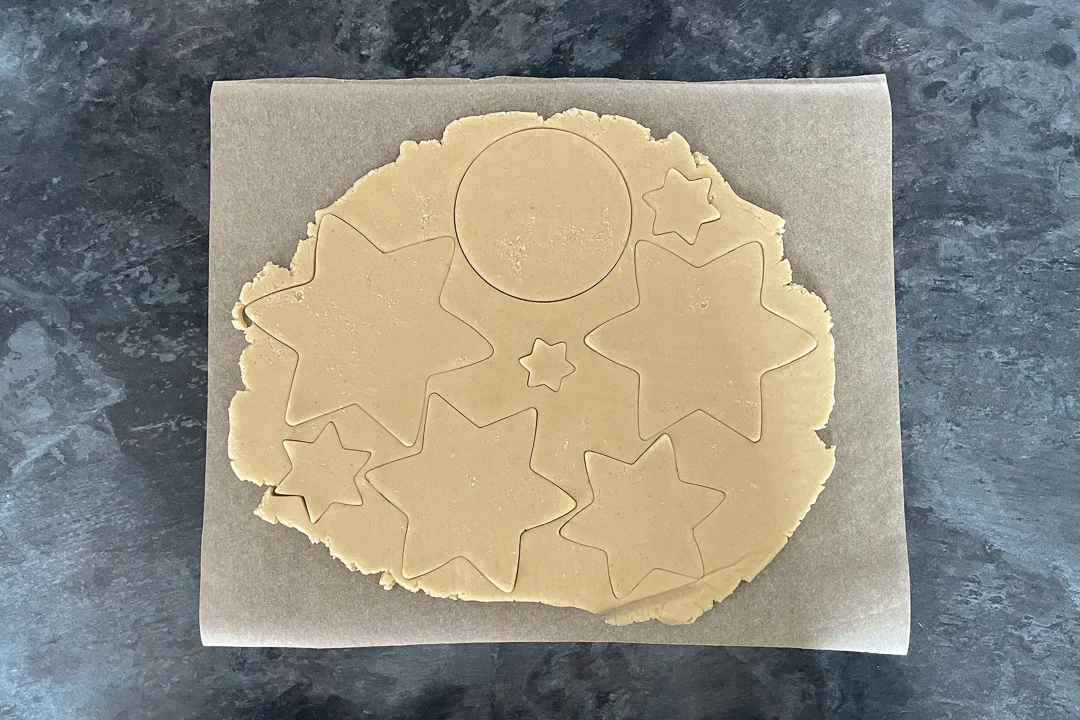
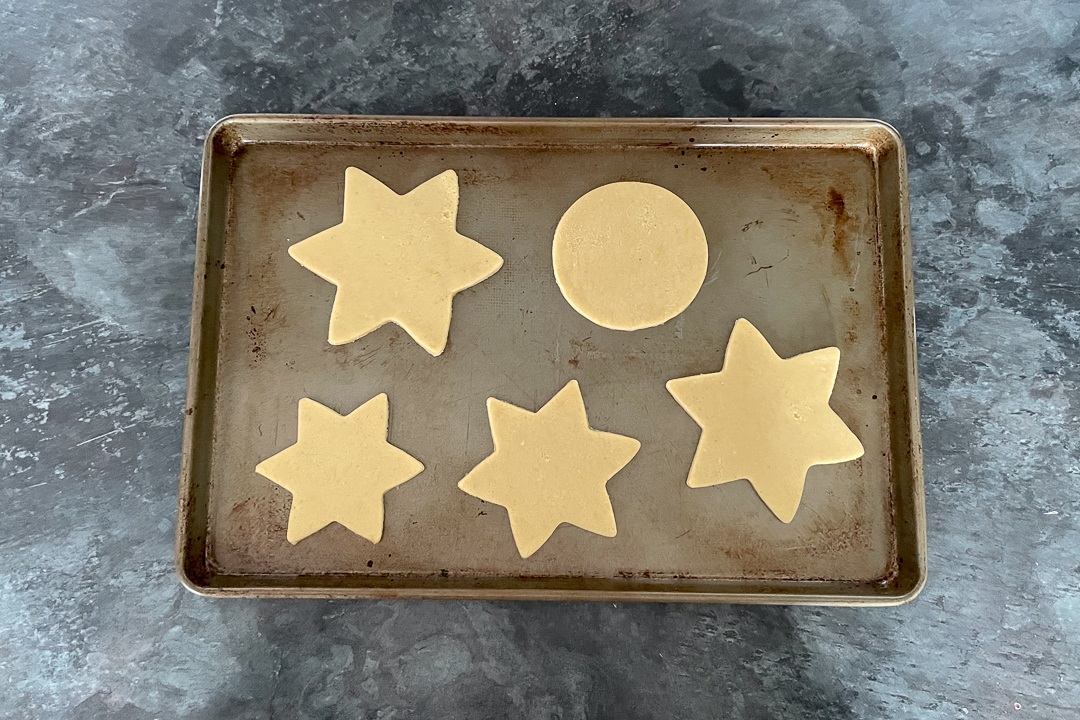
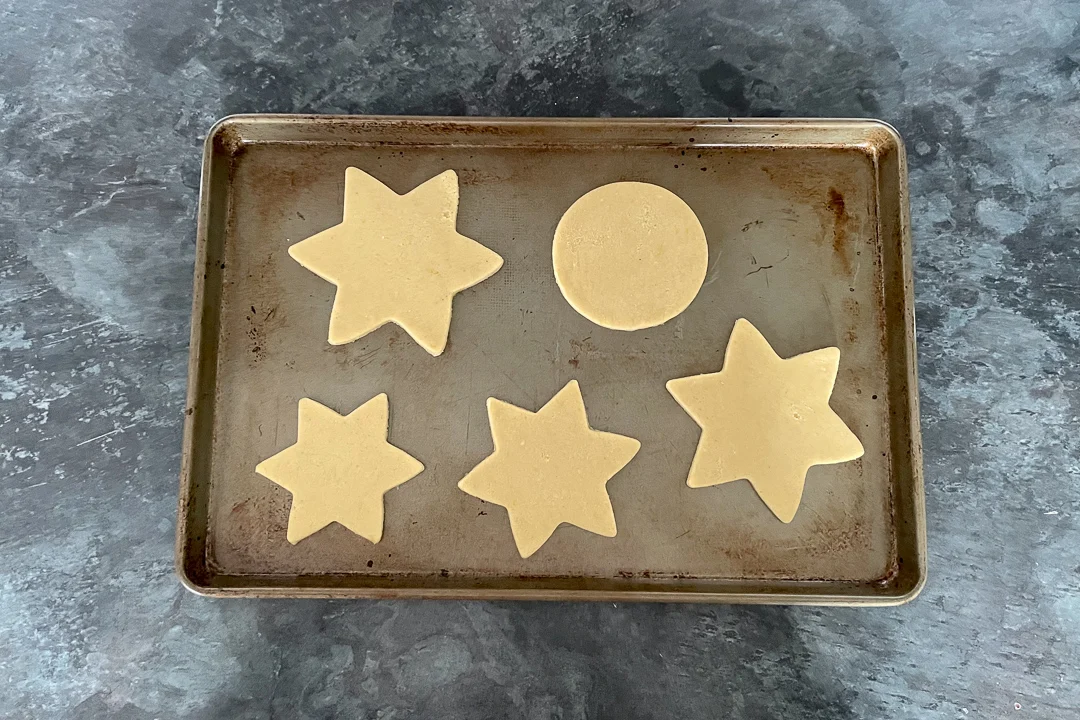
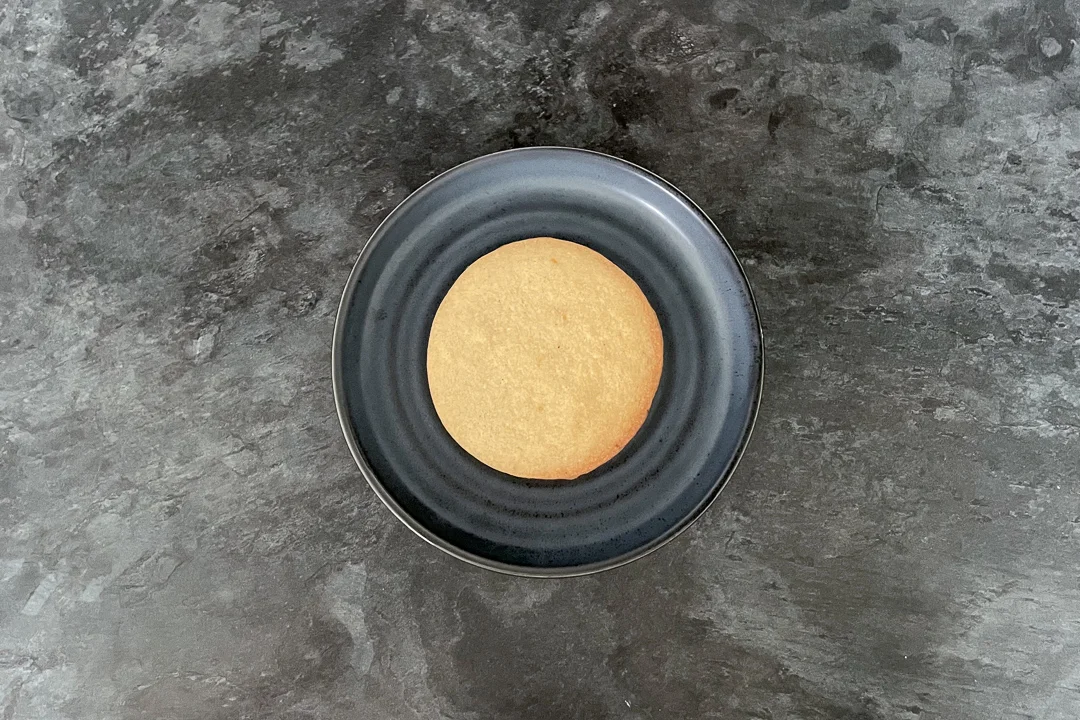
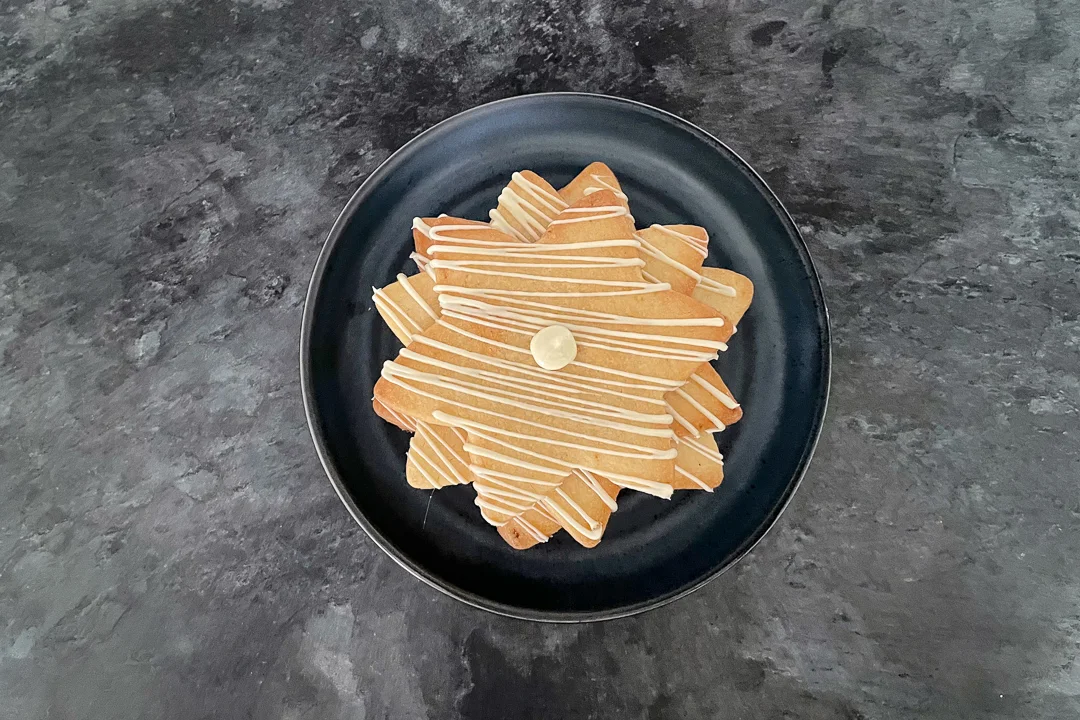
Then start cutting out your shapes. I like to do one circular cookie for the base, and then one of each size star to form the tree. With two of the smallest size stuck back to back, for the star on top of the tree.


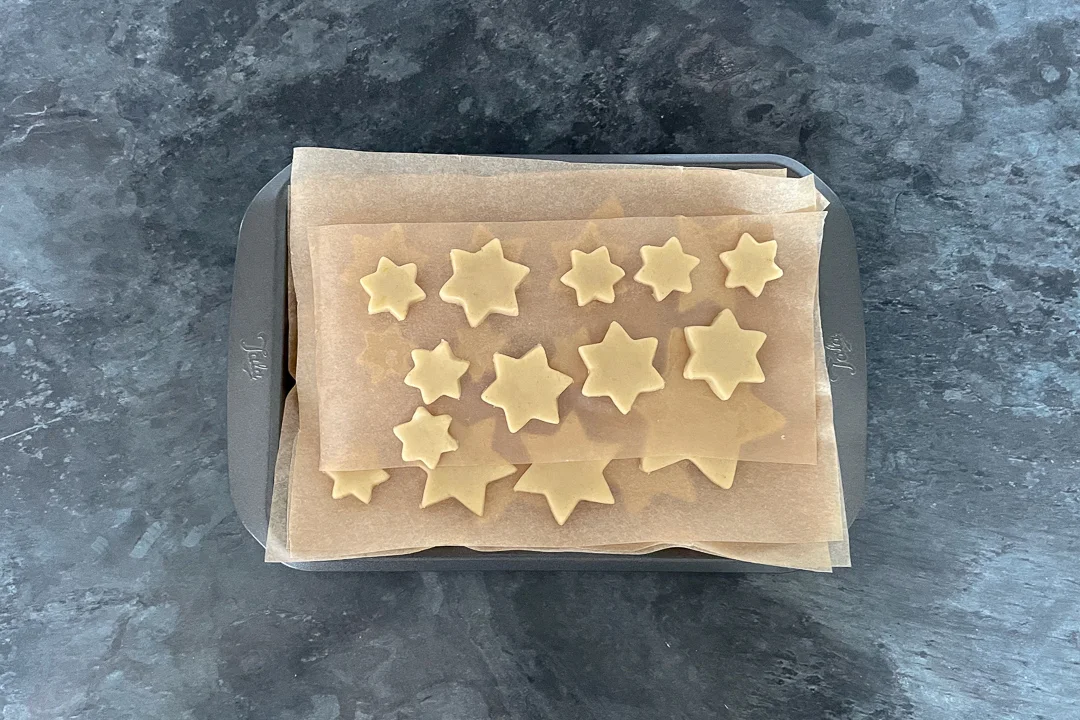
Lay the cut cookies in layers between baking paper on a small tray. Continue re-rolling and cutting out shapes until you have all the ones you need.
If you have any spare dough, you can make extra biscuits to enjoy, or they can be gift wrapped and given to friends and family.


Place the cookies into the freezer for 10 minutes to chill (this will help them hold their shape during baking). Meanwhile, preheat your oven to 180ºC/Fan 170ºC/356ºF.


NOTE: Please line your baking tray with either baking paper or a silicone liner, or your cookies may stick. (I found this out after I’d taken these photos!!!)
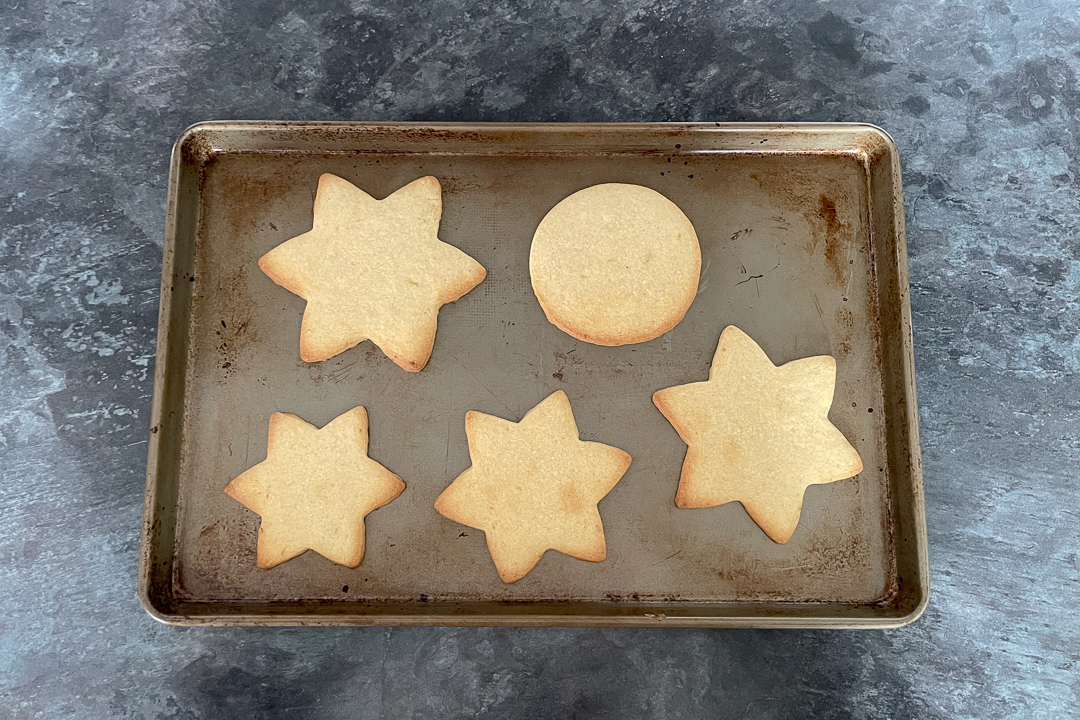
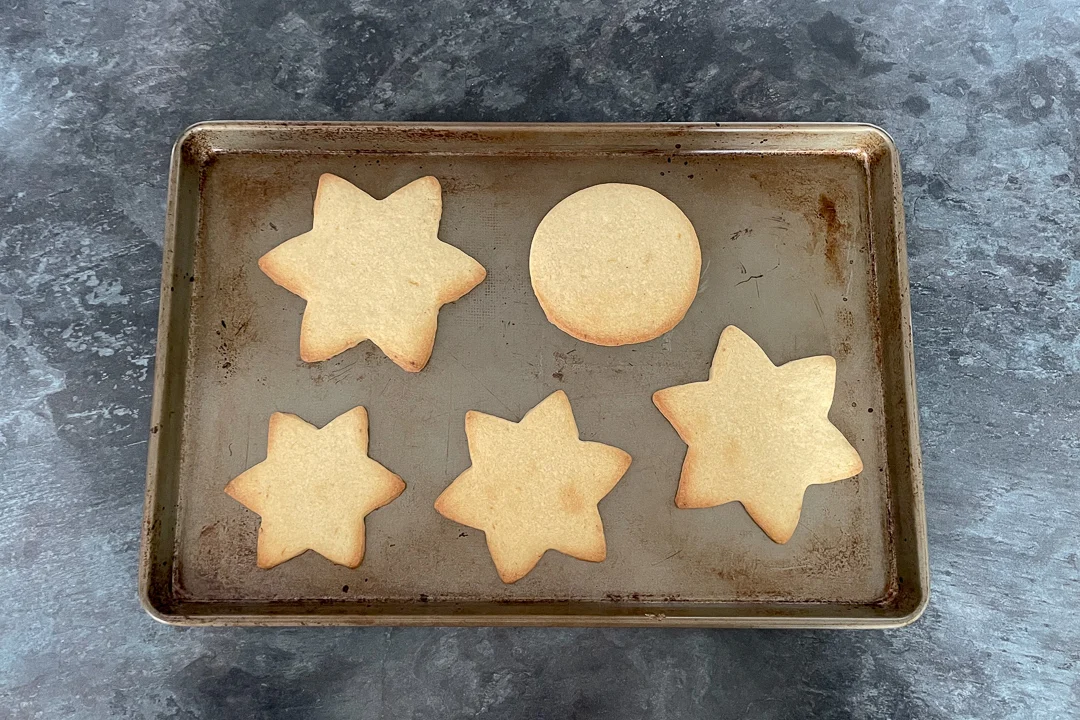
When the oven is preheated, space some of the cookies out onto a lined baking tray. Allow a little room between for spreading. I recommend you bake similar sizes together.
For the larger sizes, bake them for around 11-14 minutes. For the smaller sizes, bake them for around 7-10 minutes. They should be golden on the edges when they’re done.


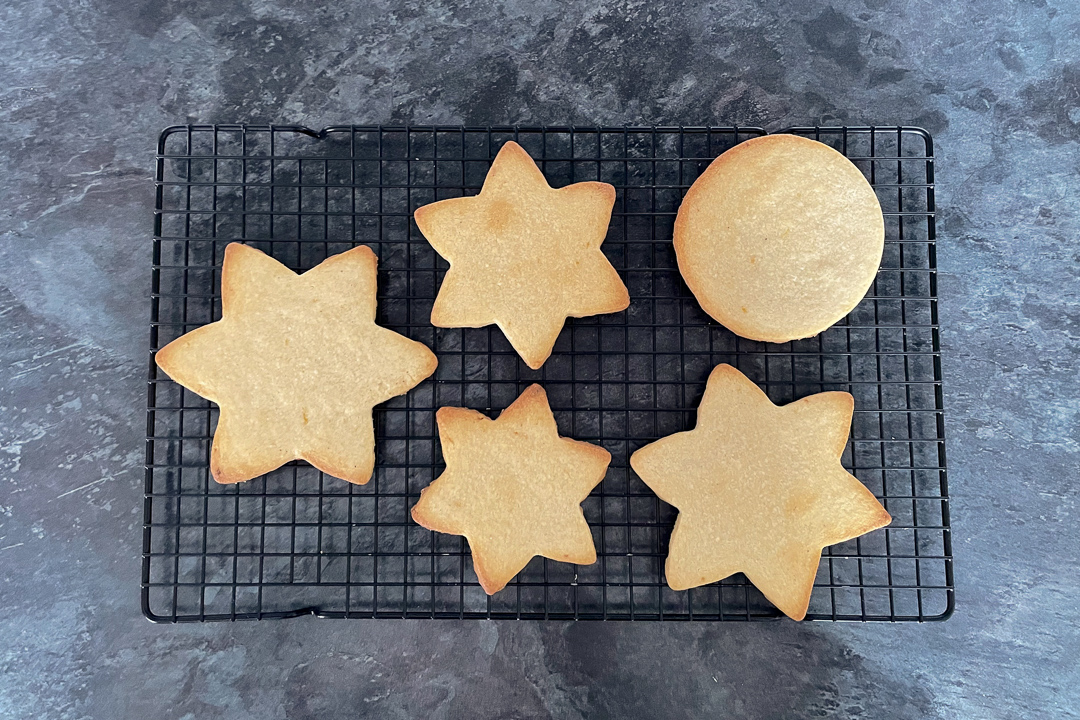
Carefully transfer the cookies to a wire rack to cool completely before moving on to the next step. Repeat if necessary, until all the cookies are baked and cooled.
Decorating instructions
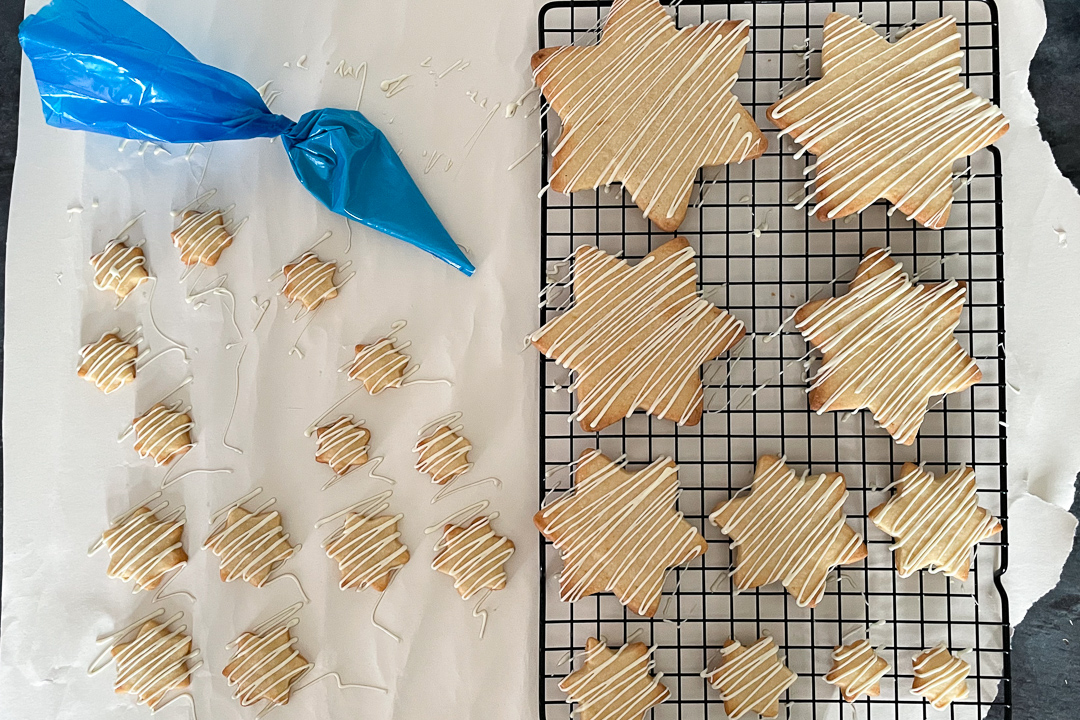
If you are decorating using white chocolate, break it into pieces and melt in a small bowl in the microwave in 10 second intervals. Stirring well after each blast.
Once fully melted, pour into a piping bag and snip the end. Then pipe zig zags Or whatever pattern you choose) over each biscuit. Allow to set completely before moving on to assembly.
NOTE: There should be some white chocolate leftover to ‘glue’ each biscuit together when you stack them.


Assembly instructions
Once your chocolate has fully set, reheat the white chocolate for 10-20 seconds in the microwave to remelt it.
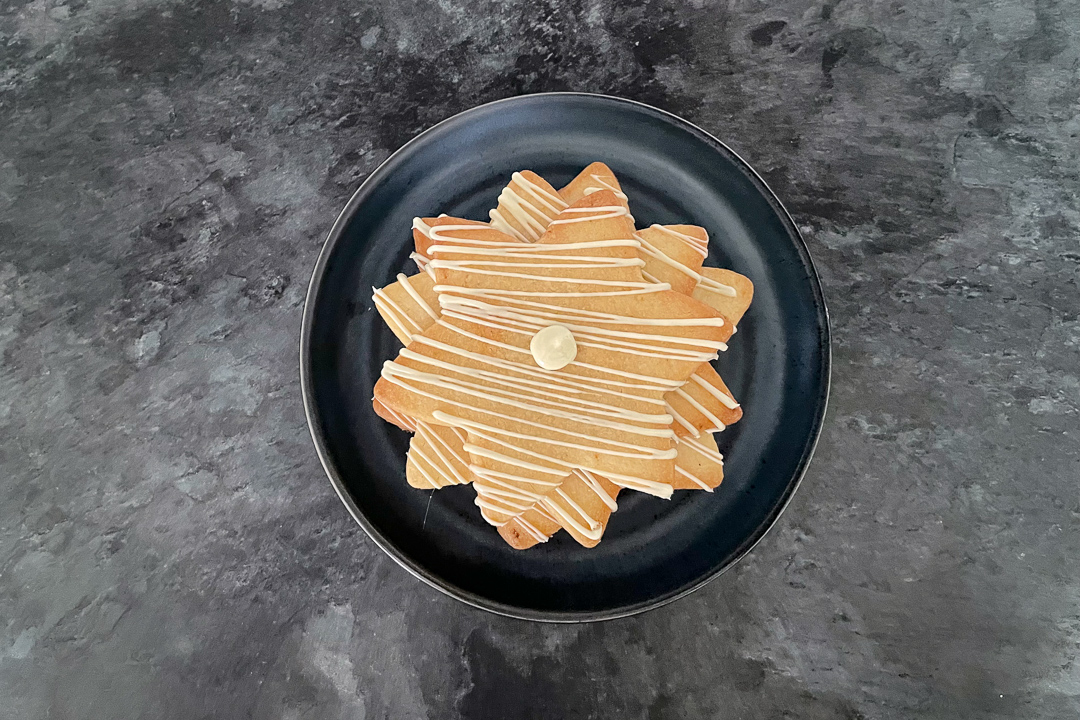
Then place the circular base biscuit into the middle of your chosen serving plate.


Then squeeze a blob of melted white chocolate into the middle, and top with the largest star biscuit. Top with another blob of melted white chocolate in the middle.


Then place the next largest star cookie on top. Add another blob of white chocolate in the middle, and top with the next size star cookie. Repeat this process until you get to the smallest stars…


To finish – place a blob of white chocolate between 2 of the smallest size stars to stick them together. Allow them to set.
Then put a large blob of white chocolate on top, and stick the star upright on the very top of the Christmas cookie tree. Leave to set completely, before dusting with icing sugar (optional).


How to store your Christmas cookie tree
As previously mentioned in this post, I recommend storing your Christmas cookie tree in a metal container at room temperature. Just make sure you have one that’s tall enough.
FAQs
Making a Christmas cookie tree is deceptively easy! All you need to do is bake some cookies in varying sizes, and stack them on top of each other. You can choose to leave them plain, or decorate in various ways. And this recipe is adapted from my super easy lemon cookies recipe. A gorgeous shortbread recipe that’s perfect for this festive build!


Assembling cookie trees is really very simple. You can use a number of various edible ‘glues’. In this lemon and ginger Christmas cookie tree recipe we use melted white chocolate. But you could also use thick icing, royal icing, any other type of chocolate, or even caramel that sets solid.
Then simply stack each of the cookies in size order, securing them together with the ‘edible glue’ of your choice.
I wouldn’t make this anymore than 2-3 days in advance. And that’s only if you have a proper way of storing it, so it doesn’t go too soft over time.
If you want it to be at it’s best on a certain day, but would rather do most of the prep in advance – the best thing to do would be to make the dough, cut the shapes, and store them in the fridge in an airtight container up to 2 days ahead of time. Just make sure you separate all of them with baking paper, or they might stick together.
Then all you’d need to do is bake them, drizzle with chocolate, and stack them together on the day.
This lemon and ginger shortbread Christmas cookie tree should keep for 3-4 days if stored in a metal tin at room temperature.
Obviously, not everyone may have a tall enough metal tin on hand – so you will need to consider this before you bake it. Otherwise you might have to break it down to fit it in a tin.
I don’t recommend storing baked goods in plastic tubs, as sugar sweats in plastic. This can affect the texture very quickly, and spoil all your hard work.


There are lots of ways to decorate a Christmas cookie tree!!
You could zigzag white chocolate or icing, like I have in this recipe. You could pipe pretty patterns using royal icing, like on these Firework cookies. Additional glitz, like edible glitter or shimmer spray, always looks fabulous! And the classic dusting of icing sugar never fails to make baked goods look extra pretty.
There are quite a few sets out there on the market. I used this star cutters set from Amazon, as it was very reasonably priced, fast delivery, and I prefer metal cutters over plastic ones.
All it is, is star cookie cutters in gradually increasing sizes. So when they are stacked offset on top of each other, it looks like a tree.
Loved this Christmas cookie tree recipe? Pin it!


Lemon and Ginger Christmas Cookie Tree Recipe
This delicious lemon and ginger shortbread Christmas cookie tree makes a beautiful festive centre-piece, WITHOUT all the hard work!
Ingredients
- 170g (3/4 Cup) Unsalted Butter, room temperature
- 90g (1/3 Cup + 1 tbsp) Caster Sugar
- Zest of 1 x Large Lemon *
- 1 + 1/2 tbsp Fresh Lemon Juice
- 2 tsp Ground Ginger
- 255g (1 + 3/4 Cup) Plain Flour
- 80g (2.8 oz) White Chocolate
- Icing Sugar, to dust (optional)
Essential Equipment
- Electric Stand Mixer OR Large Mixing Bowl and Electric Hand Whisk
- Spatula
- Baking Paper
- Rolling Pin **
- Star Cookie Cutters in Various Sizes #
- 13cm Circle Cookie Cutter (optional)
- Small Baking Tray or Plate
- Baking Tray
- Wire Rack
- Small Bowl
- Piping Bag (optional)
- Serving Plate
Instructions
Cookie instructions
- Using either an electric stand mixer, or a large mixing bowl with an electric hand whisk, cream together the butter and sugar until light, fluffy and pale in colour. At least 2-3 minutes.

- Then beat the lemon zest, lemon juice, and ginger in with a spatula.

- Next, gently mix in the flour. Continue to mix until it coms together to form a dough.
- Bring the dough together into a ball, and place in the middle of a sheet of baking paper. Top with another sheet, then roll out to 6mm thick using a rolling pin.
- Cut out all the star shapes you need using your cutters, including 2 extra smallest ones to make the star for the top, and one circular one for the base (optional). You may end up with spare dough. If you do, simply make more biscuits in any size of your choosing!

- Then place them layered between sheets of baking paper on a small baking tray or plate. And chill for 10 minutes to firm them back up. Meanwhile, preheat your oven to 180ºC/Fan 170ºC/356ºC.
Baking instructions
- Line a large baking tray with a silicone mat or baking paper (or they will stick to the tray), and space out the largest cookies on it.
- Bake for between 11-14 minutes, until the edges are golden. Keep a close eye on them, as they are different sizes.
- Carefully transfer them to a wire rack to cool completely. Then repeat for all remaining biscuits. (The smaller ones will bake for between 7-10 mins).

Decorating and assembly
- Break the white chocolate into a piping bag and heat in the microwave in 10 second intervals. Give it a good squash after each time, and continue until the chocolate is fully melted. Then snip the end and pipe zigzags over each biscuit.
- Once the chocolate has set, place the circular biscuit base onto a serving plate.

- Pipe a blob of melted chocolate into the middle, and press the largest star cookie on top.

- Repeat the process, offsetting the points so they look like a tree, until you get all the way to the top.
- Then 'glue' two of the smallest ones together, back to back, and let set for a few minutes. Add a final large blob of melted chocolate to the top, and place the star upright on top of your cookie tree! Allow to set fully before dusting with icing sugar (optional).


Notes
* if you can’t get a large lemon, use 2 small lemons
** This is my favourite rolling pin (affiliate link), as you can adjust the sizes. So it takes away all the guess work!
# I used this set of star cookie cutters (affiliate link)
If you would rather use a more in depth picture recipe, please see the main body of this post. Where you’ll also find lots of extra FAQs and helpful tips, should you need them.
Please note, this recipe includes both UK metric and US Cup measurements.
Tips
- Forgot to take your butter out the fridge to come to room temperature? Learn how to soften butter quickly.
- Make sure you roll this dough out between two sheets of baking paper. It is a little sticky, so rolling without paper can lead to unnecessary mess.
- Allow the biscuits to cool completely before attempting to decorate and/or stack. Otherwise things can fall apart/get messy very easily!
- Try to find a tall metal storage tin BEFORE you make this Christmas cookie tree. Taking the time to make it then realising you have nowhere to store it can be very frustrating.
- Be careful when transferring your biscuits from the tray to the cooling rack. I find it helpful to use a large flat spatula (affiliate link) to make this easier.
Recommended Products
As an Amazon Associate and member of other affiliate programs, I earn from qualifying purchases at no extra cost to you.


Nutrition Information:
Yield: 14 Serving Size: 1Amount Per Serving: Calories: 212Total Fat: 12gSaturated Fat: 7gTrans Fat: 0gUnsaturated Fat: 4gCholesterol: 27mgSodium: 7mgCarbohydrates: 25gFiber: 1gSugar: 10gProtein: 2g
Nutritional information on kitchenmason.com should only be used as a general guideline, I am not a certified nutritionist. Please always check labels for allergens where applicable.
If you like this recipe…
…you might also like:
- Shortcrust pastry mince pies
- Gingerbread cupcakes
- No bake chocolate orange cheesecake
- Gingerbread cheesecake
- Christmas jam recipe
- Orange and cranberry loaf
I want to see YOUR baking!
Have you made this beautiful lemon and ginger Christmas cookie tree? I’d love to know if you have! Tag me in your pics on Facebook, Twitter and Instagram or email me at emma@kitchenmason.com.

Emma is a British recipe writer, home cook, and founder of Kitchen Mason. For over 15 years, she has been creating simple, comforting recipes and practical kitchen tips that help tired, everyday people make dinner feel easier and more enjoyable again. Passionate about British home cooking, Emma shares reliable recipes, comforting classics, and realistic kitchen guidance designed for real life. Her work has also been featured in publications including Food Network, Cosmopolitan, and The Huffington Post.
Knowledgeable On: British home cooking, Easy dinner ideas, Comford food recipes, Recipe writing