


This post may contain affiliate links. Where I make a small commission on purchased items, at no extra cost to you. See my disclosure for details.
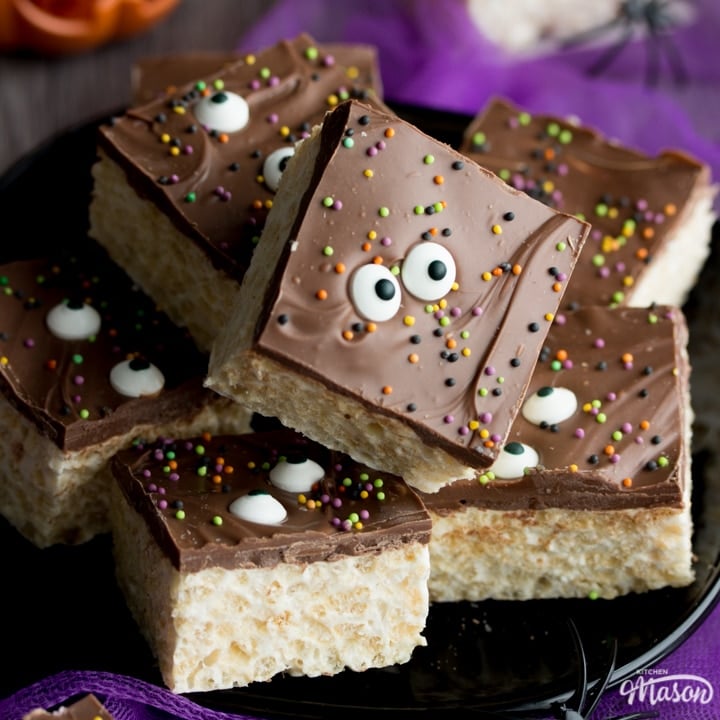
When it comes to Halloween treats, don’t you want something that looks creepy, tastes great but is actually really simple and quick to make? Snap – me too! These CRAZY quick and easy rice krispie Halloween treats not only look the part but they taste it too. Just like my ginger-dead men Halloween biscuits and ‘bloody surprise Halloween cupcakes, you get maximum effect with minimum effort. That’s the kind of math I love to do!

These Halloween treats are very popular in my house. They always seem to just magically disappear (mysteriously whenever the Mr is left alone in the near by vicinity…) which can only speak volumes for their undeniable yumminess!

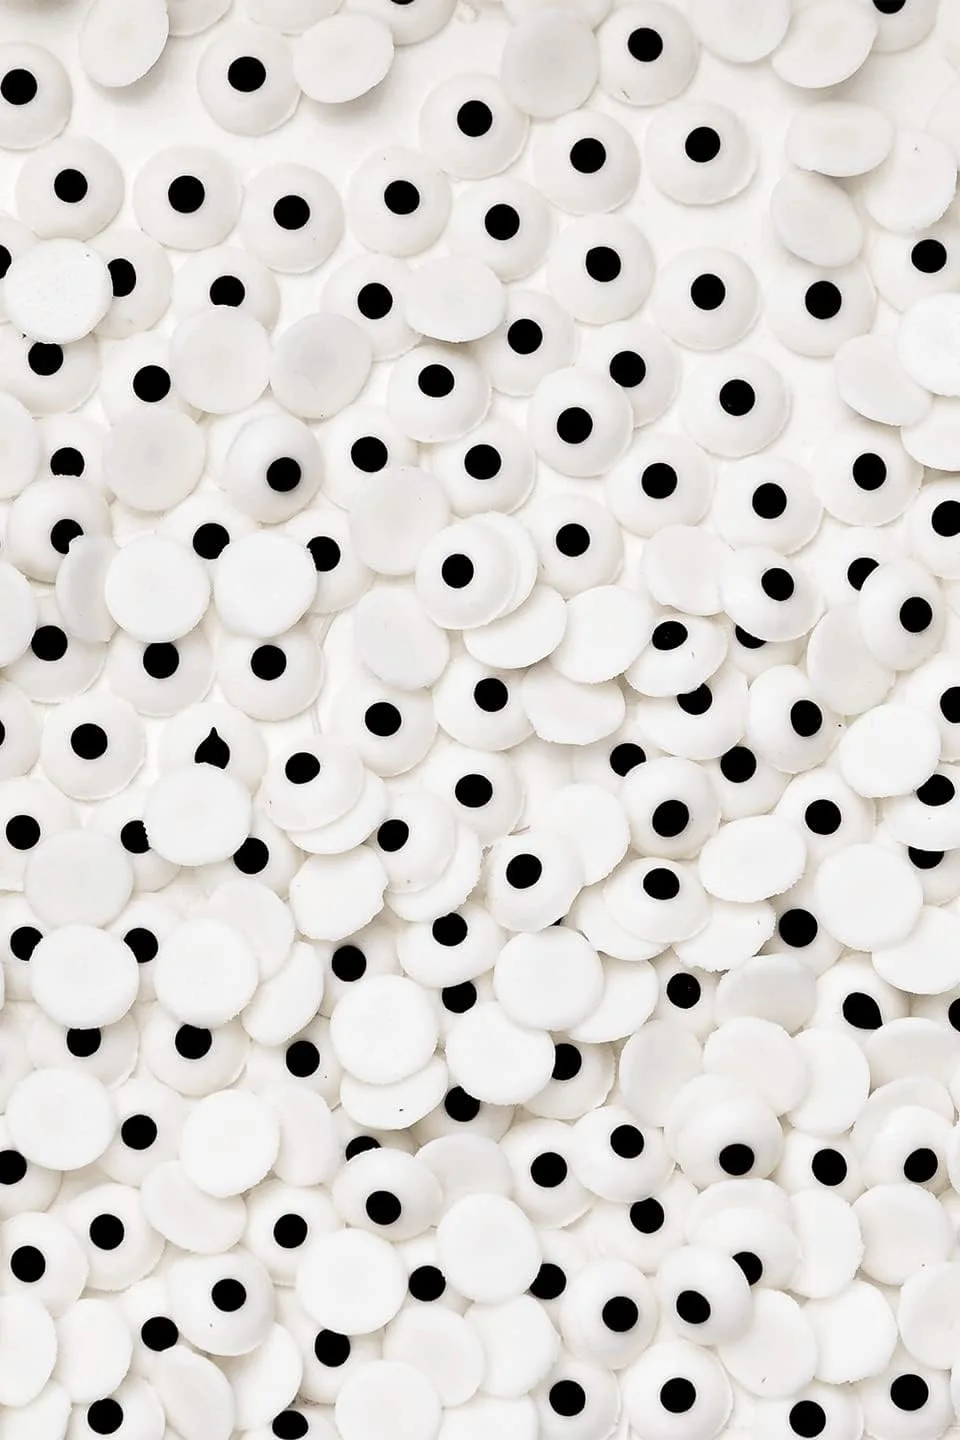
When I was looking at what creepy Halloween food ideas I could imagine into existence this year, I knew at least one had to include edible eyes. There’s something SO creepy about your food staring back at you but also really fun too!
Can't face cooking dinner on Fridays? 😩
Imagine a guilt free Friday night dinner, without the exhausting mental load. BYOD Fridays are a fun and supportive Friday night community for tired people who still need to cook, but really cba 💛
Join The Community

Recipe tips
Have you never made rice krispie bars before? Fear not! I’m right here with some awesome top tips to help you every step of the way.
- Start out using the biggest saucepan you have. It needs to be able to fit ALL the ingredients in it with room to spare for mixing.
- When pressing the finished rice krispie mixture into your baking tin, use a lightly oiled metal spoon. This will really help with the stickiness, making your life WAY easier!
- If you’ve tempered your chocolate as directed in the recipe below, don’t store them in the fridge. They will likely lose that lovely shine due to the dramatic change in temperature. (Similarly, don’t store them anywhere too warm either!)
- Store your treats in a metal container instead of plastic. Sugar likes to ‘sweat’ in plastic meaning your rice krispies may become a little soggy and lose their crunch.
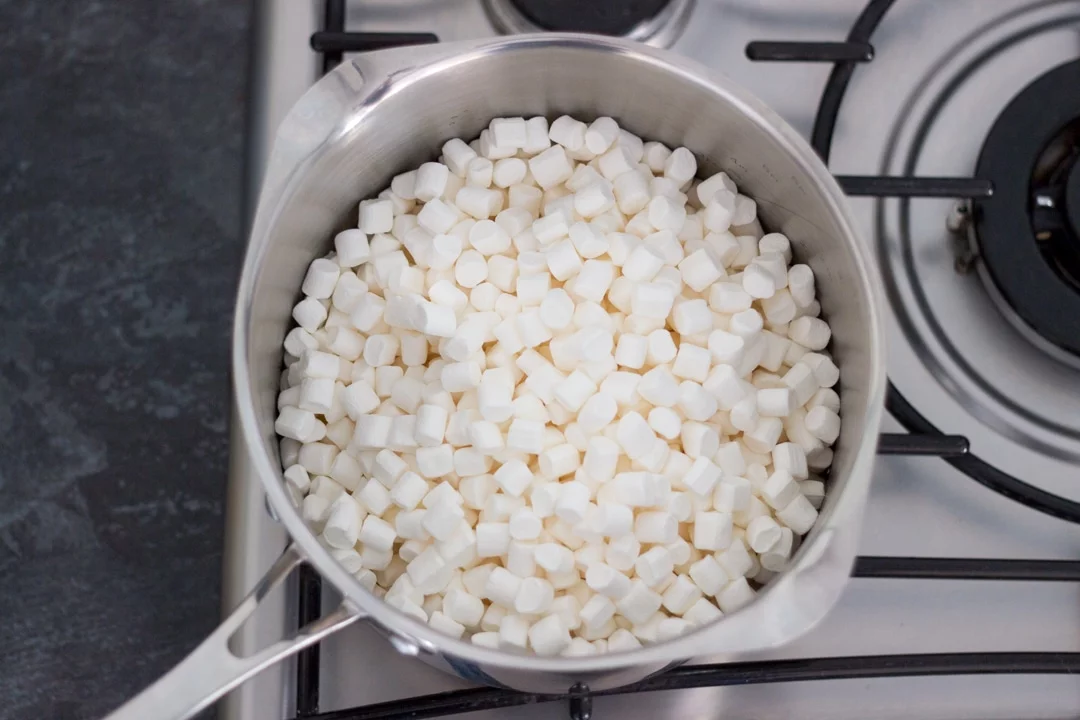
- Don’t wander off when melting the marshmallows. They could catch and burn on the bottom of the pan!
- Want to make this with the kids/grandkids? Sure thing! Keep them away from the open flames of the hob and melt the marshmallows in the microwave in 10 second intervals. Just make sure to use a very large bowl and stir well between each blast.

Rice Krispie Halloween Treats – Step by Step Picture Recipe
(For a printer friendly version, see the recipe card at the end of this post)
Please note, this recipe includes both UK metric and US Cup measurements.
Ingredients
Here is what you will need to make 16 bars.
- 50g (1/4 cup) Unsalted Butter
- 320g (11 oz) Marshmallows
- 110g (4 oz) Rice Krispies Cereal
- 250g (9 oz) Milk Chocolate
- Halloween Coloured Sprinkles
- 32 x Edible Eyes
Essential Equipment
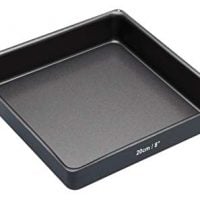
- 20cm (8″) Square Baking Tin
- Large Saucepan
Rice Krispie bar instructions
First grease and line your baking tin with baking paper (leaving a good overhang to help you remove it later) and set to one side.
Then, in a large saucepan, melt the butter (50g | 1/4 cup) over a low/medium heat.


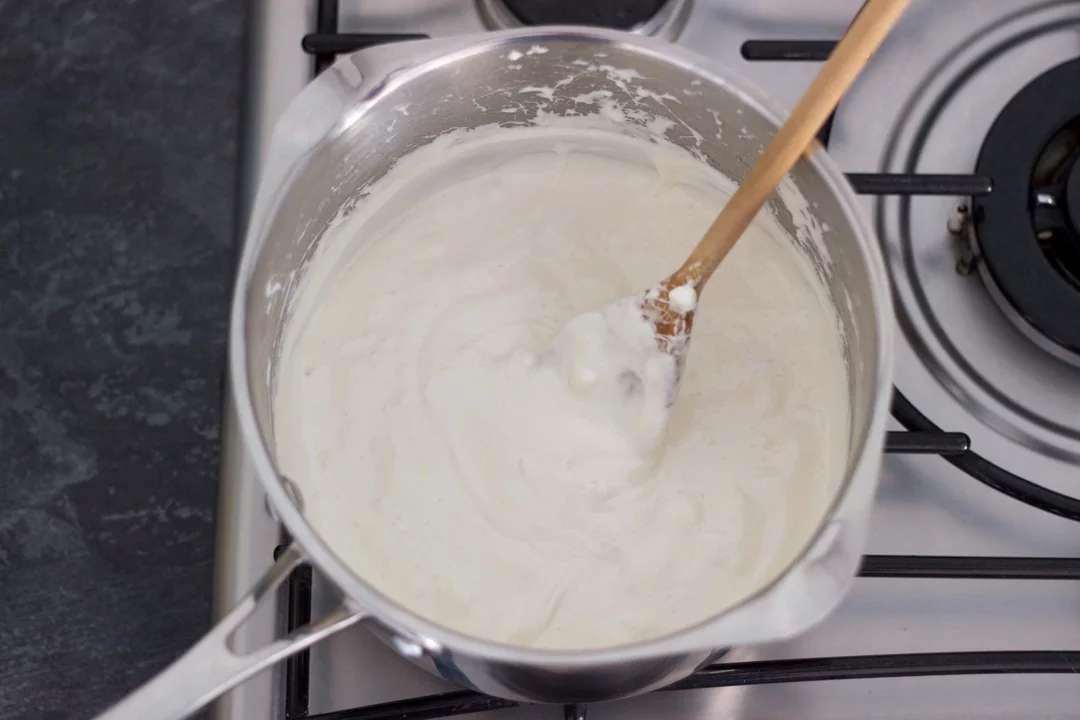
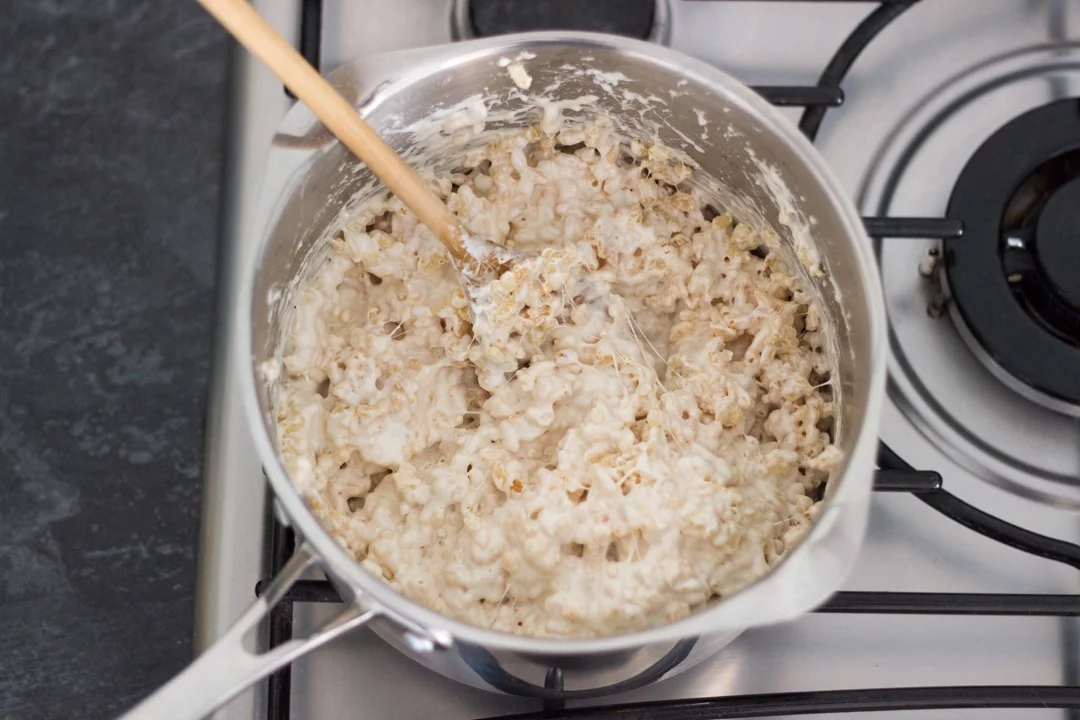
Next add in the marshmallows (320g | 11 oz) and melt gently, stirring constantly so they don’t catch on the bottom.

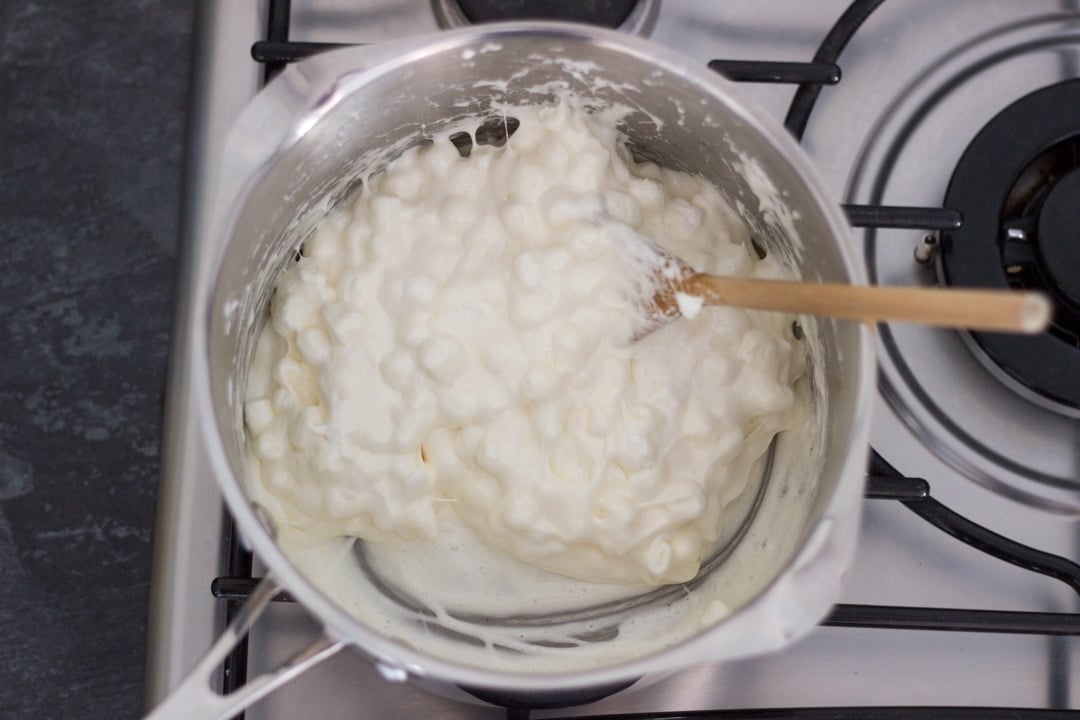
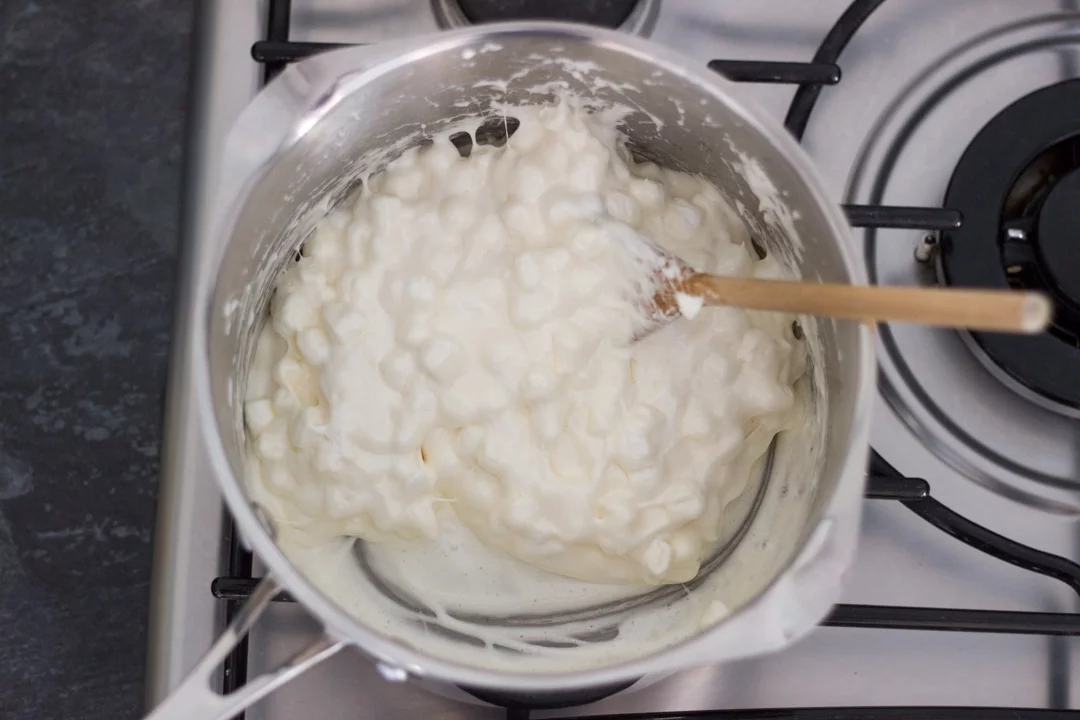

Now dump in all the Rice Krispies (110g | 4 oz) and give it a really good mix. Make sure all the cereal is evenly coated.
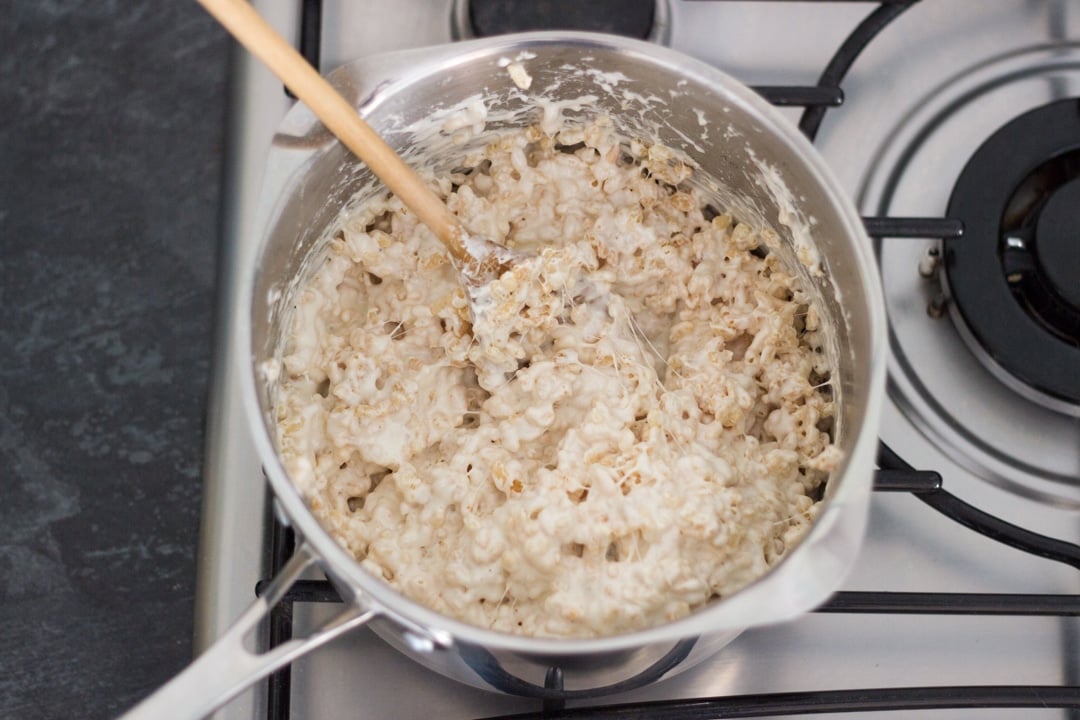
Then tip the mixture into your prepared tin and press in firmly using the back of a lightly oiled metal spoon. (I find this the easiest way, otherwise you get yourself into a sticky mess!)

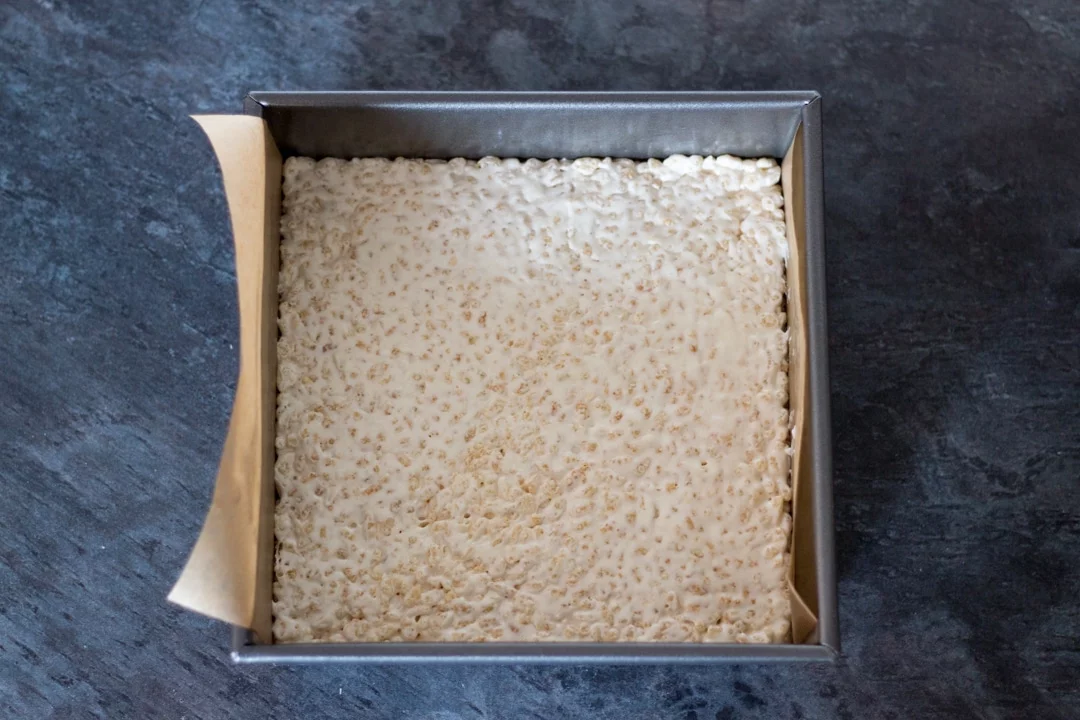
Place into the fridge while we make the topping.
Decorating instructions
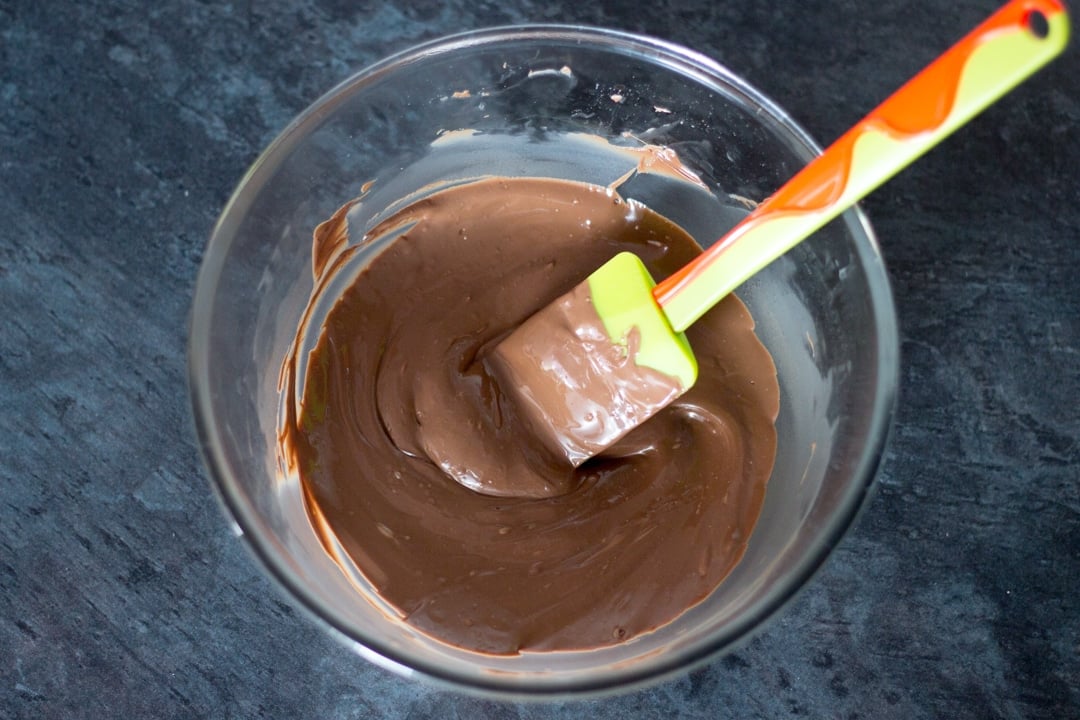
Next, break the chocolate (250g | 9 oz) into a large microwavable bowl. Reduce your microwave’s power to half and heat in 20 second intervals, stirring well between each time.
Once it is 2 thirds melted, don’t heat again – just stir stir stir until it’s completely melted. And there you are – you have tempered your chocolate in the easiest way possible!

Then pour your melted chocolate over the Rice Krispies and smooth out.
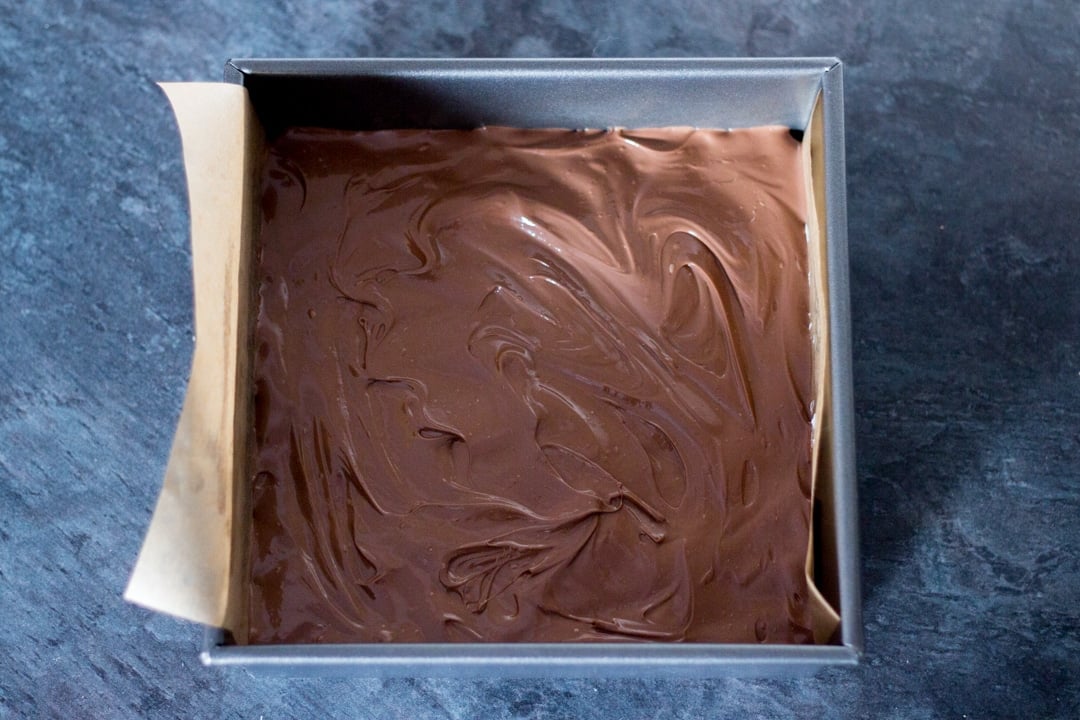

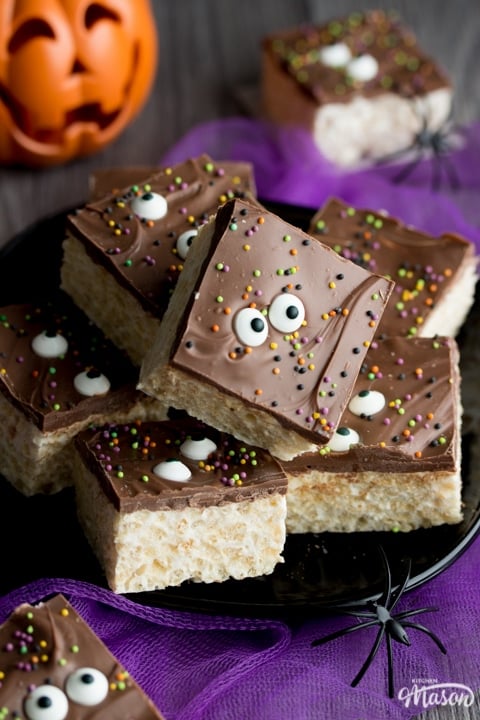
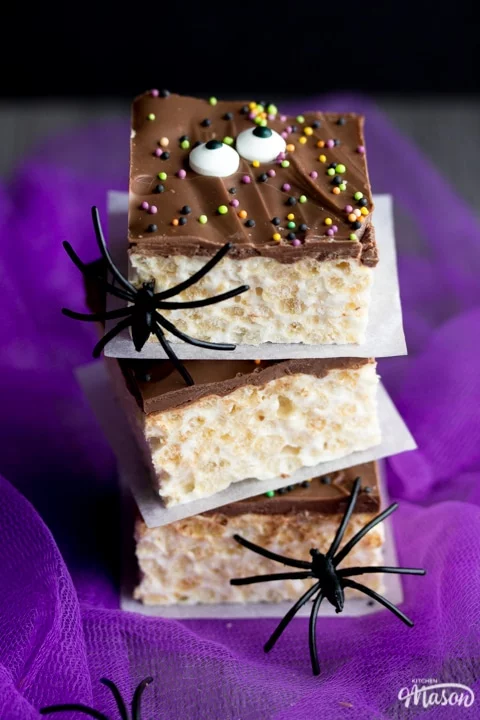
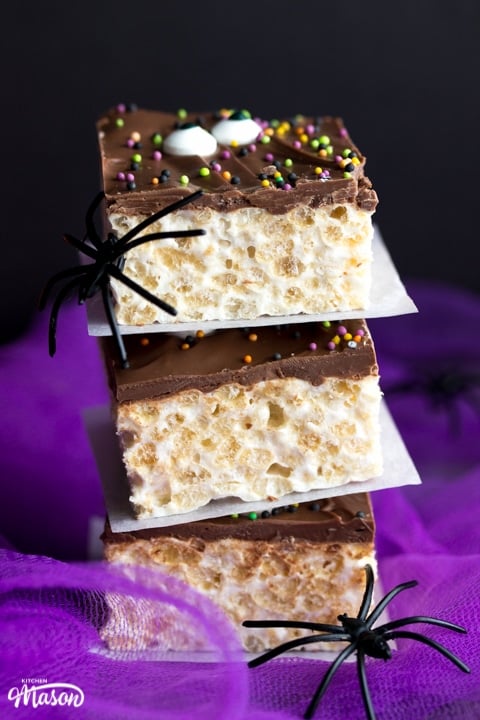
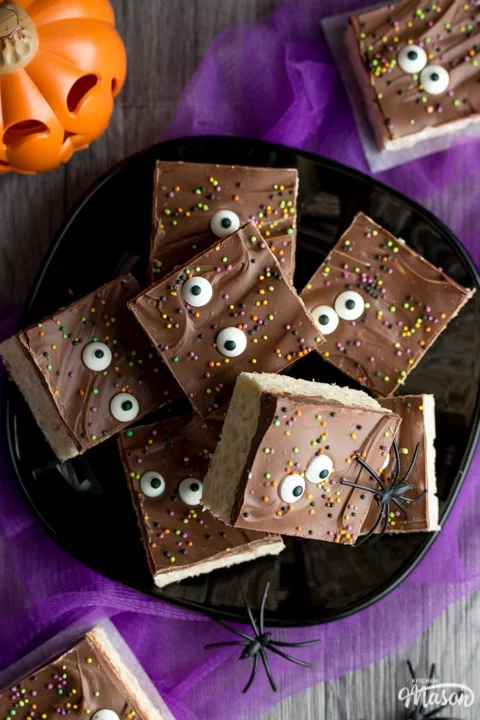
Finally, while the chocolate is still melted, sprinkle over your chosen Halloween decorations. If using edible eyes like me – be mindful of where you will be slicing so you can try and get a pair (or more!) on every bar.

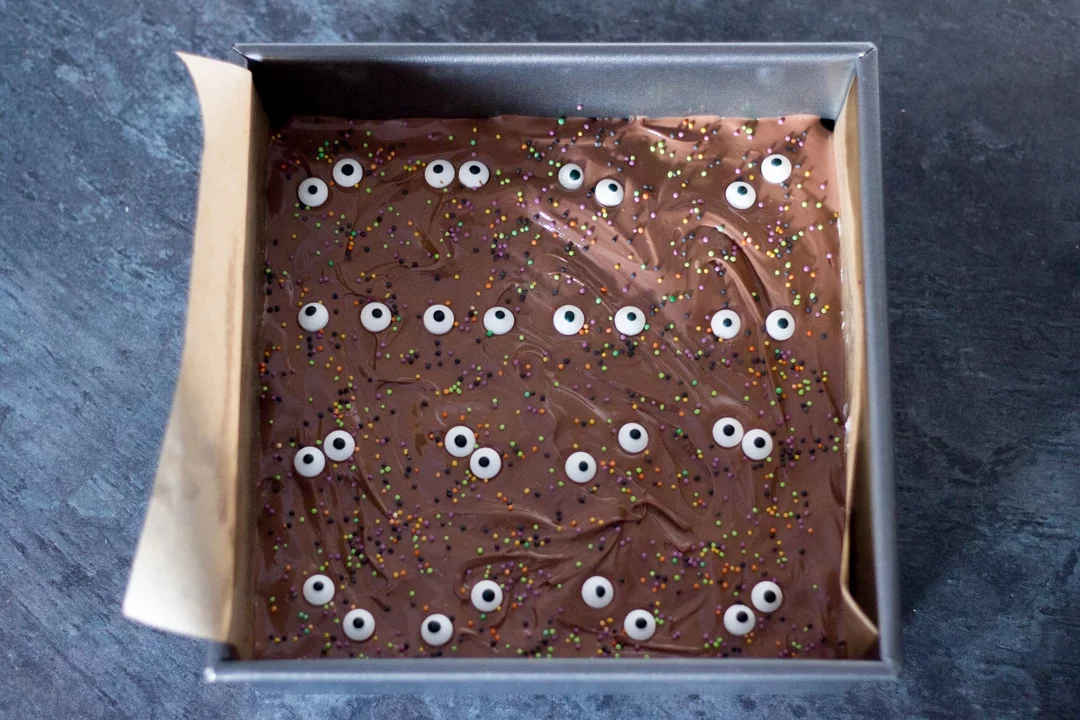
Leave at room temperature to set completely before removing and slicing into 16 bars (a 4 x 4 grid.) You may find it easier to lightly oil your knife if it sticks a little.
Store in an airtight container at room temperature and consume within 3-4 days.
If you don’t have that much time on your hands, you might prefer to try a last minute halloween platter for kids.
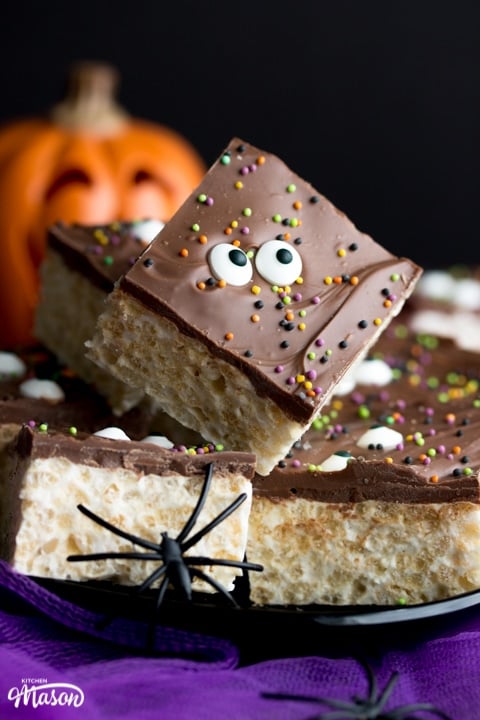

Didn’t I tell you these Rice Krispie Halloween Treats were crazy easy to make?! They’re 100% the Mr’s favourite too so didn’t last very long in our house at all. I think I’m going to have to make another batch for the trick or treaters and actually hide them from him!
How are you going to decorate yours? Have you already made some? I want to know! Please comment below or tag me in your pictures on any social media. You have no idea how much I LOVE hearing from you!

Alternative design options
If you want to change up these Halloween treats and use a different spooky design, or even have multiple designs to spice up your Halloween party table – you can absolutely do that! Here are some awesome ways you can tweak this recipe to impress all your friends and family.
- Add food colouring gel to the melted marshmallow mixture to make the colour more exciting. (OR use different coloured marshmallows.)
- Use white chocolate for the topping and decorate with edible eyes for ‘ghost’ krispie treats
- Use a white chocolate topping and milk chocolate buttons to make spiders. Simply use the buttons as ‘bodies’ pipe the ‘legs’ on with melted milk chocolate.
- Use milk or dark chocolate for the topping then decorate with white chocolate ghosts. (Just like I did in this easy Halloween bark recipe.)
- Use white chocolate for the topping and decorate with ‘blood spatter’. Just colour more melted white chocolate with red food colouring gel and splatter over the top using a fork.
- Simply decorate the top with Halloween shaped sprinkles (cheap & easily found on sites like eBay)
- Use a milk/dark chocolate topping and create spider webs with white chocolate using the same technique as in this epic Halloween dessert recipe.
The possibilities are endless, just use your imagination!
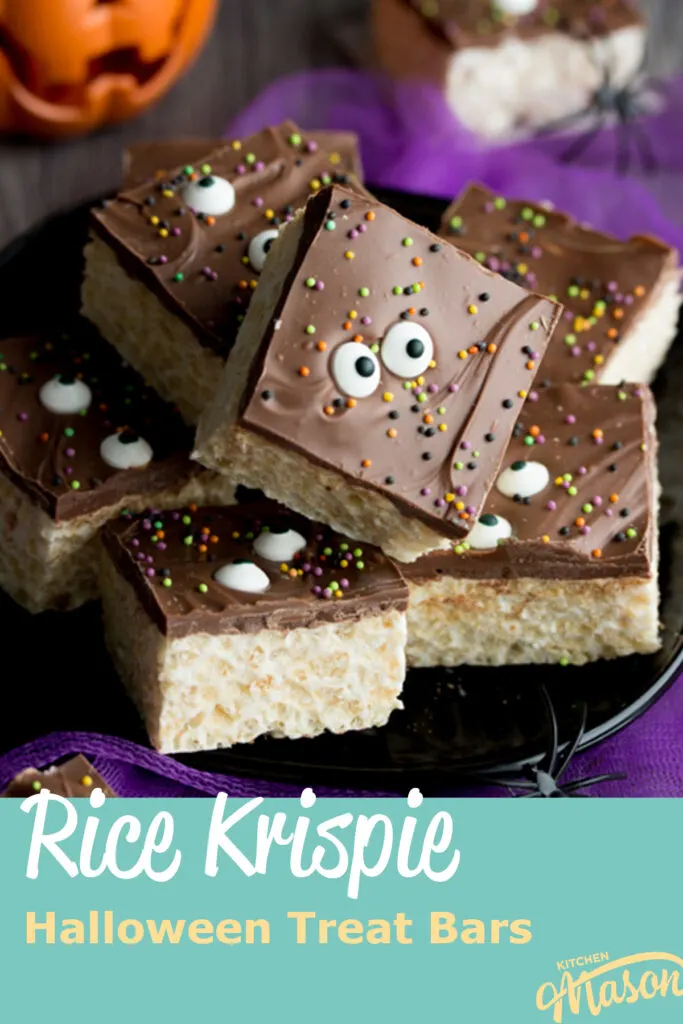
Loved This Post? Pin It!


Rice Krispie Halloween Treats Recipe
Learn how to make the easiest Halloween treats EVER! Terrifyingly tasty rice krispie bars with creepy eyes are the perfect Halloween party treat!
Ingredients
- 50g (1/4 cup) Unsalted Butter
- 320g (11 oz) Marshmallows
- 110g (4 oz) Rice Krispies Cereal
- 250g (9 oz) Milk Chocolate
- Halloween Coloured Sprinkles
- 32 x Edible Eyes
Essential Equipment
- 20cm (8″) Square Baking Tin
- Large Saucepan
Instructions
- Lightly grease and line the tin with baking paper. Melt the butter in a large saucepan over a low/medium heat.

- Add the marshmallows and stir continuously until melted.
- Thoroughly mix in the rice cereal then press the mixture into the lined tin with an oiled metal spoon. Place in the fridge.
- Break the chocolate into a bowl and switch your microwave's power to half. Then heat in 10 second intervals in the stirring very well after each blast. When two thirds melted - don't heat any more. Stir until 100% melted.
- Smooth the chocolate over the top. While it's still melted, decorate with sprinkles and edible eyes. Allow to set at room temperature then take out the tin and cut into 16 pieces. Store in a metal container at room temperature. Consume within 3-4 days.
Notes
If you would rather use a more in depth picture recipe, please see the main body of this post. Where you’ll also find lots of extra FAQs and helpful tips, should you need them.
Please note, this recipe includes both UK metric and US Cup measurements.
Storage
Store in an airtight container at room temperature and consume within 3-4 days.
Tips
- Start out using the biggest saucepan you have. It needs to be able to fit ALL the ingredients in it with room to spare for mixing.
- When pressing the finished rice krispie mixture into your baking tin, use a lightly oiled metal spoon. This will really help with the stickiness, making your life WAY easier!
- If you’ve tempered your chocolate as directed in the recipe below, don’t store them in the fridge. They will likely lose that lovely shine due to the dramatic change in temperature. (Similarly, don’t store them anywhere too warm either!)
- Store your treats in a metal container instead of plastic. Sugar likes to ‘sweat’ in plastic meaning your rice krispies may become a little soggy and lose their crunch.
- Don’t wander off when melting the marshmallows. They could catch and burn on the bottom of the pan!
- Want to make this with the kids/grandkids? Sure thing! Keep them away from the open flames of the hob and melt the marshmallows in the microwave in 10 second intervals. Just make sure to use a very large bowl and stir well between each blast.
Recommended Products
As an Amazon Associate and member of other affiliate programs, I earn from qualifying purchases at no extra cost to you.

Nutrition Information:
Yield: 16 Serving Size: 1Amount Per Serving: Calories: 197Total Fat: 7gSaturated Fat: 5gTrans Fat: 0gUnsaturated Fat: 2gCholesterol: 10mgSodium: 65mgCarbohydrates: 32gFiber: 1gSugar: 20gProtein: 2g
Nutritional information on kitchenmason.com should only be used as a general guideline, I am not a certified nutritionist. Please always check labels for allergens where applicable.

Emma is a British recipe writer, home cook, and founder of Kitchen Mason. For over 15 years, she has been creating simple, comforting recipes and practical kitchen tips that help tired, everyday people make dinner feel easier and more enjoyable again. Passionate about British home cooking, Emma shares reliable recipes, comforting classics, and realistic kitchen guidance designed for real life. Her work has also been featured in publications including Food Network, Cosmopolitan, and The Huffington Post.
Knowledgeable On: British home cooking, Easy dinner ideas, Comford food recipes, Recipe writing