


This post may contain affiliate links. Where I make a small commission on purchased items, at no extra cost to you. See my disclosure for details.
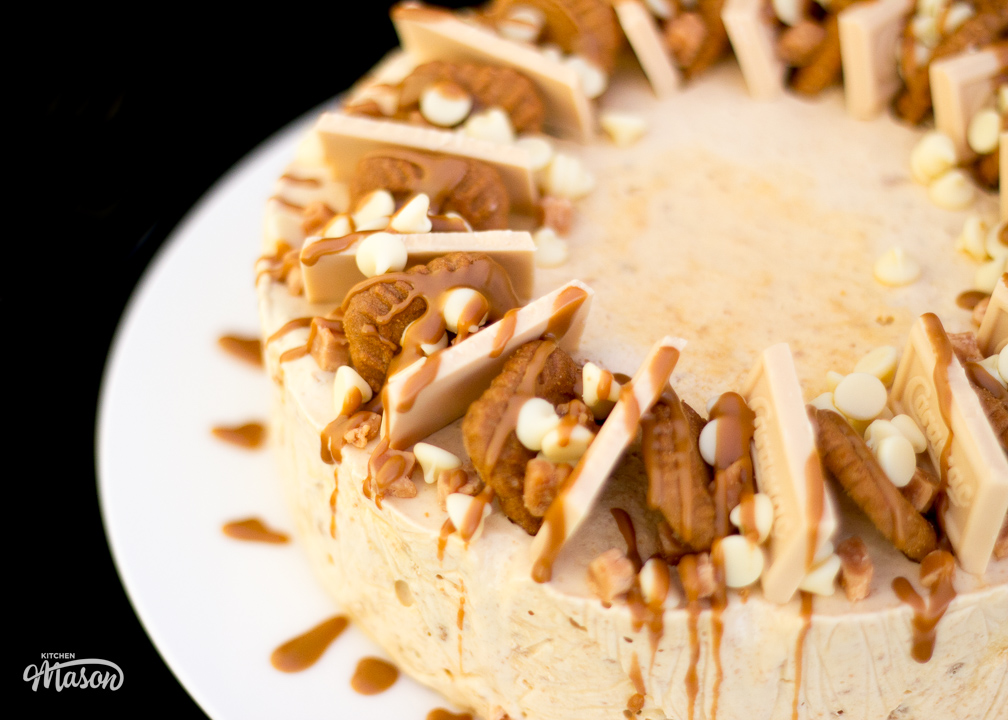
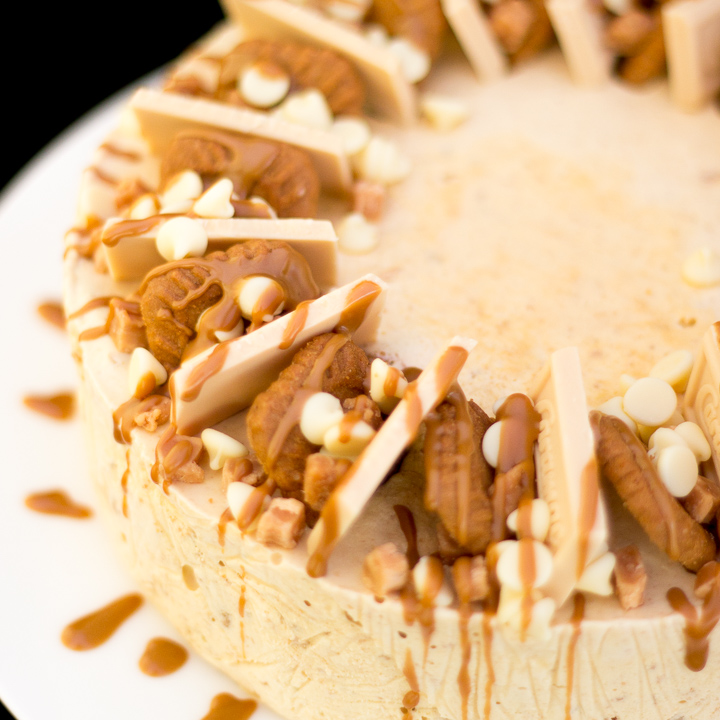
If you’re looking for a dessert that’s sure to impress, but takes minimal time and effort to create… you’re in the right place! This GORGEOUS Biscoff ice cream cake recipe is a showstopper in it’s own right! With lashings of Biscoff ice cream, Biscoff biscuits, blonde chocolate, white chocolate chips and fudge pieces, this is a dessert recipe you’re going to want to bookmark!


Why you’ll love this recipe
Life gets BUSY. Trust me, I know. That’s what makes this dessert so perfect! All you have to do is throw some ingredients together, mix them up, pour it all into a tin, put it back in the freezer. I don’t think there’s an easier dessert recipe!
I’ve found this works brilliantly when I know I’m hosting guests at the weekend, but my work week and evenings are stacked. And I’ve no time to make faffy complicated recipes!

Ingredients
Confused about what ingredients to buy? Not sure about a substitution? Here’s everything you might need to know…
- Biscoff Biscuits – Yes, the original Lotus Biscoff biscuits are lovely. But there are some fantastic imitation Biscoff biscuits available at a fraction of the cost. Either will work great!
- White Chocolate Chips – These can be any brand or variety. You could even use a bar of chocolate and chop it instead.
- Fudge Pieces – I used Asda’s fudge chunks. But other brands will work fine. You could even cut up pieces of vanilla fudge (you know, the kind you get in a pick and mix?).
- Ice Cream – This is entirely personal preference. I like Carte D’or vanilla for this, but you can use whatever vanilla ice cream you like the taste of!
- Biscoff Spread – Again, the original Lotus Biscoff spread is great, but the imitations that are available would also work perfectly well. Make sure you use the smooth variety, not the chunky.
- Caramac Bars – These have been on and off shelves for years here in the UK. If you can’t find Caramacs, any blonde chocolate will work.
Emma’s top tips
Here are tips you’ll find helpful when making a Biscoff ice cream cake.
- Choose an ice cream you love the flavour of, as this will be the main flavour (along with Biscoff) that comes through.
- Biscoff ice cream cake is an ideal make ahead dessert! As it keeps well in the freezer for up to 2-3 weeks.
- Can’t get hold of Caramac bars? You can always use Cadbury’s Caramilk, or any other blonde chocolate you can find instead. Or even leave them off entirely.
- Rather not decorate? Serve alongside some homemade milk chocolate sauce, or white chocolate sauce instead!

Timings
Have limited time? Struggle with recipe timings? Or juggling around other things? Here’s some time managing info to make your life easier!
- Allow 20-30 minutes for the ice cream to soften (less if your kitchen is warm).
- Preparing the other ingredients will take no more than 5 minutes.
- Mixing and shaping will only take 5 minutes.
- Allow 5-6 hours for a complete set (2-3 hours if you are inserting Biscoff biscuits into the top for decoration.)
- Decorating as I have will take less than 5 minutes.
Biscoff Ice Cream Cake – Step by Step Picture Recipe
(For a printer friendly version, see the recipe card at the end of this post)
Please note, this recipe includes both UK metric and US Cup measurements.
Here is what you will need to serve 10-12.
Ingredients
- 250g (8.8 oz) Biscoff Biscuits
- 200g (1 + 1/8 Cup) White Chocolate Chips
- 150g (3/4 Cup) Fudge Pieces/Chunks
- 1.5 litres (6 Cups) Vanilla Ice Cream
- 150g (2/3 Cup) Smooth Biscoff Spread *
- 3 x Bars (3.2 oz) Caramac Bars
*Plus a little extra for drizzling (optional)
Essential Equipment
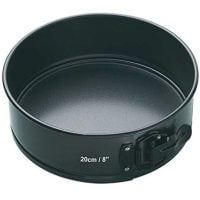
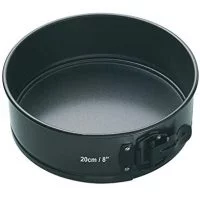
- 20cm (8″) Round Springform Baking Tin
- Cling Film or Baking Paper
- Large Mixing Bowl
- Spatula
- Rolling Pin
- Disposable Piping Bag or Small Bowl
Instructions
First thing’s first. Place 8 Biscoff biscuits (out of 250g | 8.8 oz), a few white chocolate chips (out of 200g | 1 + 1/8 Cup), and a few fudge pieces (out of 150g | 3/4 Cup) to one side for decoration later.
Then take your ice cream (1.5 litres | 6 Cups) out the freezer, and allow to sit out at room temperature to soften for 20-30 minutes. (Maybe 10-15 minutes on a warm day)
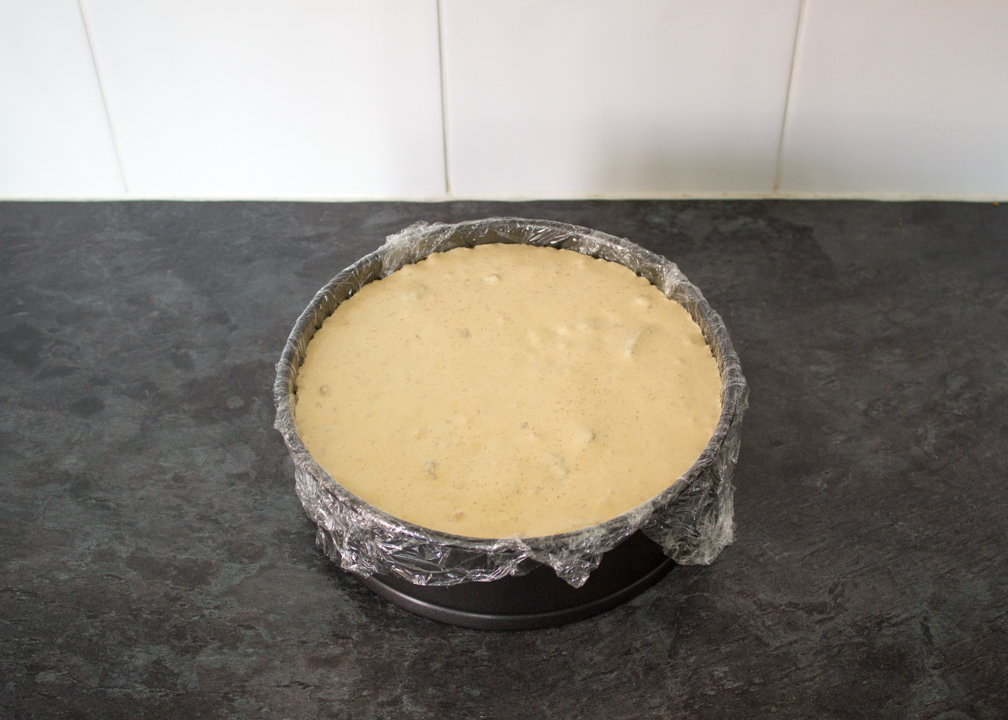
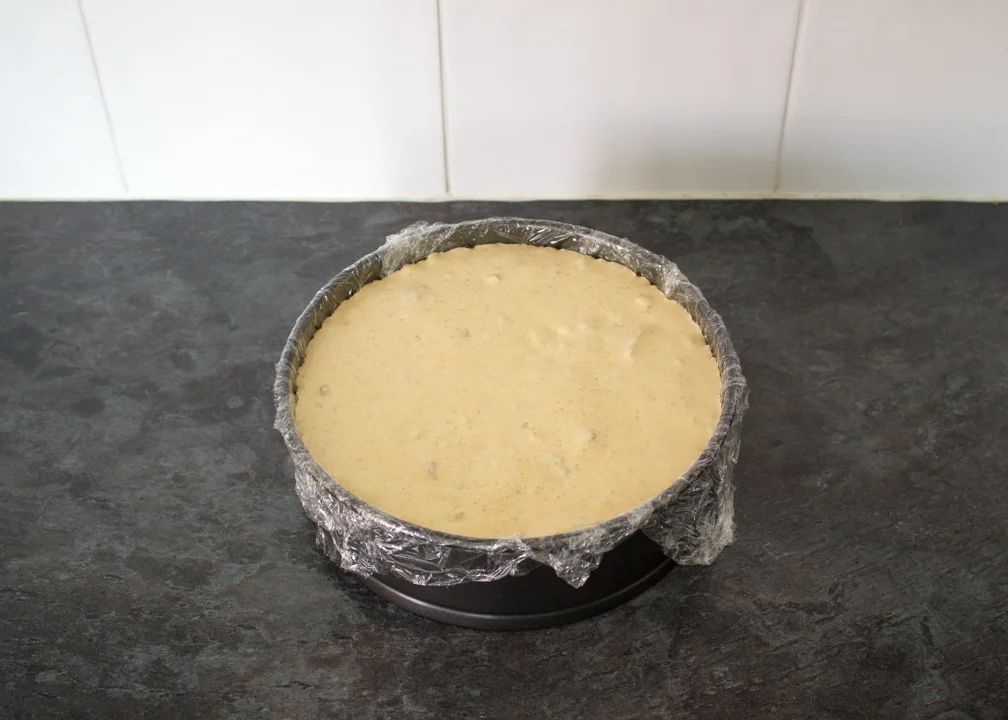
Next, line your tin with cling film. I like to do 2 sheets in a criss cross layer.
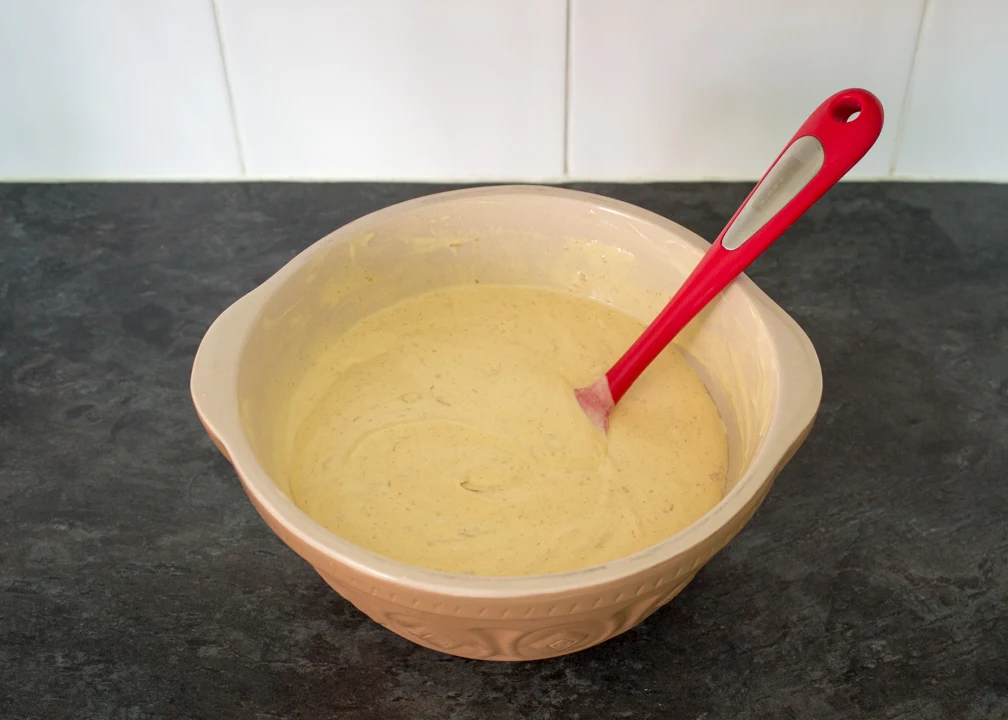
Then tip the softened ice cream into a large bowl, and mix until smooth.
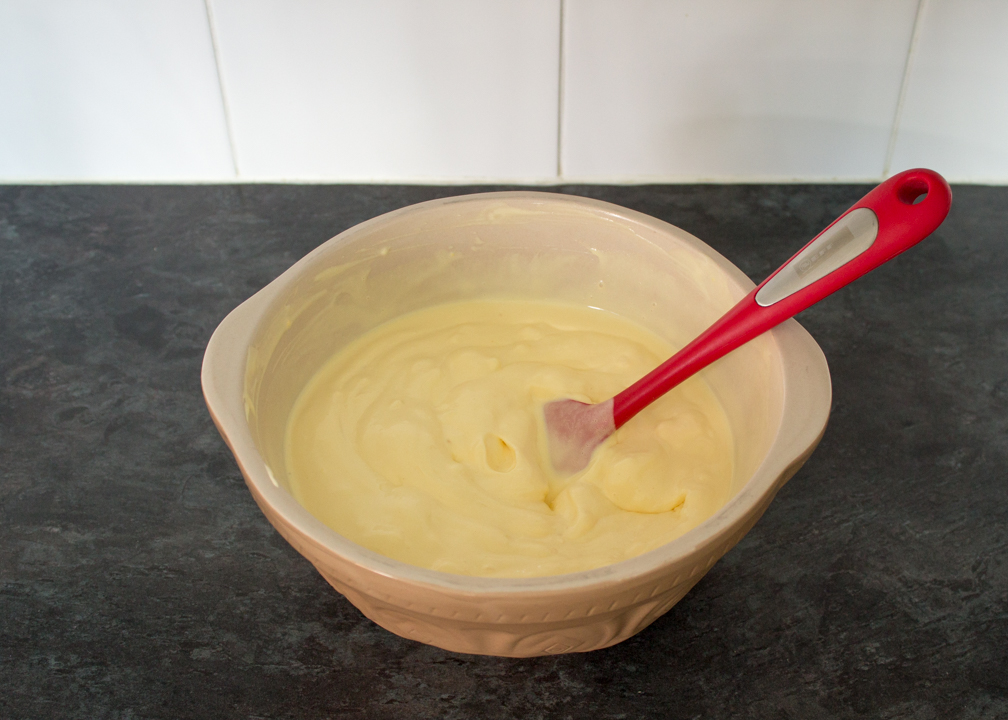
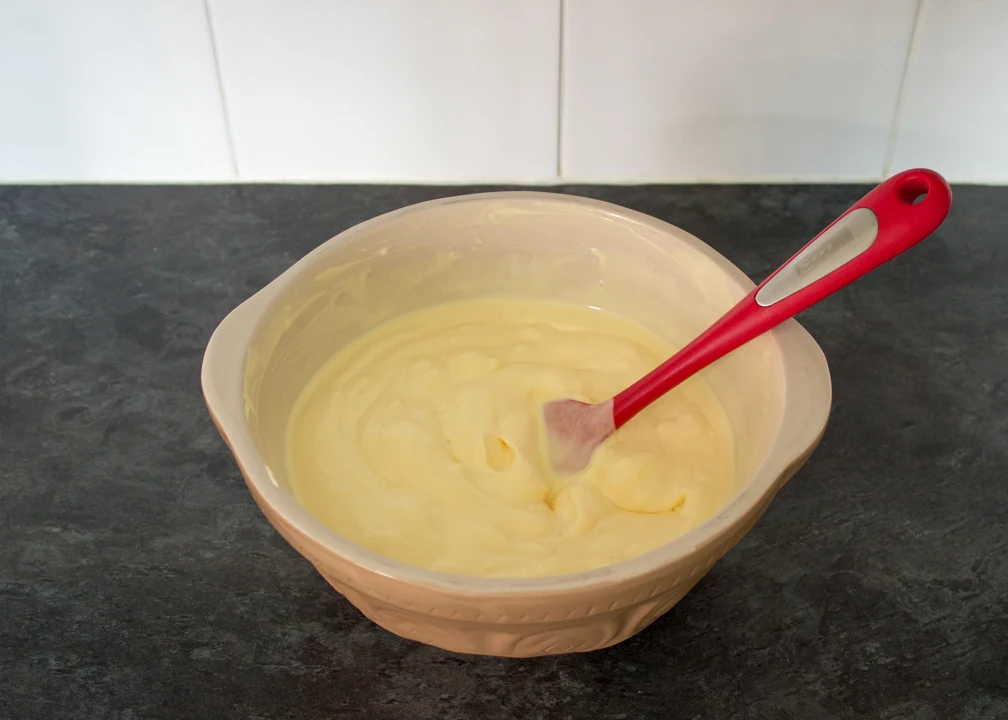
Add in the Biscoff spread (150g | 2/3 Cup) and stir until blended well. (Making your very own Biscoff ice cream, exciting!!)

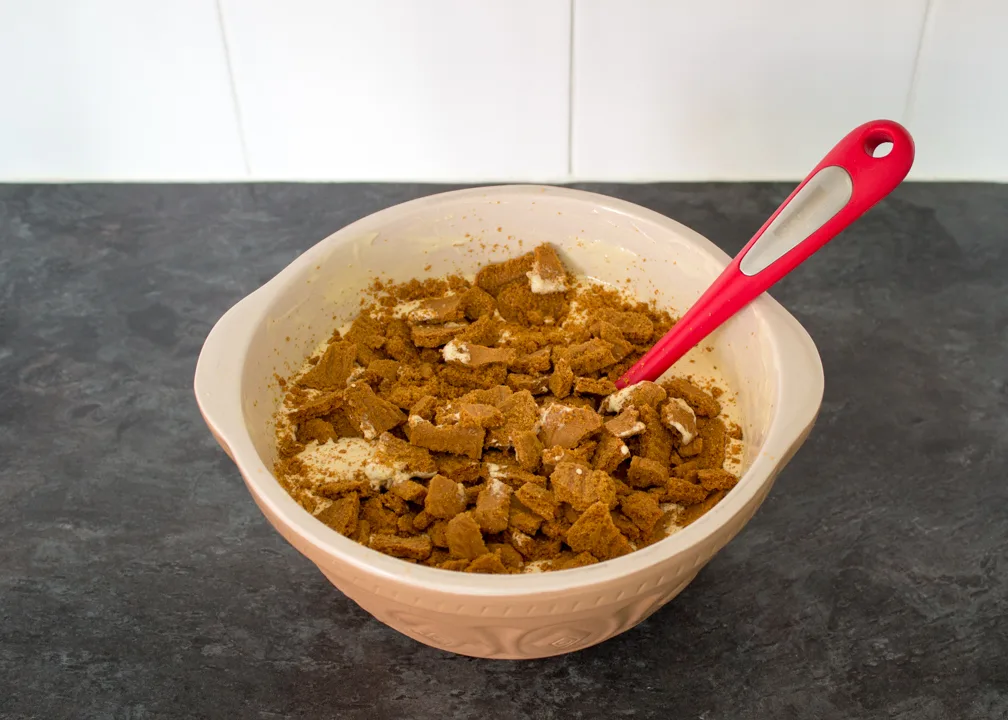
Back to the remaining Biscoff biscuits. Leave them in the packet and take a rolling pin to them. Bash gently, until they’re broken into nice chunky pieces. But NOT into a powder. Then add them into the bowl and stir through.

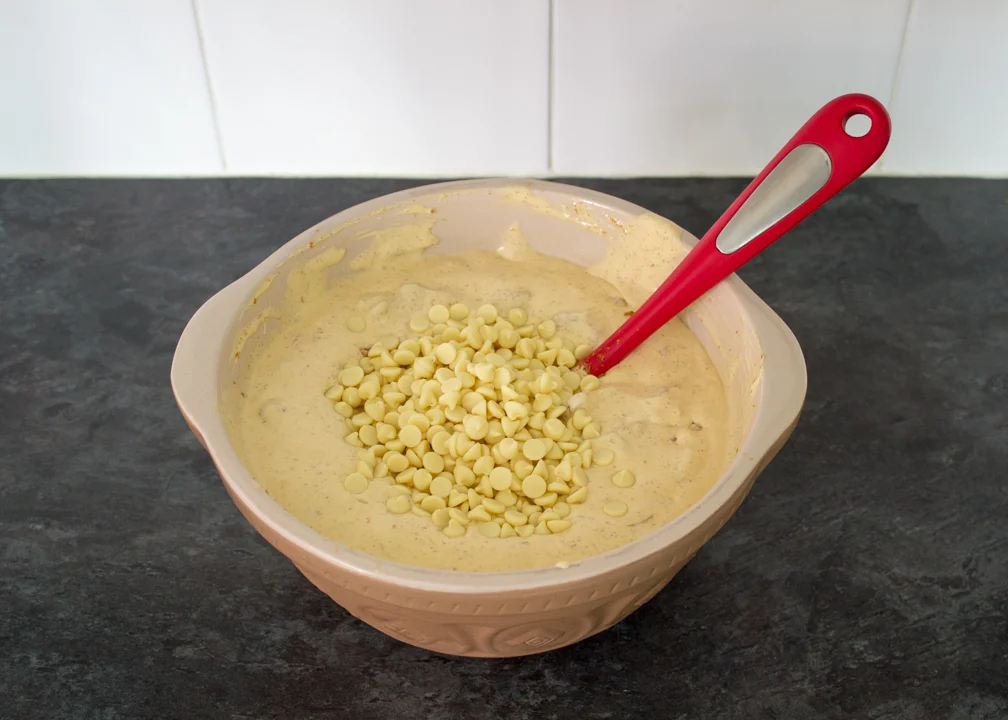
Next, add in the remaining white chocolate chips and stir them through.

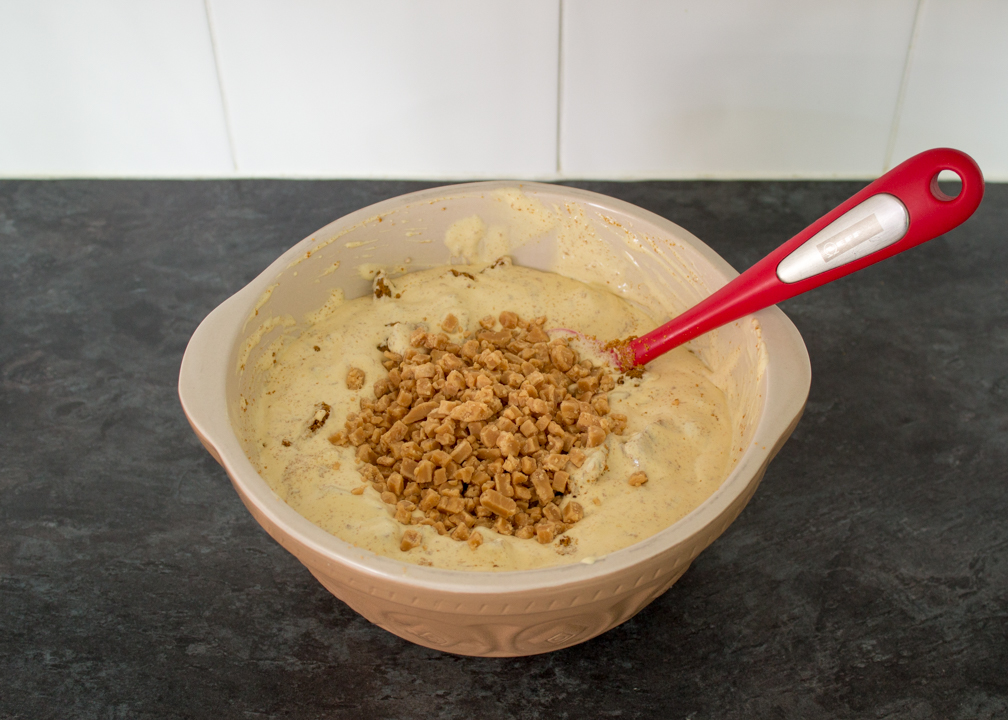
Then add the remaining fudge chunks and give it a thorough final mix.

Then pour the mixture into the prepared tin, and freeze until set. (At least 5-6 hours, overnight is best to be sure.)
To decorate (optional)
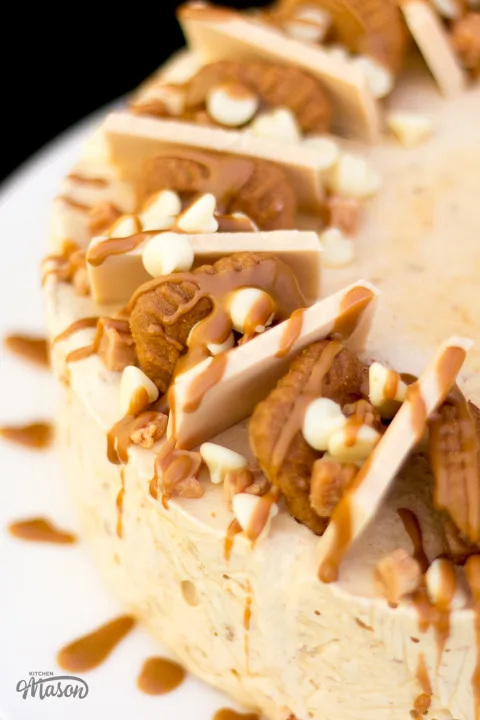
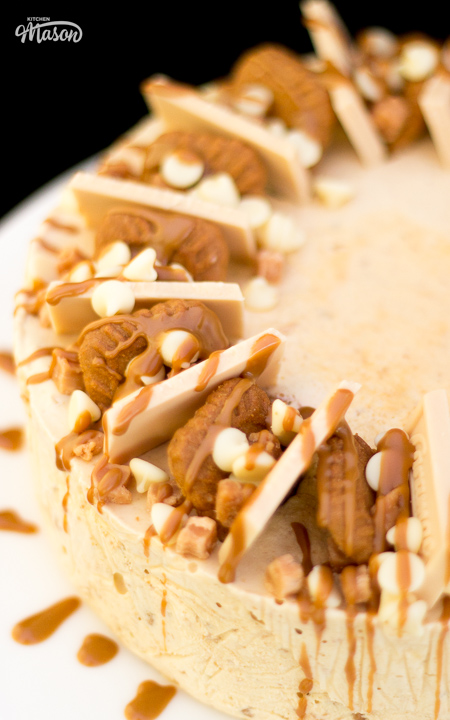
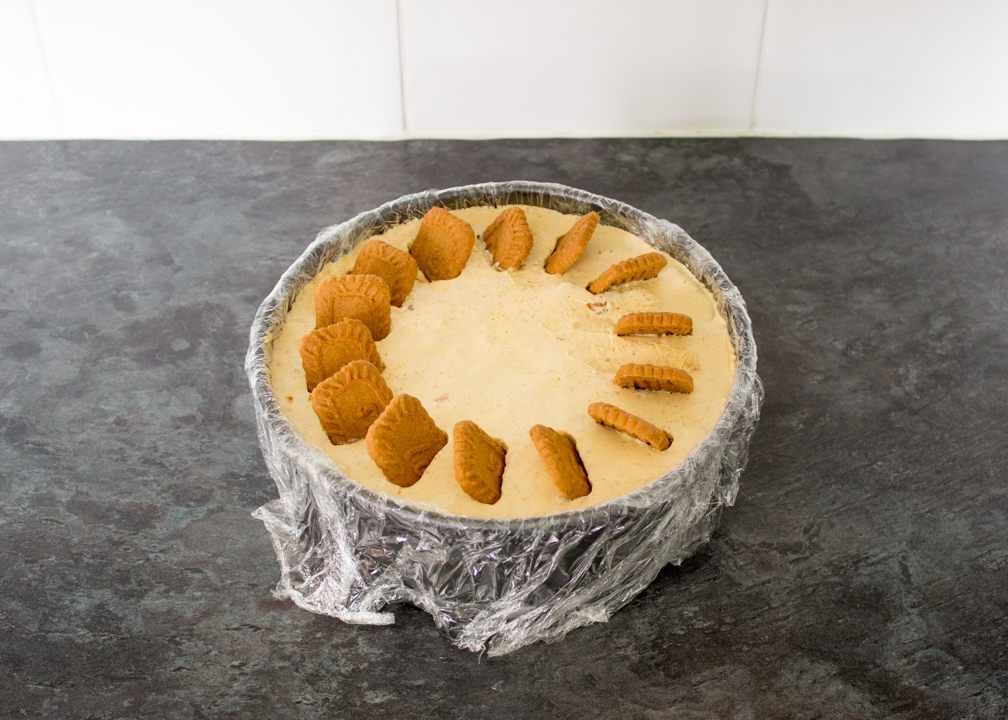
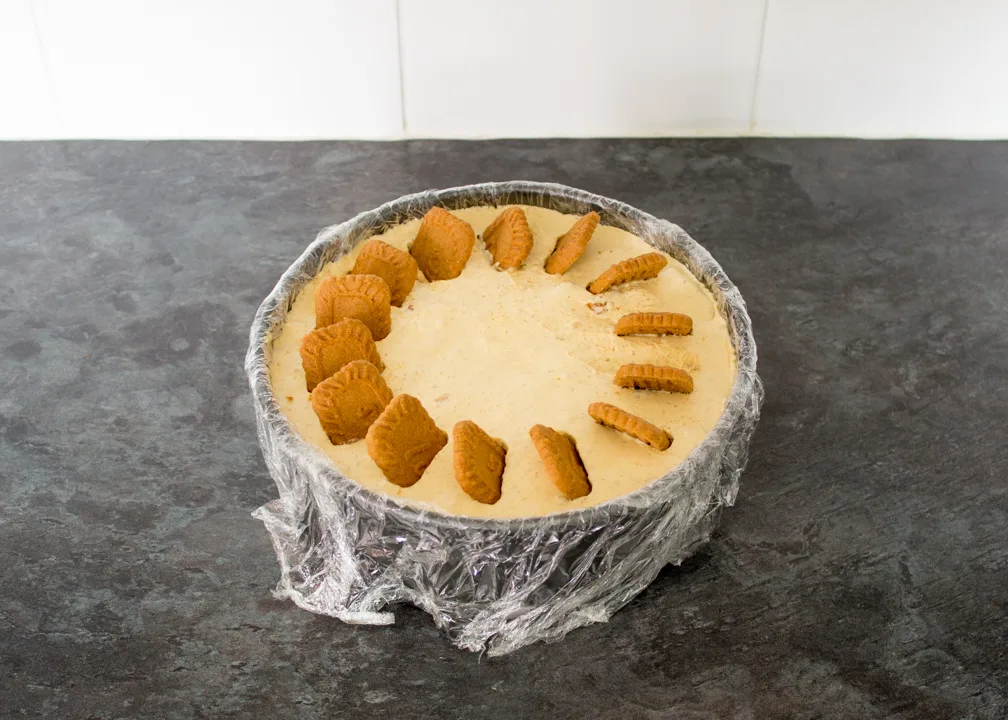
If you want to decorate your Biscoff ice cream cake – about 2-3 hours into the freezing time (when the ice cream is firmer but still a little soft), break the reserved Biscoff biscuits in half, and press them into the top of the ice cream. Going all the way around at a slight angle, like in the picture below.
Then place the ice cream cake back into the freezer to set completely.
When it’s fully set, remove it from the tin and peel off the cling film. Place it onto a serving plate or cake stand. Then break the Caramac (3 x bars | 3.2 oz) into pieces, and place them between the biscuits on top of the Biscoff ice cream cake.
Scatter over the reserved white chocolate chips and fudge pieces. And for the finishing touch, drizzle with melted Biscoff spread!
Do this by melting 1 tsp of Biscoff spread in a piping bag in the microwave for 20 seconds. Snip the end and drizzle over the edges of the dessert.
Slice and serve your Biscoff ice cream cake immediately, or pop back into the freezer until you’re ready to serve.

How to store Biscoff ice cream cake
Store your Biscoff ice cream cake covered (or wrapped well) in the freezer, and consume within 2-3 weeks. To make slicing easier, you may need to take it out the freezer 10-15 minutes before serving to soften.
Loved this Biscoff ice cream cake post? Pin it!

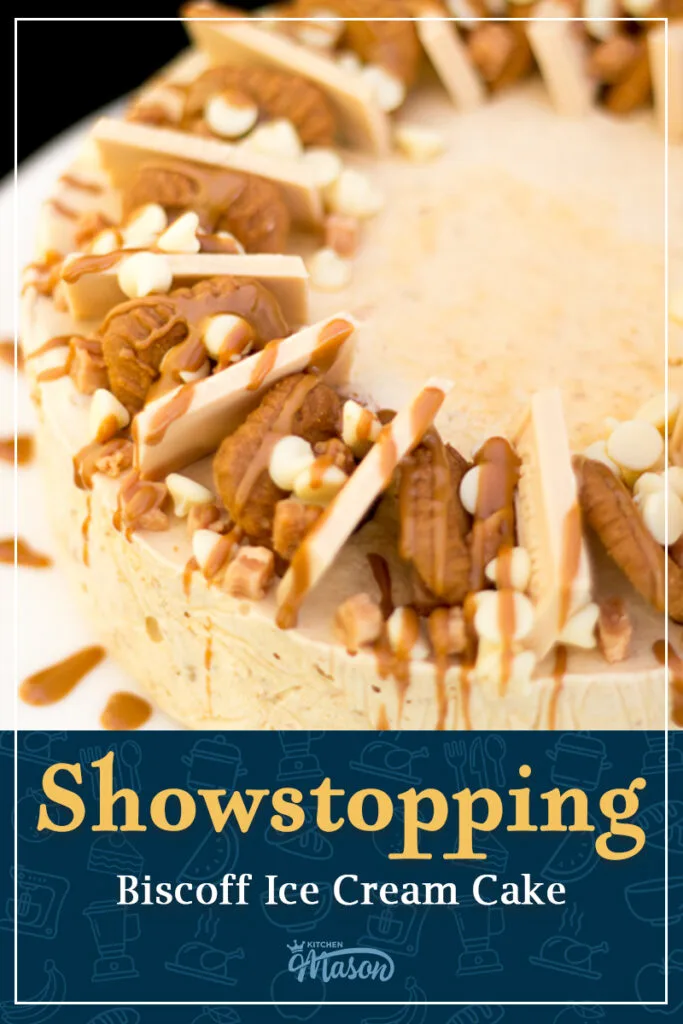

Easy Biscoff Ice Cream Cake Recipe
This Biscoff ice cream cake takes very little time and effort, but creates a BIG showstopping dessert! Perfect for Summer, BBQs and sharing.
Ingredients
- 250g (8.8 oz) Biscoff Biscuits
- 200g (1 + 1/8 Cup) White Chocolate Chips
- 150g (3/4 Cup) Fudge Pieces/Chunks
- 1.5 litres (6 Cups) Vanilla Ice Cream
- 150g (2/3 Cup) Smooth Biscoff Spread *
- 3 x Bars (3.2 oz) Caramac Bars
Essential Equipment
- 20cm (8″) Round Springform Baking Tin
- Cling Film or Baking Paper
- Large Mixing Bowl
- Spatula
- Rolling Pin
- Disposable Piping Bag or Small Bowl
Instructions
Before you begin, reserve 8 Biscoff biscuits, a few white chocolate chips, and a few fudge pieces out of the quantities listed above. Set them to one side for decoration later.
- Take the ice cream out the freezer, and allow to soften for 20-30 minutes. Then line your baking tin with two criss-cross layers of cling film. When softened, tip the ice cream into a large mixing bowl.

- Add the Biscoff spread into the ice cream and mix well, until evenly distributed.
- Leave the remaining Biscoff biscuits in the packet, and bash gently with a rolling pin to break into chunky pieces. Add them into the mixing bowl and stir through.
- Stir through the remaining white chocolate chips and fudge pieces.
- Pour the mixture into your lined tin, place into the freezer and allow to set for 5-6 hours. (Or 2-3 if you are decorating as pictured.)
To Decorate
- After 2-3 hours, when the ice cream is more firm but still a little soft, break the reserved Biscoff biscuits in half, and press them into the top of the ice cream cake. Then return to the freezer for a further 3 hours or so, to fully set.
- When fully set, remove from the tin, peel off the cling film, and place onto a serving plate. Break the Caramac into pieces, and place them between the Biscoff biscuits on the top. Then scatter with the reserved white chocolate chips and fudge pieces. Finally, melt a little extra Biscoff spread in a piping bag (or small bowl) in the microwave for 20 seconds. Then drizzle it over the edges of the ice cream cake.
Notes
*Plus a little extra for drizzling (optional)
If you would rather use a more in depth picture recipe, please see the main body of this post. Where you’ll also find lots of extra FAQs and helpful tips, should you need them.
Please note, this recipe includes both UK metric and US Cup measurements.
Tips
- Choose an ice cream you love the flavour of, as this will be the main flavour (along with Biscoff) that comes through.
- Biscoff ice cream cake is an ideal make ahead dessert! As it keeps well in the freezer for up to 2-3 weeks.
- Can’t get hold of Caramac bars? You can always use Cadbury’s Caramilk, or any other blonde chocolate you can find instead. Or even leave them off entirely.
- Rather not decorate? Serve alongside some homemade milk chocolate sauce, or white chocolate sauce instead!
Storage
Store your Biscoff ice cream cake covered (or wrapped well) in the freezer, and consume within 2-3 weeks. To make slicing easier, you may need to take it out the freezer 10-15 minutes before serving to soften.
Recommended Products
As an Amazon Associate and member of other affiliate programs, I earn from qualifying purchases at no extra cost to you.

Nutrition Information:
Yield: 12 Serving Size: 1Amount Per Serving: Calories: 399Total Fat: 20gSaturated Fat: 11gTrans Fat: 0gUnsaturated Fat: 7gCholesterol: 38mgSodium: 203mgCarbohydrates: 50gFiber: 1gSugar: 38gProtein: 6g
Nutritional information on kitchenmason.com should only be used as a general guideline, I am not a certified nutritionist. Please always check labels for allergens where applicable.
If you like this recipe…
…you might also like:
- Easy peasy Biscoff traybake cake recipe
- No bake Biscoff rocky road
- Creamy no bake Biscoff cheesecake
I want to see YOUR no baking!
Have you made this showstopping Biscoff ice cream cake? I’d love to know if you have! Tag me in your pics on Facebook, Twitter and Instagram or email me at emma@kitchenmason.com.


Experienced British Online Publisher, recipe writer, and home cook, Emma has a background of over 20 years in British cuisine and cooking. Born and bred in the UK, she excels in classic British dishes, is passionate about air frying, and loves sharing her Gran’s old school recipes. She has been featured in popular publications such as Food Network, Cosmopolitan, and The Huffington Post.
Knowledgeable On: Traditional British Cuisine, Recipe Writing, Air Frying, Home Cooking.
Rosanne
Friday 16th of September 2022
Please can you email the print out version of the recipe.
Many thanks. Can't wait to try it!
Karly
Monday 1st of August 2016
Um, this no-bake creation is no joke in the deliciousness department. I'm totally obsessed with Biscoff all the time, but this is the perfect way to put it to use for warm summer days! Yum!
Miss KitchenMason
Monday 1st of August 2016
Haha thanks Karly! Glad you like it :)