


This post may contain affiliate links. Where I make a small commission on purchased items, at no extra cost to you. See my disclosure for details.
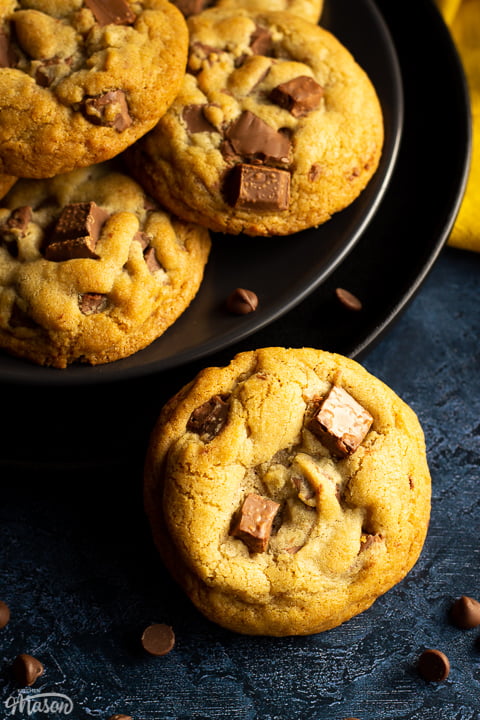
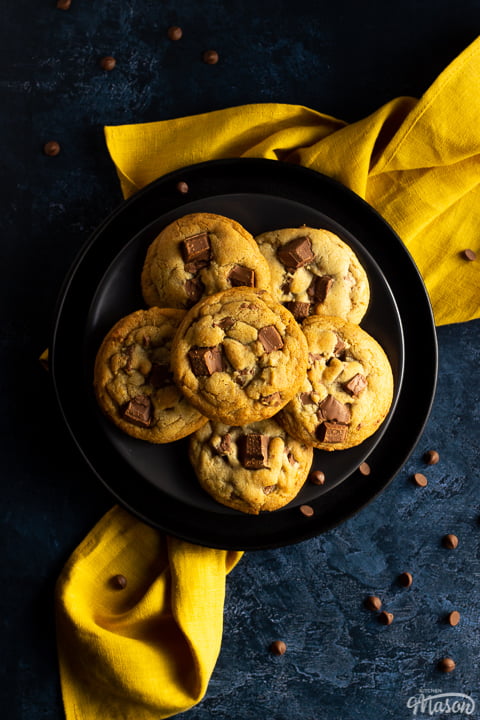
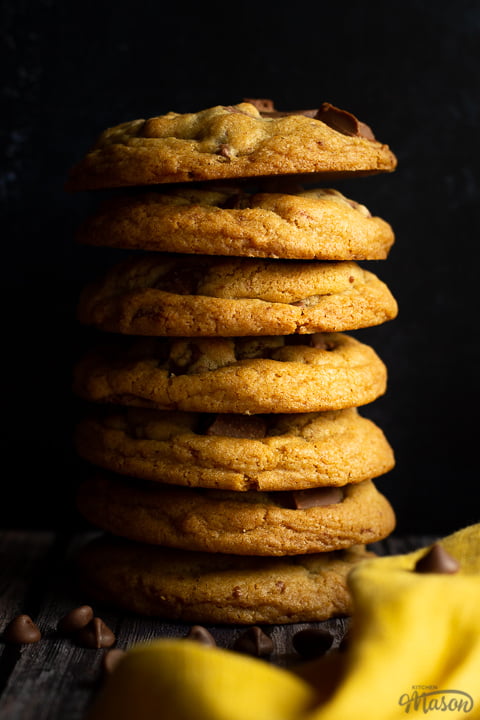
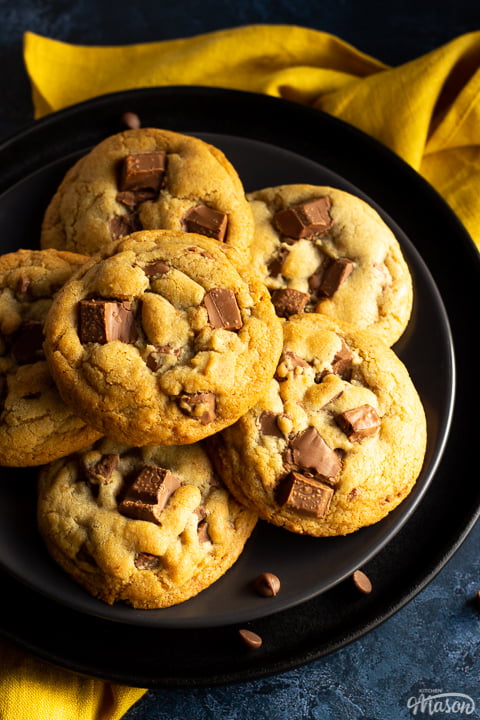
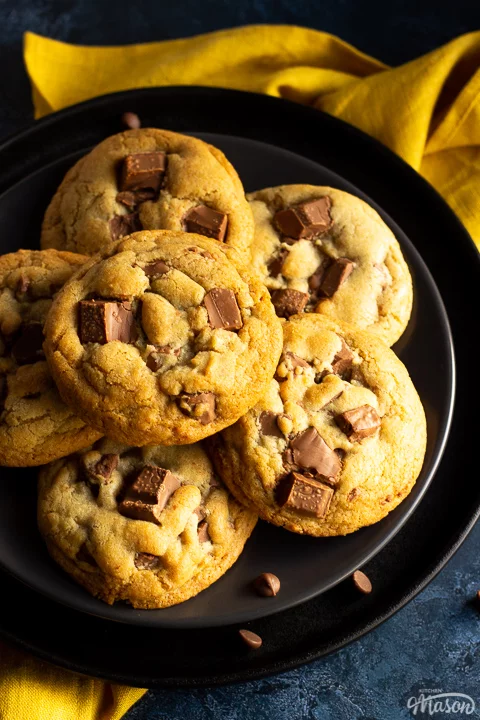
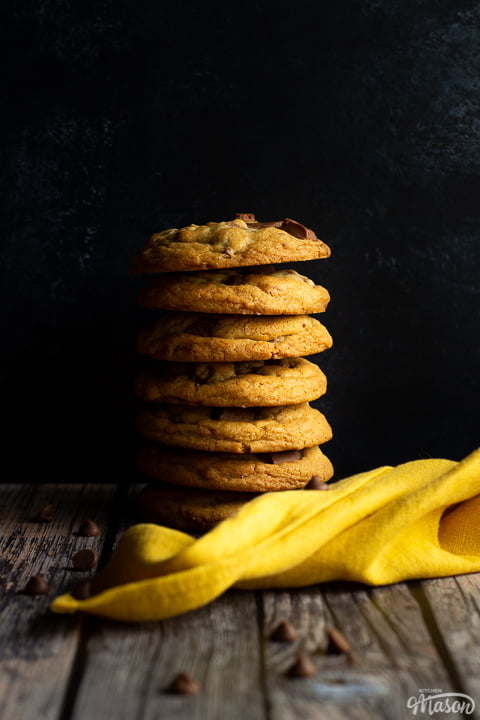
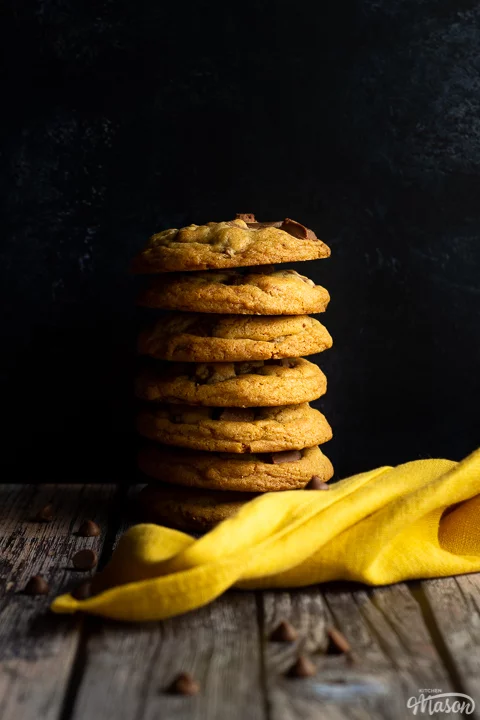
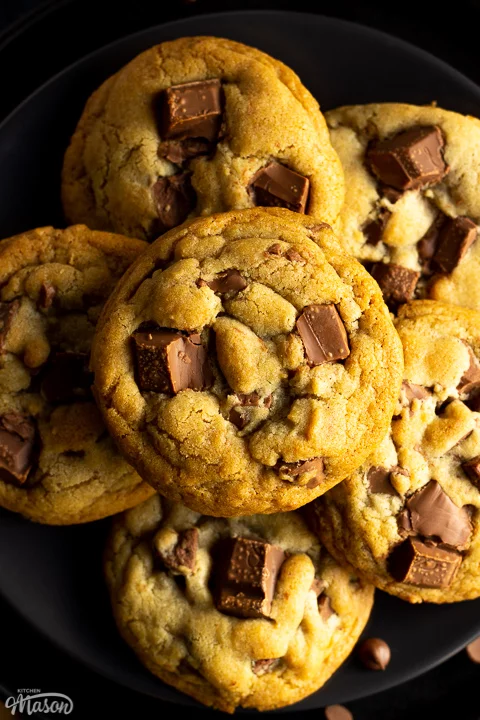
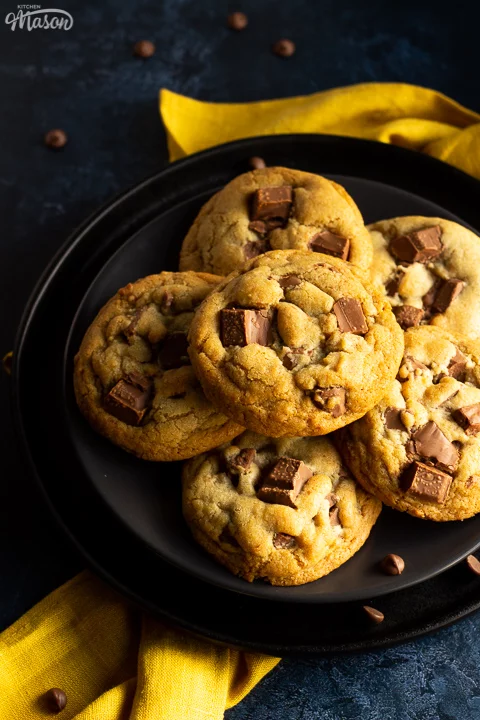
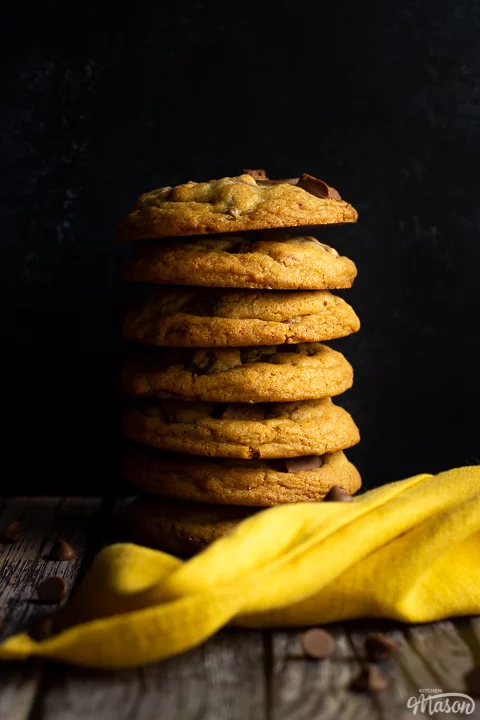
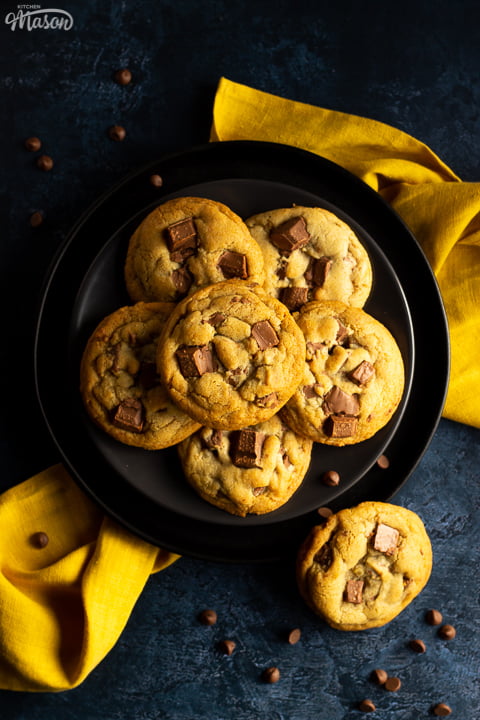
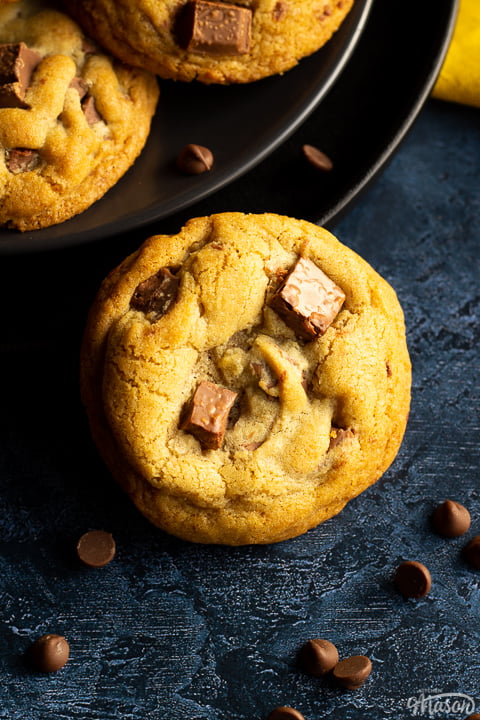
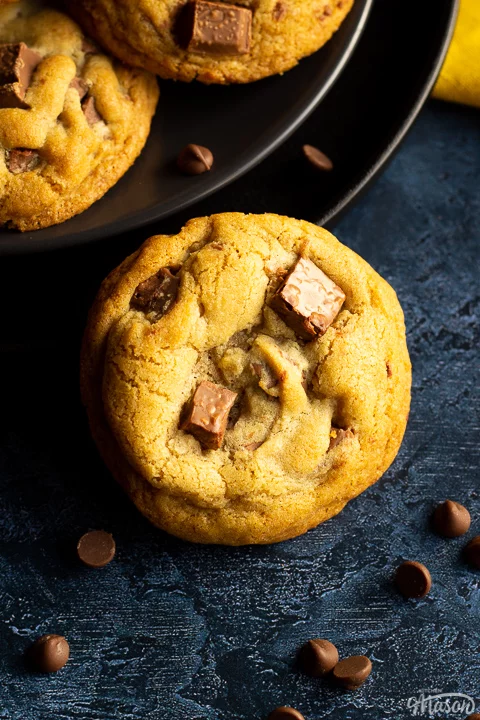
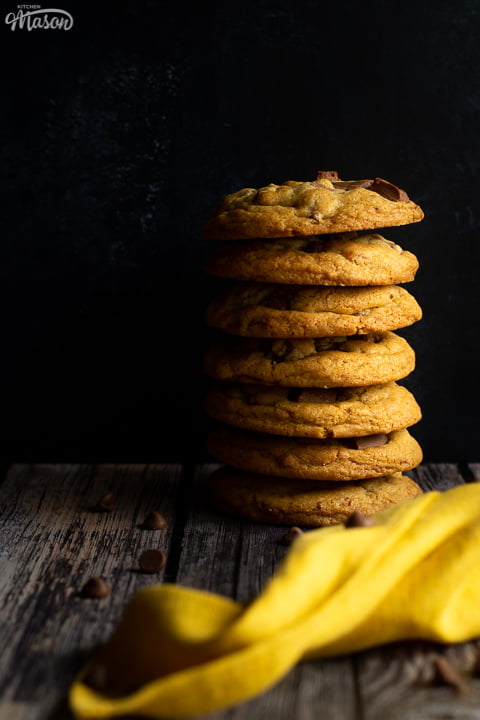
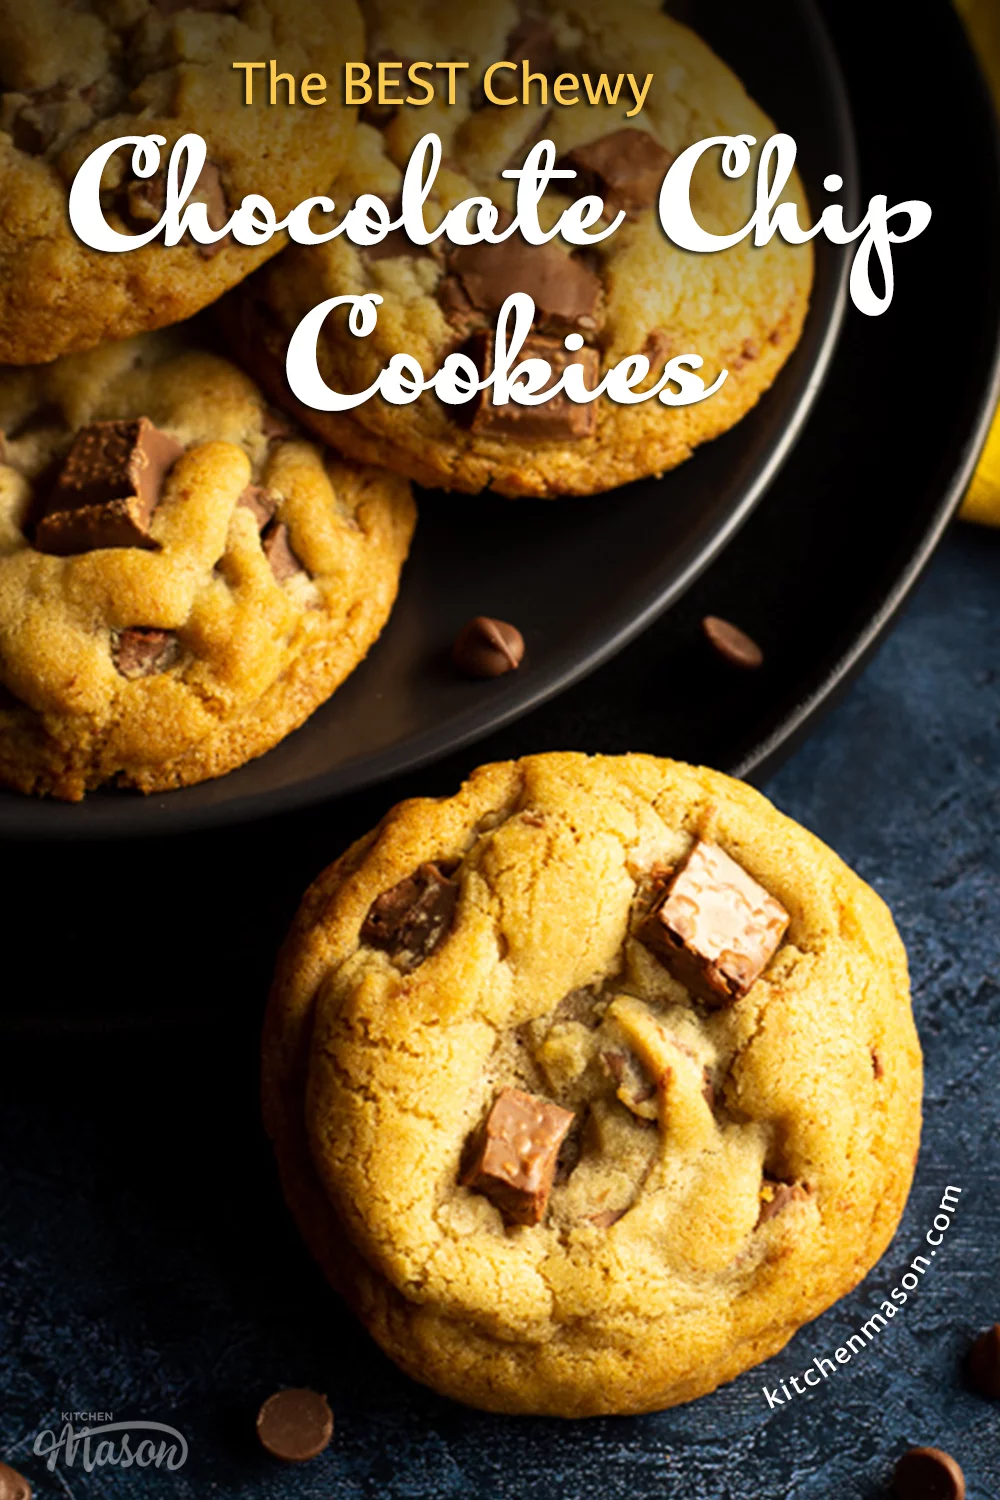
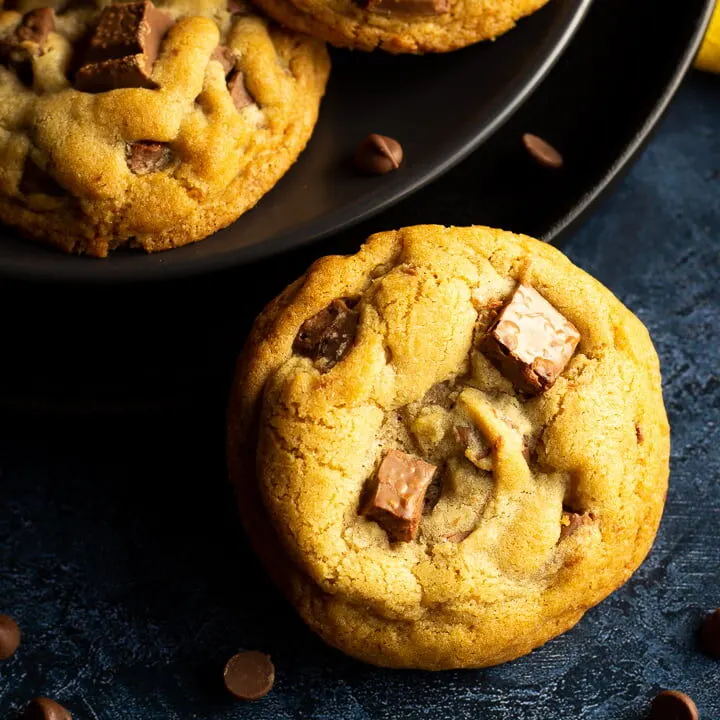
If you’re looking for wonderfully thick and chewy chocolate chip cookies, you’re in luck! This easy to follow recipe yields perfectly chewy cookies jam packed full of chocolate chips. And just like my chewy white chocolate chip cookies, boy are they GOOD!! Read on for the full recipe, tons of helpful tips and more!

Developed from years of frustration and determination – this is a recipe I’m CRAZY proud of! I have made many cookies in my time but the humble chocolate chip cookie is one I’ve always been determined to master. (Easier said than done!)

I’ve tried a lot of different recipes. Big, small, flat, different fillings. Even Levain cookies (the chunky US style). But none of them were truly what I was going for here.
Can't face cooking dinner on Fridays? 😩
Imagine a guilt free Friday night dinner, without the exhausting mental load. BYOD Fridays are a fun and supportive Friday night community for tired people who still need to cook, but really cba 💛
Join The CommunityI wanted them chewy in the middle with a little crunch on the edges. Packed FULL of chocolate chip goodness, and the perfect thickness.
Improving your baking knowledge is one way to achieve better, more consistent results. I urge you to check out baking for beginners if you’re lacking confidence.

Which is why I’m so proud to say that, after two weeks of experimenting, frustration, eureka moments and A LOT of calories consumed (about 25 cookies worth!), I finally did it. I created a chewy chocolate chip cookie recipe that’s easy to make, easily repeatable and makes the BEST cookies. No flat and greasy cookies here anymore! I’m SO excited to share this with you!!
What makes a cookie chewy or crispy?
It’s generally the balance of the sugars that determines whether a cookie will be chewy or crispy. More brown sugar and your cookies will be chewier, more white sugar and your cookies will be crispier.
How do cookies stay chewy?
Here’s a great tip for you! Store them in an airtight container (I prefer metal) at room temperature along with a slice of bread. I don’t quite understand the science behind it but it keeps them soft and chewy for much longer!


Should you chill cookie dough before baking it?
100% YES! It took me a while to learn this one (and I did, the hard way) but I can’t emphasise enough the difference it makes to the overall bake. Teamed up with having enough flour in your dough, chilling before baking makes a huge difference in preventing your cookies from going flat and greasy.
That being said, if you just don’t have the time – these air fryer cookies might be the answer. There’s no need to chill them and no waiting for the oven to preheat!

How long does it take cookies to bake?
In my opinion (unless you’re making giant cookies) a good cookie shouldn’t take longer than 8-10 minutes to bake. This, of course, depends entirely on the size of cookies you’re making and the temperature you’re cooking them at.


Why are my chocolate chip cookies flat and greasy?
I’ve come to learn that this could happen for a few different reasons.
- You need more flour in your dough.
- You’re baking them at too low a temperature.
- You haven’t chilled them before baking.
- You used margarine instead of real butter.


Are these not chocolatey enough for you?? How about trying these double chocolate cookies instead?!
How to make chewy chocolate chip cookies
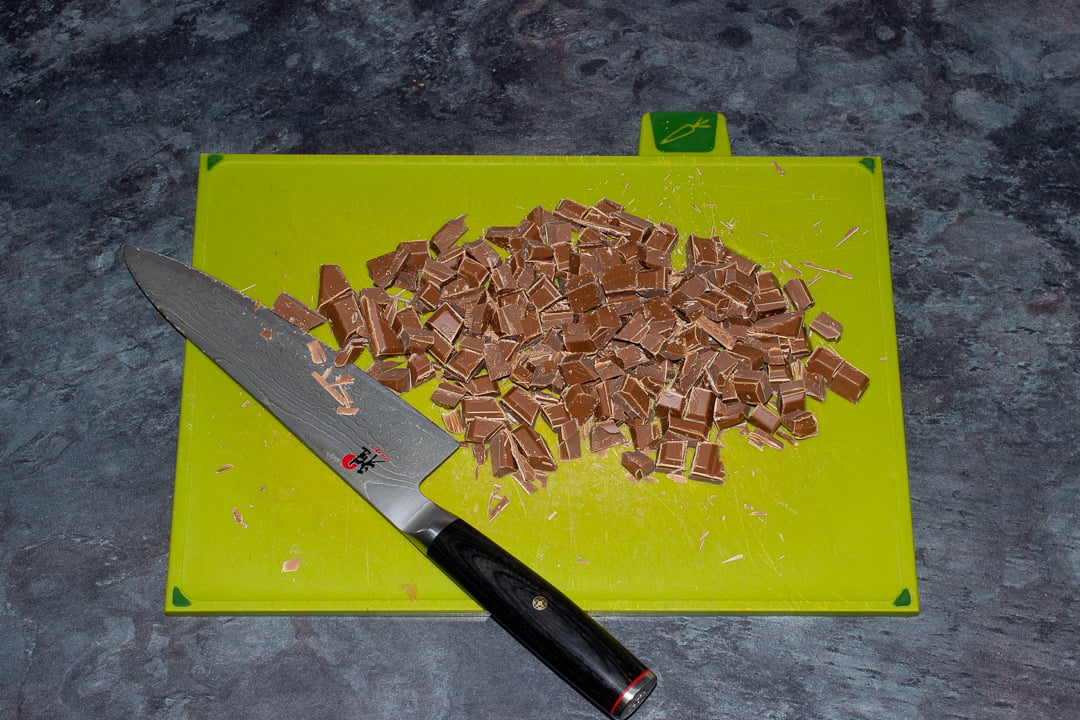
- Chop your chocolate into chunks and set aside.
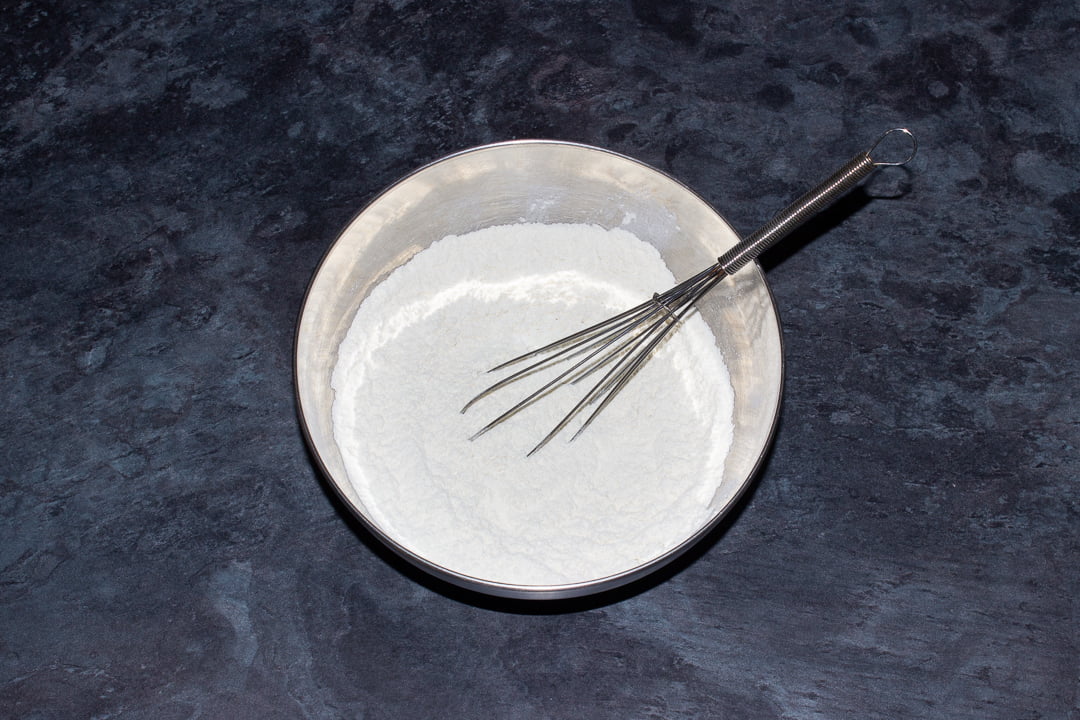
- Whisk flour, bicarbonate of soda and salt together in a bowl and set aside.
- Cream brown sugar, caster sugar and butter until light and fluffy.
- Beat in the egg and vanilla.
- Fold in half the flour, followed by the remaining half.
- Mix through the chocolate chunks.
- Cover and chill for 60 mins.
- Scoop into even sized balls and press more chocolate chunks into the top.
- Chill for 60 mins and preheat your oven.
- Bake for 8-10 mins until a light golden colour.
- Allow to firm up on the tray for a few minutes then transfer to a rack to cool completely.

Chewy chocolate chip cookie ingredients
Here’s everything you need to know about the ingredients needed for this recipe.
- Chocolate – Use the best you can afford. Chop up bars of chocolate instead of using chips for better texture.
- Flour – Use plain flour (all purpose in the US) for the best cookies.
- Bicarbonate of Soda – (Baking soda in the US) This gives the cookies a little lift during baking.
- Salt – You season your dinner so you should season your bakes!
- Brown Sugar – Soft light brown sugar gives a nice chew to your cookies.
- Caster Sugar – (Superfine in the US) Gives crispy edges, for a cookie that has it all!
- Butter – Use unsalted to give you more control over the salt content (and flavour).
- Egg – I use free range organic but whatever you have will work fine.
- Vanilla – Use a good quality one like Nielsen-Massey. You get what you pay for!

Recipe tips
After making SO many cookies, I’ve made a fair few mistakes over the years. So here’s my top tips for achieving perfect, chewy chocolate chip cookies!
- Use good quality chocolate. It’s a huge flavour in choc chip cookies and will make a big difference! (Lindt works VERY well!)
- Use an ice cream scoop to help keep your cookies all the same size.
- Take cold ingredients out the fridge 1 hour before use to come to room temperature.
- Don’t skip the chilling stages! This is imperative to achieving thick chewy cookies.
- Store with a slice of bread to keep them soft and chewy for longer.
- Hot spots in your oven? Turn the tray round half way through the cooking time to get a more even bake.
- Remember that all ovens vary so keep an eye on your cookies in the last few minutes to avoid disappointment!
- Allow your cookies to cool on the tray for a few minutes or they won’t be firm enough to transfer to a rack.
Other recipes you might like…
Chewy Chocolate Chip Cookies – Step by Step Picture Recipe
(For a printer friendly version, see the recipe card at the end of this post)
Please note, this recipe includes both UK metric and US Cup measurements.
BE AWARE THAT THERE IS A TOTAL OF 2 HOURS CHILLING TIME IN THIS RECIPE.
Ingredients
Here is what you will need to make 16 bars.
- 250g (8.8 oz) Good Quality Milk Chocolate
- 220g (1 + 3/4 Cups) Plain/All Purpose Flour
- 1 tsp Bicarbonate of Soda
- 1/4 tsp Salt
- 110g (1/2 Cup) Soft Light Brown Sugar
- 70g (1/3 Cup) Caster Sugar
- 110g (1/2 Cup) Unsalted Butter, room temperature
- 1 Egg, room temperature
- 1 tsp Vanilla Extract
Essential Equipment
- Chopping Board
- Sharp Knife
- Whisk
- Medium Bowl
- Electric Stand Mixer OR Large Bowl with Electric Hand Whisk
- Rubber Spatula
- Small Ice Cream Scoop
- Plate
- Large Baking Tray
- Silicone Baking Mat or Baking Paper
Cookie dough instructions
Let’s get started! First, chop your milk chocolate (250g | 8.8 oz) into chunks on a chopping board with a sharp knife. It doesn’t matter if some are small and some are big, it all adds to the texture. Set aside until we need them later.

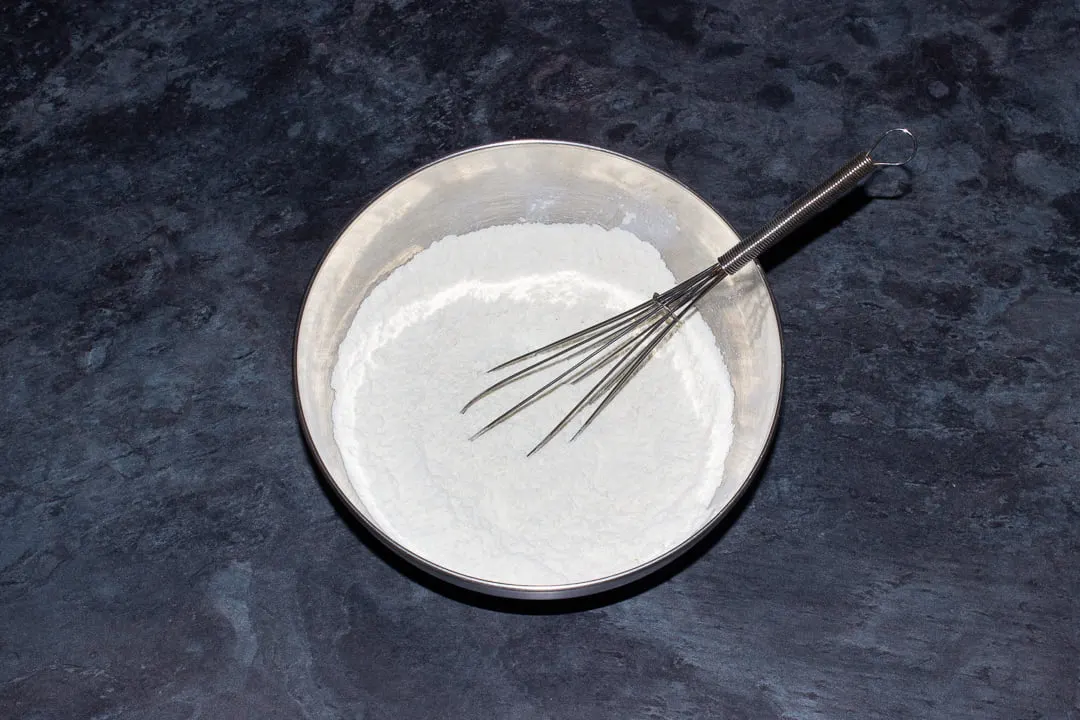
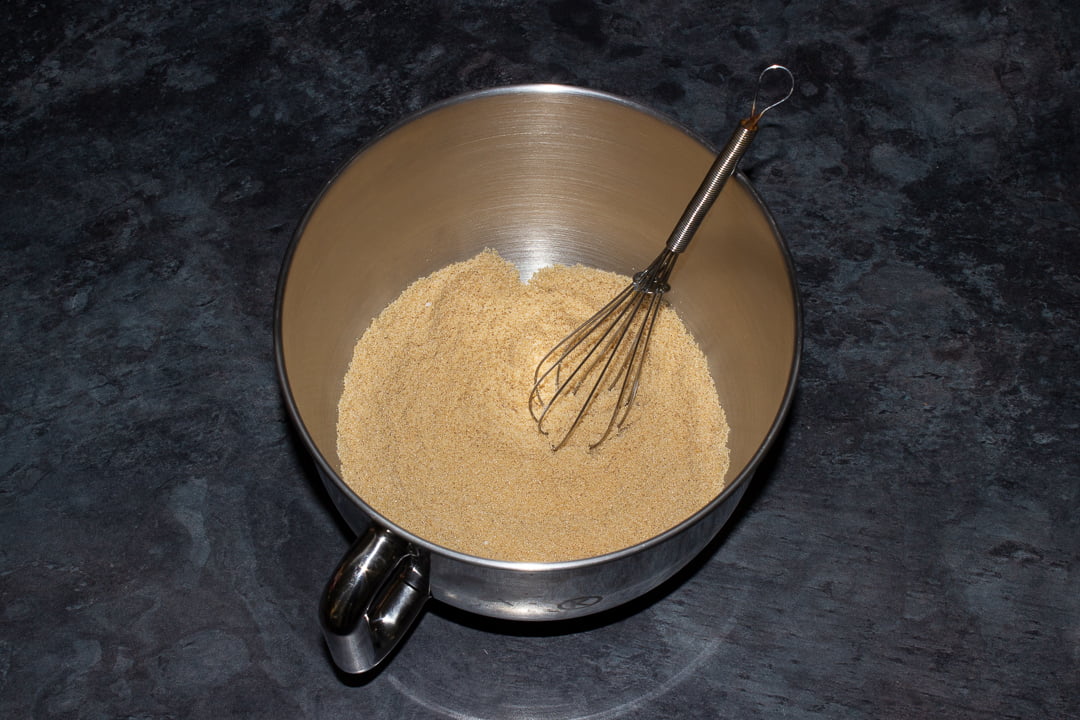
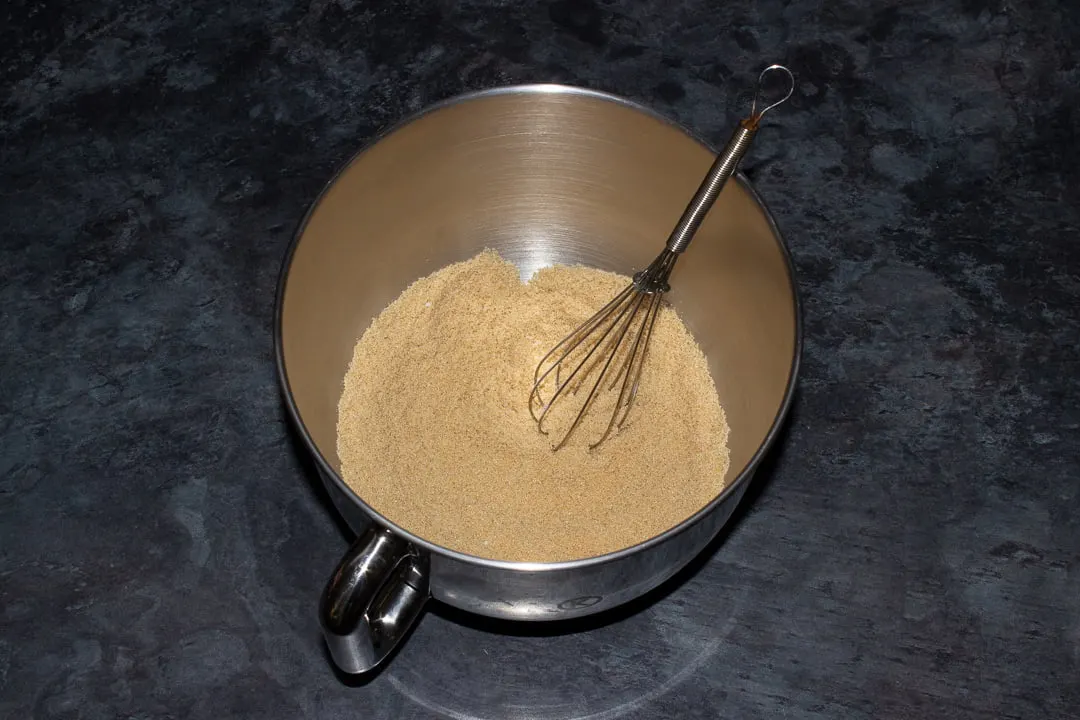
Then whisk together the flour (220g | 1 + 3/4 Cups), bicarbonate of soda (1 tsp) and salt (1/4 tsp) into a medium bowl. (Whisking aerates it a little and gets rid of any lumps.) Set to the side.
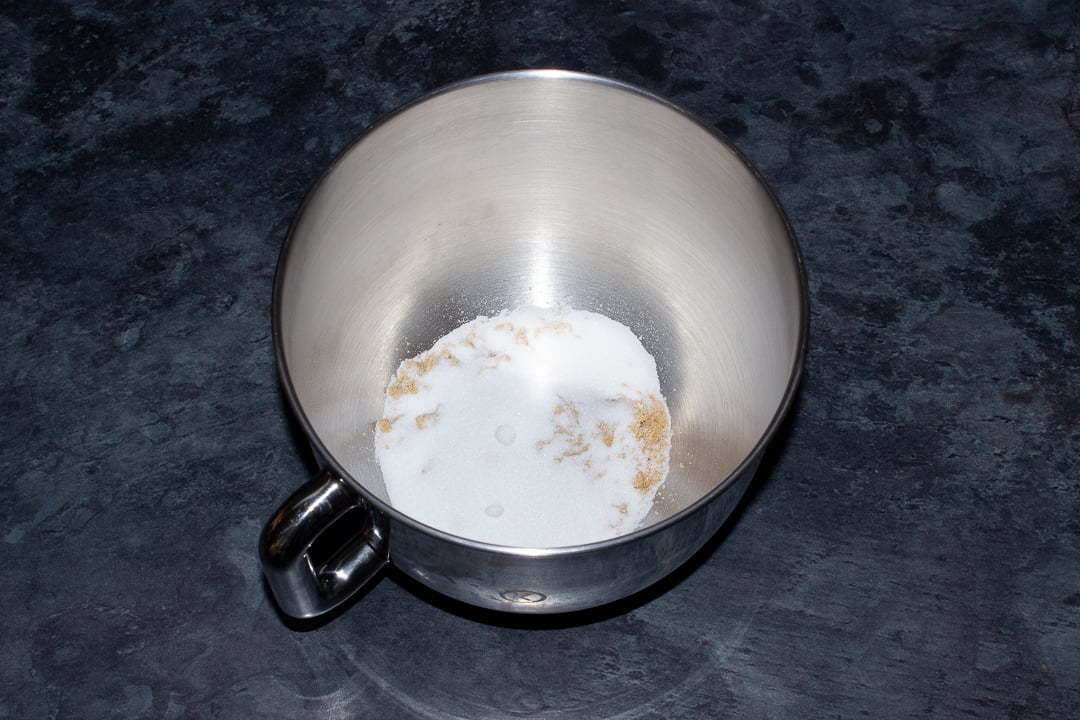
Next, weigh the brown sugar (110g | 1/2 Cup) and caster sugar (70g | 1/3 Cup) into the bowl of an electric stand mixer and whisk briefly to get rid of any lumps.

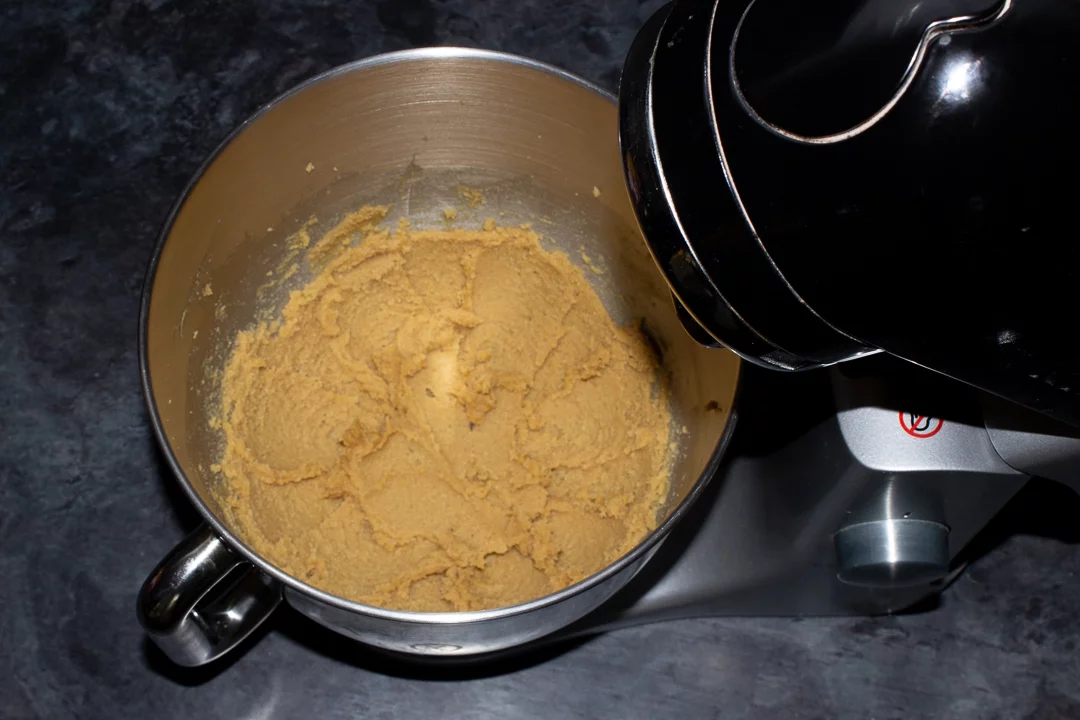
Cut the room temperature butter (110g | 1/2 Cup) into cubes and add to the sugar. (You can use a large bowl and an electric hand whisk if you don’t have a stand mixer.) Cream them together until they’re light and fluffy. It should take about 2 mins and you will likely need to scrape the bowl down once or twice.

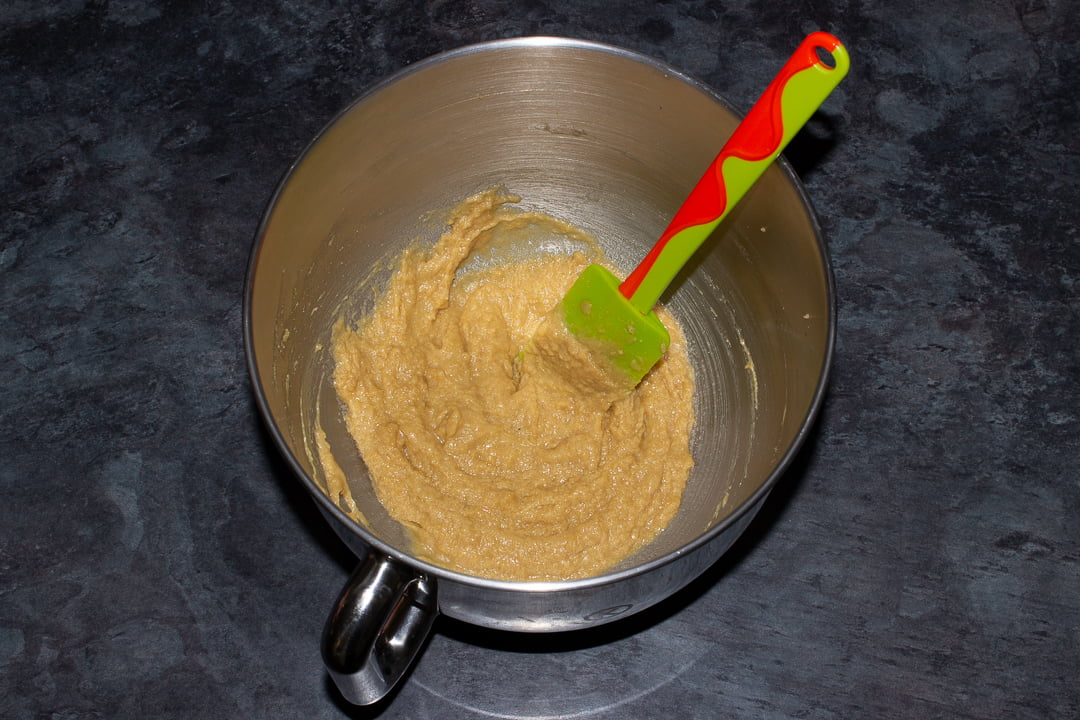
Time to crack in the egg (x 1) and add in the vanilla (1 tsp). Beat it in by hand with a rubber spatula but go easy – beat gently, until it’s only JUST blended in. It will look a little ‘scrappy’.

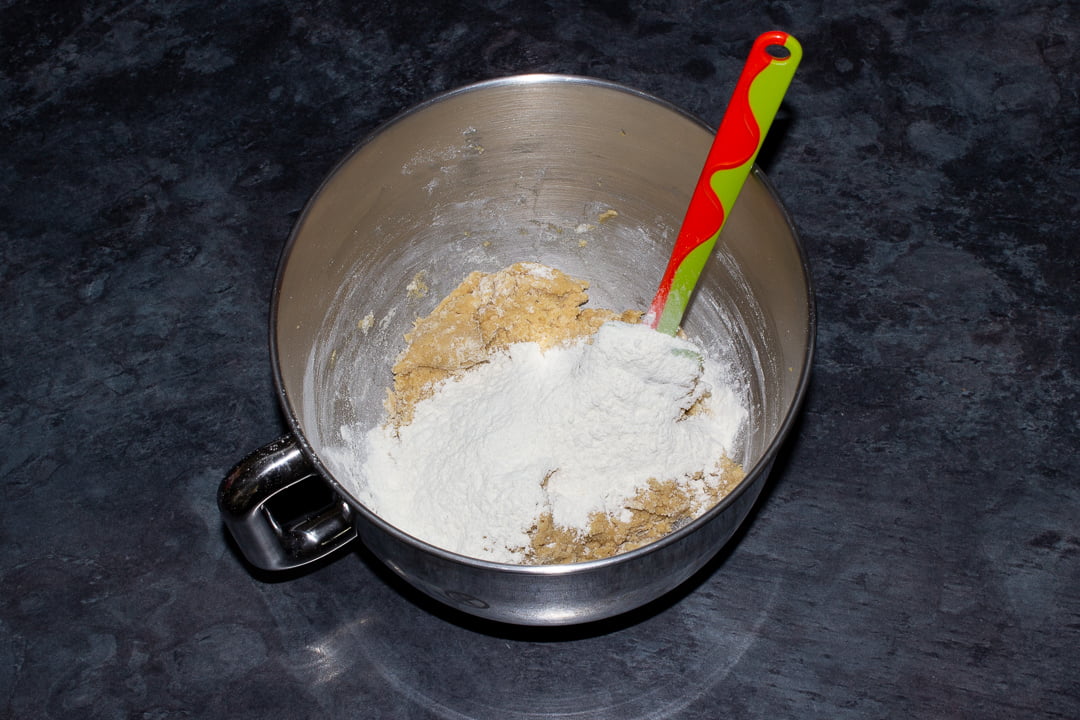
Back to the flour we prepared earlier. Add half of it into the bowl and gently fold it in with your spatula.

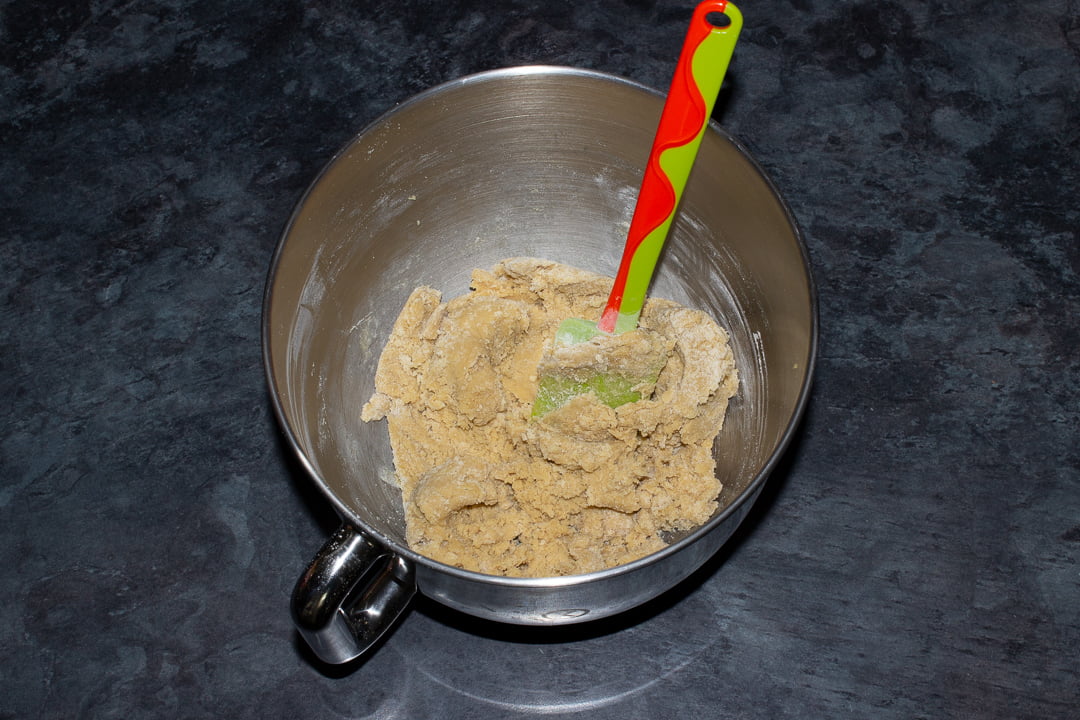
Now add the remaining half…

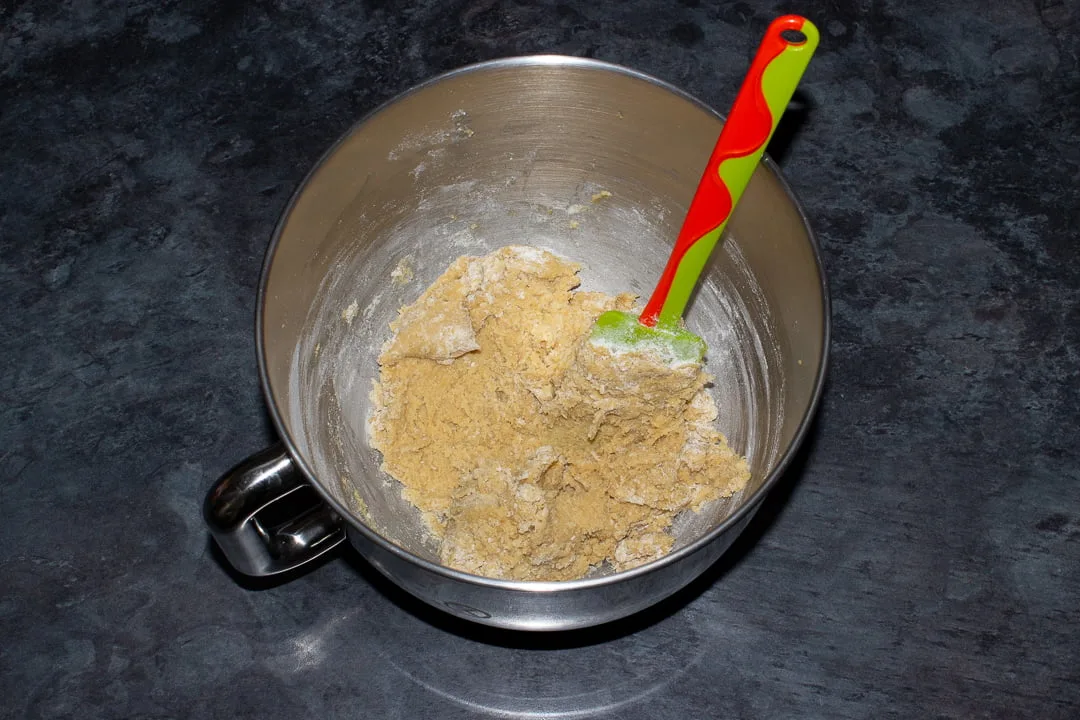
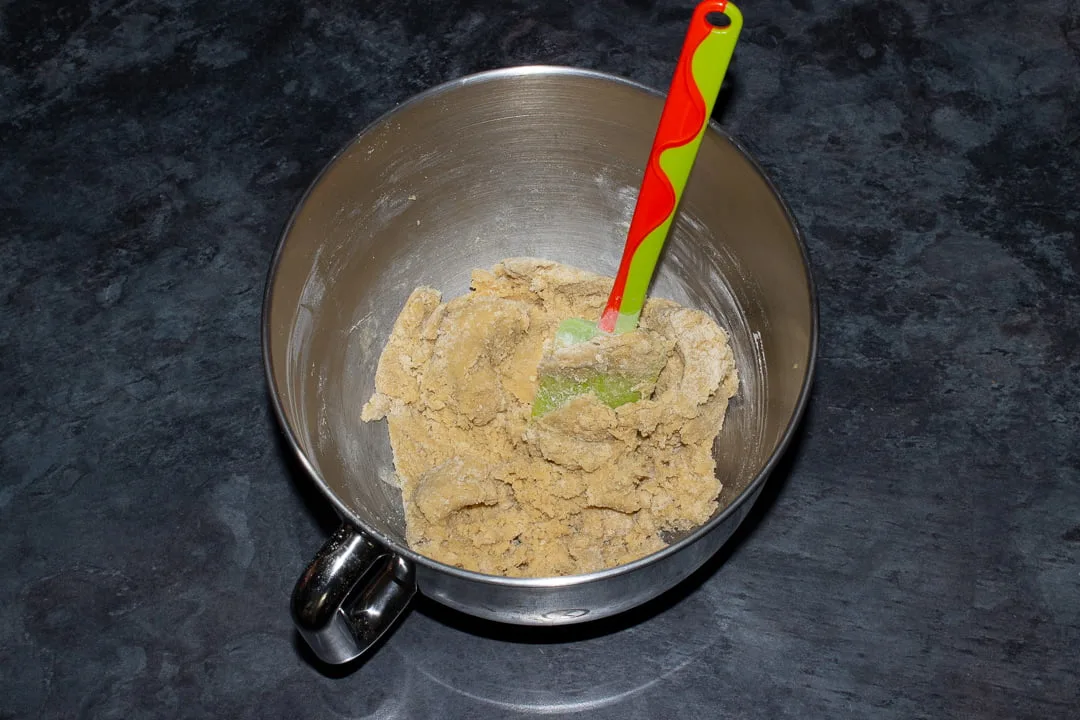
And fold in gently until it looks like this… DON’T over mix it.
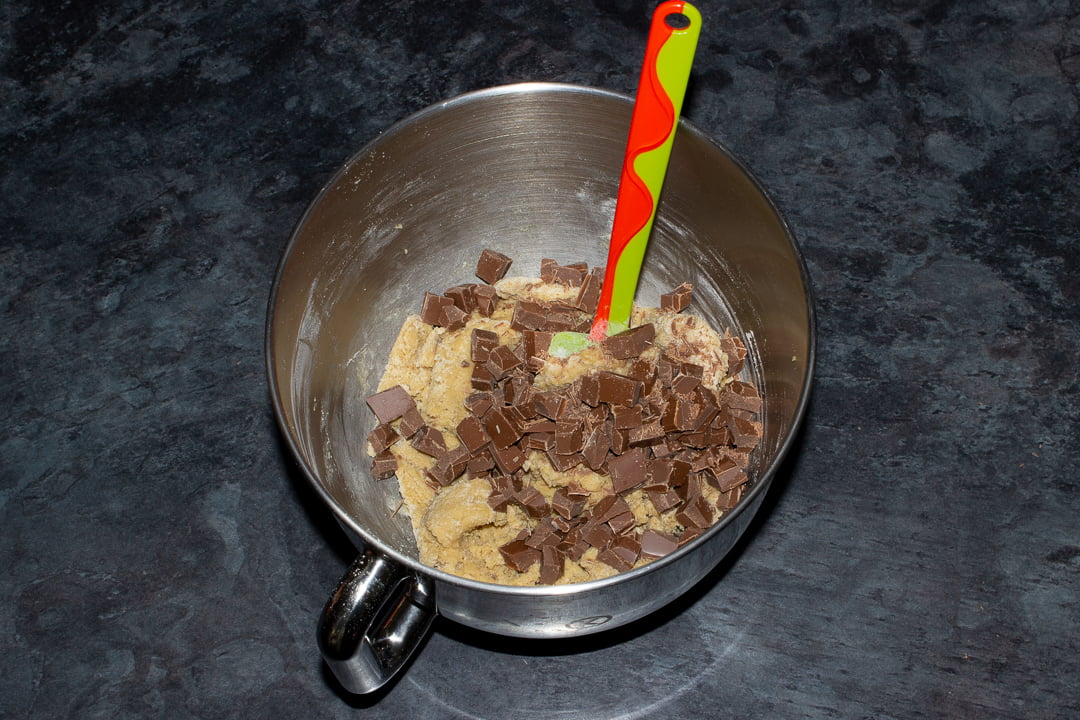
At last, it’s time for those chocolate chunks! Save a few to press into the tops of your cookies later then tip the rest into the cookie dough and gently fold them through.

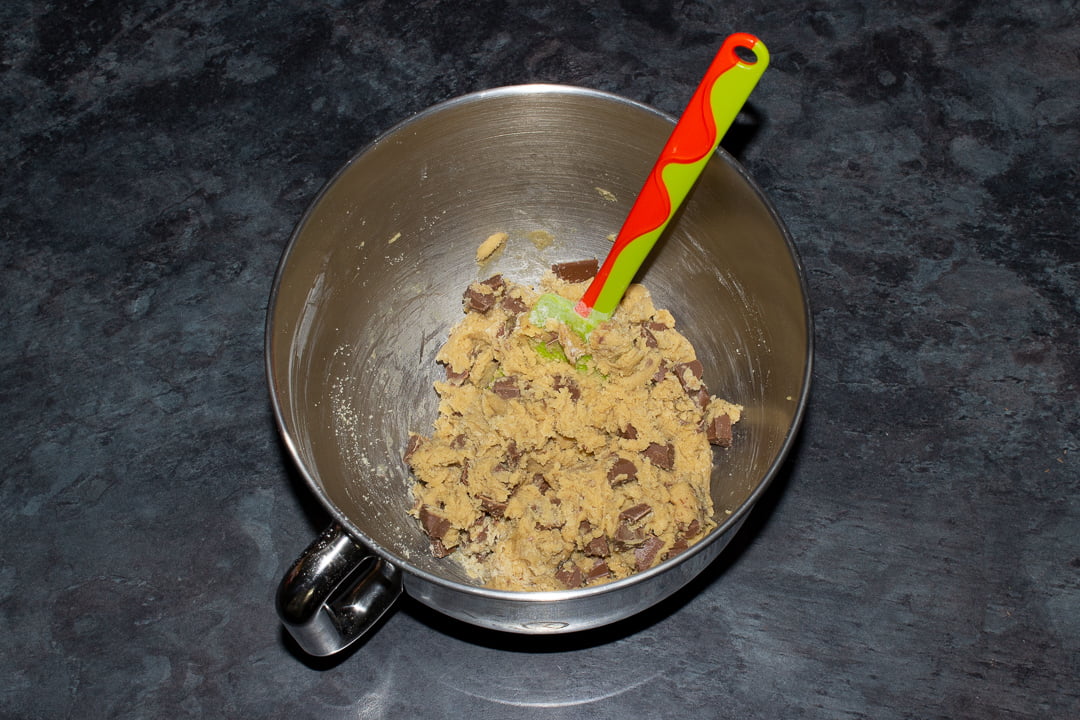
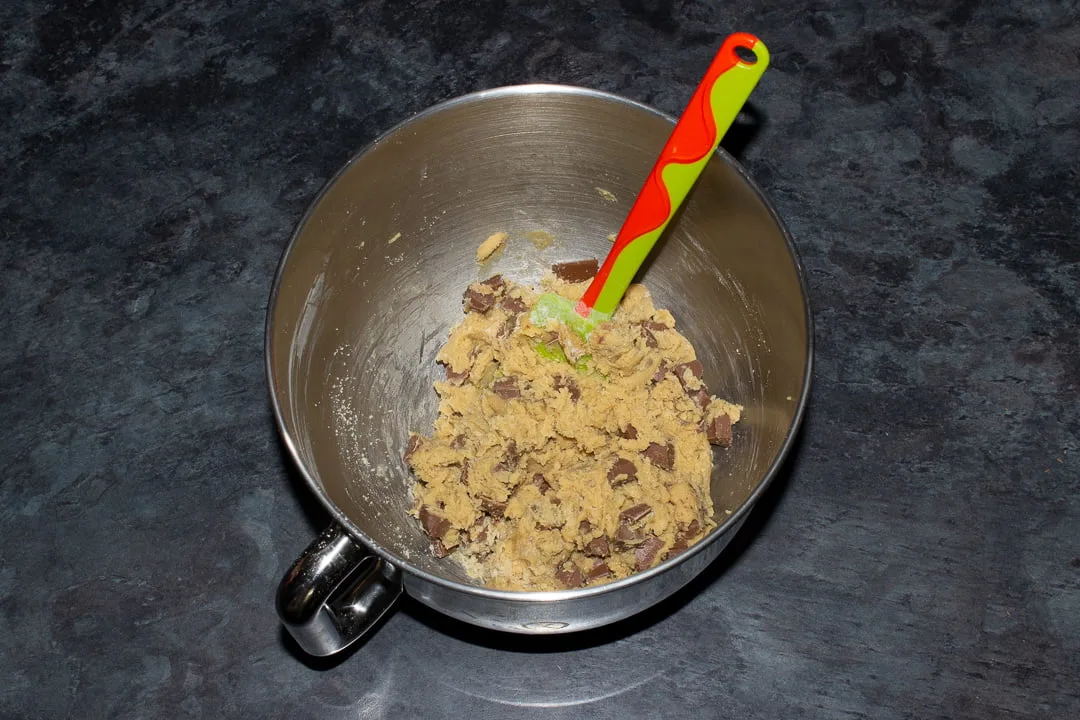
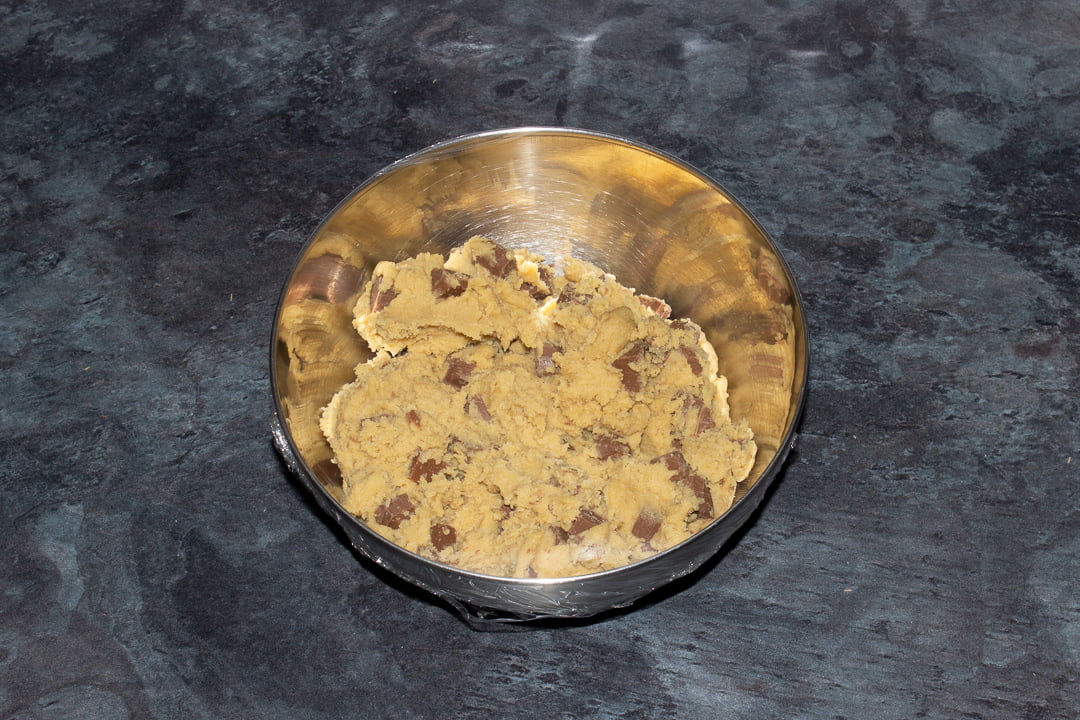
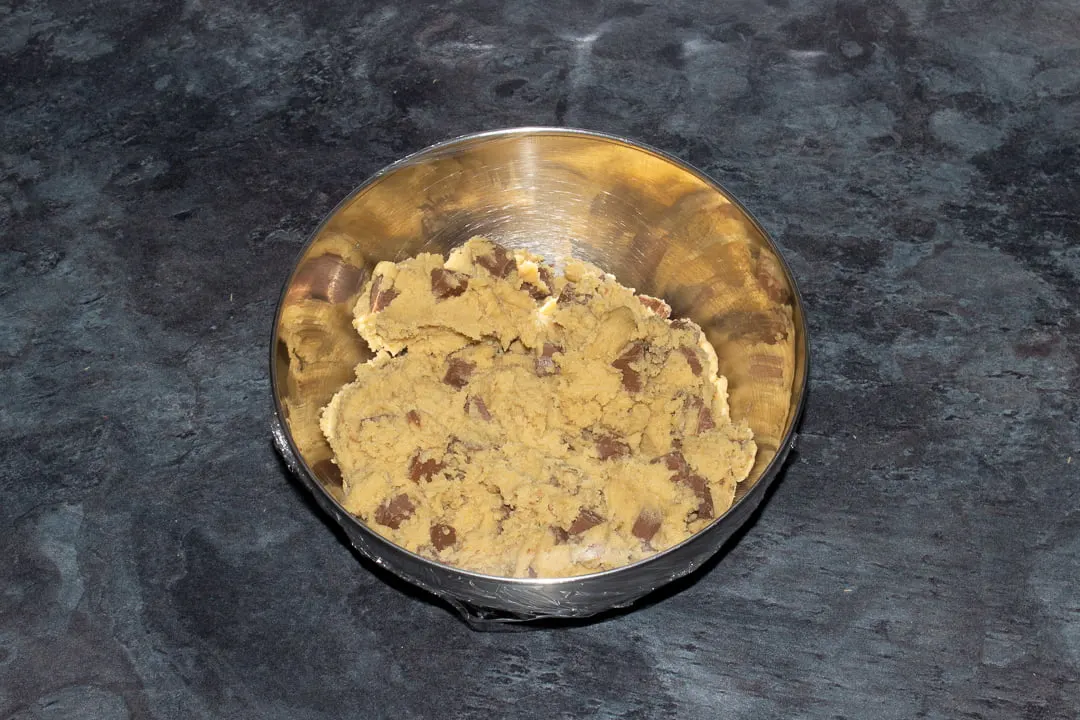
Then tip your chocolate chip cookie dough into the medium bowl from earlier, cover and chill for 1 hour.
When the time is up, remove the dough from the fridge and shape into evenly sized balls using a small ice cream scoop. Place your cookies onto a lined plate.

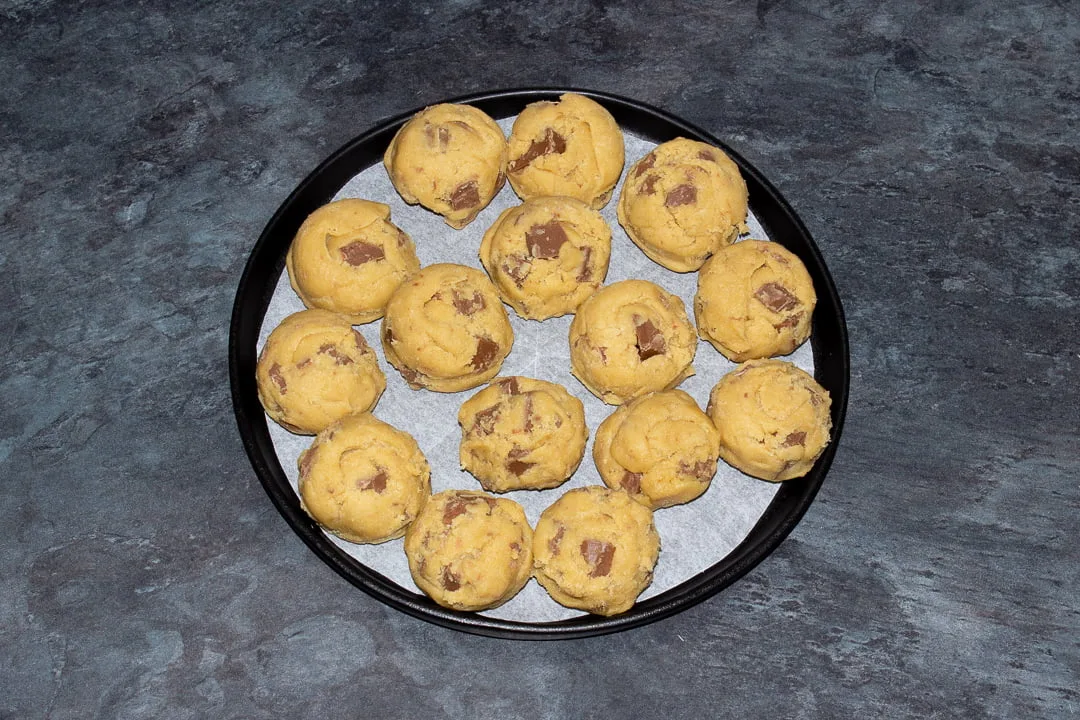
If you haven’t already eaten them, press the chocolate chunks you reserved earlier into the tops of each cookie.

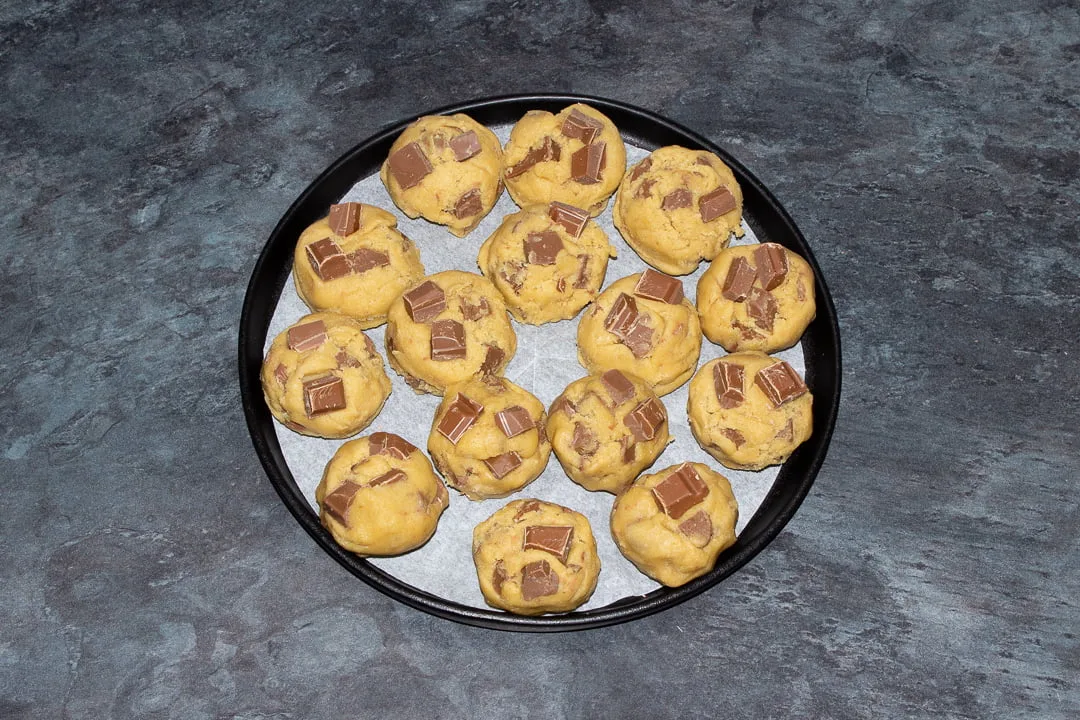
Now pop them back into the fridge for 1 hour and preheat your oven to 180ºC/Fan 170ºC/356ºF.
Baking instructions
When the time is up and your cookies are sufficiently chilled, line a large baking tray with a silicone baking mat or baking paper. Space a few cookies out evenly across the tray, leaving space for spreading. You will likely need to cook in batches so don’t overcrowd the tray!
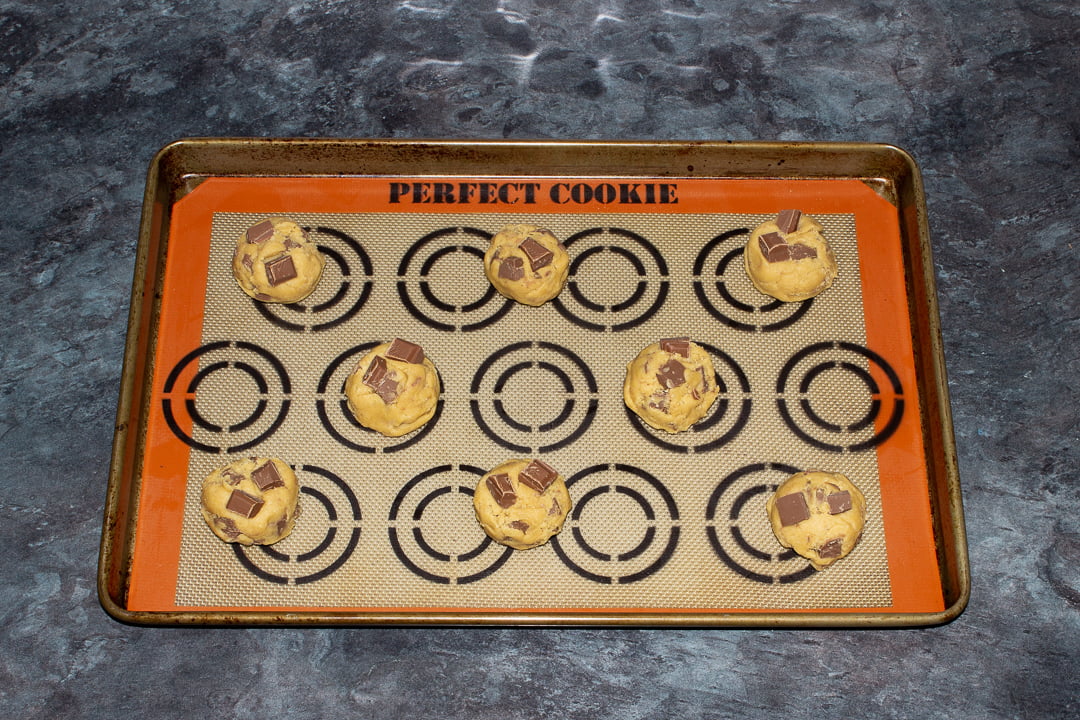
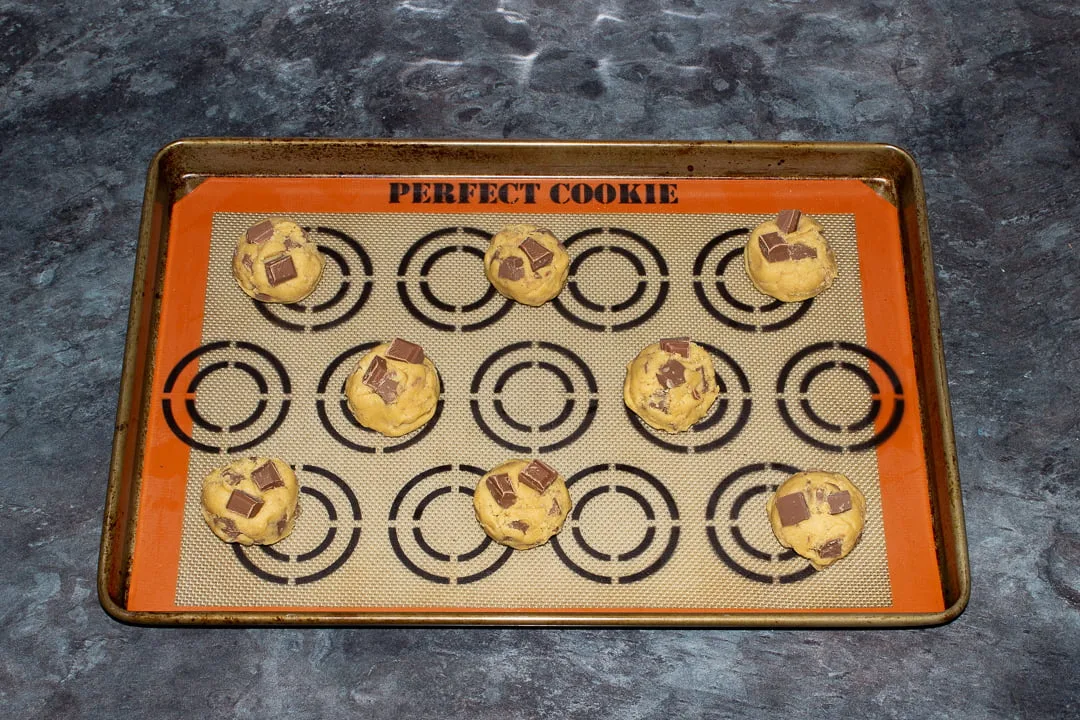
Bake for 8-10 minutes until they’re a light golden colour. If you have hot spots in your oven, you may want to turn the tray round halfway through the cooking time for a more even bake.
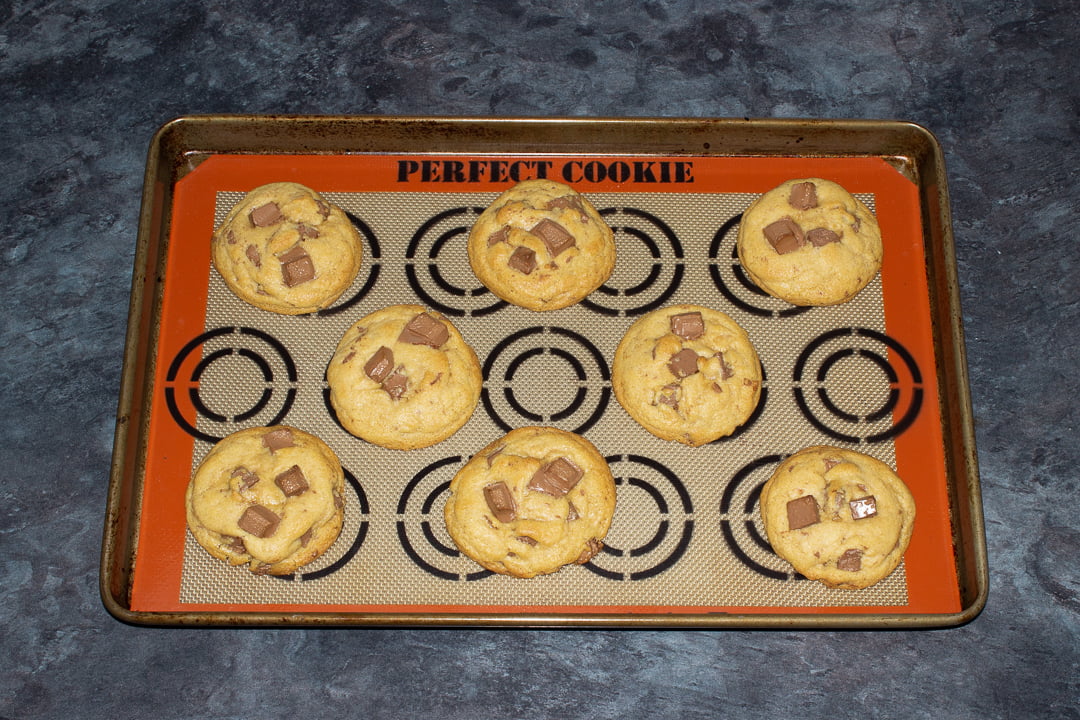

Allow your cookies to firm up on the baking tray for a few minutes before transferring to a wire rack to cool completely.
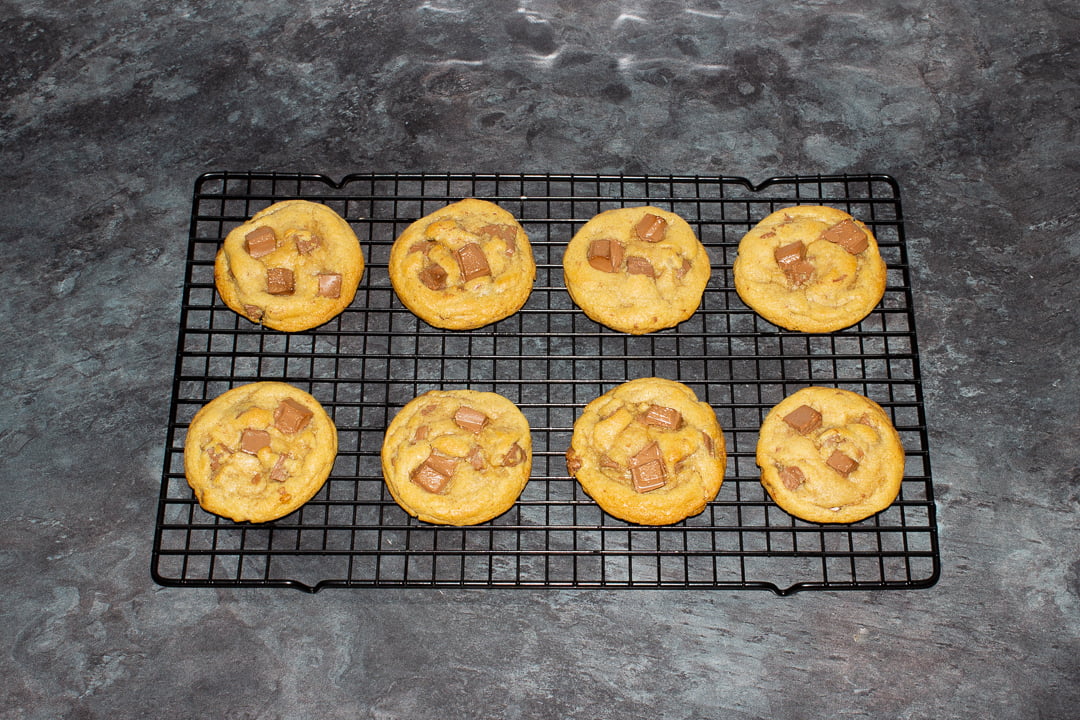
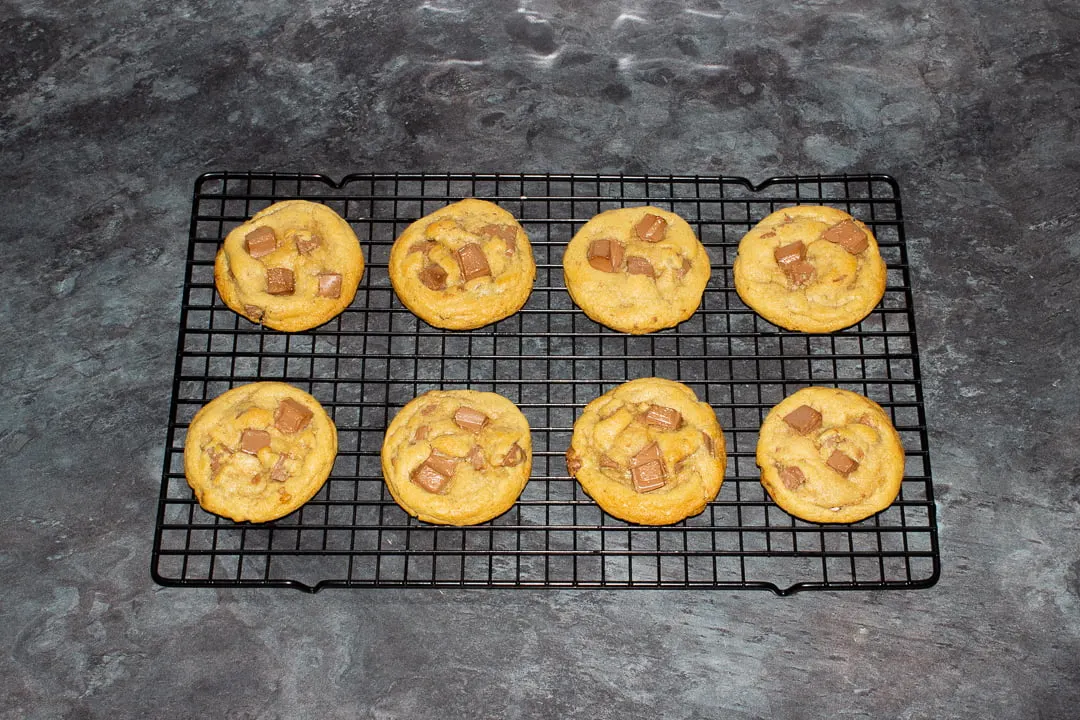
Once completely cooled, store your cookies in an airtight container (I prefer metal) at room temperature and consume within 5 days. If you want to keep them soft and chewy for longer – add a slice of bread in there. Sounds crazy but it works!

Have you made this recipe?
Have you made these AMAZING chewy chocolate chip cookies? I’d love to know if you have! Send me your pics, comments and questions on Facebook, Twitter and Instagram or email me at emma@kitchenmason.com.

Loved this recipe? Pin it!


Chewy Chocolate Chip Cookies Recipe
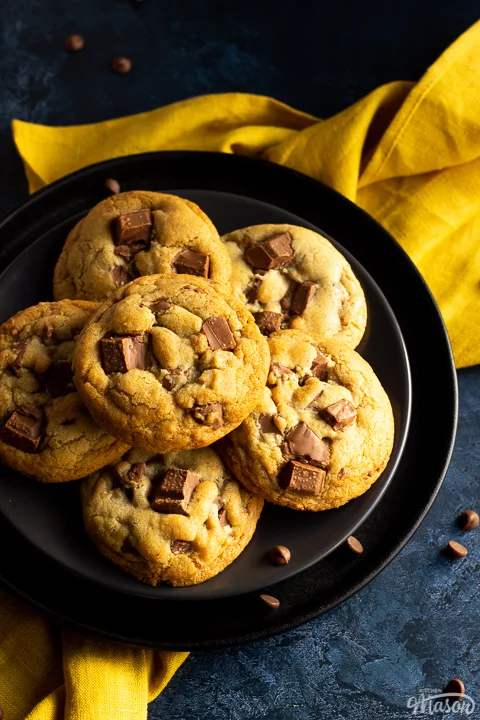
These thick, golden, chewy chocolate chip cookies are the perfect feel good pick me up! Share with friends and family or simply treat yourself.
Ingredients
- 250g (8.8 oz) Good Quality Milk Chocolate
- 220g (1 + 3/4 Cups) Plain/All Purpose Flour
- 1 tsp Bicarbonate of Soda
- 1/4 tsp Salt
- 110g (1/2 Cup) Soft Light Brown Sugar
- 70g (1/3 Cup) Caster Sugar
- 110g (1/2 Cup) Unsalted Butter, room temperature
- 1 Egg, room temperature
- 1 tsp Vanilla Extract
Essential Equipment
- Chopping Board
- Sharp Knife
- Whisk
- Medium Bowl
- Electric Stand Mixer OR Large Bowl with Electric Hand Whisk
- Rubber Spatula
- Small Ice Cream Scoop
- Plate
- Large Baking Tray
- Silicone Baking Mat or Baking Paper
Instructions
- Chop the chocolate into chunks on a chopping board with a sharp knife. Set aside.

- Whisk the flour, bicarbonate of soda and salt together in a medium bowl. Set aside.
- Whisk the brown sugar and caster sugar in an electric stand mixer (or large bowl with an electric hand whisk) to get rid of any lumps.
- Cube the butter and cream together with the sugars until light and fluffy. (About 2 mins.)
- Add the egg and vanilla and gently beat in with a spatula until just blended. Don't over mix.
- Tip in half the flour and fold in gently. Add the remaining flour and fold in until there are no more streaks of flour.
- Save some chocolate chunks to press into the top and fold the rest into the dough.
- Tip the dough into a bowl, cover and chill for 1 hour.
- Shape the dough into evenly sized balls using a small ice cream scoop and place on a lined plate.
- Press the reserved chocolate chunks into the tops and return to the fridge to chill for 1 hour. Preheat your oven to 180ºC/Fan 170ºC/356ºF.
- Line a baking tray with a mat or baking paper and space cookies apart, allowing room for spreading. (You will need to cook in batches.)
- Bake for 8-10 mins until a light golden colour. Turn the tray round half way through if you have hot spots in your oven.
- Leave the cookies on the tray to firm up for a few minutes before transferring to a wire rack to cool completely.
Notes
If you would rather use a more in depth picture recipe, please see the main body of this post. Where you’ll also find lots of extra FAQs and helpful tips, should you need them.
Please note, this recipe includes both UK metric and US Cup measurements.
Storage
Store in an airtight container at room temp (my favourite is a metal tin) and consume within 5 days.
Tips
- Use good quality chocolate. It’s a huge flavour in choc chip cookies and will make a big difference! (Lindt works VERY well!)
- Use an ice cream scoop to help keep your cookies all the same size.
- Take cold ingredients out the fridge 1 hour before use to come to room temperature.
- Don’t skip the chilling stages! This is imperative to achieving thick chewy cookies.
- Store with a slice of bread to keep them soft and chewy for longer.
- Hot spots in your oven? Turn the tray round half way through the cooking time to get a more even bake.
- Remember that all ovens vary so keep an eye on your cookies in the last few minutes to avoid disappointment!
- Allow your cookies to cool on the tray for a few minutes or they won’t be firm enough to transfer to a rack.
Recommended Products
As an Amazon Associate and member of other affiliate programs, I earn from qualifying purchases at no extra cost to you.
Nutrition Information:
Yield: 15 Serving Size: 1Amount Per Serving: Calories: 247Total Fat: 11gSaturated Fat: 7gTrans Fat: 0gUnsaturated Fat: 3gCholesterol: 32mgSodium: 106mgCarbohydrates: 33gFiber: 1gSugar: 20gProtein: 3g
Nutritional information on kitchenmason.com should only be used as a general guideline, I am not a certified nutritionist. Please always check labels for allergens where applicable.

Emma is a British recipe writer, home cook, and founder of Kitchen Mason. For over 15 years, she has been creating simple, comforting recipes and practical kitchen tips that help tired, everyday people make dinner feel easier and more enjoyable again. Passionate about British home cooking, Emma shares reliable recipes, comforting classics, and realistic kitchen guidance designed for real life. Her work has also been featured in publications including Food Network, Cosmopolitan, and The Huffington Post.
Knowledgeable On: British home cooking, Easy dinner ideas, Comford food recipes, Recipe writing
Mathew
Thursday 15th of August 2024
Another great recipe - easy to make and fantastic results. If you like cookies - you won't be disappointed!!
Emma
Thursday 15th of August 2024
Hi Mathew. Aww thank you SO much! I'm really pleased you love my recipe so much :) Emma x
Karen
Friday 15th of September 2023
Hi Emma, can’t wait to try this recipe! Just wondered if you can freeze the chilled cookies and bake them as and when needed. If so, how long and at what temperature should I bake them? Many thanks 😊
Emma
Friday 15th of September 2023
Hi Karen. Yes! You can freeze these cookies in a bag or airtight tub for up to 2 months. I'd keep the temperature the same, and maybe add 2-3 mins onto the cooking time. But keep a close eye on the first batch, just in case, as all ovens/ingredients vary. Emma x
Paul
Saturday 30th of April 2022
Thank you Emma, these have that perfect texture I have been searching for. I added 2 tablespoons of dark cocao powder in the dry mix and they came out delicious. 10/10. The chilling is the key, the anticipation immense, the best I've made so far.
Emma
Saturday 30th of April 2022
Hi Paul. Oh I’m SO pleased you love my recipe and it worked so well for you!!! Love the addition of the cocoa powder :) Emma x
Davina
Monday 17th of May 2021
Thank you for your explanation on making these cookies. I was just wondering why do you chill the dough before and after you roll the dough into balls Step 8-10. What happens if you skip step 8?
Emma
Monday 17th of May 2021
Hi Davina. It's just to guarantee that the cookies are properly chilled before baking. If not, it will result in flat, greasy cookies instead of nice chunky cookies. The dough can be quite difficult to handle before chilling too. Emma x