


This post may contain affiliate links. Where I make a small commission on purchased items, at no extra cost to you. See my disclosure for details.
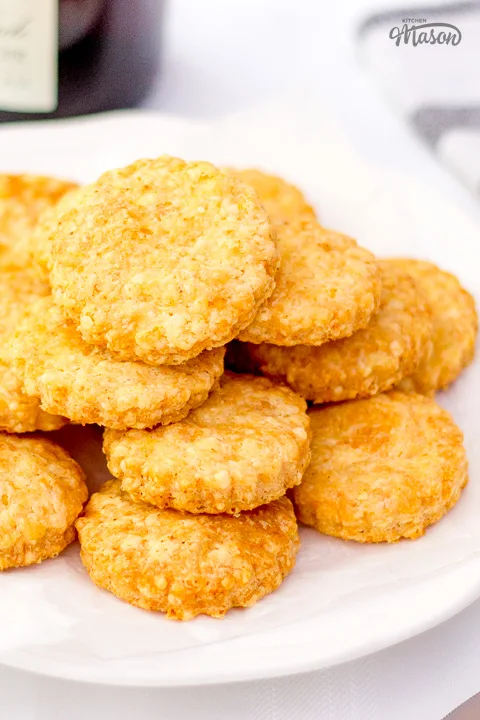
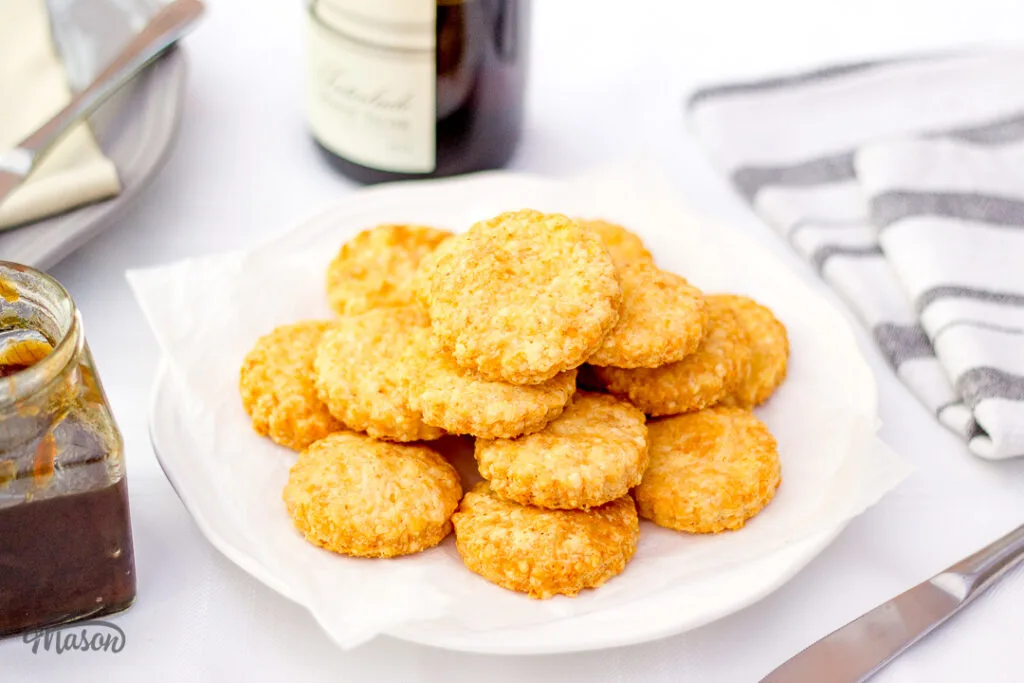
Need a savoury snack to rival ALL snacks? These gorgeous cheese biscuits are IT! Light, flaky and packed with flavour, I guarantee you’ll make these time and time again. Keep reading for the easy recipe, helpful tips and more…


Why you’ll love this recipe
I remember these being dished out at family parties when I was a kid. They were SO addictive in the best possible way!
Crammed full of cheese with hints of garlic and onion, there’s no shortage of flavour here. Ideal both on their own or with chutneys and cold cuts.
They’re essentially a smaller, more bitesize version of my Gran’s cheese scones. Not snappy to the bite, like crackers or spicy rosemary thins. Trust me, you’re going to LOVE them!


Ingredients
Confused about what ingredients to buy? Not sure about a substitution? Here’s everything you might need to know…
- Flour – Plain/all purpose flour is all that’s needed. Don’t switch for self raising, as this will mess with the texture.
- Dried Flavours – I went with onion and garlic powders. You’re welcome to add in any dried herbs you like too!
- Butter – As cheese is very salty, I tend to use unsalted butter for these. Salted would still work if that’s all you have though.
- Cheese – This needs to be a strong cheese for best flavour. Extra mature works perfectly, but don’t use a mild or medium cheddar.
- Parmesan – This packs a lot of flavour in a small quantity, don’t leave it out. Alternatively, you could use pecorino romano or grana padano.
- Egg – We only need the yolk to add a little richness to the dough. Why not use up the leftover whites to make some chewy meringues?!
Emma’s top tips
Here are tips you’ll find helpful when making cheese biscuits.
- Change up the flavour by adding extra dried herbs and spices. Think rosemary, thyme, paprika or cumin!
- Don’t have a food processor? You can just use your hands and a large mixing bowl. A pastry blender would also help. (Affiliate link.)
- Using cold butter straight from the fridge tends to work much better than room temperature butter for cheese biscuits.
- Don’t over mix it in the food processor, otherwise you will over work the flour. This makes for dense and chewy cheese biscuits… we want light and flaky!
- These cheese biscuits don’t spread much at all during baking, so no need to space them miles apart on the tray.

Timings
Have limited time? Struggle with recipe timings? Or juggling around other things? Here’s some time managing info to make your life easier!
- Making the dough should take around 5-10 mins.
- Cutting the biscuits will take roughly 5-10 mins.
- Preheating the oven and chilling the biscuits will take about 10-15 minutes.
- Baking the cheese biscuits takes about 15 minutes.
Easy Cheese Biscuits – Step by Step Picture Recipe
(For a printer friendly version, see the recipe card at the end of this post)
Please note, this recipe includes both UK metric and US Cup measurements.
Here is what you will need to make approx 16 – 20 (easily doubled.)
Ingredients
- 85g (2/3 Cup) Plain Flour
- Salt 1/2 tsp
- 1/2 tsp Garlic Powder
- 1/2 tsp Onion Powder
- 45g (1/8 Cup + 1 tbsp) Unsalted Butter, cubed
- 80g (3/4 Cup) Strong Cheddar Cheese
- 20g (4 tbsp) Freshly Grated Parmesan Cheese
- 1 Egg Yolk
- 1 tbsp Water
Essential Equipment
- Food Processor
- Cling Film or Baking Paper
- Rolling Pin
- 5.5cm Cookie Cutter (I used a fluted one)
- Baking Tray
Instructions
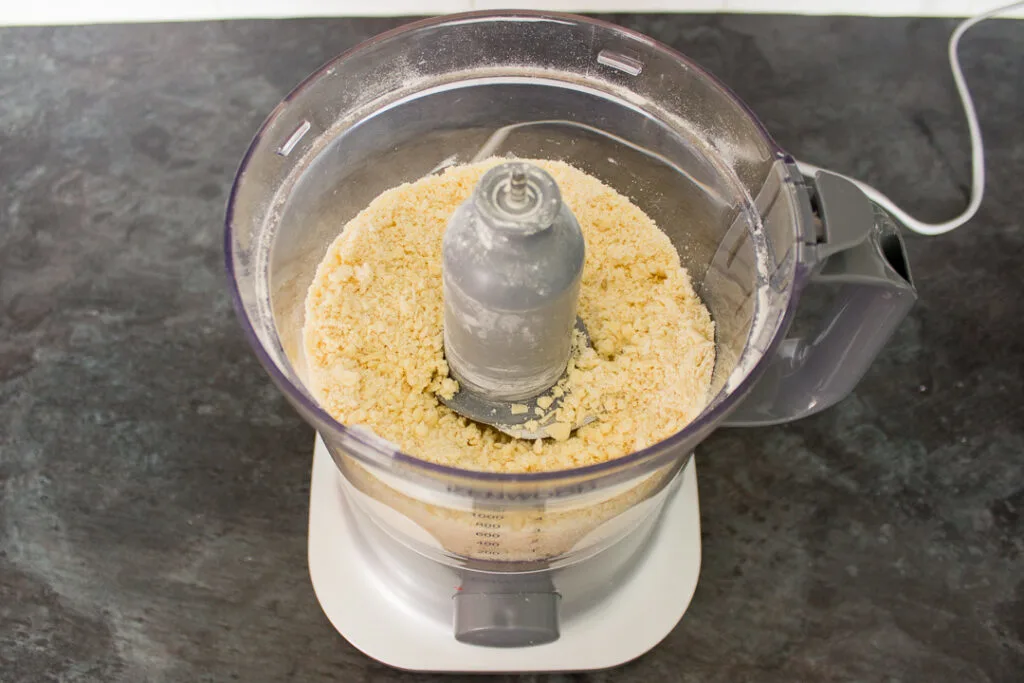
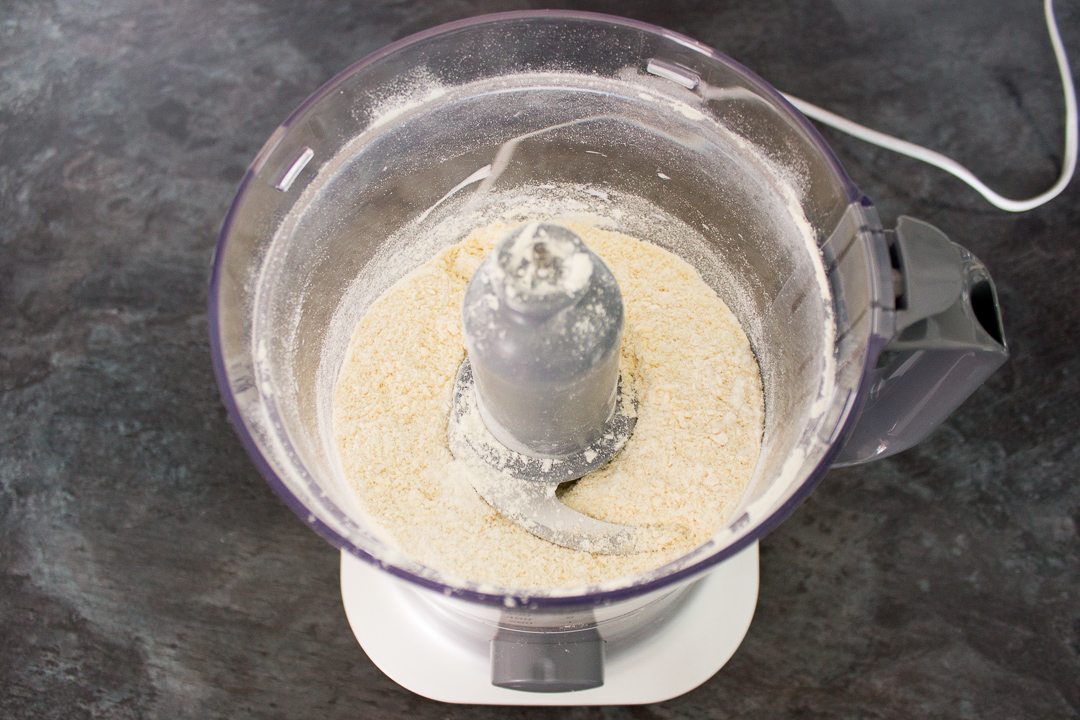
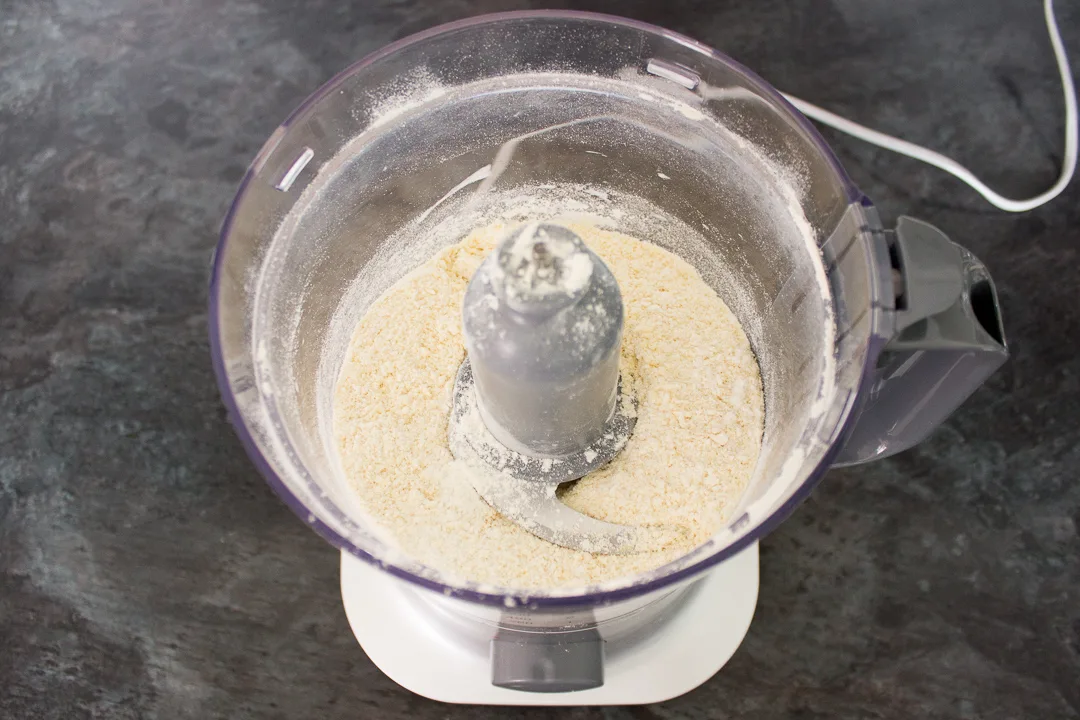
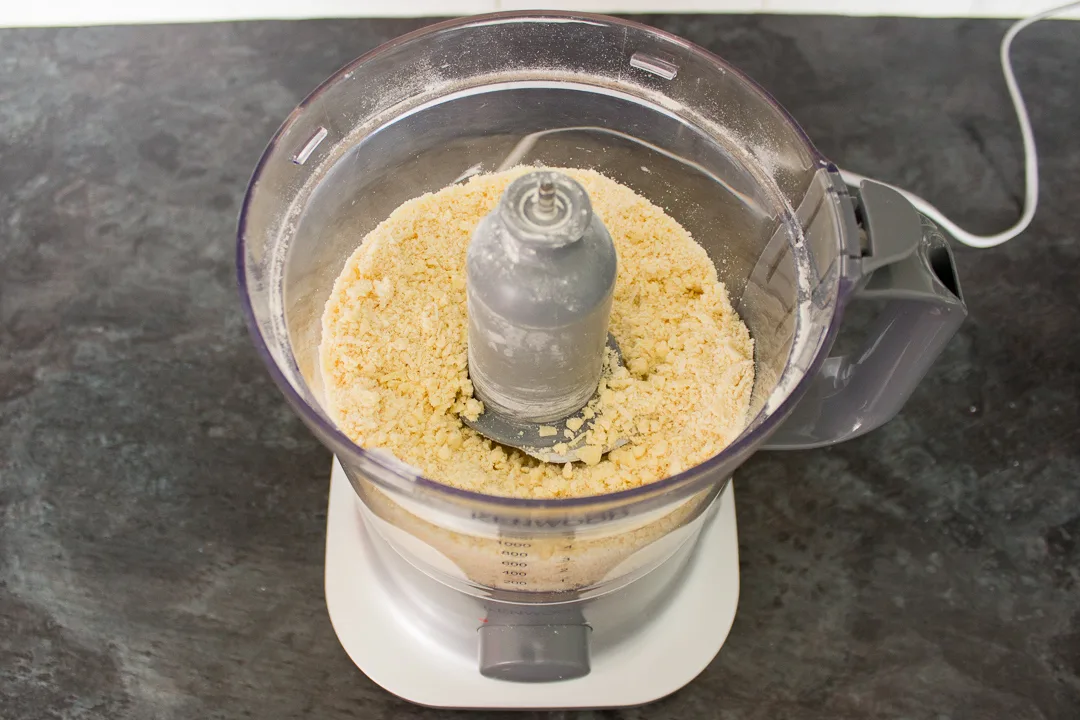
Place the flour (85g | 2/3 Cup), salt (1/2 tsp), garlic powder (1/2 tsp), onion powder (1/2 tsp) and cubed butter (45g | 1/8 Cup + 1 tbsp) into a food processor. Pulse until it looks like fine breadcrumbs.
Then add in the cheddar (80g | 3/4 Cup) and parmesan cheese (20g | 4 tbsp), and pulse again until it resembles fine crumbs again.

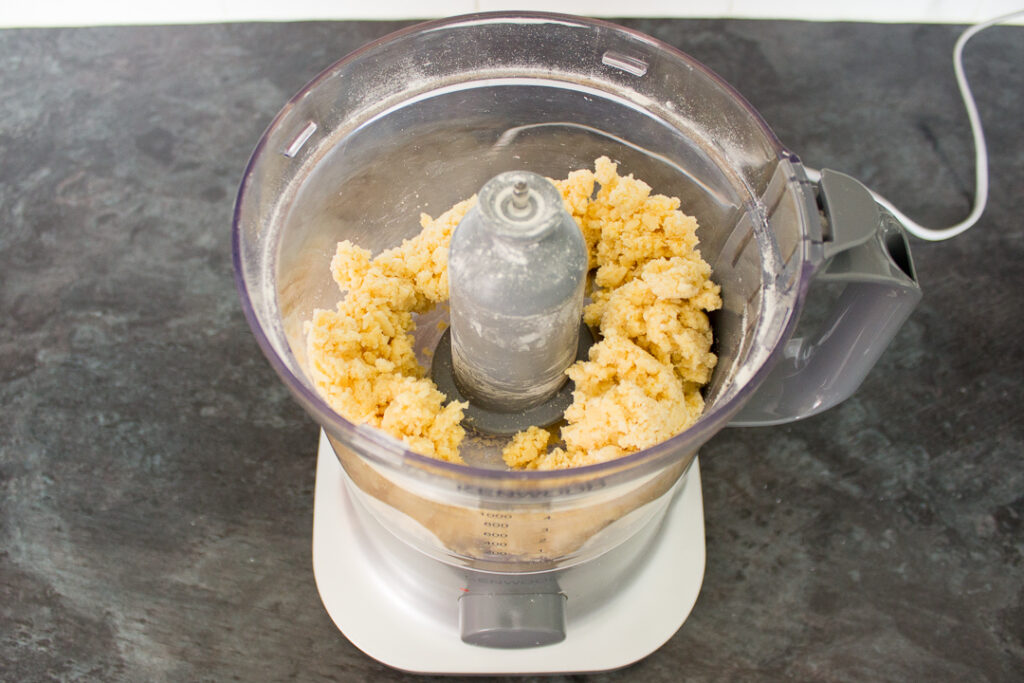
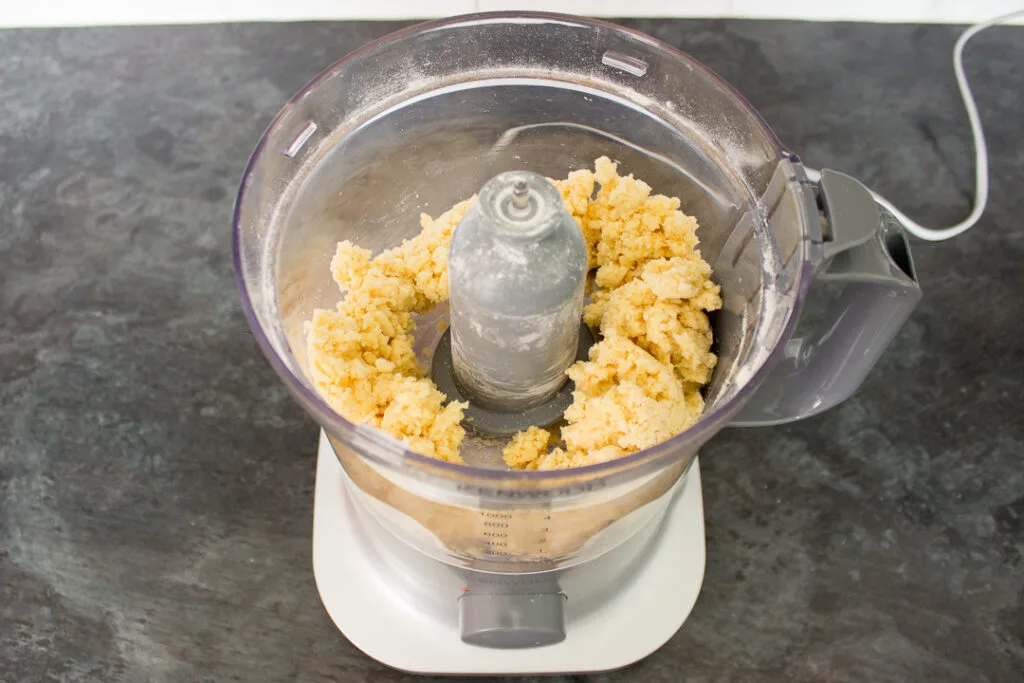
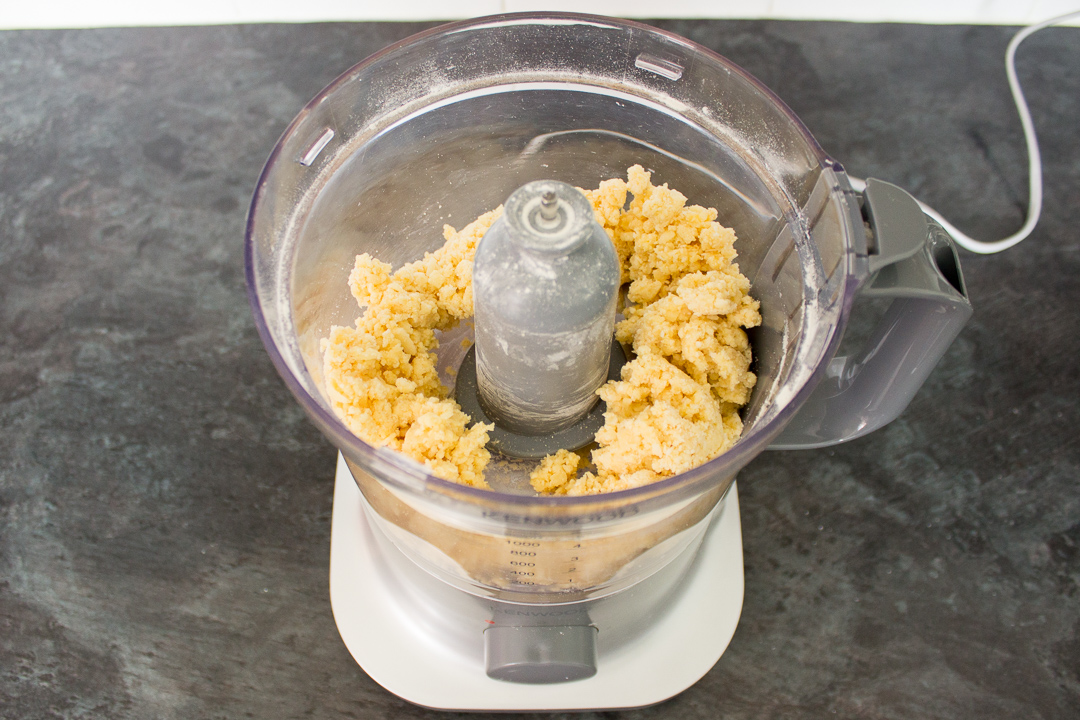
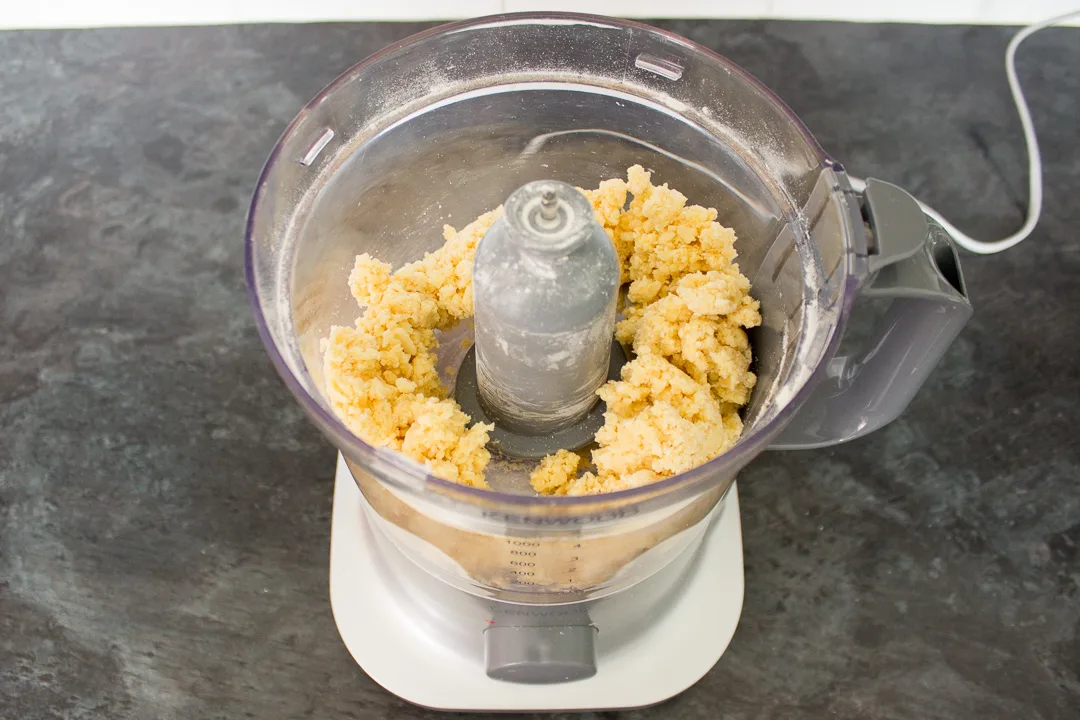
Next, add the egg yolk (x 1) and the water (1 tbsp), and pulse until it just comes together to form a dough.
Then tip the dough out onto a sheet of cling film (or baking paper). Place another sheet on top, and roll out to a thickness of approx 6mm (1/4″).


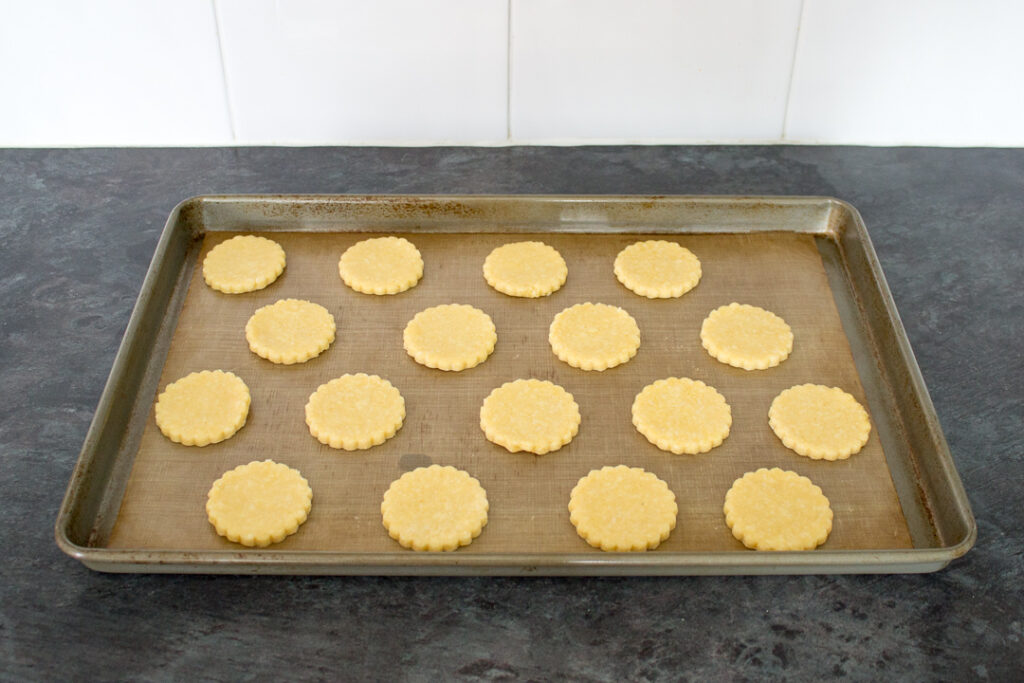
Cut out as many circles as you can (5.5cm | 2.2″ round cutter). Re-roll any leftovers and cut out more circles. Repeat until all the dough is used up.
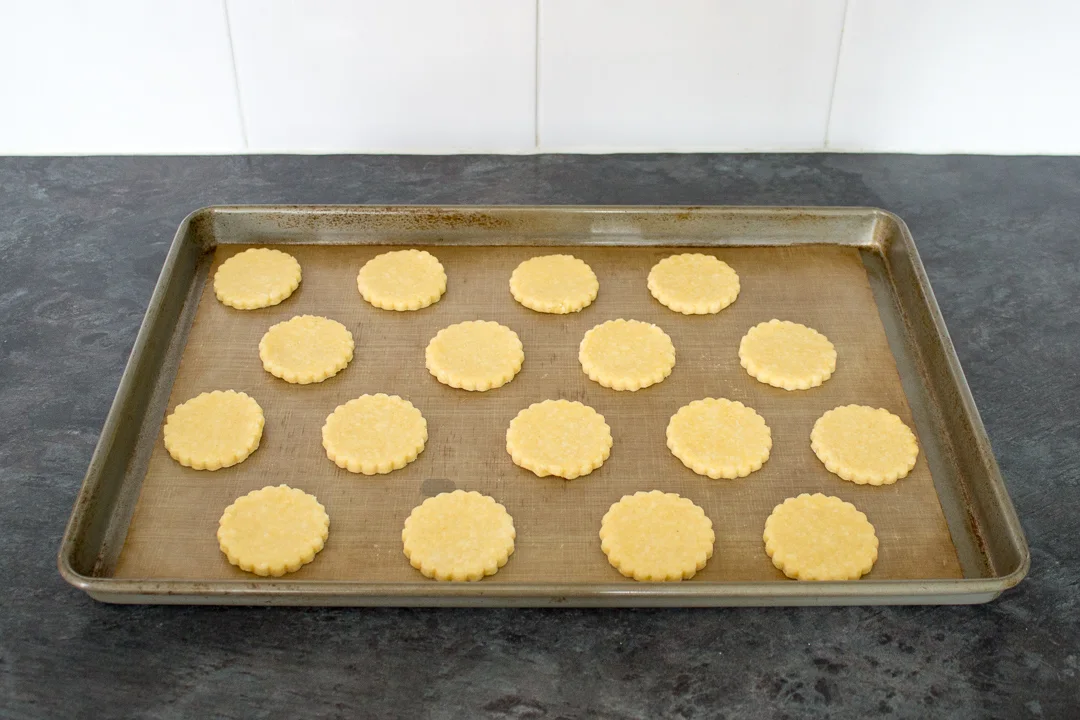
Then pop the biscuits into the freezer for 15 minutes to chill, while you preheat the oven to 180°C/Fan 170°C/356ºF.
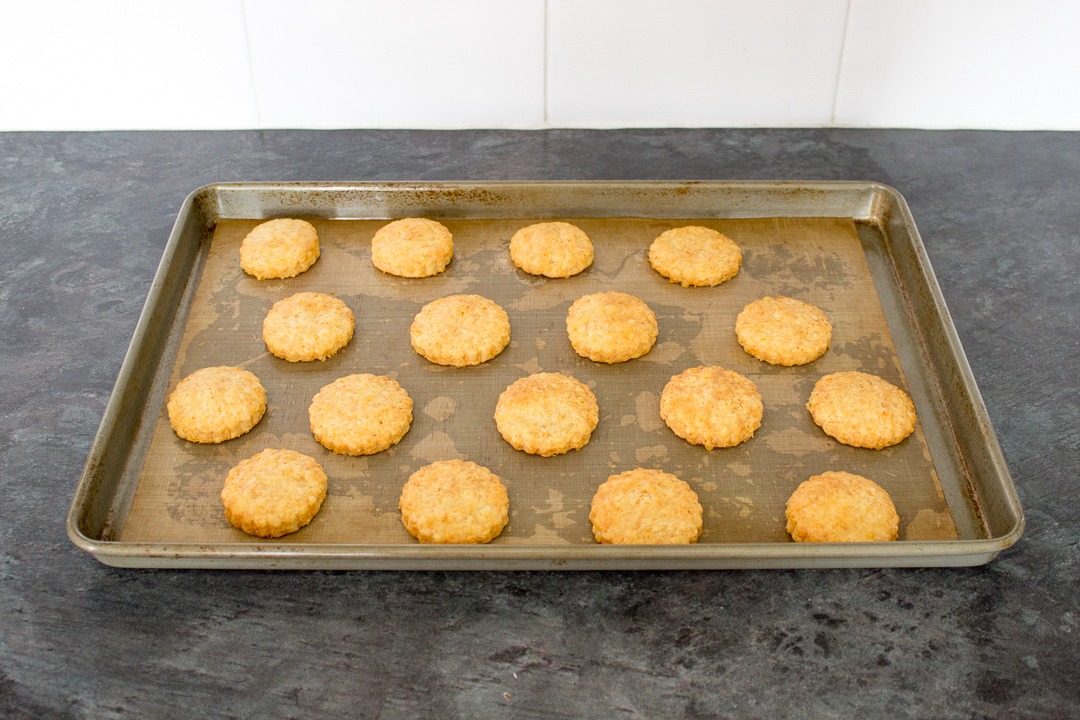
Space the biscuits apart on a lined baking tray, and bake for roughly 15 minutes. Until a lovely deep golden colour. Turn the tray round halfway through the cooking if you have hot spots in your oven.

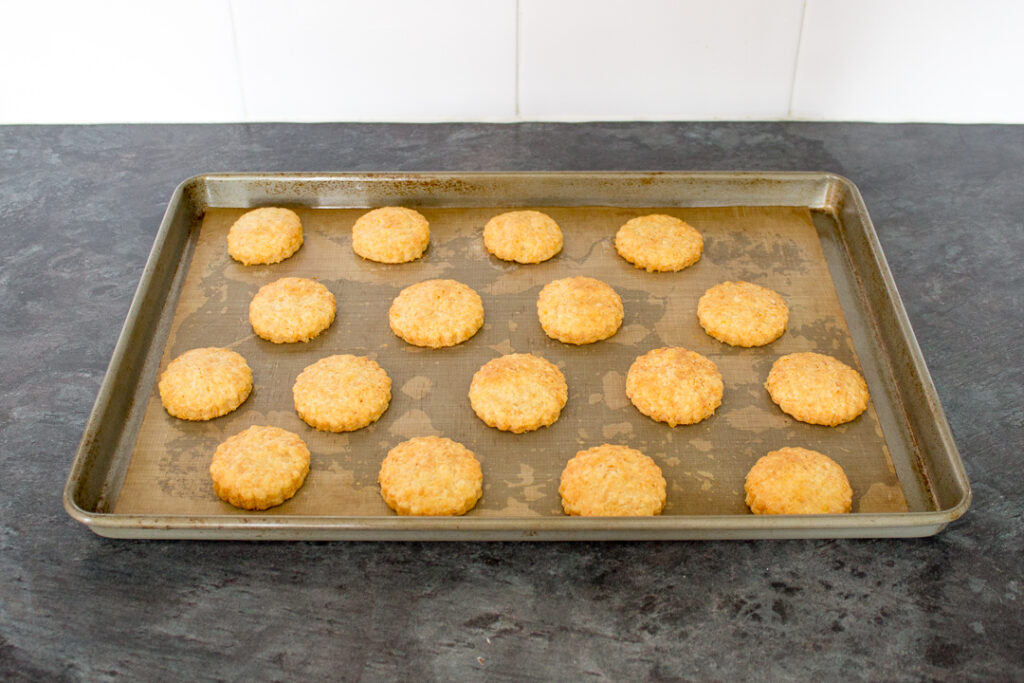

Finally, leave your cheese biscuits on the tray for a few minutes, before transferring to a wire rack to cool completely.

How to store cheese biscuits
Assuming they don’t get eaten straight away (which is highly likely!), store your cheese biscuits in an airtight container at room temperature.
I prefer to use metal, as they seem to keep their freshly baked texture for longer.
Loved this cheese biscuits recipe? Pin it!


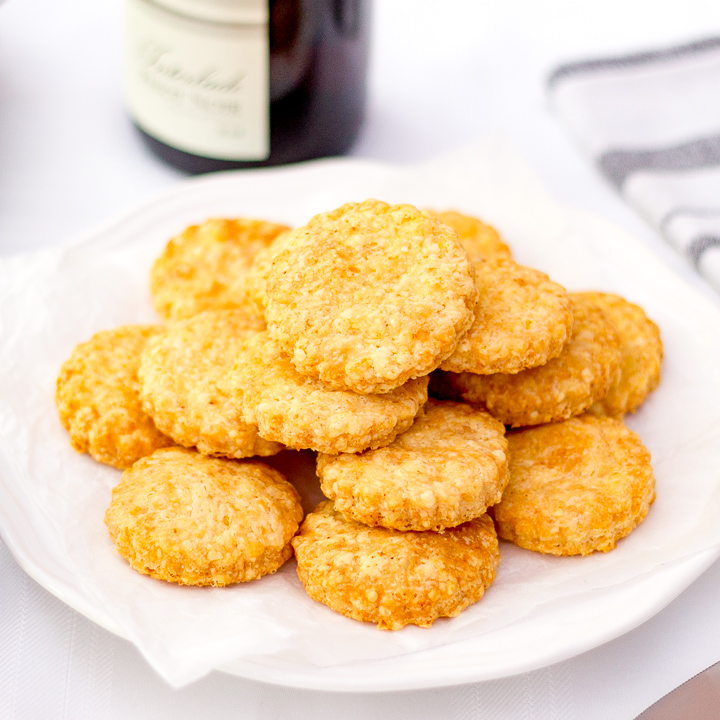

Easy Cheese Biscuits Recipe
A savoury snack to rival ALL snacks! These cheese biscuits are light, flaky and PACKED with flavour. I guarantee you'll make these again!
Ingredients
- 85g (2/3 Cup) Plain Flour
- Salt 1/2 tsp
- 1/2 tsp Garlic Powder
- 1/2 tsp Onion Powder
- 45g (1/8 Cup + 1 tbsp) Unsalted Butter, cubed
- 80g (3/4 Cup) Strong Cheddar Cheese
- 20g (4 tbsp) Freshly Grated Parmesan Cheese
- 1 Egg Yolk
- 1 tbsp Water
Essential Equipment
- Food Processor
- Cling Film or Baking Paper
- Rolling Pin
- 5.5cm Cookie Cutter (I used a fluted one)
- Baking Tray
Instructions
- In a food processor, briefly blitz together the flour, salt, garlic powder and onion powder.

- Add the cubed butter, and pulse until it resembles fine breadcrumbs. Then add the cheddar and parmesan, and pulse to a breadcrumb consistency again.

- Finally, add the egg yolk and water, and pulse JUST until it forms a dough. (Don't over work it!)
- Tip the dough out onto a work surface lined with a sheet of cling film (or baking paper), and top with another sheet. Roll out to 6mm (1/4″) thick, then cut out as many biscuits as you can. Re-roll any scraps and repeat until there is no more dough left.

- Place them into the freezer to chill for 15 mins, and preheat your oven to 180°C/Fan 170°C/356ºF. Then space the biscuits apart on a lined baking tray.

- Bake for 15 mins, until a deep golden colour. Allow to cool for a few minutes on the tray, before transferring to a wire rack to cool completely.


Notes
If you would rather use a more in depth picture recipe, please see the main body of this post. Where you’ll also find lots of extra FAQs and helpful tips, should you need them.
Please note, this recipe includes both UK metric and US Cup measurements.
Tips
- Change up the flavour by adding extra dried herbs and spices. Think rosemary, thyme, paprika or cumin!
- Don’t have a food processor? You can just use your hands and a large mixing bowl. A pastry blender would also help. (Affiliate link.)
- Using cold butter straight from the fridge tends to work much better than room temperature butter for cheese biscuits.
- Don’t over mix it in the food processor, otherwise you will over work the flour. This makes for dense and chewy cheese biscuits… we want light and flaky!
- These cheese biscuits don't spread much at all during baking, so no need to space them miles apart on the tray.
Storage
Assuming they don’t get eaten straight away (which is highly likely!), store your cheese biscuits in an airtight container at room temperature.
I prefer to use metal, as they seem to keep their freshly baked texture for longer.
Serving Suggestions
Recommended Products
As an Amazon Associate and member of other affiliate programs, I earn from qualifying purchases at no extra cost to you.


Nutrition Information:
Yield: 18 Serving Size: 1Amount Per Serving: Calories: 61Total Fat: 4gSaturated Fat: 2gTrans Fat: 0gUnsaturated Fat: 1gCholesterol: 21mgSodium: 115mgCarbohydrates: 4gFiber: 0gSugar: 0gProtein: 2g
Nutritional information on kitchenmason.com should only be used as a general guideline, I am not a certified nutritionist. Please always check labels for allergens where applicable.
Serving suggestions…
…you might like to serve these with:
I want to see YOUR cooking!
Have you made these delicious cheese biscuits? I’d love to know if you have! Tag me in your pics on Facebook, Twitter and Instagram or email me at emma@kitchenmason.com.


Experienced British Online Publisher, recipe writer, and home cook, Emma has a background of over 20 years in British cuisine and cooking. Born and bred in the UK, she excels in classic British dishes, is passionate about air frying, and loves sharing her Gran’s old school recipes. She has been featured in popular publications such as Food Network, Cosmopolitan, and The Huffington Post.
Knowledgeable On: Traditional British Cuisine, Recipe Writing, Air Frying, Home Cooking.
Claire
Sunday 25th of May 2025
Can these be frozen once made, cooked and allowed to cool? Also how long can they be kept for? My toddler loves these and it's a struggle to get him to eat anything so thank-you!x
Emma Mason
Sunday 25th of May 2025
Hi Claire. I’m so pleased to hear your toddler loves these! I haven’t personally frozen them before (they never last long enough!), but I don’t see any harm in giving it a go. I would be inclined to try freezing them before being baked. Then cook them from frozen by adding a few minutes onto the cooking time. Hope this helps! Emma x
Sharon
Tuesday 18th of July 2023
Can you freeze the dough ahead so can bake fresh at the time?
Emma
Wednesday 19th of July 2023
Hi Sharon. I've not personally tried it, but I see no reason why it wouldn't work! I would slice them before freezing. And make sure they're wrapped/covered well. You'll need to adjust the cooking times for cooking from frozen, but I wouldn't have thought it'd be more than 1-2 mins more. I'd love to know how you get on if you give it a go! Emma x
Suzy
Friday 7th of June 2019
Wow, these won my son first prize at school in a biscuit making contest!
Thank you
Miss KitchenMason
Friday 7th of June 2019
Aww that’s amazing!! Well done to your son :) Thanks so much for sharing this. Emma x
Carolyn Harmon
Friday 27th of April 2018
These were delicious and I should have made three batches.
Miss KitchenMason
Friday 27th of April 2018
Yay!! So glad you like my recipe Carolyn! Thanks for sharing with me - you've made my day. Emma x