
This post may contain affiliate links. Where I make a small commission on purchased items, at no extra cost to you. See my disclosure for details.
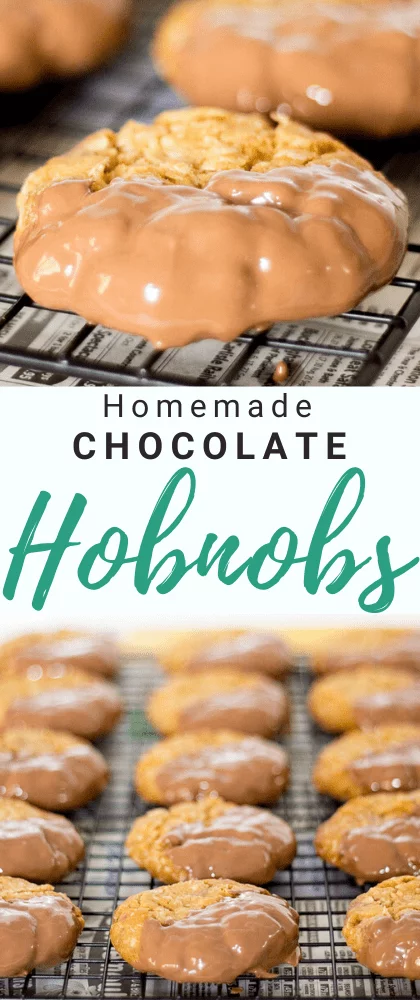
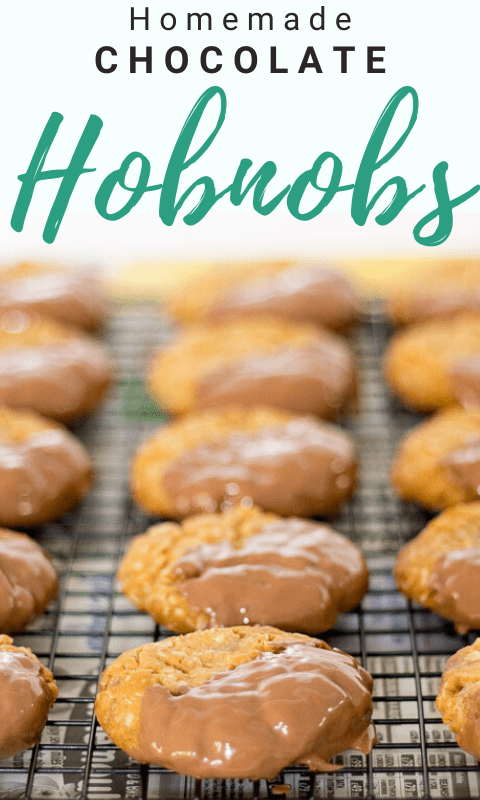
If you want sensationally chunky, chocolate dipped, gloriously golden, oaty pieces of heaven, this chocolate hobnobs recipe is for you! Really easy to make and super moreish, I guarantee this hobnobs recipe is one you’ll be making again and again. Read on for the easy step by step picture recipe, helpful tips and more…

Chocolate Hobnobs are an ultimate biscuit favourite aren’t they? With a sweet oaty base that’s crunchy and crumbly and a silky coating of beautiful milk chocolate on top, what’s not to love?!
It’s definitely one of my personal all time favourites that’s for sure. Oaty biscuits are always so satisfying anyway, but with chocolate on the top? Hells bells I’m ON IT!
Stuck in Dinner Survival Mode?
BYOD Fridays are a fun and supportive online cooking club for tired people who still need to cook dinner... but really cba!
Join The Waitlist
Never tried a Chocolate Hobnob before? Firstly, where on earth have you been?! And secondly, this incredibly quick and easy recipe will have you joining the Chocolate HobNobs addiction club in no time. I promise!
Why is this chocolate hobnobs recipe so good? Well, I take mine to the next level. I know, like that’s even possible right? Well it is! How you ask? I throw chocolate chunks into the biscuit dough to make them even more incredible. It’s completely optional of course but it really does make them sooooo good!
Need to brush up on your baking skills first? Read through baking for beginners. It’ll really boost your confidence!

What is a Chocolate Hobnob?
A chocolate hobnob is a crunchy, crumbly round oat biscuit that’s topped with a layer of milk chocolate. It’s kind of like a cross between a biscuit and a flapjack, teamed up with chocolate. It’s a British born biscuit that was actually released into the world the same year I was born, 1987! What a great year haha!

Homemade Chocolate Hobnobs – Recipe Summary
It really couldn’t be more simple.
- Melt butter and golden syrup together and allow to cool.
- Mix together the flour, sugar, oats, salt and bicarbonate of soda in a bowl and add the chocolate chunks (if using).
- Mix in the butter mixture until it forms a dough.
- Roll into balls, space out on a baking sheet and flatten slightly.
- Bake then cool completely.
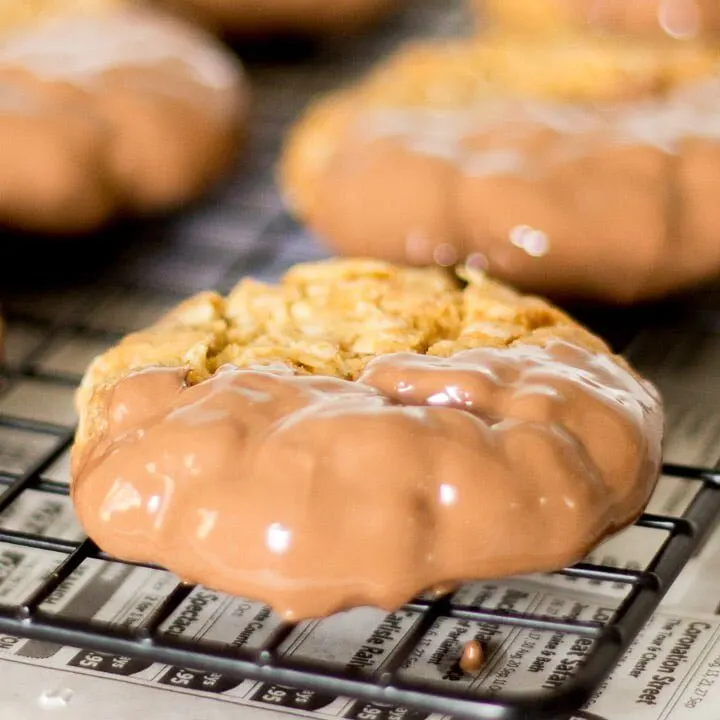
- Dip in melted milk chocolate and allow to set.


Chocolate Hobnobs ingredients
- Butter – Use unsalted butter for complete control over the flavour.
- Golden Syrup – This is a really key ingredient for both flavour and texture but I realise it’s not available everywhere in the world. Corn syrup is a good alternative if you can’t get it.
- Flour – Self raising flour is best. Don’t have any in the cupboard? See how to make self raising flour.
- Sugar – Light brown soft sugar is best overall for hobnobs. If you switch to caster sugar they will spread more when baking and become a darker golden colour.
- Salt – When teamed up with unsalted butter, adding salt gives the best control of the overall flavour.
- Oats – Real hobnobs use a combination of jumbo oats and rolled oats. Either will work great on their own though.
- Bicarbonate of Soda – Essential for a little oomph. Don’t switch this out for baking powder as they do different things.
- Chocolate – It has to be milk chocolate for me here as it’s more authentic. You can switch it out for dark if you prefer though.

Chocolate Hobnobs recipe tips
Never tried to make chocolate hobnobs before? Here’s a few pointers to help you out.
- Does your oven have hot spots? During baking, rotate the your tray once to get an even bake.
- Don’t have chocolate to cut into chunks? You can use chocolate chips instead.
- Hobnobs purist? Leave out the chocolate chunks (or chips) and use a 40/60 combo of jumbo oats and rolled oats.
- Don’t have any self raising flour? Use 125g of plain flour and 1.5 tsp of baking powder instead.
- Allow your hobnobs to cool completely before coating in chocolate or it will struggle to set and get vey messy!
- Store your chocolate hobnobs in a metal tin at room temperature to keep their crunch for longer.
Other recipes you might like…

Homemade Chocolate Hobnobs – Step by Step Picture Recipe
(For a printer friendly version, see the recipe card at the end of this post)
Please note, this recipe includes both UK metric and US Cup measurements.
Ingredients
Here is what you will need to make 16 biscuits.
- 125g (1/2 Cup + 1 tbsp) Unsalted Butter
- 1 tbsp Golden Syrup
- 125g (1 Cup) Self Raising Flour
- 125g (1/2 Cup + 1 tbsp) Light Brown Soft Sugar
- Pinch of Salt
- 125g (1 + 1/4 Cups) Rolled Oats
- 1/2 tsp Bicarbonate of Soda
- 100g (3.5 oz) Milk Chocolate, cut into chunks (Optional)
- 150g (5.3 oz) Milk Chocolate, for dipping
Essential equipment
- Small Saucepan or Small Microwavable Bowl
- Large Bowl
- Large Baking Tray
- Cooling Rack
- Microwavable Bowl or Glass Bowl and Small Saucepan
Instructions
Preheat your oven to 170°C/Fan 160°C/356°F.
In a small saucepan over a low-medium heat (or in bowl in 10 second intervals in the microwave) melt together the butter (125g | 1/2 Cup + 1 tbsp) and golden syrup (1 tbsp) then set aside to cool.
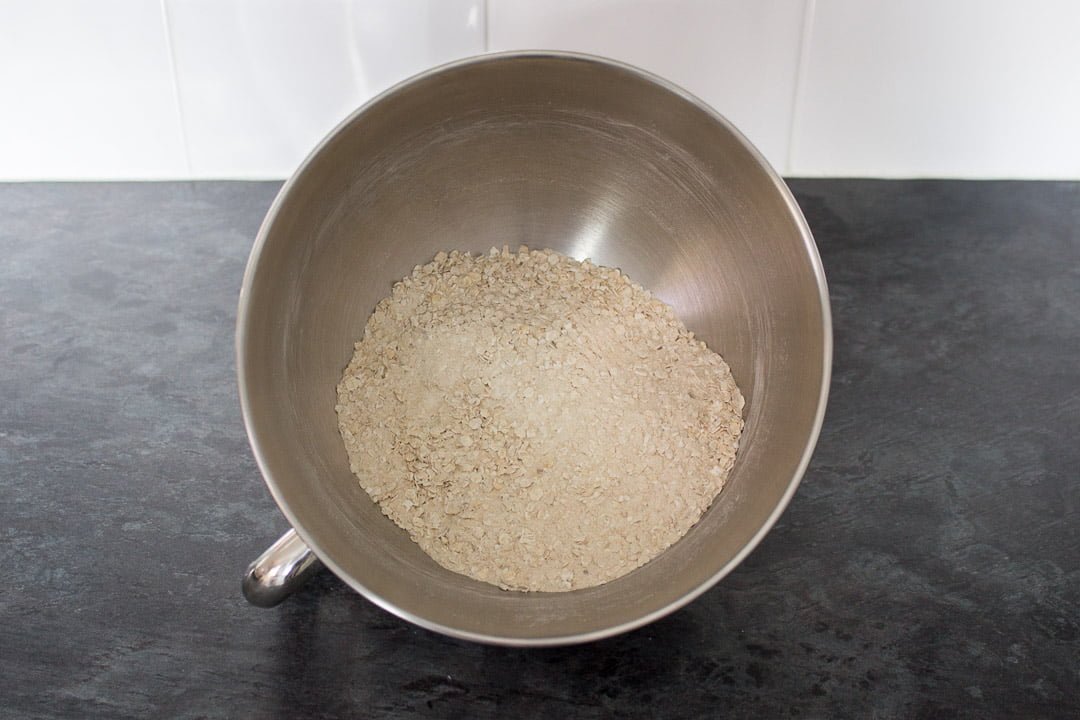
Next, in a large bowl, mix together the flour (125g | 1 Cup), brown sugar (125g | 1/2 Cup + 1 tbsp), salt (pinch), oats (125g | 1 + 1/4 Cups) and bicarbonate of soda (1/2 tsp).
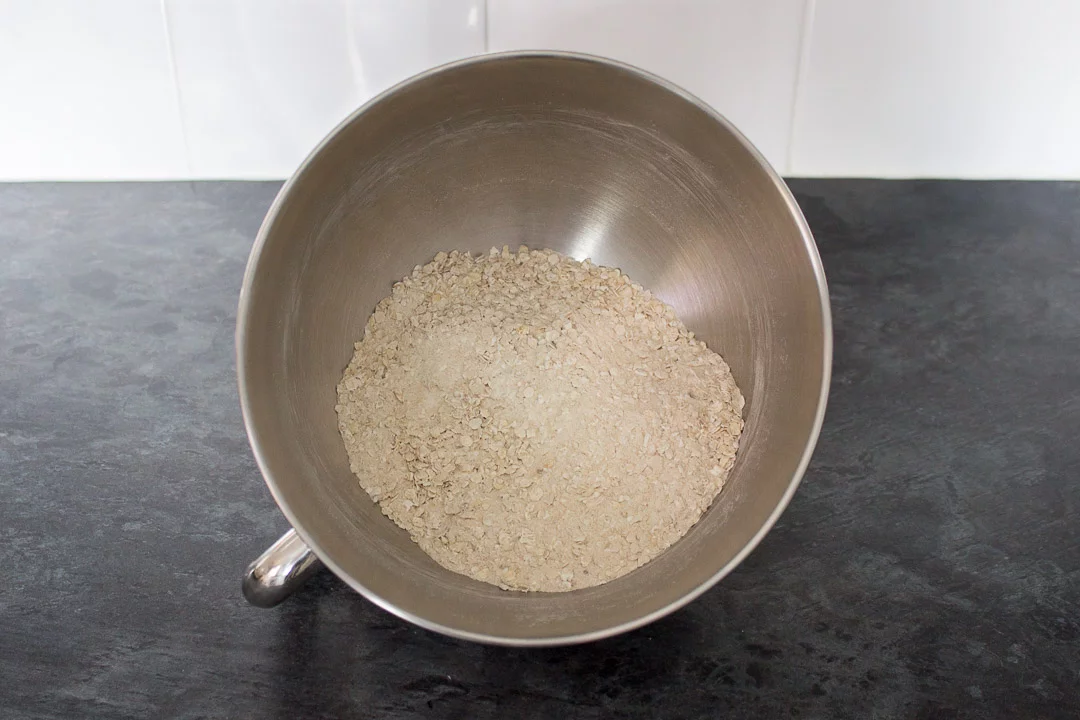
Then, if you are using them, add in the chocolate chunks (100g | 3.5 oz) and mix briefly to distribute.


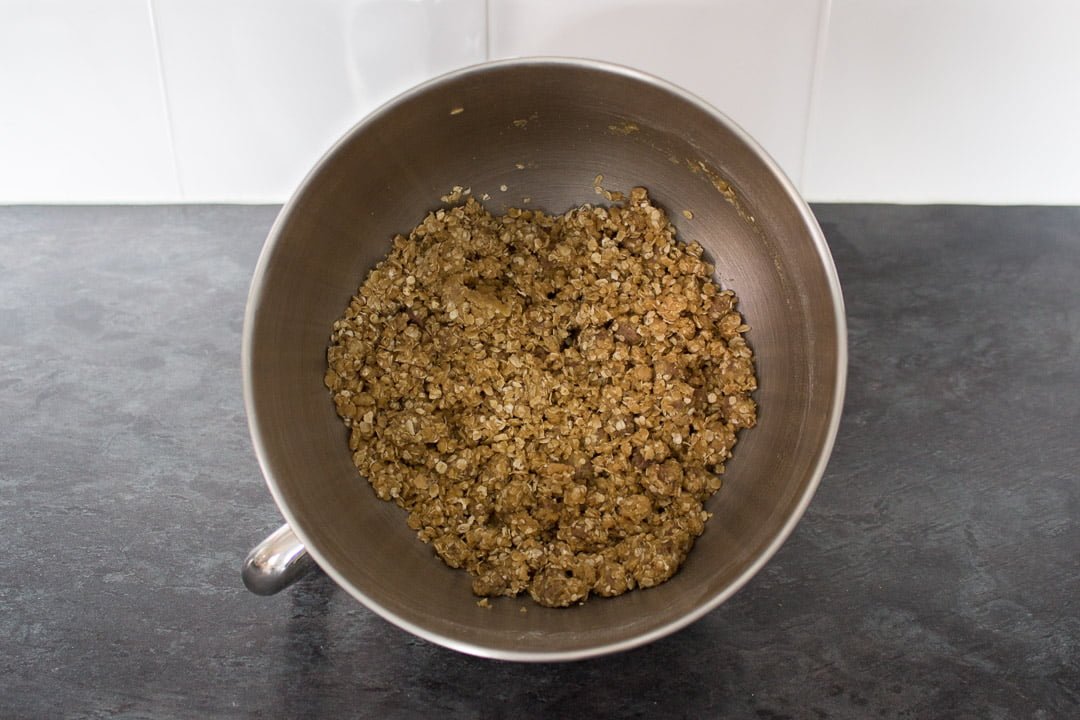
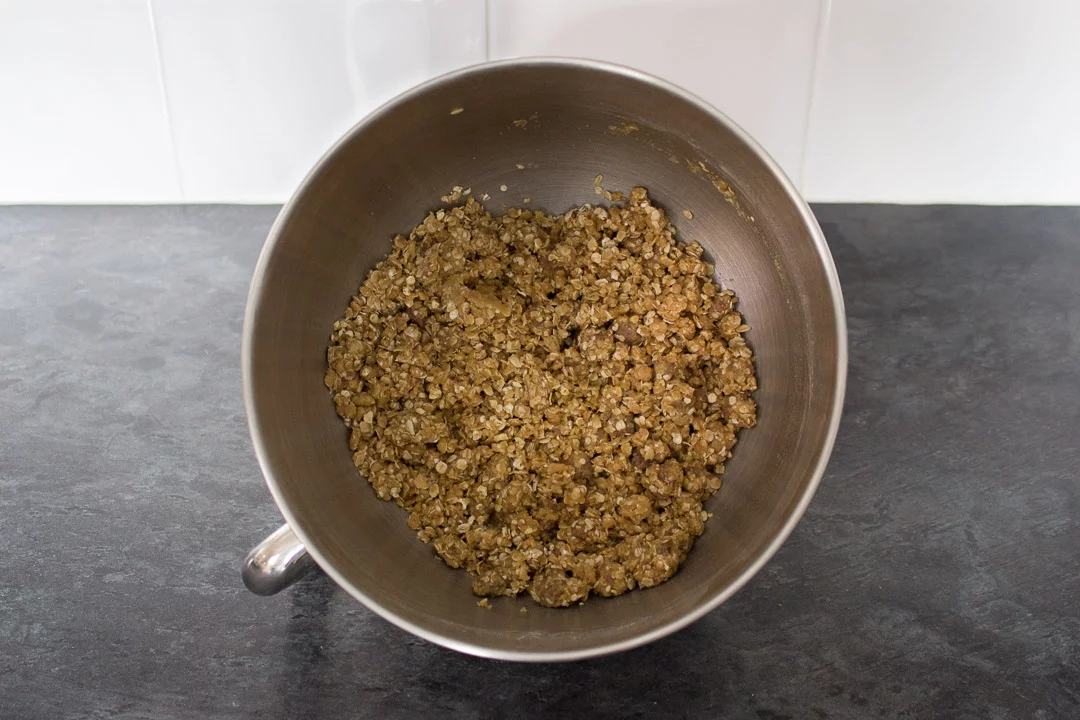
Now, pour in the cooled butter and mix until everything is evenly blended and it all comes together nicely to form a crumbly dough.
Next, divide the mixture into 16 equal pieces and roll into balls.
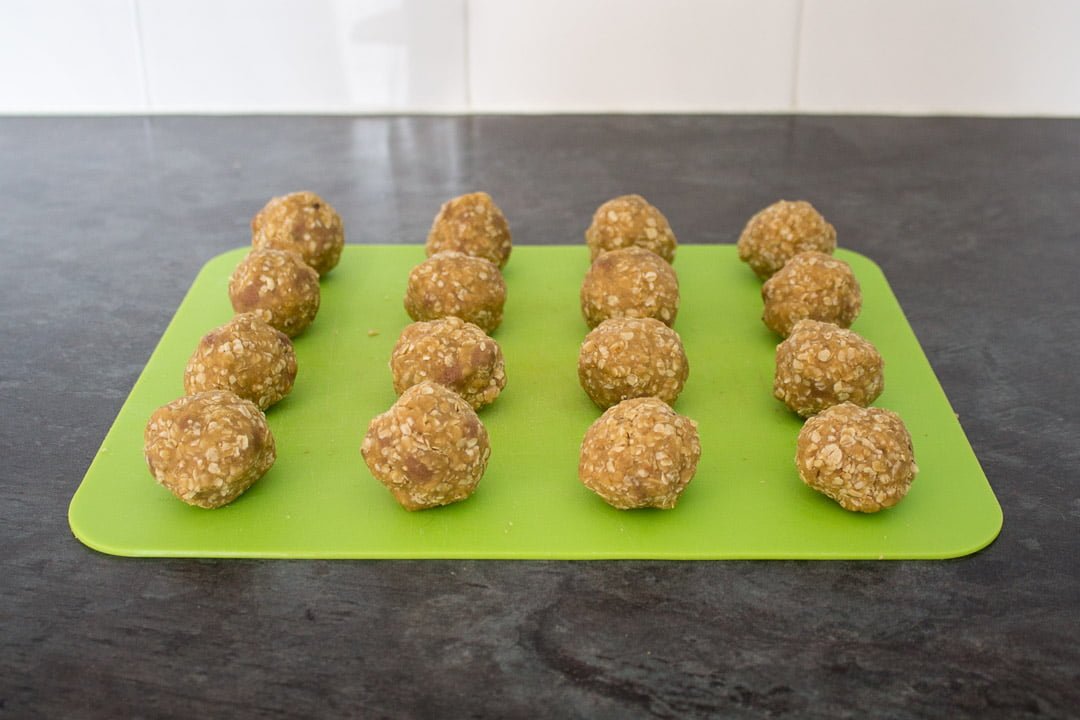
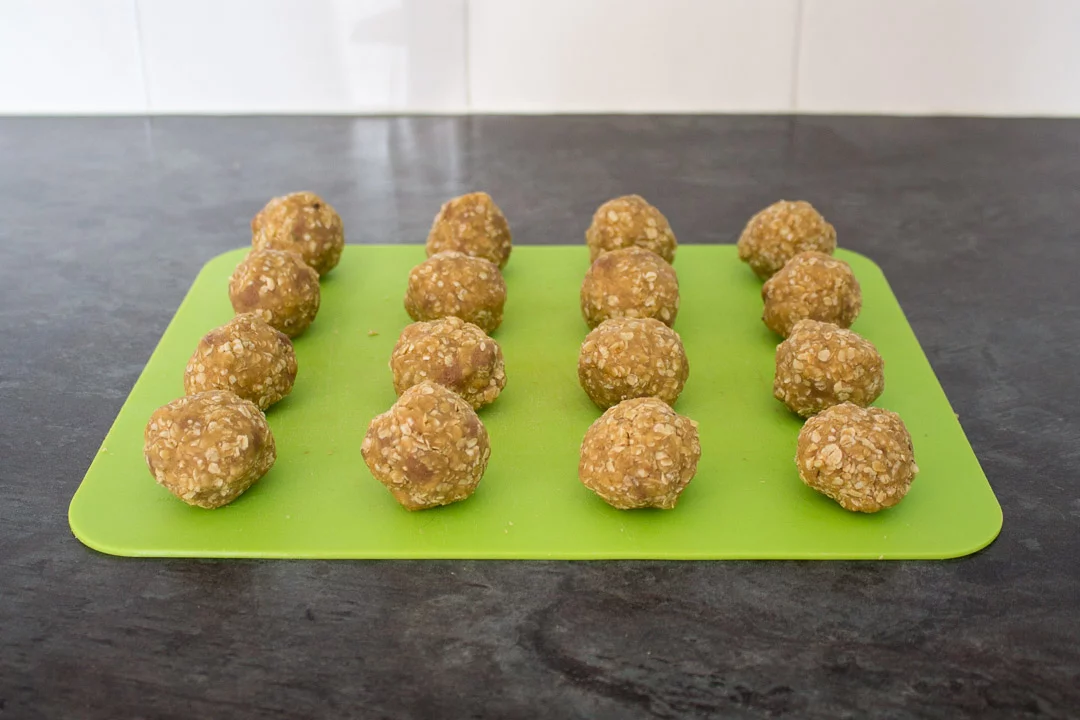
Flatten them slightly and space them out onto a large baking sheet. Make sure you allow room between each onr for spreading though. (You may need to cook them in batches.)
I lined mine with a silicone baking mat. It doesn’t really need lining though, I tend to just do it out of habit.
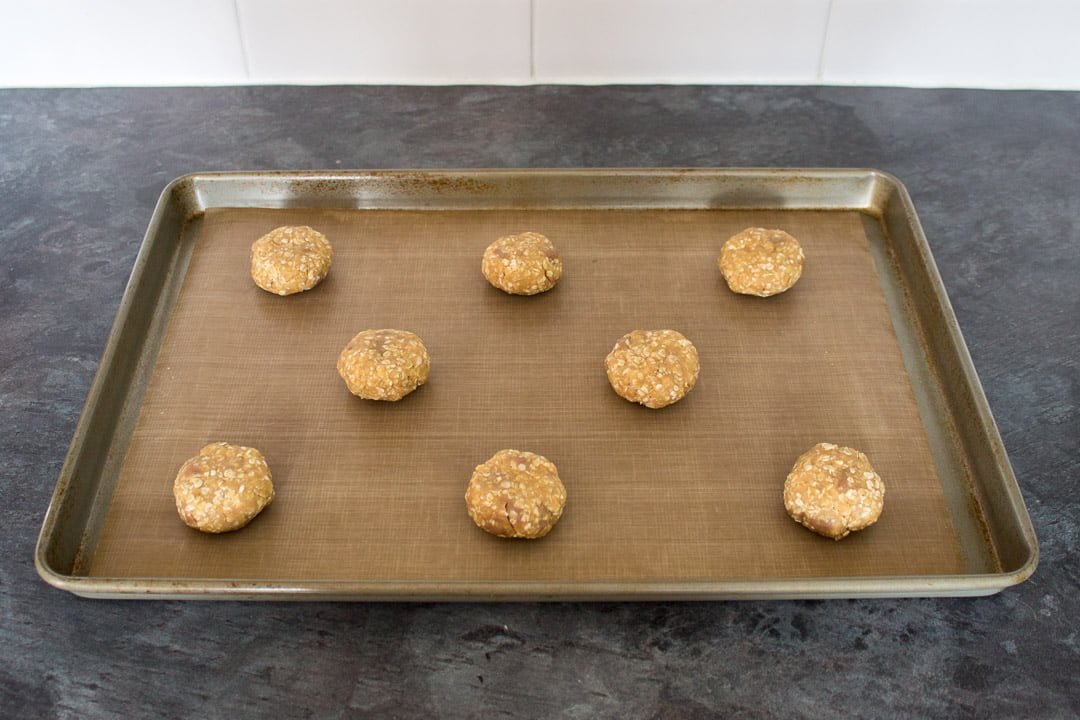

Then bake your hobnobs in the centre of the preheated oven for 14-16mins until golden brown. You may wish to turn your tray round half way through to get an even bake if your oven has hot spots.
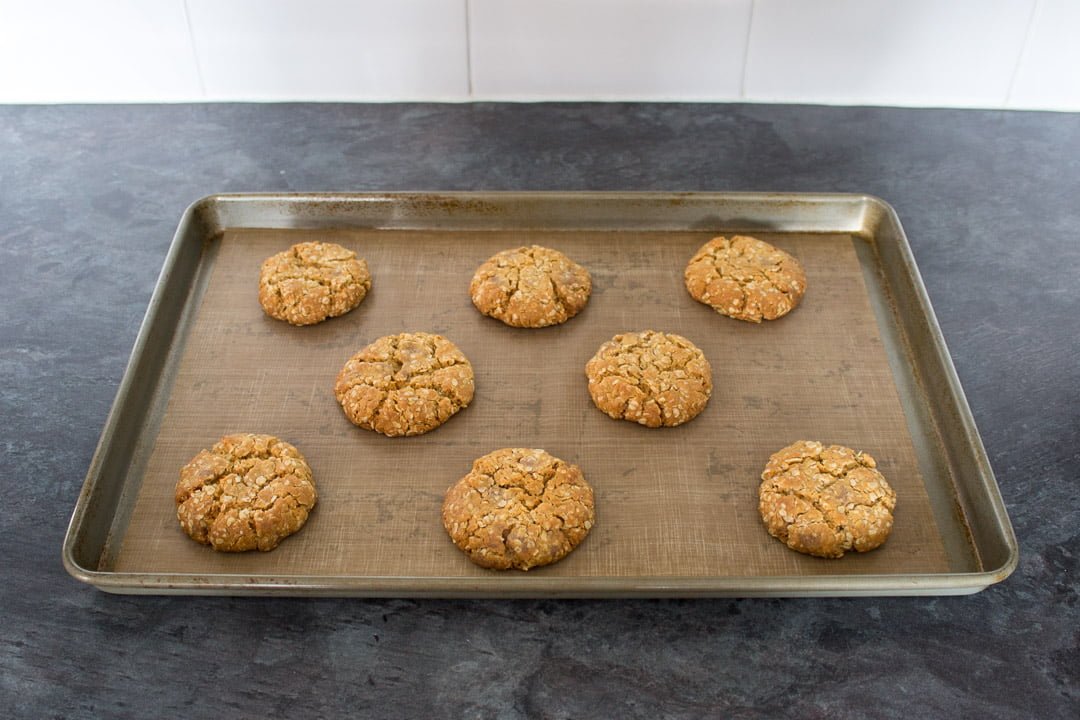

Allow your hobnobs to sit on the tray for a couple of minutes to firm up then transfer to a wire rack to cool completely before moving on to the next step.
Decoration instructions
When the biscuits are cooled, melt the milk chocolate (150g | 5.3 oz) in one of the following two ways.
- In a bowl in the microwave in 10 second intervals, stirring really well after each time. When it’s two thirds melted, stir until completely melted.
- In a bowl set over a saucepan of barely simmering water. When it’s two thirds melted, remove from the heat and stir until completely melted.
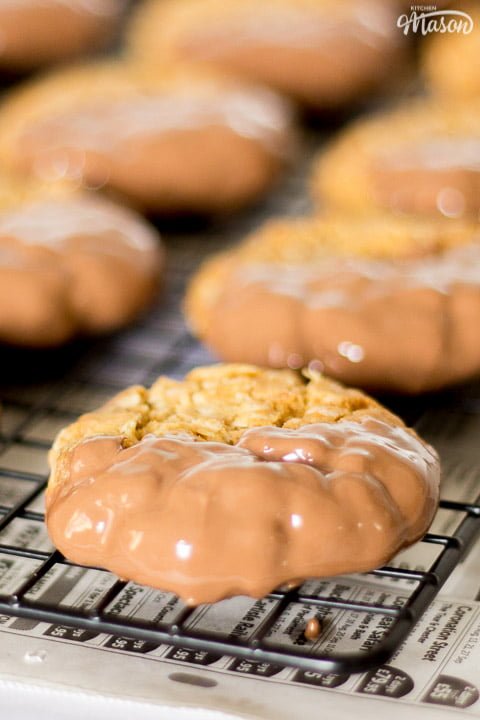
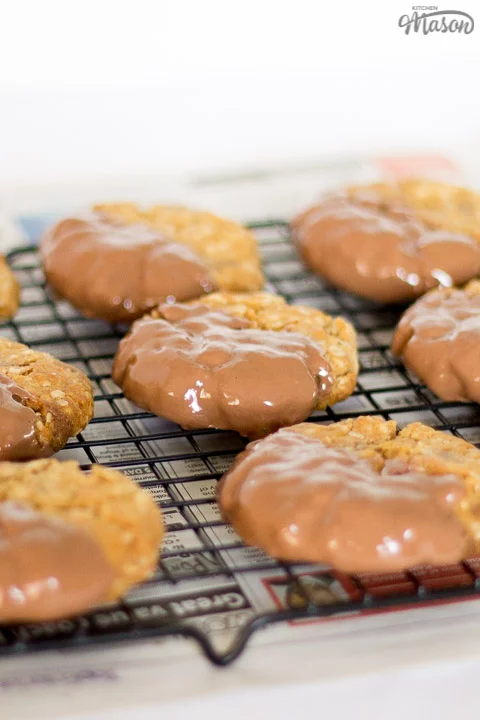
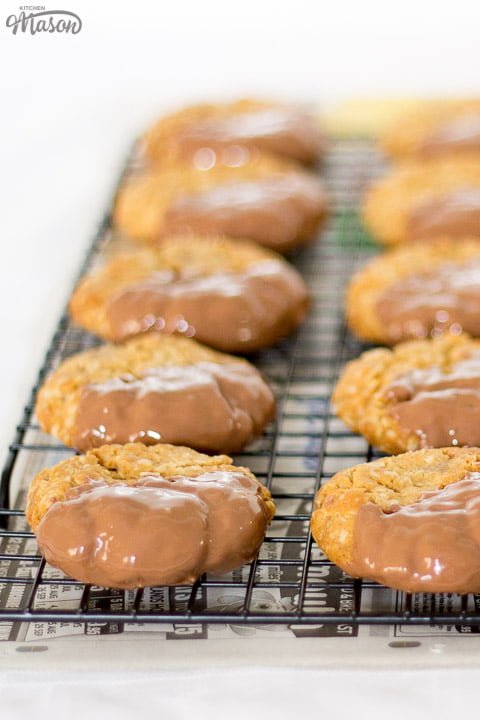
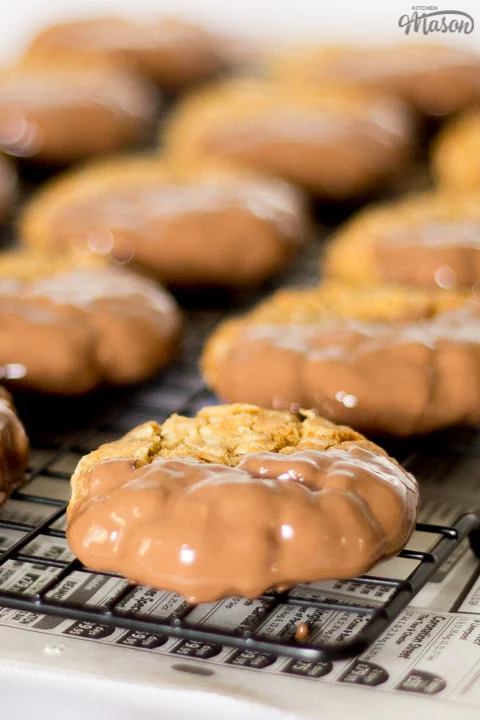
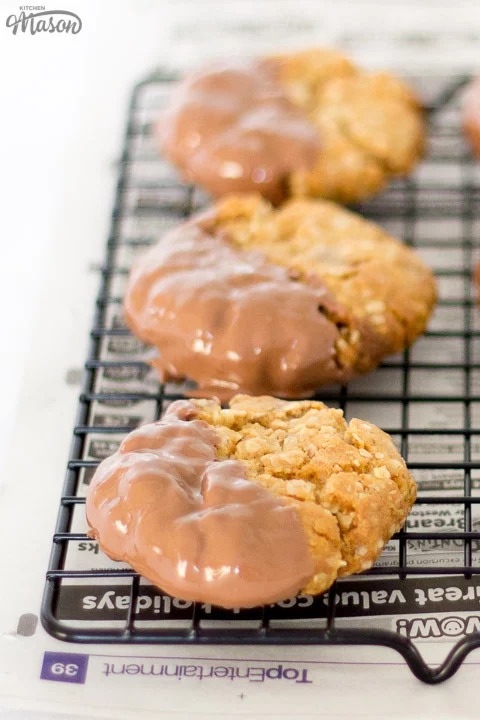
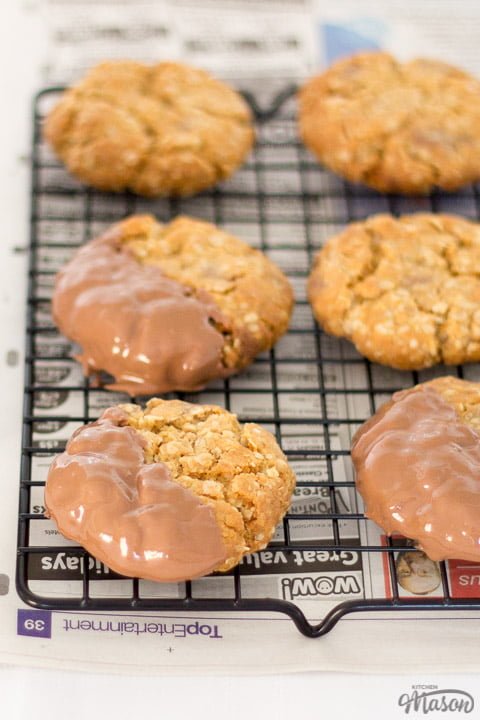
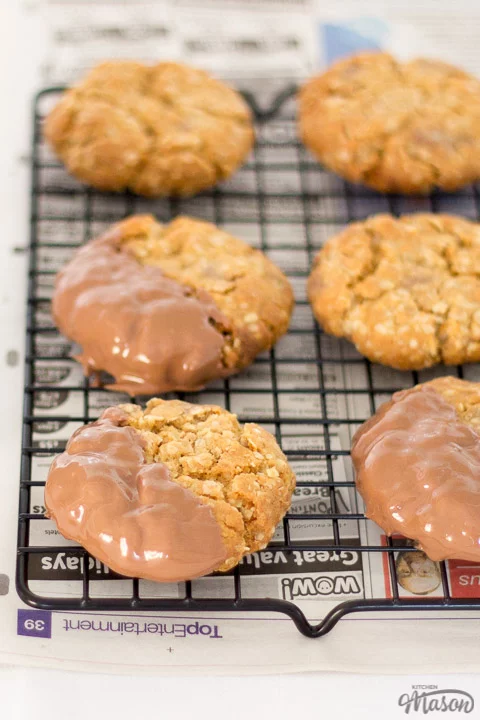
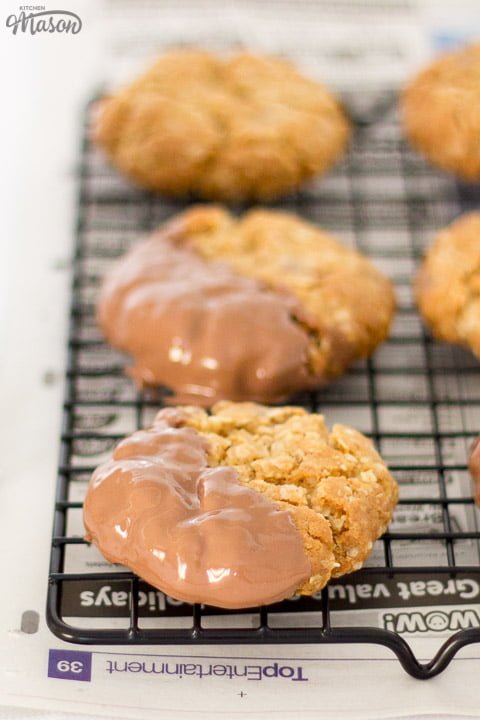
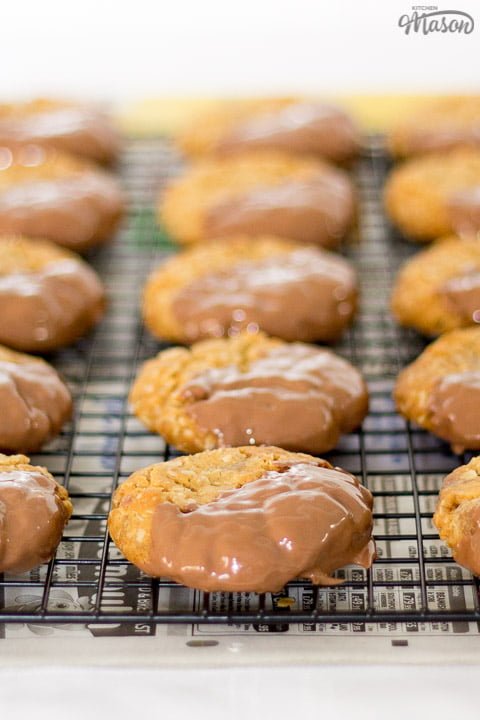
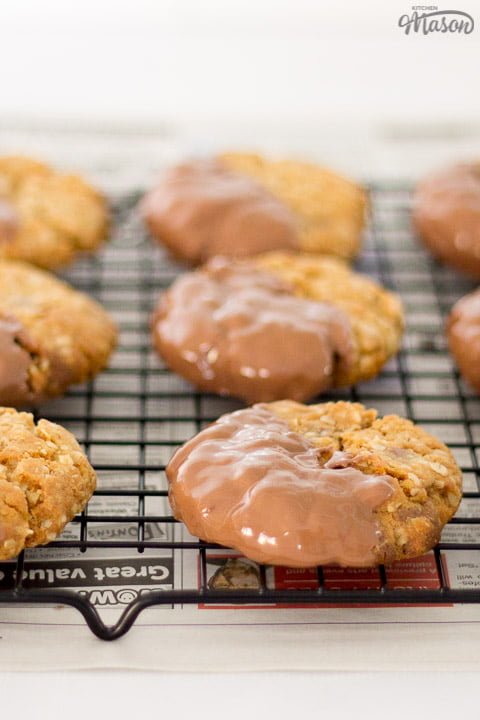
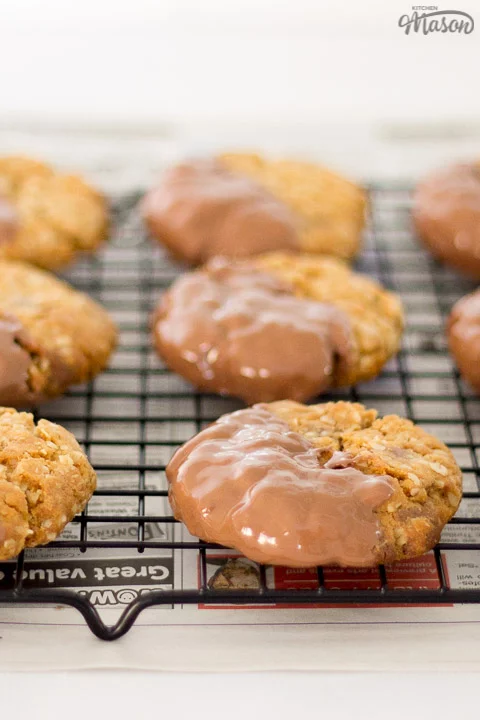
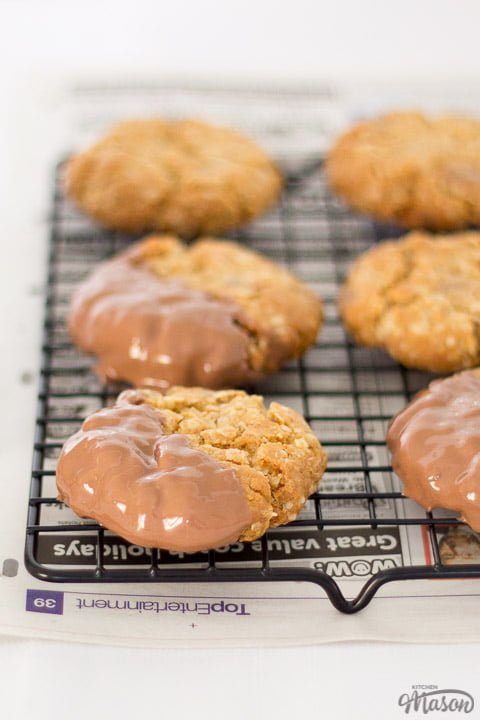
The next part is entirely up to you. You can ‘paint’ the chocolate onto the top of each biscuit with a teaspoon/sillicone brush or, like me, you can just dunk one half straight into the chocolate.
Whatever you choose, once coated – place them onto a wire rack over a piece of newspaper to set at room temperature.

How to store homemade chocolate HobNobs
To keep these little beauties nice and crunchy, store in a metal tin at room temperature and consume within 5-7 days.
Have you made this recipe?
Will these moreish Chocolate Hobnobs be making their way into your home? I’d love to know if they are! Send me your pics, comments and questions on Facebook, Twitter and Instagram or email me at emma@kitchenmason.com.

Loved this Recipe? Pin it!


Easy Homemade Chocolate Hobnobs Recipe
If you want sensationally chunky, chocolate dipped, gloriously golden, oaty pieces of heaven, this chocolate hobnobs recipe is for you!
Ingredients
- 125g (1/2 Cup + 1 tbsp) Unsalted Butter
- 1 tbsp Golden Syrup
- 125g (1 Cup) Self Raising Flour
- 125g (1/2 Cup + 1 tbsp) Light Brown Soft Sugar
- Pinch of Salt
- 125g (1 + 1/4 Cups) Rolled Oats
- 1/2 tsp Bicarbonate of Soda
- 100g (3.5 oz) Milk Chocolate, cut into chunks (Optional)
- 150g (5.3 oz) Milk Chocolate, for dipping
Essential Equipment
- Small Microwavable Bowl
- Large Bowl
- Large Baking Tray
- Cooling Rack
- Microwavable Bowl
Instructions
Biscuit instructions
- Preheat your oven to 170°C/Fan 160°C/356°F. In a small bowl, melt the butter and golden syrup together in the microwave in 10 second intervals. Set aside to cool.
- Mix together the flour, sugar, salt, oats and bicarbonate of soda in a large bowl.

- Add the chocolate chunks (if using) and mix briefly.
- Pour the butter into the flour and mix until it forms a crumbly dough.
- Roll the dough into 16 equally sized balls.
- Space out evenly on a large baking sheet (allow room for spreading) and flatten slightly.
- Bake for 14-16 minutes until golden brown, allow to firm up on the tray for a few minutes then transfer to a wire rack to cool completely.
Decoration instructions
- Melt the chocolate in a microwavable bowl in 10 second intervals. Stir really well between each time.
- Once the chocolate is two thirds melted, don't heat anymore - just stir until it's completely melted.
- Set a cooling rack over a sheet of newspaper.
- Dip each hobnob biscuit halfway into the melted chocolate, gently shake off any excess then place onto your cooling rack. Allow to set at room temperature.


Notes
If you would rather use a more in depth picture recipe, please see the main body of this post. Where you’ll also find lots of extra FAQs and helpful tips, should you need them.
Please note, this recipe includes both UK metric and US Cup measurements.
Storage
Store in an airtight metal container at room temperature to keep their crunch for longer. Consume within 5-7 days.
Tips
- Does your oven have hot spots? During baking, rotate the your tray once to get an even bake.
- Don’t have chocolate to cut into chunks? You can use chocolate chips instead.
- Hobnobs purist? Leave out the chocolate chunks (or chips) and use a 40/60 combo of jumbo oats and rolled oats.
- Don’t have any self raising flour? Use 125g of plain flour and 1.5 tsp of baking powder instead.
- Allow your hobnobs to cool completely before coating in chocolate or it will struggle to set and get vey messy!
- Store your chocolate hobnobs in a metal tin at room temperature to keep their crunch for longer.
Recommended Products
As an Amazon Associate and member of other affiliate programs, I earn from qualifying purchases at no extra cost to you.
Nutrition Information:
Yield: 16 Serving Size: 1Amount Per Serving: Calories: 231Total Fat: 12gSaturated Fat: 7gTrans Fat: 0gUnsaturated Fat: 4gCholesterol: 20mgSodium: 116mgCarbohydrates: 29gFiber: 2gSugar: 17gProtein: 3g
Nutritional information on kitchenmason.com should only be used as a general guideline, I am not a certified nutritionist. Please always check labels for allergens where applicable.

Emma is a British recipe writer, home cook, and founder of Kitchen Mason. For over 15 years, she has been creating simple, comforting recipes and practical kitchen tips that help tired, everyday people make dinner feel easier and more enjoyable again. Passionate about British home cooking, Emma shares reliable recipes, comforting classics, and realistic kitchen guidance designed for real life. Her work has also been featured in publications including Food Network, Cosmopolitan, and The Huffington Post.
Knowledgeable On: British home cooking, Easy dinner ideas, Comford food recipes, Recipe writing
gregory anderson
Thursday 9th of December 2021
Hi, I'm Greg. I'm a hobnob addict.
I recognize I'm unable to defeat my addiction.
humor alert.
Emma
Thursday 9th of December 2021
Hahaha! I’m a fan of them too :) Emma x
Wanda B
Saturday 10th of July 2021
I have not heard of Hobnobs ( I’m pretty sure we don’t have them in the US) but this recipe is amazing! I’ve made it twice in the past 2 days! I didn’t bother to even add the “dip” of chocolate and they’re phenomenal. I did think though that if I decided to gild the lily and add the extra chocolate on the top I might just sprinkle a few bits on the cookies while they’re warm and spread it out, and let it melt. Less fuss and no waste. Anyway, if you were on the fence, BAKE these today. They won’t disappoint. Thanks, Emma!
Emma
Saturday 10th of July 2021
Hi Wanda. Thank you so much for taking the time to share your kind words with me, you’ve made my day and I’m so happy you loved my recipe! Emma x
Ros
Tuesday 20th of April 2021
Absolutely delicious! Taste just like hob nobs. I used a small ice cream scoop to measure out the mixture which made 15 whoppers. When they were cool I turned them over and spooned over the melted chocolate - of corse couldn’t wait to try one even though Chico not set.
Great recipe well done Emma
Emma
Tuesday 20th of April 2021
Hahaha aww yay!!! I’m so happy you had great success with my recipe :) Thank you for taking the time to comment, you’ve made my day! Emma x
Noreen
Sunday 3rd of May 2020
Hobnobs are new to me, but chocolate isn't! haha I'll be trying these soon.
Emma
Sunday 3rd of May 2020
Hi Noreen. Hobnobs are AMAZING! You’re gonna love them I promise :) Emma x
Robyn
Wednesday 2nd of December 2015
Great recipe! Chocolate HobNobs are a family favourite and not always easy to find here. I searched various websites and food blogs before deciding to try your recipe. I simply covered the top of each biscuit with the melted milk chocolate. I've now made it a number of times and passed it on to friends who loved the biscuits too. I do cook from my iPad sometimes but like a paper copy. I cut and pasted from your instructions to create a Word file of one page. Many thanks!
Miss KitchenMason
Wednesday 2nd of December 2015
That's lovely, thank you so much for your comment! I'm currently working on a website overhaul which will hopefully make printing much easier in the future x