

This post may contain affiliate links. Where I make a small commission on purchased items, at no extra cost to you. See my disclosure for details.
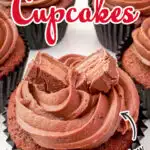
Want to make the best Mars Bar cupcakes EVER? You’re in the right place! This insanely easy to follow step by step picture guide will guarantee it so you can make your very own Mars Bar cupcakes to share with friends and family. (Ok ok – you don’t have to share!)

Ever since I can remember my brother has always been obsessed with Mars Bars. I’ve made him Mars Bar slice before. But, as it’s his birthday this Saturday, I decided to turn his favourite chocolate bar into his favourite cupcake!
And just so you know, Mars Bar Cupcakes are ridiculously amazing, and you absolutely need them in your life. Because a life without Mars Bars is a life not worth living!
Can't face cooking dinner on Fridays? 😩
Imagine a guilt free Friday night dinner, without the exhausting mental load. BYOD Fridays are a fun and supportive Friday night community for tired people who still need to cook, but really cba 💛
Join The WaitlistThese easy cupcakes really do taste like Mars Bar making them perfect for the Mars Bar lovers in your life! Take note of my tips below and read through the whole recipe before beginning so you know what’s coming. There’s nothing worse than being surprised by something at a critical moment in a recipe!
Want to learn more brilliant baking tips? Check out baking for beginners! You might also like these Malteser tiffin bars!

Top Tips for Mars Bar Cupcakes
I make the mistakes so you don’t have to! Here’s some helpful tips to help you get it right first time…
- Remove refrigerated items from the fridge and bring them to room temperature. Batters blend much better when all ingredients are the same temperature.
- Use foil cupcake cases instead of paper ones. Butter will always seep through paper cases but not foil.
- Cool the cakes completely before decorating or your frosting will literally melt off the top!
- Make sure you use cocoa powder and not a hot chocolate drinking powder. Cocoa powder is unsweetened but hot chocolate powders are not. This will affect the overall sweetness of your cakes.
- If you can, store your cupcakes in a metal container, not in plastic. Sugar ‘sweats’ in plastic.
- Do not store your cupcakes in the fridge. It will draw the moisture from the cake very quickly and render them quite dry.


Mars Bar Cupcakes – Step by Step Picture Recipe
(For a printer friendly version, see the recipe card at the end of this post)
Please note, this recipe includes both UK metric and US Cup measurements.
Ingredients and equipment
Here is what you will need to make about 16 -20.
Mars Bar cupcake ingredients
- 1 tbsp Milk
- 3 x Mars Bars (120g or 4 oz), chopped
- 200g (3/4 + 1/8 Cup) Unsalted Butter, Room Temp
- 200g (1 Cup) Golden Caster Sugar
- 4 Eggs, Room Temp
- 200g (1 + 1/2 Cups) Self Raising Flour
- 25g (1/4 Cup) Cocoa Powder
Chocolate buttercream ingredients
- 250g (2 Cups) Icing Sugar
- 3 tbsp Cocoa Powder
- 190g (3/4 Cup) Unsalted Butter, Room Temp
- 1 tbsp Milk
- 1-2 Mars Bars (80g or 3 oz), Chopped to Decorate
Essential equipment
- 12 Hole Cupcake Tin *
- 16 Foil Cupcake Cases
- Saucepan
- Wooden Spoon
- Electric Stand Mixer or Large Bowl and Electric Hand Whisk
- Sieve
- Piping Bag
- Nozzle
*If you have 2 great! If not, just bake in 2 batches.
Mars bar cupcake instructions
Firstly, preheat your oven to 190°C/Fan 170°C/356ºF and line a cupcake tin with cases.
Next, put the milk and the chopped Mars Bars into a heavy based saucepan and melt gently over a low heat. Leave to one side to cool.


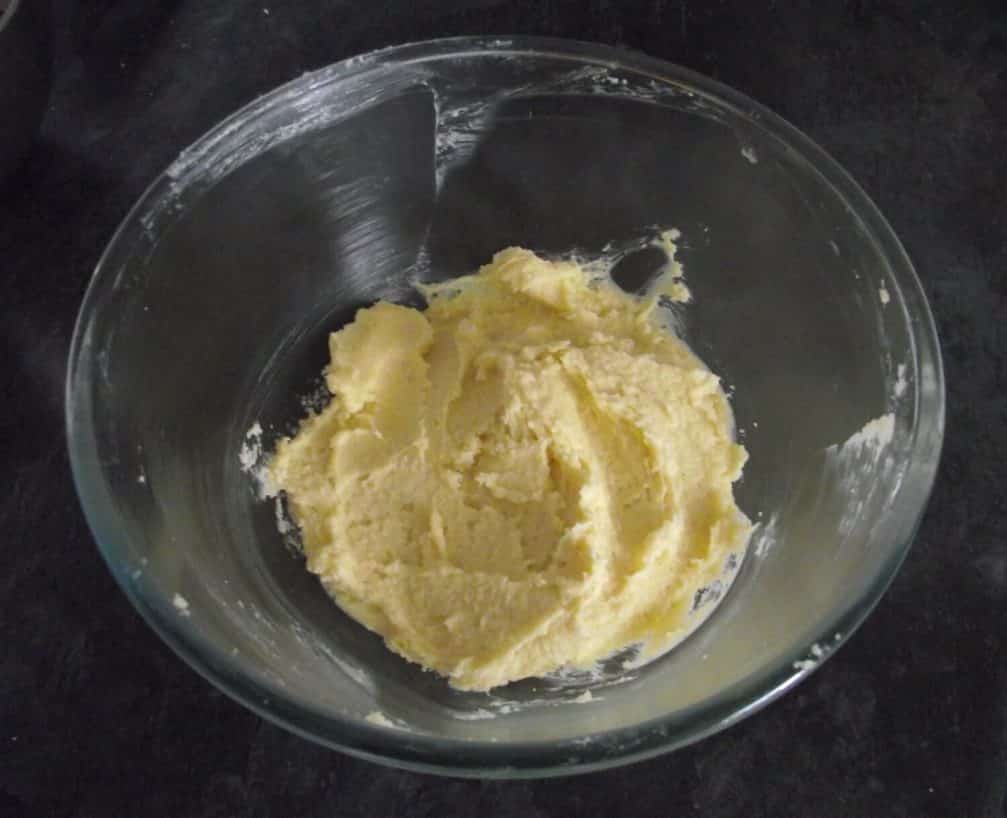
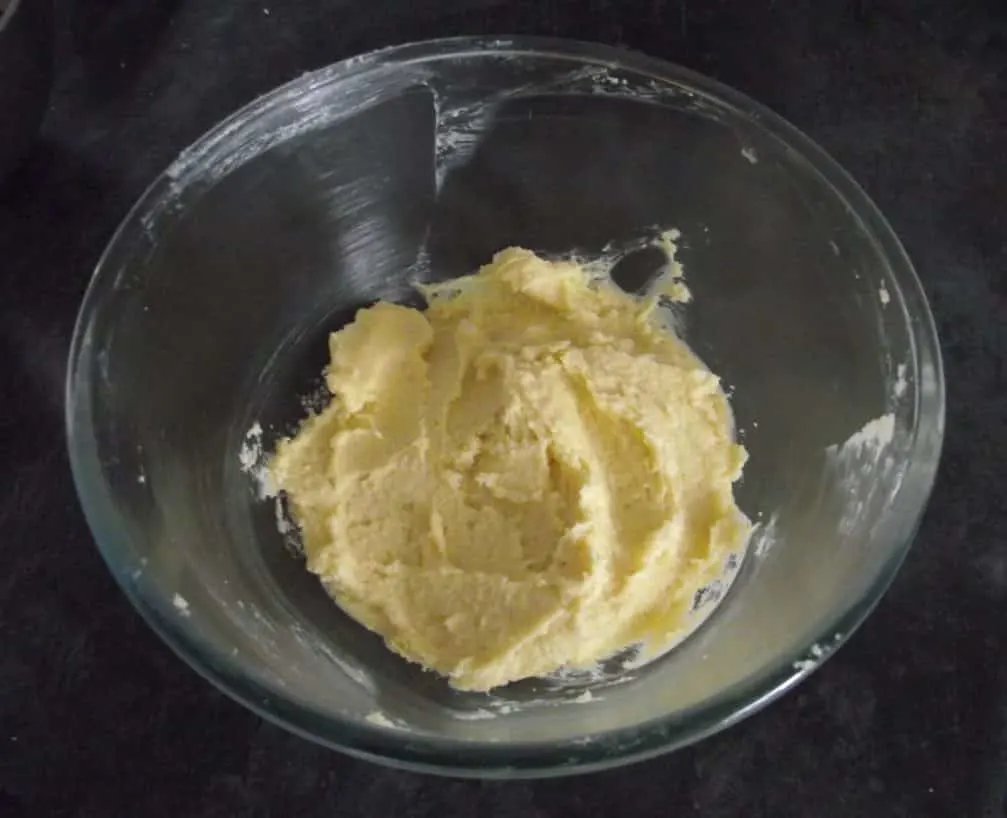
Either in a stand mixer or a large bowl with an electric hand whisk, cream together the butter and sugar until light and fluffy.
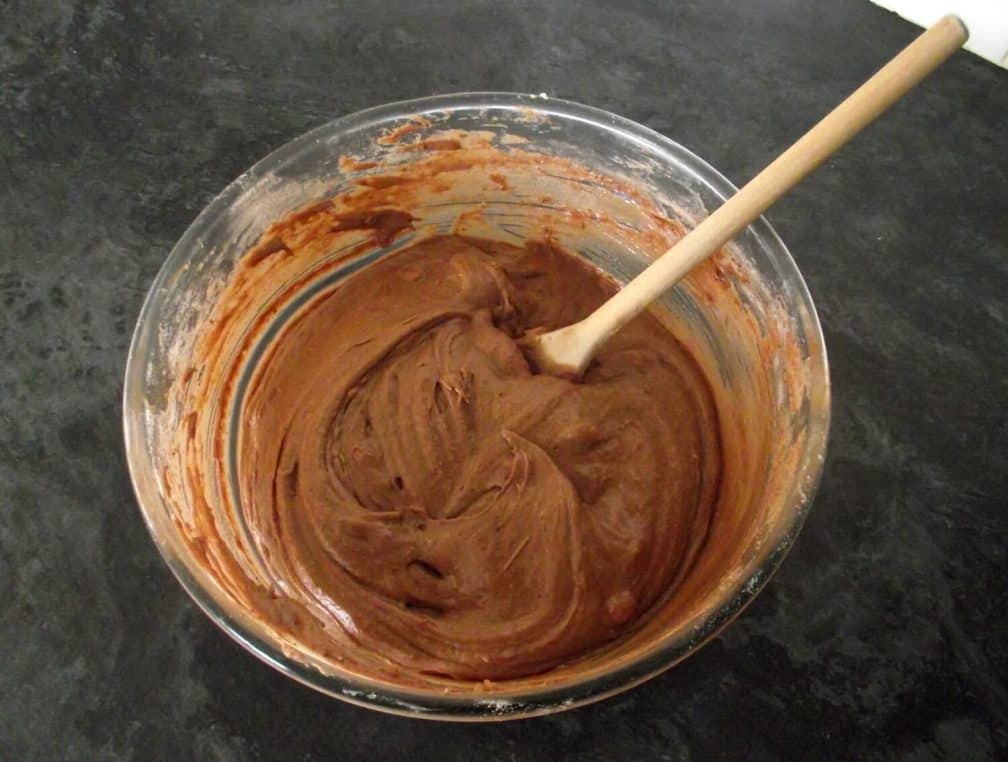
One at a time, beat the eggs into the butter and mix until well combined. Then sift in the flour and the cocoa powder and fold in until just combined.
After that, fold in the melted mars bar until you have a smooth, thick batter.

Lastly spoon the mixture evenly into the cases (each about 2 thirds full) and bake for 18-20 minutes.
Test with a skewer to see when they’re done. If they’re ready the skewer will come out clean, if there is cake batter on it, they need another minute or two.
Finally, allow to sit in the tin for 2 minutes before removing & placing on a wire rack to cool completely.
Chocolate buttercream instructions
Firstly, sieve the icing sugar and cocoa powder together into a bowl then set aside.
Then either in a stand mixer or in a large bowl with an electric hand whisk, cream the butter until softened.
Next, mix the icing sugar/cocoa powder into the butter in thirds. Beat well after each addition.
Lastly add the milk to loosen the mixture and make it smooth. You want a soft consistency that can still hold it’s shape. This will make for easier to pipe.


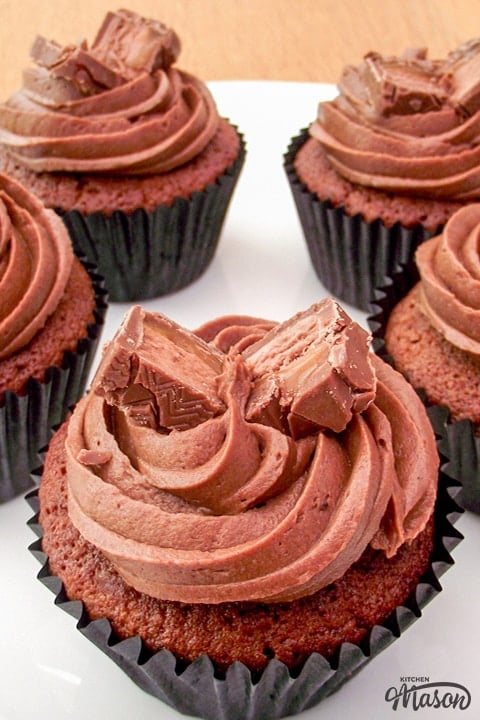
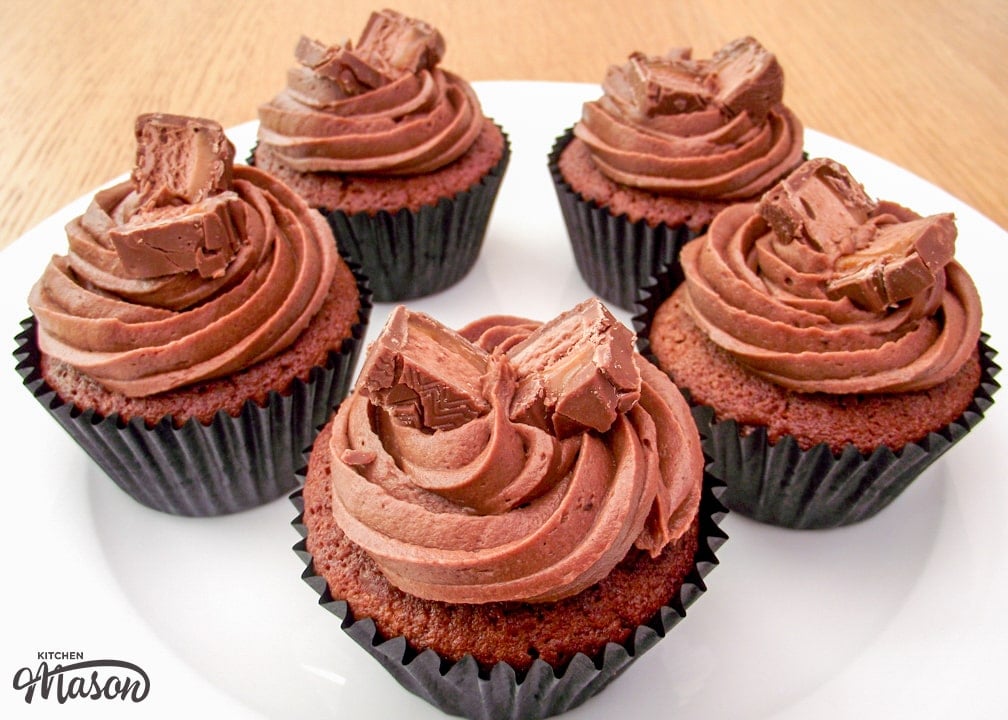
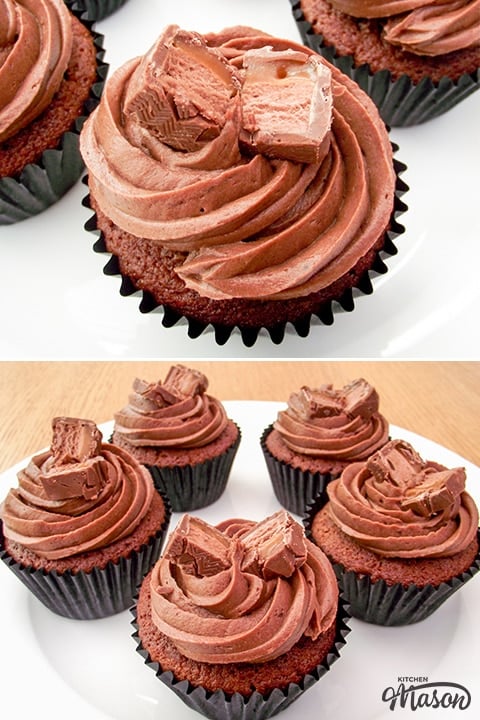
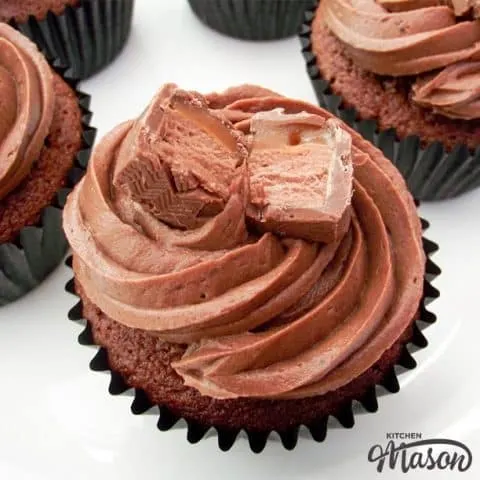
To decorate, load a piping bag with a nozzle of your choice, fill with the buttercream and pipe a swirl onto each cupcake.
Finally if you fancy it, chop up a Mars Bar and place a couple of pieces on top of each one to finish. While you’re at it, why don’t you eat one to celebrate how awesome you are for making such amazing cakes?!

In conclusion, these Mars Bar Cupcakes are moist, full of Mars Bar flavour and therefore CRAZY delicious! These beauties pave the way for many other chocolate bars to be converted into cupcakes. I can’t wait to give some a try!
Mmmm just think, Galaxy cupcakes, Cadburys flake cupcakes, Lindt lindor cupcakes, Yorkie cupcakes, Tobelerone cupcakes, Terry’s Chocolate Orange cupcakes, seems like the list is actually endless! It’s a shame my stomach isn’t… God help my waistline.
I hope you enjoyed the post my lovelies, until next time! Miss KitchenMason x
Loved This Recipe? Pin it!


Easy Mars Bar Cupcakes Recipe
Make the best EVER Mars Bar Cupcakes with this easy step by step recipe guide!
Ingredients
For The Cakes
- 1 tbsp Milk
- 3 x Mars Bars (120g or 4 oz), chopped
- 200g (3/4 + 1/8 Cup) Unsalted Butter, Room Temp
- 200g (1 Cup) Golden Caster Sugar
- 4 Eggs, Room Temp
- 200g (1 + 1/2 Cups) Self Raising Flour
- 25g (1/4 Cup) Cocoa Powder
For the Frosting
- 250g (2 Cups) Icing Sugar
- 3 tbsp Cocoa Powder
- 190g (3/4 Cup) Unsalted Butter, Room Temp
- 1 tbsp Milk
- 1-2 Mars Bars (80g or 3 oz), Chopped to Decorate
Essential Equipment
- 12 Hole Cupcake Tin *
- 16 Foil Cupcake Cases
- Saucepan
- Wooden Spoon
- Electric Stand Mixer or Large Bowl and Electric Hand Whisk
- Sieve
- Piping Bag
- Nozzle
Instructions
To Make the Cakes
- Line the cupcake with foil cases and preheat the oven to 190°C/Fan 170°C/356ºF. Put the milk and mars bars in a small saucepan and melt gently over a low heat stirring often.


- Cream together the butter and sugar in an electric stand mixer (or bowl with an electric hand whisk) until light.

- Beat the eggs into the mixture one at a time then sift in the flour and cocoa powder. Fold until you can't see anymore streaks of flour. Fold through the melted mars bar until you have a smooth, thick batter then fill each of the foil cases 2 thirds full. You might need to use 2 cake tins or bake in 2 batches but DON'T OVER FILL THE CASES. Bake for 18-20 mins until a skewer inserted into the middle comes out clean. Transfer to a wire rack to cool completely before decorating.


To Make the Frosting
- Beat the butter in an electric stand mixer (or bowl with an electric hand whisk) until soft then sift in the icing sugar and cocoa powder. Beat slowly until it's mostly incorporated, then turn up the speed and beat until light and smooth. Add the milk and beat again until loosened and smooth.

To Decorate
- Load a piping bag with a nozzle of your choosing then fill with the frosting. Pipe swirls from the outside inwards then top with chopped pieces of Mars Bar.

Notes
*If you have 2 great! If not, just bake in 2 batches.
If you would rather use a more in depth picture recipe, please see the main body of this post. Where you’ll also find lots of extra FAQs and helpful tips, should you need them.
Please note, this recipe includes both UK metric and US Cup measurements.
Storage
Store in an airtight container (preferably metal) at room temperature and consume within 4-5 days.
Tips
- Remove refrigerated items from the fridge and bring them to room temperature. Batters blend much better when all ingredients are the same temperature.
- Use foil cupcake cases instead of paper ones. Butter will always seep through paper cases but not foil.
- Cool the cakes completely before decorating or your frosting will literally melt off the top!
- Make sure you use cocoa powder and not a hot chocolate drinking powder. Cocoa powder is unsweetened but hot chocolate powders are not. This will affect the overall sweetness of your cakes.
- If you can, store your cupcakes in a metal container, not in plastic. Sugar ‘sweats’ in plastic.
- Do not store your cupcakes in the fridge. It will draw the moisture from the cake very quickly and render them quite dry.
Recommended Products
As an Amazon Associate and member of other affiliate programs, I earn from qualifying purchases at no extra cost to you.

Nutrition Information:
Yield: 16 Serving Size: 1Amount Per Serving: Calories: 944Total Fat: 51gSaturated Fat: 22gTrans Fat: 2gUnsaturated Fat: 23gCholesterol: 128mgSodium: 652mgCarbohydrates: 120gFiber: 4gSugar: 90gProtein: 9g
Nutritional information on kitchenmason.com should only be used as a general guideline, I am not a certified nutritionist. Please always check labels for allergens where applicable.

Emma is a British recipe writer, home cook, and founder of Kitchen Mason. For over 15 years, she has been creating simple, comforting recipes and practical kitchen tips that help tired, everyday people make dinner feel easier and more enjoyable again. Passionate about British home cooking, Emma shares reliable recipes, comforting classics, and realistic kitchen guidance designed for real life. Her work has also been featured in publications including Food Network, Cosmopolitan, and The Huffington Post.
Knowledgeable On: British home cooking, Easy dinner ideas, Comford food recipes, Recipe writing
Jackie
Tuesday 12th of March 2024
Hi Is one tbsp of milk enough to melt the Mars bars or do I need a little more?
Emma
Wednesday 13th of March 2024
Hi Jackie. 1 tbsp has worked fine for me in the past. If you want to, you could probably use 2 tbsp, but I wouldn't increase it any more than that or you may upset the balance of ingredients. Emma x
Kelly
Saturday 20th of February 2021
The main recipe at the end has missed the following direction
After that, fold in the melted mars bar until you have a smooth, thick batter.
Emma
Sunday 21st of February 2021
Hi Kelly. GREAT spot! Thank you so much for letting me know! I've just changed it :) Emma x
Isla Morison
Monday 1st of July 2019
Can I use this recipe for 2 sponge cakes instead of cupcakes?
Miss KitchenMason
Monday 1st of July 2019
Hi Isla. I see no reason why not! Just keep an eye on them during the cooking process and check with a skewer to see if they’re done towards the end. I’d love to know how you get on :) Emma x
Steph
Sunday 15th of May 2016
I made these recently and they were lovely! Ive just made a Milky Way alternative today and they are just as nice :D thank you for recipe !
Miss KitchenMason
Sunday 15th of May 2016
Ooh! A Milky Way version sounds great! Glad you liked them Steph :)
linda
Wednesday 20th of January 2016
Hiya I've recently gotten a few mars bars and been looking for a recipe to use them, these looks aaaamazing! I love how u melt mars into the batter, can't wait to make them! Thanks for sharing :) :)
Miss KitchenMason
Wednesday 20th of January 2016
Haha thank you!! Glad you like them :)