
The Best Easy Doughnut Recipe (Fluffy and Golden!) 4 hrs 15 mins 12

This post may contain affiliate links. Where I make a small commission on purchased items, at no extra cost to you. See my disclosure for details.
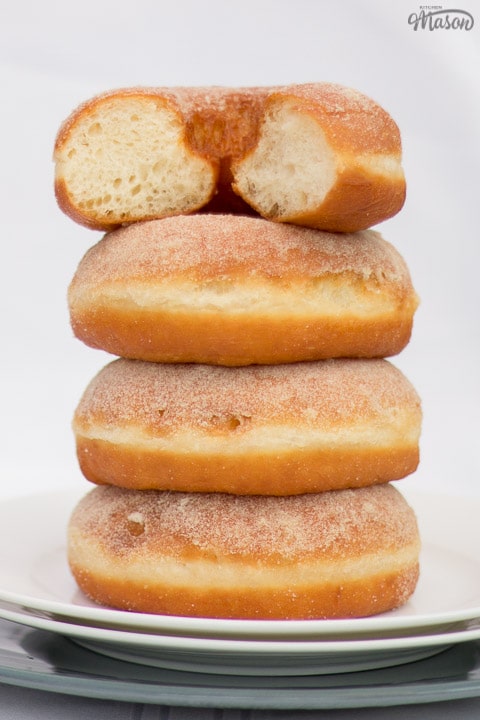
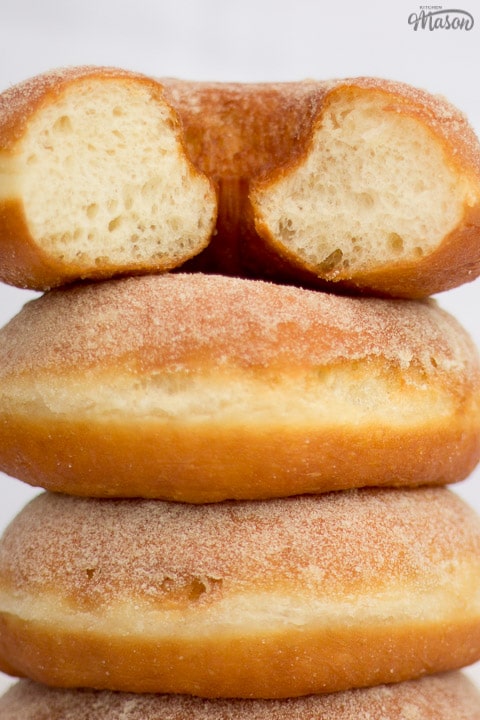
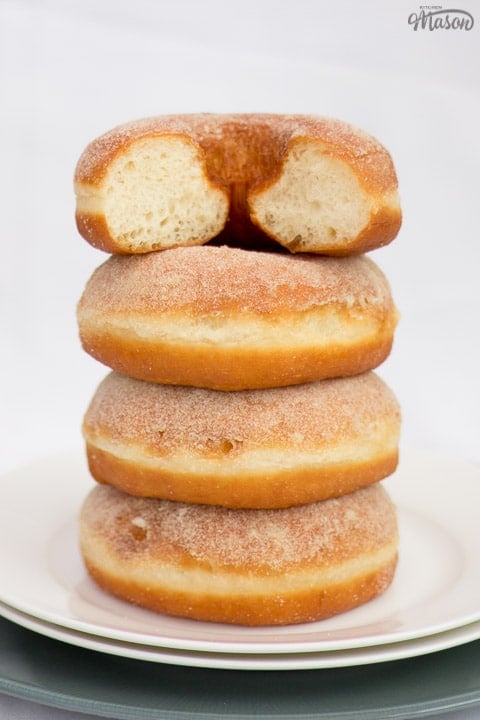
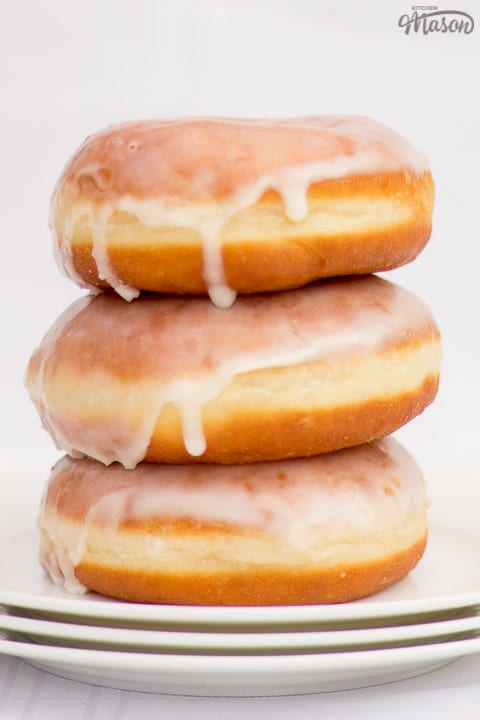
Want an easy doughnut recipe that yields light, fluffy, golden results... and that elusive white ring? You're in the right place! This simple step by step recipe walks you through everything you need to know. Here's how to make them...
Jump to:
Why you'll love it 💛
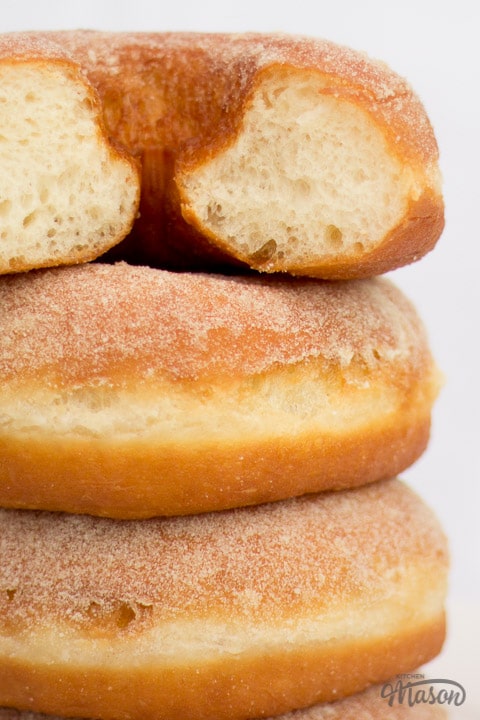
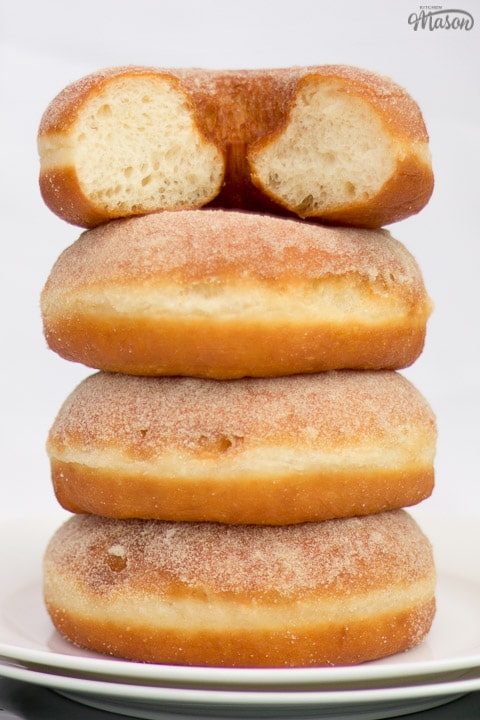
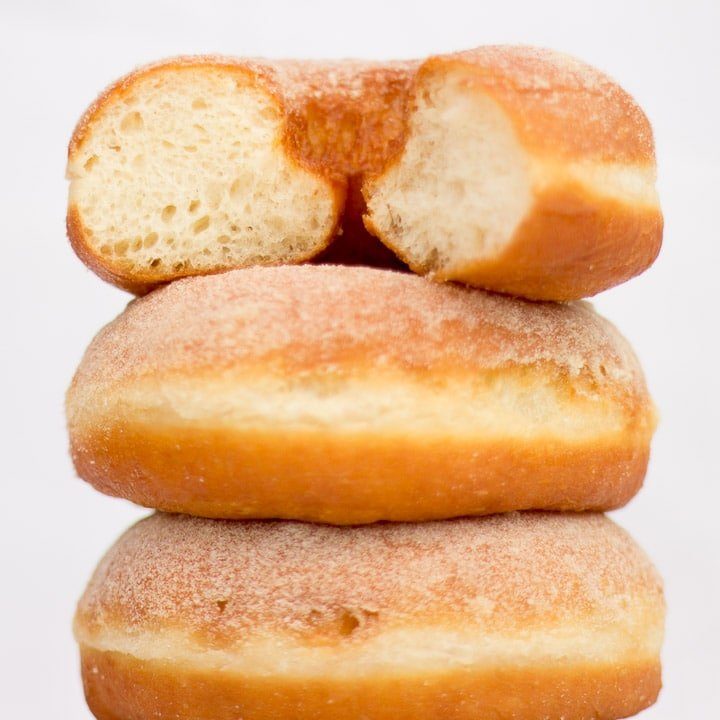
You know that pale white ring you see around the middle of a really good doughnut? That's the sign of a perfectly made one, and this recipe is designed to help you get it every time! No expensive equipment needed either, just the basics, this recipe, and your hands.
New to bread baking? My Baking for Beginners guide is a great place to start before diving in!
Ingredient notes
Confused about what ingredients to buy? Not sure about a substitution? Here's everything you might need to know...
- Flour - A strong flour or bread flour works best with doughnuts. Avoid using plain/all purpose flour if you can.
- Sugar - Use a fine sugar (like caster/superfine) so it absorbs into the dough more easily. Granulated sugar has larger crystals, and will take longer to incorporate.
- Yeast - In this recipe, I use fast action yeast. Any brand will do, just don't switch for fresh yeast as this will change the balance of ingredients.
- Salt - Table salt is fine. No need to get fancy, or use your expensive sea salt!
- Butter - This is used to enrich the dough. A good quality one will always taste better, so use the best you can afford.
- Milk - Also used to enrich the dough, full fat/whole milk will give you the best flavour. You can switch it out for semi skimmed or dairy free alternatives (oat, soy etc) if you like though.
- Eggs - Any eggs will work. Just make sure they're large ones, and not tiny! Or it can mess with the balance of ingredients.
- Oil - While only used for frying, it will still impart a good deal of flavour. Choose a neutral one for this reason. Like vegetable or sunflower oil.
Emma's top tips
Here are tips you'll find helpful when making this recipe.
- Make sure you read the full recipe before you begin. That way, there won't be any surprises, and you're less likely to make potentially costly mistakes.
- Don’t have the time to wait for the milk and eggs to come to room temperature? Crack the eggs into a small saucepan along with the milk. Heat very gently over a low heat (stirring constantly) until they reach room temperature.
- Make sure you put the salt and yeast on opposite sides of the bowl when making the dough, as salt can kill yeast.
- I highly recommend using a dough scraper for this recipe. It’s a very sticky dough, making it hard work if you only use your hands.
- Want a better flavour? After the 90 minute prove - cover and place it into the fridge overnight. The longer the prove, the better the flavour. (Allow to sit at room temperature for a while before using though, as the cold will slow down the next process.)
- Although it’s possible to make doughnuts without one, using a thermometer to get the oil to the right temperature takes out a lot of guess work and stress.
Timings
Have limited time? Struggle with recipe timings? Or juggling around other things? Here's some time managing info to make your life easier!
- Making the initial dough will take around 20 minutes, followed by a 30 minute resting time.
- Next is kneading. This will take between 10 and 20 minutes.
- Then comes the 1st prove. It should take around 60-90 minutes. At this stage, you can refrigerate overnight. Just bring it back to room temperature before moving onto the next step.
- Shaping your doughnuts should take about 15-20 minutes.
- Now time for the 2nd prove, which will take around 60 minutes.
- Finally, frying your doughnuts will take about 4 minutes per batch. (How many you can cook will depend on the size of your doughnuts, and the size of your pan.)
Product suggestions
Life in the kitchen is SO much easier when you have the right equipment! Here are the tools I used and recommend...
- Dough scraper - An absolute must for this recipe. The dough is very sticky, and a scraper makes it so much easier to handle.
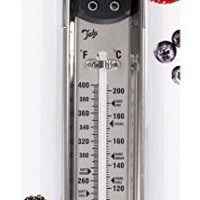
- Thermometer - Takes all the guesswork out of getting the oil to the right temperature. Cheap, and well worth having in your kitchen!
- Large heavy based saucepan or stock pot - Essential for frying. A heavy base helps stability, and to maintain a steady oil temperature, which is key to getting that white ring.
- Large baking tray - You'll need one or two for proving your shaped doughnuts before frying.
Step by step picture recipe
(For a printer friendly version, see the recipe card at the end of this post)
Ingredients
Here is what you will need to make 12 large doughnuts.
Please note, this recipe includes both UK metric and US Cup measurements.
- 500g (3 + ¼ Cups) Strong White Flour
- 50g (¼ Cup) Caster Sugar
- 7g (2 tsp) Dried Fast Action Yeast
- 10g (1 + ¾ tsp) Salt
- 50g (¼ Cup) Unsalted Butter, room temp
- 275g (1 + ¼ Cup) Full Fat Milk, room temp
- 2 Large Eggs, room temp
- Oil For Frying
Toppings (optional)
Classic sugar doughnut
- Caster Sugar
Glazed doughnut
- 250g (2 Cups) Icing / Powdered Sugar
- Pinch of Salt
- ½ teaspoon Vanilla Extract
- 3-4 tablespoon Cold Water
Essential equipment
- Large Mixing Bowl
- Fork
- Dough Scraper
- 1-2 Large Baking Trays
- Tea Towel
- Large Saucepan
- Thermometer
Making the dough
Add the flour (500g | 3 + ¼ Cups), caster sugar (50g | ¼ Cup), yeast (7g | 2 tsp) and salt (10g | 1 + ¾ tsp) to a large bowl. Make sure you put the yeast and salt on opposite sides of the bowl. Then briefly rub everything together.
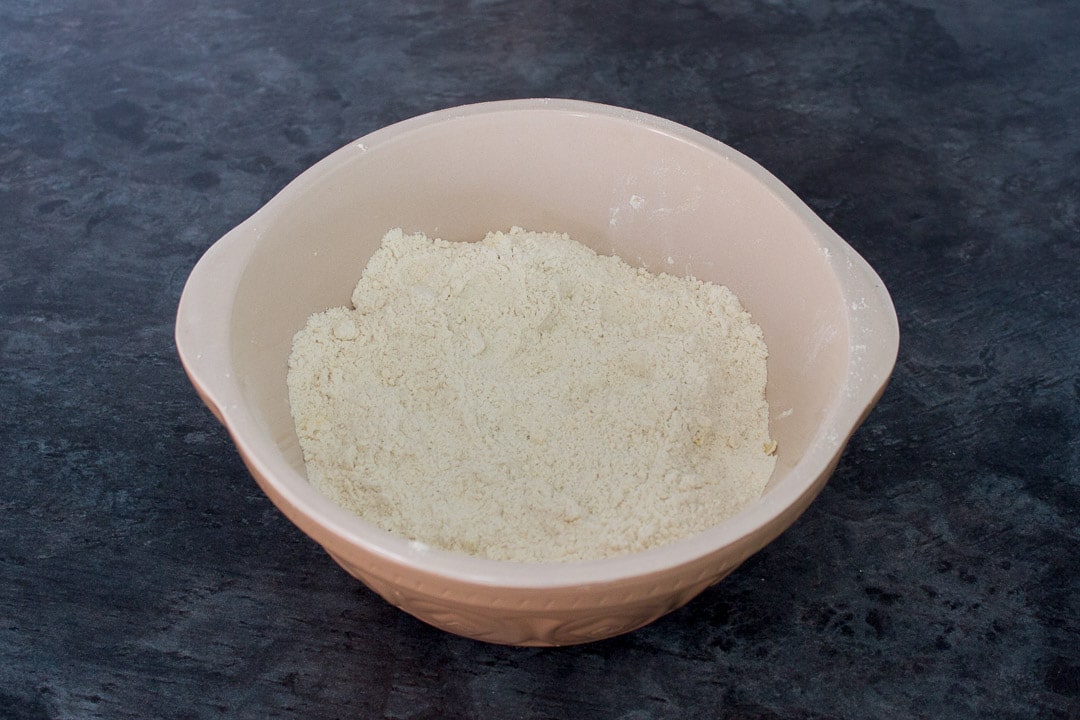
Using the tips of your fingers and thumbs - rub in the butter (50g | ¼ Cup) until you get a breadcrumb like consistency.
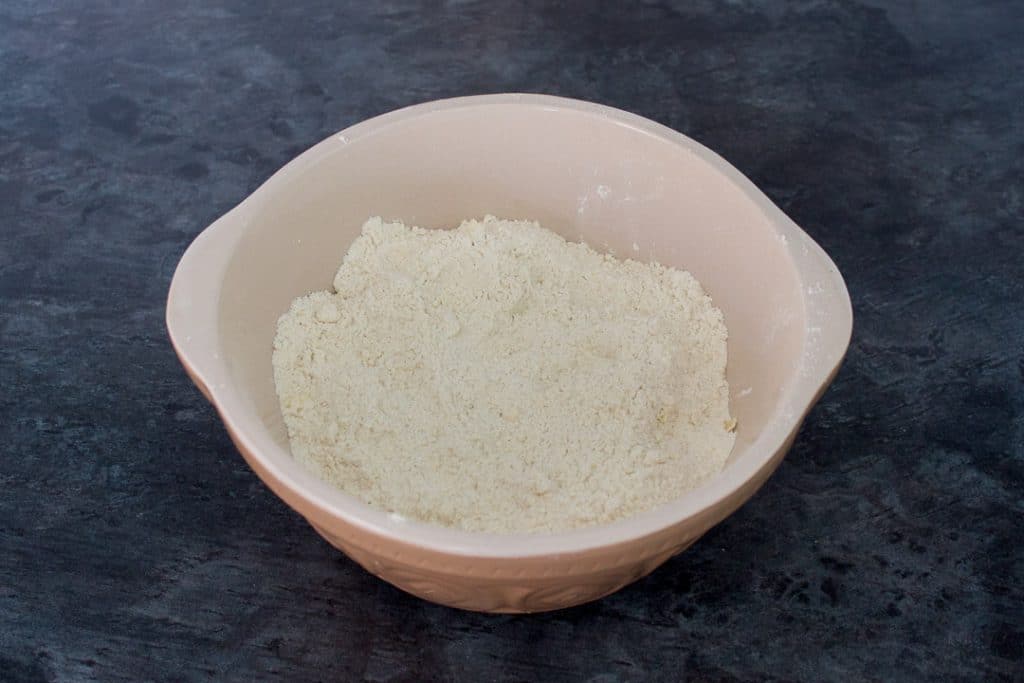
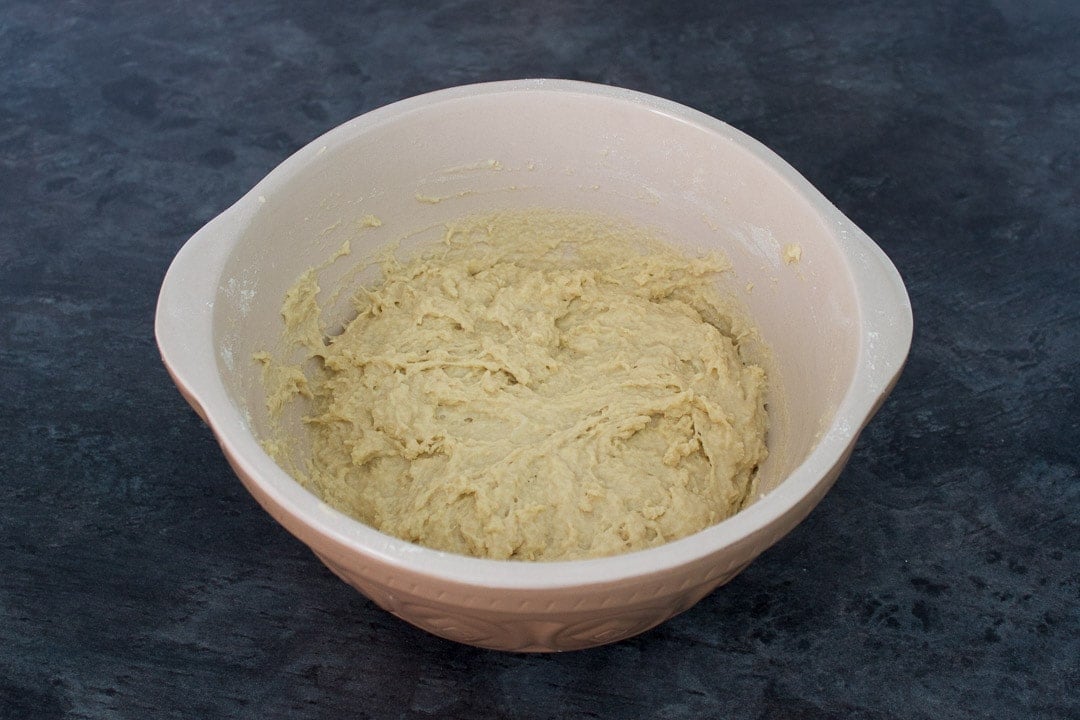
Next, make a well in the centre and add the milk (275g | 1 + ¼ Cup) and eggs (2 x Large). Mix with a fork (or your hands) until there is no more flour visible and everything has been incorporated. Yes, this is a very wet and sticky dough. That's ok.
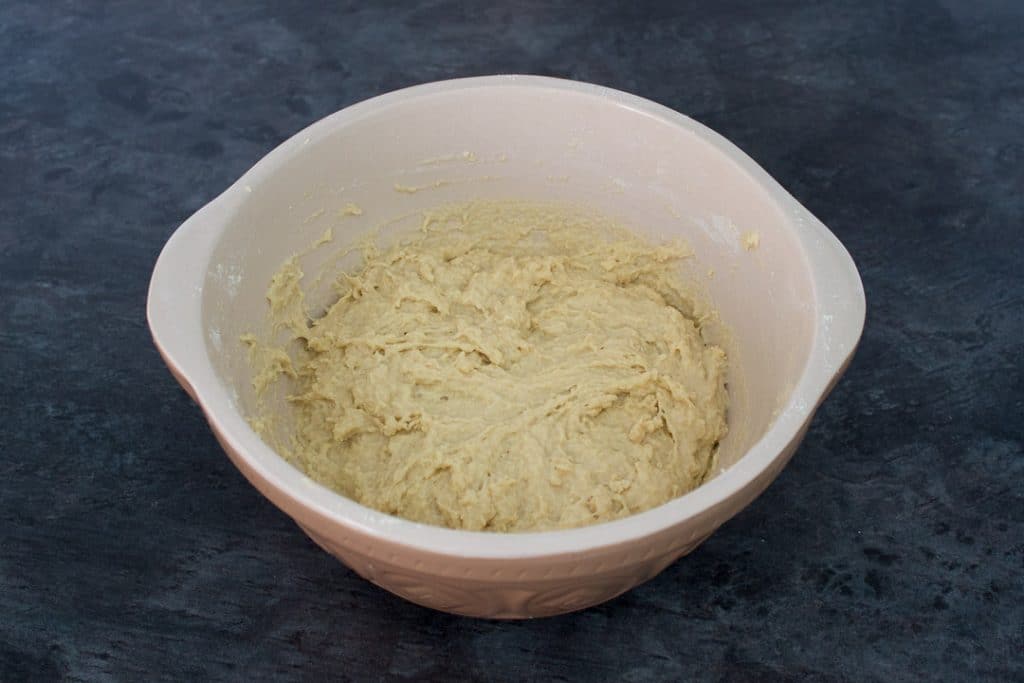
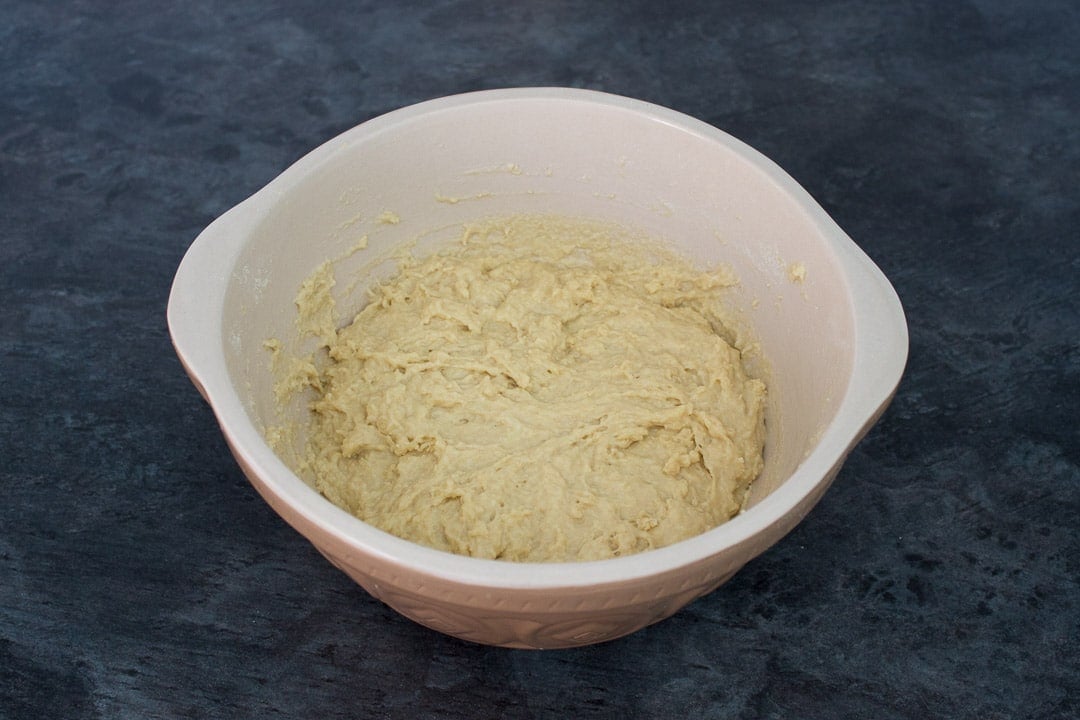
Now cover with cling film and leave to rest for 30 minutes. It should then look a little more plump than before.
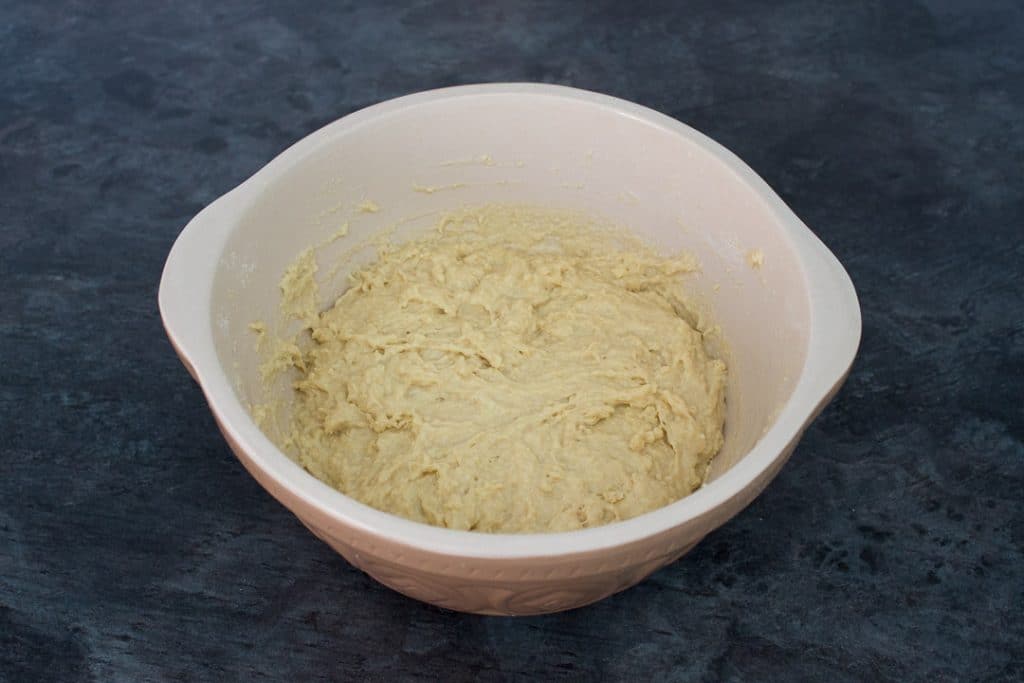
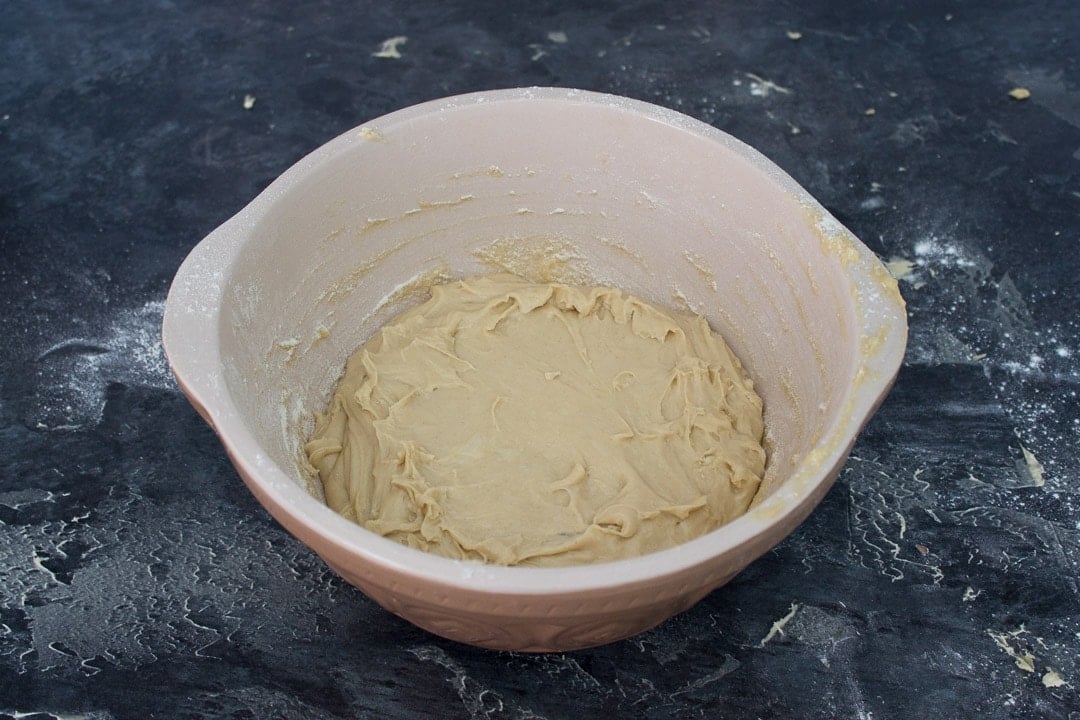
Next, tip the dough out onto a work surface and knead (with the help of a dough scraper) for about 10-20 minutes. It depends on your technique as to how long it will actually take, but you’re aiming for a soft dough that will pass the windowpane test.
I know it seems like it will never improve, but trust me, it will. Don't be tempted to add any extra flour if you can help it.
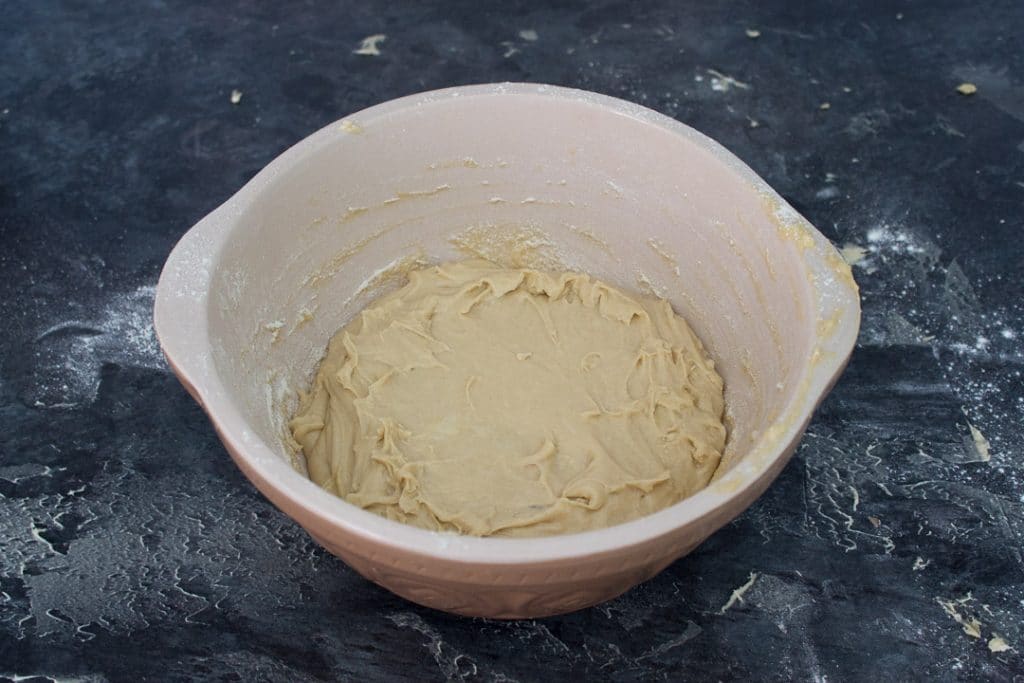
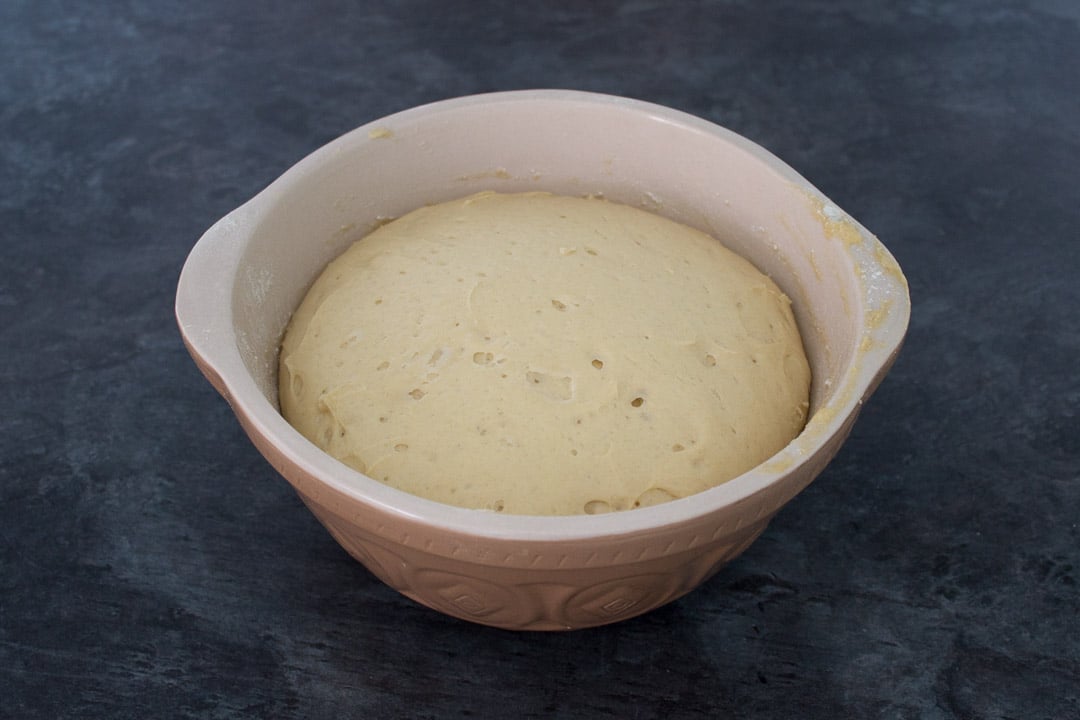
When it’s ready, place the dough back into the bowl and allow to prove for 60 - 90 minutes. (Until about doubled in size.)
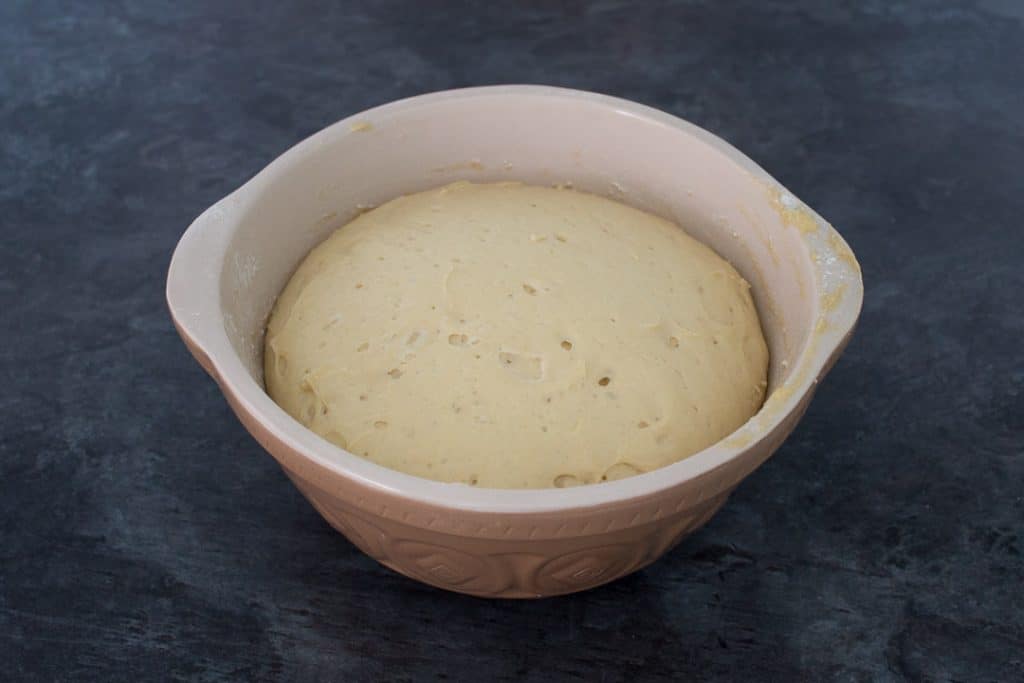
At this point you can cover and put it in the fridge overnight. This will actually help develop a much better flavour. If you do this, make sure you allow it to sit at room temperature before using, as the cold will slow down the next process.
Alternatively, you can just move straight onto the next step.
Shaping instructions
Prepare 1 or 2 large baking trays by covering in cling film and greasing with oil.
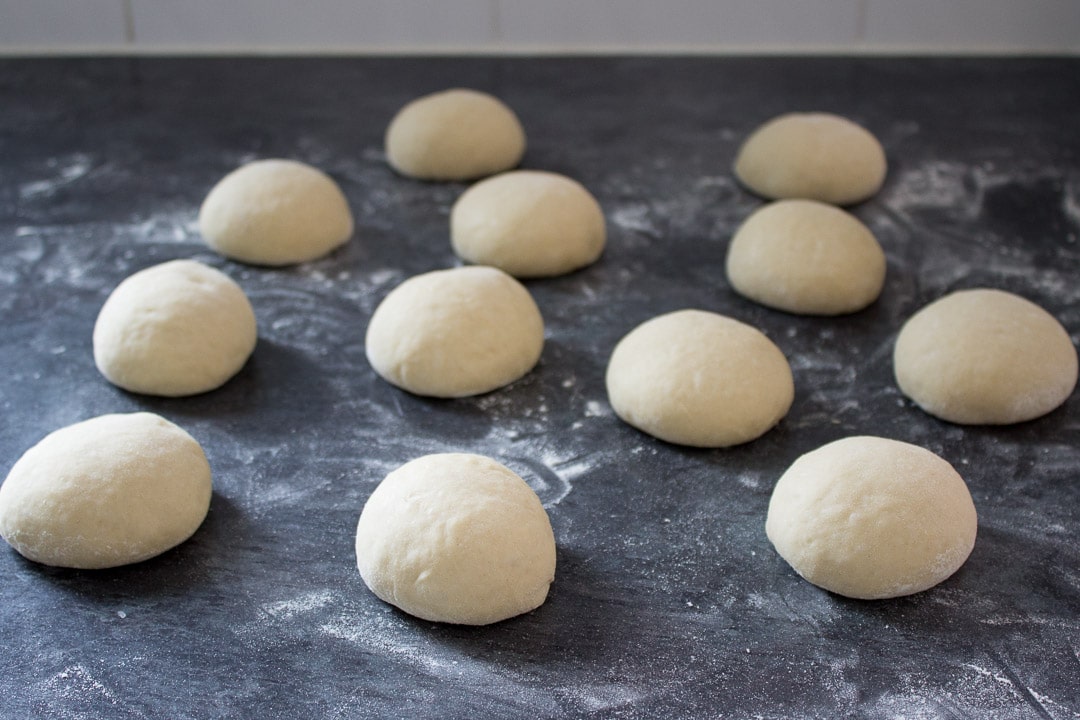
Then tip the dough out onto a lightly floured surface, and shape into a ‘sausage’. Divide the dough into 12 equal portions, then shape into balls. (James Morton’s book Brilliant Bread has an excellent guide to shaping breads if you need any further guidance.)
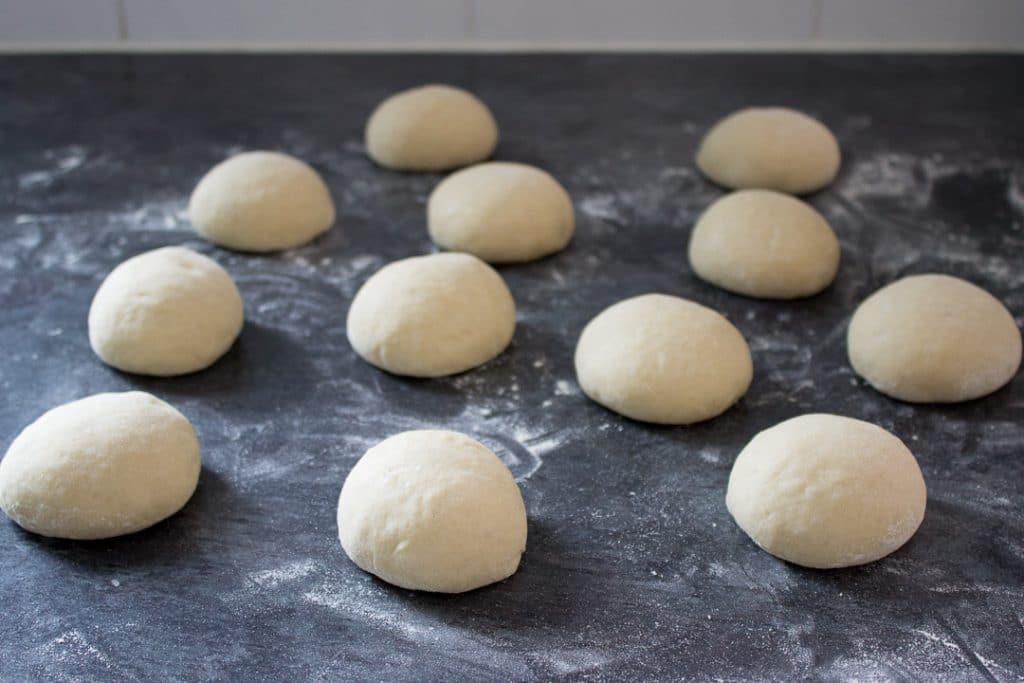
Now poke a hole in the middle of each one, and stretch it out by rotating your hands. (A bit like if you were starting the Saturday Night Fever dance!)
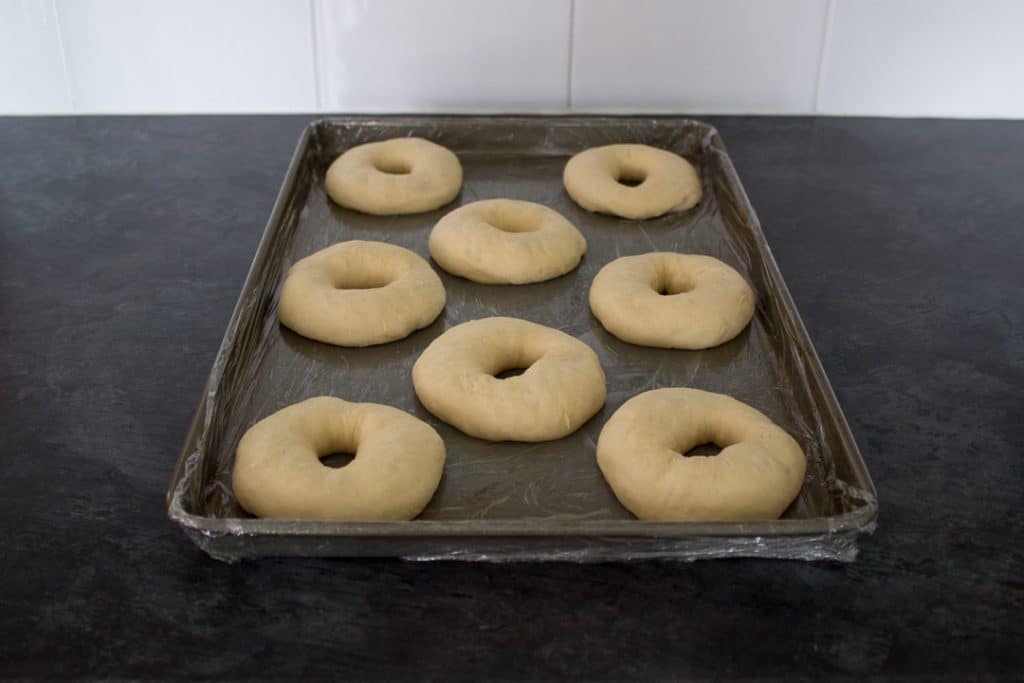
Place them onto the prepared baking sheets, cover with a slightly damp tea towel, and allow to prove for another 60 minutes.
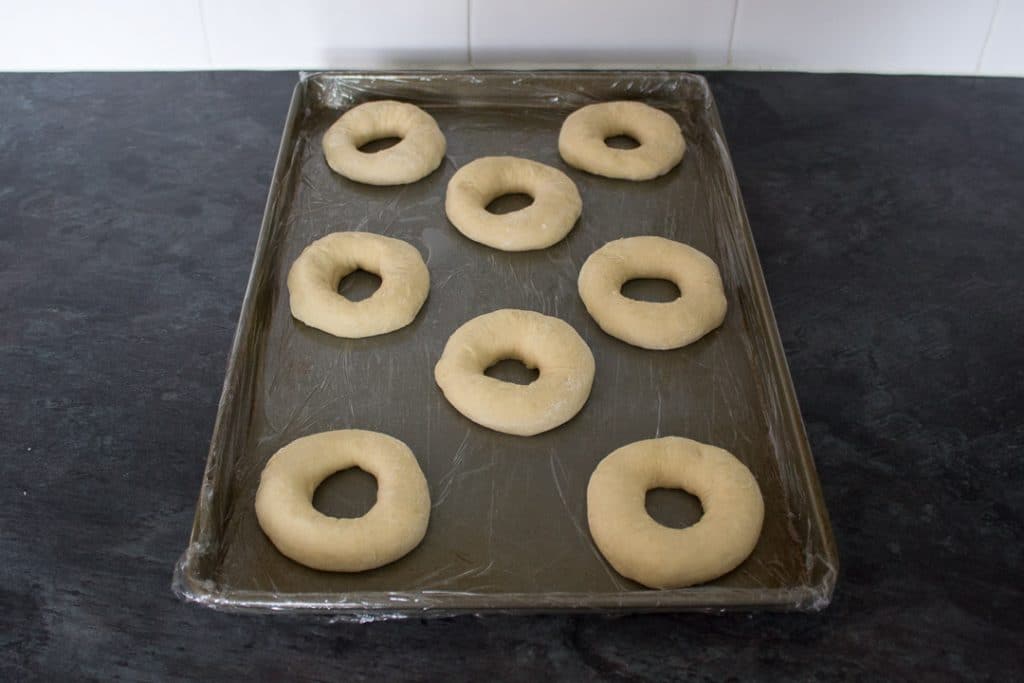
Your doughnuts are ready to be fried when you can poke them lightly and the dough springs back all the way.
Frying instructions
If you have a deep fat fryer - great. If not, it doesn’t matter. I used a large, heavy based saucepan and it worked just as well.
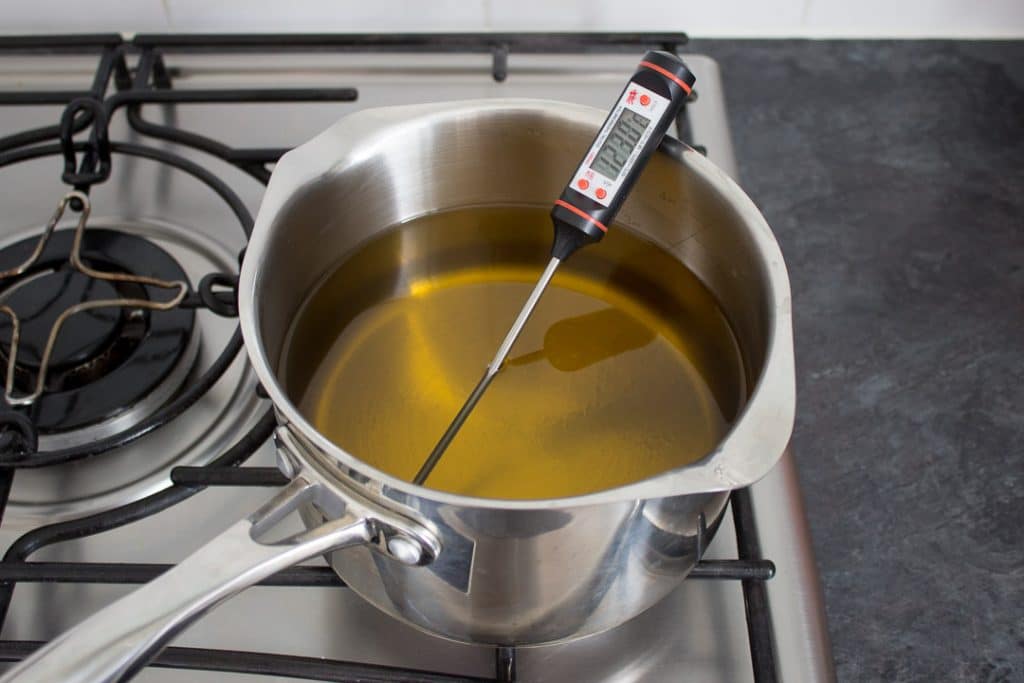
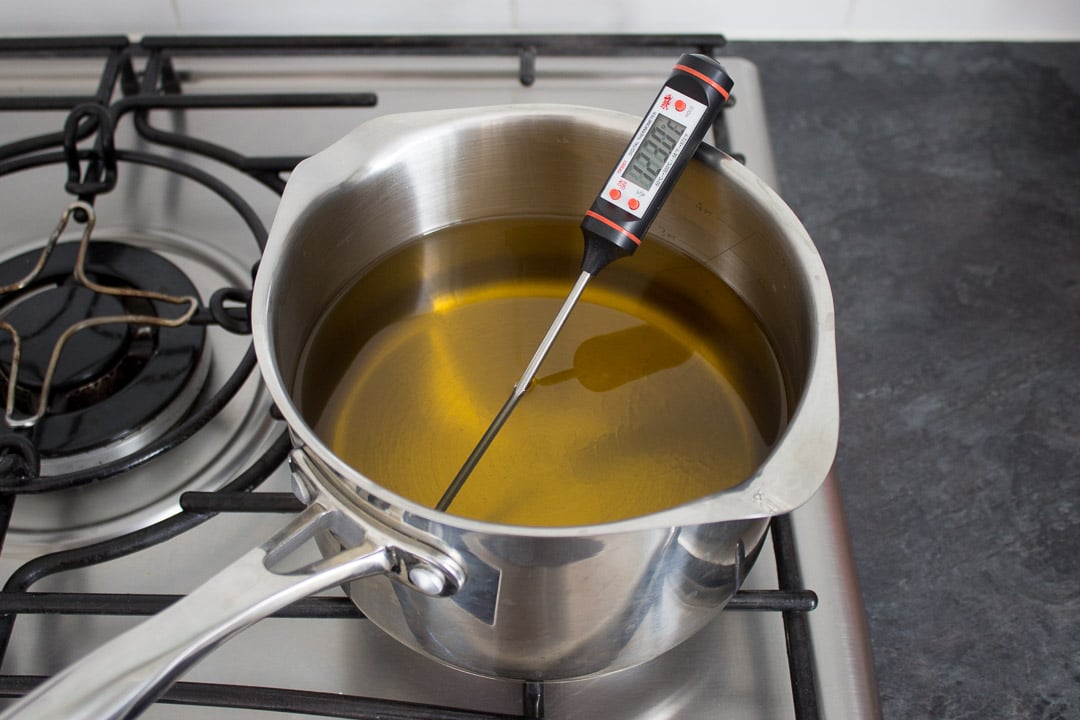
First, heat the oil to 170°C/338ºF. Once it has reached this temperature, reduce the heat to stop it getting any hotter.
Remember to regularly check with a thermometer to ensure the temperature is holding steady. (If using a deep fat fryer, it should hold the temperature for you without having to change any settings or check with a thermometer.)
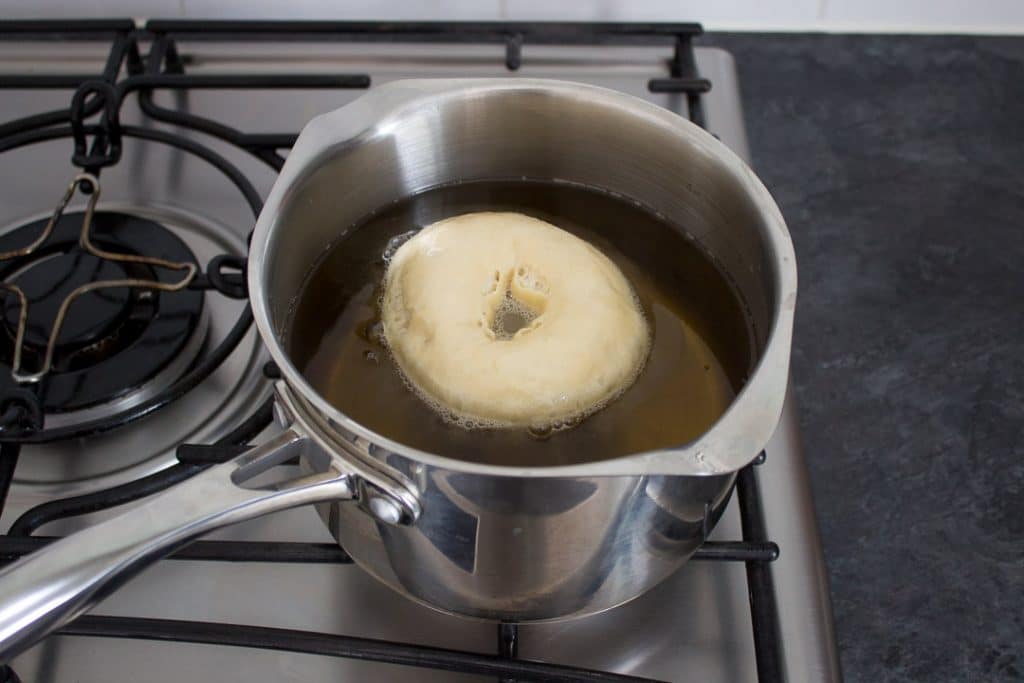
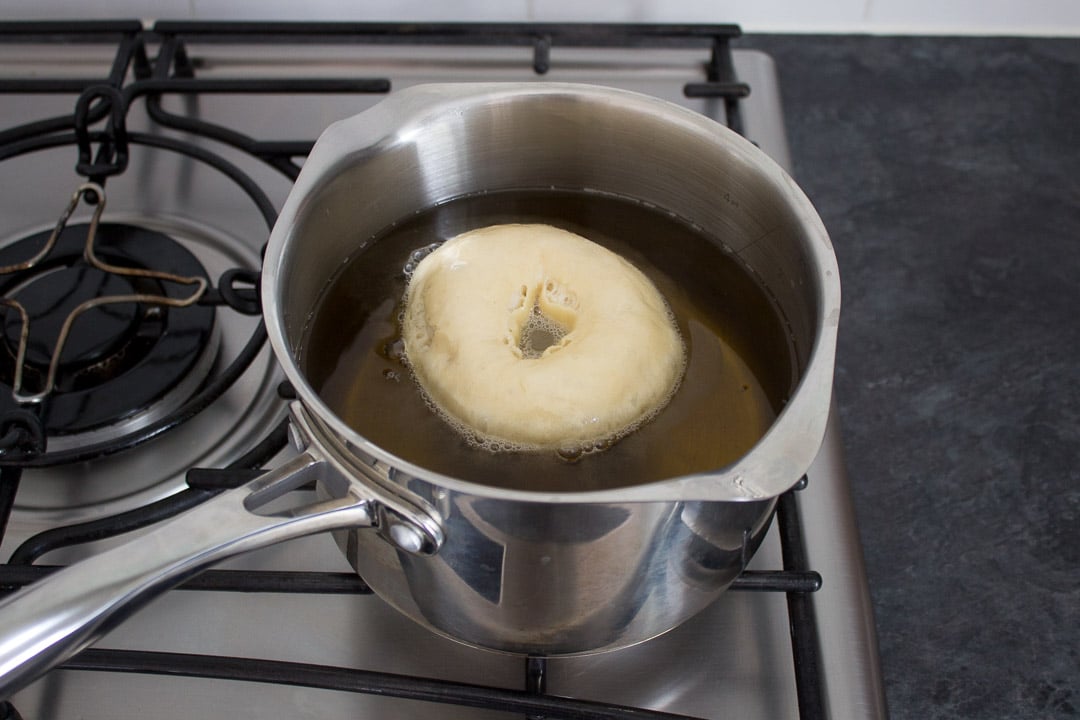
Now fry each doughnut for approx 2 minutes on each side. Be careful when you flip it over, as the oil may splash, and it will be very hot.
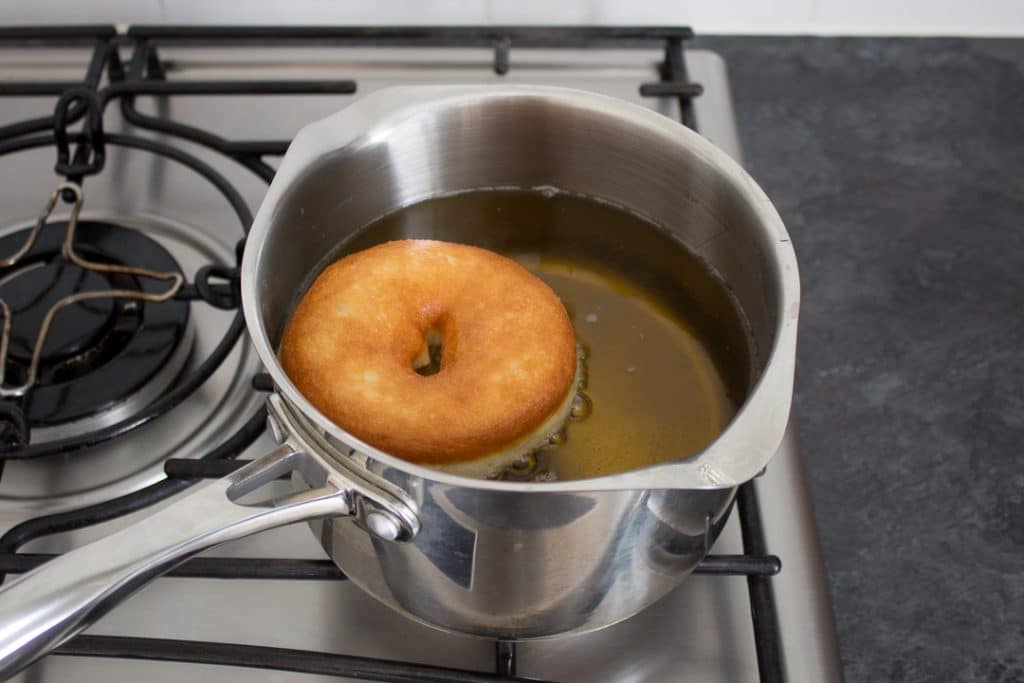
Then, using a slotted spoon, transfer to a plate covered in kitchen roll, to absorb any excess oil. Repeat the process for any remaining doughnuts.
At this point you can eat them as they are, or decorate with one of the following options... Whatever you choose, make sure you allow them to cool a little before eating!
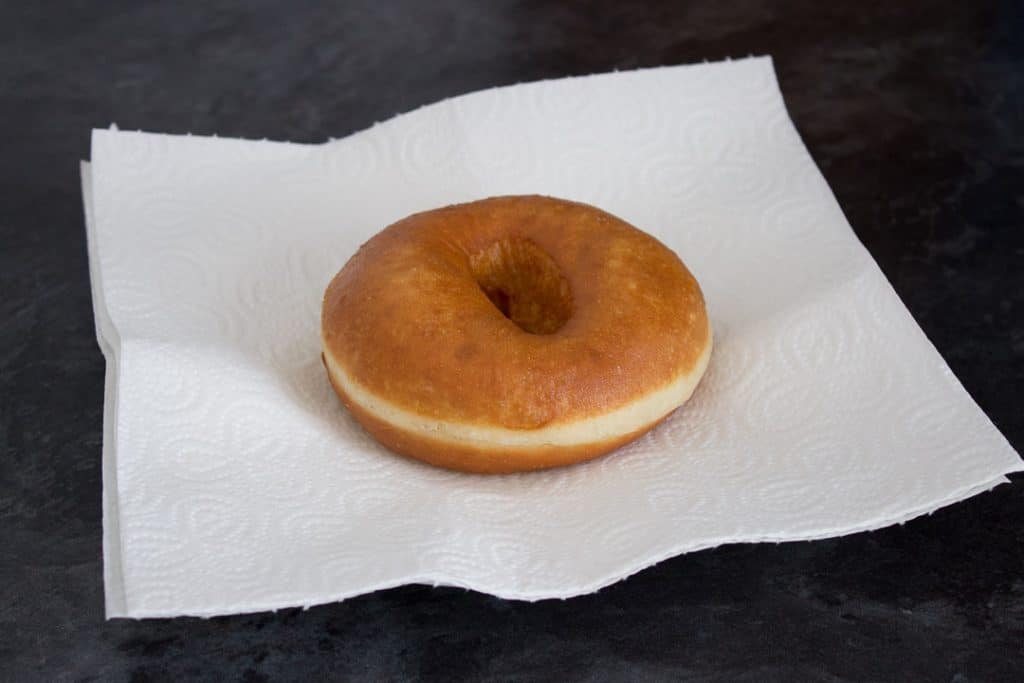
How to sugar a doughnut (optional)
Place some caster sugar into a bowl, and roll each doughnut in it. It's as simple as that!
How to glaze a doughnut (optional)
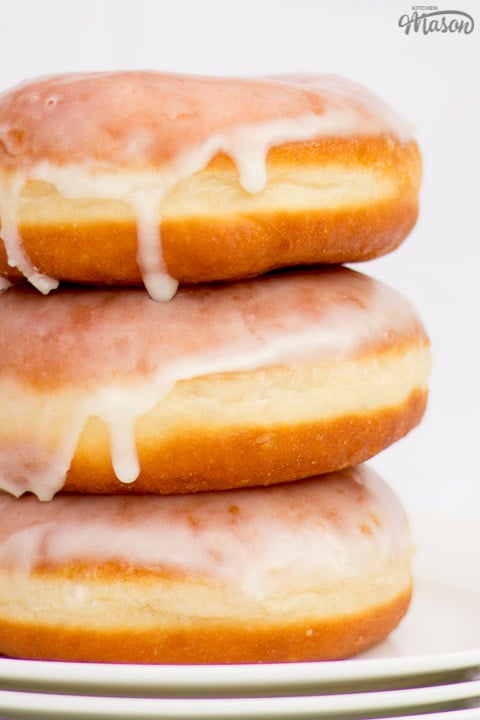
Place all the glaze ingredients (250g | 2 Cups of Icing Sugar, pinch of salt, ½ teaspoon of vanilla, 3-4 tablespoon of cold water) into a bowl, and whisk until smooth and a little runny.
Submerge the top half of each cooked doughnut into the glaze, and place on a cooling rack set over baking paper to catch any drips.
How to store
Homemade doughnuts are definitely best eaten on the day. They go stale very quickly! That being said, they will last for 2 or 3 days in an airtight container at room temperature. You can revive them a little, by microwaving for 5-10 seconds.
FAQs
Both are delicious, but a fried doughnut will always taste more indulgent due to the higher fat content. In this recipe we fry them (the traditional way) for the best possible results.
Yes, and it's actually the best choice! The extra gluten in strong bread flour is strong enough to trap air bubbles during proving, giving you a soft, pillowy doughnut. Avoid plain flour if you can.
Easily! Simply shape each piece of dough into a ball, poke a hole in the middle, and stretch it out by rotating your hands. No cutter or mould needed. It's the traditional method, and works perfectly.
Around 1.5 litres should do it, but it does depend on the size of your pan. You need enough oil for the doughnuts to float freely without touching the bottom.
From start to finish, expect around 4 hours. However, most of that is proving time rather than active work. But if you prove overnight in the fridge after the first prove, the flavour will be even better!
A flavourless oil like vegetable or sunflower oil is best. Avoid anything with a strong flavour or a low smoke point. You need the oil to reach 170°C, so it needs to be able to handle the heat.
In this recipe, yes - eggs enrich the dough and contribute to that soft, pillowy texture. Leaving them out would give you a noticeably different result, so I wouldn't recommend doing that for this particular recipe.
Strong bread flour (also called bread flour) has a higher protein content than plain flour, which creates more gluten when mixed. That extra gluten is what gives doughnuts their soft, chewy, pillowy texture - so it really is worth using the right flour here!
Loved it? Pin it! 💛

Easy Doughnut Recipe
Make the most PERFECT homemade doughnuts with that elusive 'white ring', using this easy doughnut recipe!
Ingredients
- 500g (3 + ¼ Cups) Strong White Flour
- 50g (¼ Cup) Caster Sugar
- 7g (2 tsp) Dried Fast Action Yeast
- 10g (1 + ¾ tsp) Salt
- 50g (¼ Cup) Unsalted Butter, room temp
- 275g (1 + ¼ Cup) Full Fat Milk, room temp
- 2 Large Eggs, room temp
- Oil For Frying
Iced Glaze *
- 250g (2 Cups) Icing Sugar
- Pinch of Salt
- ½ teaspoon Vanilla Extract
- 3-4 tablespoon Cold Water
Essential Equipment
- Large Mixing Bowl
- Fork
- Dough Scraper
- 1-2 Large Baking Trays
- Tea Towel
- Large Saucepan
- Thermometer
Instructions
- Rub together the flour, sugar, yeast, salt and butter in a large mixing bowl until breadcrumb like.
- Make a well in the middle, and add the milk and eggs. Mix until incorporated. (It will be very wet and sticky.)
- Cover and leave to plump up for 30 mins.
- Tip out onto a work surface and knead for 10 - 20 mins until elastic. Using a dough scraper will help make it a little easier. (Be patient and don't be tempted to add more flour.)
- Put back into the bowl, cover and prove for 60 - 90 mins until doubled in size.
- Cover a large baking tray in cling film and grease with a little oil. Then divide the dough into 12 equal pieces and roll into balls.
- Poke a hole in the middle of each one, and stretch out slightly to form a ring. Then place them on the lined tray, cover with a damp tea towel and prove for 60 mins.

- When the doughnuts can be lightly poked and spring back all the way, they're ready. Heat the oil in a large saucepan to 170°C/338ºF.

- Fry each one for approx 2 mins on each side until golden.
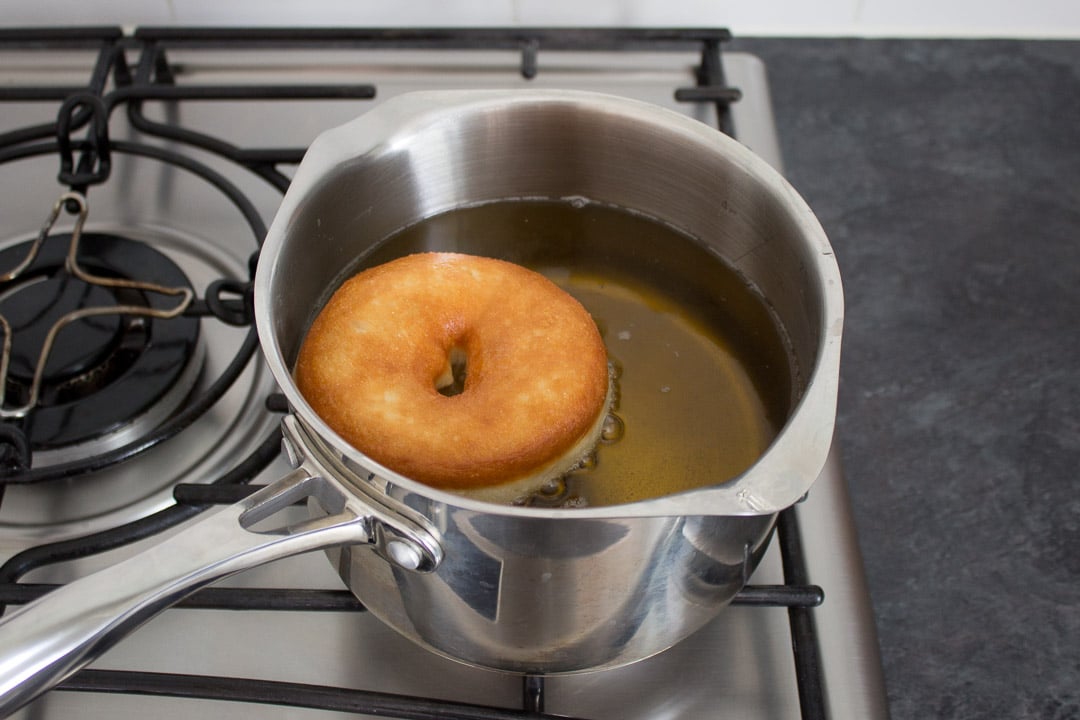
- Then place on a kitchen towel to drain any excess oil. Repeat until all the doughnuts are fried.

- Make the glaze by mixing the icing sugar, salt, vanilla and cold water together in a bowl. Then drizzle over each doughnut. Alternatively you can simply roll them in caster sugar.

Notes
* Alternatively, you can simply roll them in caster sugar
If you would rather use a more in depth picture recipe, please see the main body of this post. Where you’ll also find lots of extra FAQs and helpful tips, should you need them.
Please note, this recipe includes both UK metric and US Cup measurements.
Serving
These are best eaten on the day for the best flavour and texture.
Tips
- Make sure you read the full recipe before you begin. That way, there won't be any surprises, and you're less likely to make potentially costly mistakes.
- Don’t have the time to wait for the milk and eggs to come to room temperature? Crack the eggs into a small saucepan along with the milk. Heat very gently over a low heat (stirring constantly) until they reach room temperature.
- Make sure you put the salt and yeast on opposite sides of the bowl when making the dough, as salt can kill yeast.
- I highly recommend using a dough scraper for this recipe. It’s a very sticky dough, making it hard work if you only use your hands.
- Want a better flavour? After the 90 minute prove - cover and place it into the fridge overnight. The longer the prove, the better the flavour. (Allow to sit at room temperature for a while before using though, as the cold will slow down the next process.)
- Although it’s possible to make doughnuts without one, using a thermometer to get the oil to the right temperature takes out a lot of guess work and stress.
Recommended Products
As an Amazon Associate and member of other affiliate programs, I earn from qualifying purchases at no extra cost to you.

Nutrition Information:
Yield: 12 Serving Size: 1Amount Per Serving: Calories: 405Total Fat: 11gSaturated Fat: 5gTrans Fat: 0gUnsaturated Fat: 6gCholesterol: 42mgSodium: 163mgCarbohydrates: 69gFiber: 2gSugar: 25gProtein: 7g
Nutritional information on kitchenmason.com should only be used as a general guideline, I am not a certified nutritionist. Please always check labels for allergens where applicable.
More recipes like this
- Easy drop scones (Scotch pancakes)
- Caramel croissant pudding
- Air fryer Creme Egg croissants
- Paul Hollywood's Jam and Custard Doughnuts
- Baked Doughnuts Recipe
Share your baking! 💛
Have you used this fluffy doughnut recipe? I’d love to know if you have! Tag me in your pics on Instagram and Facebook. Or email me at emma@kitchenmason.com.

Emma is a British recipe writer, home cook, and founder of Kitchen Mason. For over 15 years, she has been creating simple, comforting recipes and practical kitchen tips that help tired, everyday people make dinner feel easier and more enjoyable again. Passionate about British home cooking, Emma shares reliable recipes, comforting classics, and realistic kitchen guidance designed for real life. Her work has also been featured in publications including Food Network, Cosmopolitan, and The Huffington Post.
Knowledgeable On: British home cooking, Easy dinner ideas, Comfort food recipes, Recipe writing


Thank so much I followed every process and it came out perfect thank you
Hi Grace. Oh that's fantastic! I'm so happy you love my recipe! Thank you for taking the time to share 🙂 Emma x
Hi! Pls what is the brand name of the flour you used cos i have been finding it difficult to make doughnuts here in UK and the yeast I have been using is still active because I tested it before using it . My doughnuts doesn't rise enough nd it is always hard but my buns and puff puff is perfect. Any trick to that or is there any raising agent aside yeast that I need to add ?
Hi Mary. I tend to use either supermarket own brand strong bread flour, or Allinsons if it's on offer. The brand of flour shouldn't make too much of a difference in my experience. No need to add another raising agent. You could possibly be over proving slightly? Emma x
Hi Emma just wanted to say a very big thank you for sharing your recipe....
I followed every step of the recipe to make Perfect homemade doughnuts...
Once I deep fried mine I Rolled them in Caster sugar then cut them all in half and Filled them with Raspberry Conserve jam and freshly Whipped double cream...
OMG they are Lush and so tasty.
I left mine oven night in the fridge and fried and added sugar jam and cream today 🙂
It's a shame I can not attach any pictures of my finished doughnuts However I did send you an email with some pictures 🙂
I'm Going to see what other recipes you have to see what my next baking session will be 🙂
Thank you again for sharing your recipe I'm sure my husband and his crew mates will enjoy them as much as the one I tried.
My Husband is a Paramedic so I'm sure they will all get a sugar rush with these to keep them all going whilst on shift 🙂
Marita-Ann
x
Hi Marita-Ann. I’m SOOO happy you loved my recipe! You’ve absolutely made my day, thank you so much 🙂 Emma x
Really nice. I think topping was a bit plain so I dipped them in sugar.
Glad you liked them! Dipping doughnuts in sugar is classic and delicious, great idea 🙂 Emma x
Please teach me how to prepare donut.
Hi Emmanuel. If you read through the post, it'll tell you everything you need 🙂 Emma x
Hi! The. Amount of milk listed is different in your walk through versus your print out recipe. I had set out milk based on the walk through but then later went to read the print out portion but noticed I had too much milk. I mixed it up based on the print out recipe and the mixture was dry so I added the rest of the milk and then it was sticky like you said it should be.
Oh my goodness, thank you SO much for sharing this with me! I've corrected it now 🙂 Emma x
We've just made these and they're perfect, crisp outside and sooo fluffy in the middle! Thanks for the recipe 🙂
Hi Aimee. Oh yay!! I’m so happy you love my recipe and it worked so well for you! Happy New Year 🙂 Emma x
What is a "strong" white flour?
Hi Kathie. Strong flour is what we use here in the uk to make bread and various doughs. It’s higher in protein and better for bakes that require more structure. I hope this helps? Emma x
Thanks so much! I wanted to double check to make sure I had the right things to start. Thank you for sharing your recipe!
You're so very welcome! Emma x
How many donuts can we make in this recipe?
Hey! It makes about 12 large doughnuts. Emma x
So light and fluffy. I spent 20 mins kneading it was hard work but worth it thanks
Hi Anthony. I’m so glad you stuck with it and created beautiful doughnuts!! Thank you so much for taking the time to share this with me 🙂 Emma x
Hellooo 🙂
I'm just wondering how much oil is needed to fry in?
Thanks and can't wait to try making these! 😀 x
Hi Nat. From memory I think I used about 1.5 litres. Once completely cooled, you can pour this back into the bottle and use again when you make more doughnuts - saves waste 🙂 Emma x
@Emma, Thanks so much Emma! I was wondering what to do with it afterwards too haha. Is there a particular type of oil that works best? x
You’re very welcome! The mostly flavourless oils like vegetable or sunflower would work fine. Don’t use olive oil as it has a low burning point and a strong flavour. Emma x
I’ve read the comments where people were not happy with the result due to too thin dough. I wish you showed the dough consistency . According to the recipe it looks there a lot of liquid - milk eggs butter to the flour.
Hi Dana. To get a light doughnut with that perfect white ring around it, you need a lot of liquid in the dough. It helps to have a dough scraper to manage this better. Instead of clicking the 'jump to recipe' button which takes you to the printable recipe card at the end of my posts, try scrolling down to the step by step picture recipe instead. I do these for every single one of my recipes and it shows an image for every step. You should find what you're looking for there. Emma x
I would like to try this recipe is it possible to make finger doughnuts from it
Hi Olwen. Yes absolutely! You can make these whatever shape you like and they should work just fine. Just bear in mind it could effect the cooking times so keep an eye on them when frying. Emma x
Hi,
I'm in the processing of making these donuts - I'm an American in Mexico right now so maybe it's the humidity? I also halved the recipe. My dough was very wet even up until turning the dough into a sausage. I couldn't get any of it off my hands. It was a mess. Both my hands had dough on it and I added some more flour to get some sort of structure to turn it into a ball. My bag of flour has dough stuck to it haha. Was it supposed to be this wet? It had no structure.
I added more flour to the dough and then also added flour to my hands to shape it but now there might be too much flour that'll make them crispy on the outside *cries* haha.
Have an idea of what could have went wrong?
Hi Felicia. I’m sorry you’re having trouble making these! Humidity can definitely play a part in baking, also every flour has slightly different levels of absorbency. It definitely should be a wet dough to start with but it should be manageable by the time you shape. I know dough is largely judged by how it feels but maybe use my step by step pictures next time to make sure your dough looks the same as mine at each step? Emma x
Hi
I made this recipe twice. Both times I got good results but the batch that I left in the fridge overnight were fantastic: better flavour and much lighter and fluffier - made 24 normal size doughnuts. Also I found 170c way too high. Better results at 165c or a little lower.
That's good to know, thank you so much for sharing this knowledge with me! The beauty of cooking is that we are always learning 🙂 Emma x