


This post may contain affiliate links. Where I make a small commission on purchased items, at no extra cost to you. See my disclosure for details.
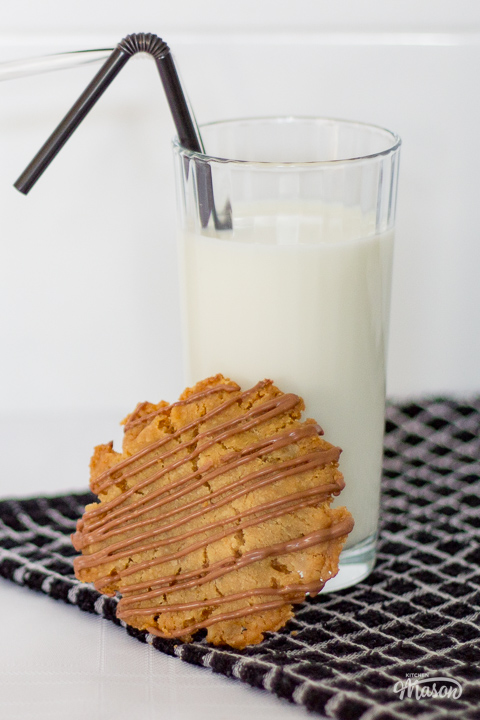
LOVE caramel? Tired of the fake flavoured stuff? This easy recipe uses real caramel pieces to make the most beautiful homemade caramel cookies! The deep caramel flavour and crunchy texture is out of this world! Keep reading to learn how easy it is to make them…

Why you’ll love this recipe
These incredibly moreish caramel shard cookies showcase a fantastic way to include caramel in cookies! I’ve eaten caramel flavoured biscuits and caramel drizzled biscuits before – but these beauties use real, homemade caramel, that’s been smashed into pieces and put straight into the dough. It honestly takes them to a whole other level!
The result is absolutely MAGICAL! I thought that the first time I made them, and every time after that too!
How to make caramel cookies
To make these chocolate and caramel cookies you first make caramel in a pan and let it cool, before crushing it into pieces. Then you make a brown sugar cookie dough, and add in the caramel shards. Shape and bake them as you would any other cookie, then drizzle in melted chocolate if you wish.
Not a confident baker yet? Check out baking for beginners! It’ll improve your baking knowledge and boost your confidence.


Ingredients
Confused about what ingredients to buy? Not sure about a substitution? Here’s everything you need to know…
- Sugar – I always use caster sugar when baking, as it’s finer crystals dissolve easily. Don’t substitute for granulated sugar if you can help it, as those crystals are much larger. And you may over mix the dough trying to get it to dissolve.
- Water – No need for anything fancy here! Tap water is absolutely fine.
- Brown Sugar – I use light brown muscovado sugar here, as it has a more caramel flavour than regular light brown sugar. Although that would work ok if that’s all you have.
- Butter – Unsalted butter is my go to in baking, as it gives me full control of the salt content. If you use salted butter instead, you may prefer to leave out the additional salt.
- Salt – As I said previously, I like to pair salt with unsalted butter as it gives me full control. If you want to make salted caramel cookies, you can simply add more salt to taste.
- Flour – Use plain (all purpose) flour here. Don’t substitute for self raising or strong bread flour, as this will alter the final texture of your cookies.
- Baking Powder – Don’t switch this out for bicarbonate of soda as they react differently in baking. It needs to be baking powder.
- Vanilla – As always, I’m passionate about using good quality vanilla, as you can REALLY taste the difference! Supermarket versions are genuinely a waste of money. Try using Little Pod or Nielsen Massey.


Emma’s top tips
Here are tips you’ll find helpful when making these caramel cookies.
- Don’t be tempted to stir when you’re making the caramel. If you do, that’s when sugar crystals form, and the whole thing seizes up.
- Be careful handling freshly made caramel, as it’s incredibly hot. It will burn if it touches your skin.
- Make sure you bring the butter to room temperature before using it, or you will have difficulty creaming it with the sugar.
- Forget to take your butter out the fridge and it’s really hard? Here’s how to soften butter quickly.
- Don’t skip the dough chilling stage! Otherwise your cookies will spread a lot more during baking.
- Don’t be tempted to flatten the dough balls, as they will spread a fair amount during baking anyway.
Timings
Have limited time? Struggle with recipe timings? Or juggling around other things? Here’s some time managing info to make your life easier.
- The caramel will take around 10 minutes to make, and 10 minutes to cool.
- It should take you around 10-15 minutes to make the cookie dough.
- Allow a minimum of 30 minutes dough chilling time. But if you have longer, they will be even better and spread less.
- Shaping the cookies will take about 5-10 minutes.
- Baking the cookies will take between 14-18 minutes. You many need to cook in batches though, so bear this in mind.
- Cooling shouldn’t take too long, but it will vary depending on how warm your kitchen is.


If you like this recipe…
…you might also like:
Easy Caramel Cookies – Step by Step Picture Recipe
(For a printer friendly version, see the recipe card at the end of this post)
Please note, this recipe includes both UK metric and US Cup measurements.
Ingredients
Here is what you will need to make 20.
For the caramel
- 100g (1/3 + 1/8 Cup) Caster Sugar
- 3 tbsp Water
For the cookie dough
- 200g (1 Cup) Light Brown Muscovado Sugar
- 150g (2/3 Cup) Unsalted Butter, Room Temp
- 1/2 tsp Salt
- 200g (1 + 1/2 Cups) Plain Flour
- 1 tsp Baking Powder
- 1 tsp Vanilla Extract
To decorate (Optional)
- 100g (3.5 oz) Milk Chocolate
Essential equipment
- Saucepan
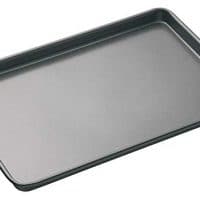
- Large Baking Tray
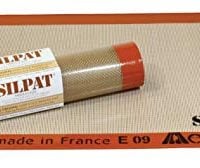
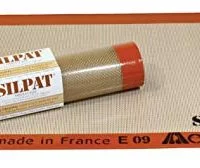
- Silicone Mat OR Baking Paper
- Electric Stand Mixer *
- Cling Film OR Plastic Bag
- Rolling Pin
- Wire Cooling Rack
*Or a large Bowl with Electric Hand Whisk.
Caramel instructions
To make the caramel, put the sugar (100g | 1/3 + 1/8 Cup) and water (3 tbsp) into a saucepan and stir together. Then place the pan over a high heat, and allow to boil for about 5-6 minutes without stirring. (If you stir, sugar crystals will form and it won’t work.)
When it’s ready, the bubbles will be much smaller than at the start, and the caramel will be a nice golden colour.


Pour the caramel onto a baking tray lined with baking paper or a silicone mat, and allow to cool/set for at least 10 minutes.


Cookie instructions
In a stand mixer fitted with the beater attachment (or in a large mixing bowl with an electric hand whisk) cream together the sugar (200g | 1 Cup), butter (150g | 2/3 Cup) and salt (1/2 tsp) until light and smooth.


Next add in the flour (200g | 1 + 1/2 Cups), baking powder (1 tsp) and vanilla (1 tsp) and mix until a crumbly dough is formed.


When the caramel has completely cooled, wrap it in cling film (or place in a plastic bag) and bash with a rolling pin to make small shards.


Tip the caramel pieces into the dough, and mix until everything is nicely incorporated. Now wrap the dough in cling film or foil, and pop it into the fridge for a minimum of 30 minutes.


Baking instructions
Preheat your oven to 170°C/Fan 160°C/338°F.
Divide the dough into 20 pieces, and roll into balls. Then space them apart on a lined baking tray and bake for approximately 16 minutes, until golden on the edges. You may need to bake them in batches.


Allow the caramel cookies to sit on the tray for a few minutes before transferring to a wire rack to cool completely. When cool, you can eat them as they are or decorate with chocolate.


To decorate (optional)
Place the cooled caramel cookies onto a cooling rack or on a sheet of baking paper.
Melt the milk chocolate (100g | 3.5 oz) either in a small bowl in 10 second intervals in the microwave, or in a bowl set over a pan of barely simmering water.
Then pour into a piping bag, snip the end, and drizzle over the cookies. Allow to set before transferring to a container for storage.


How to store caramel cookies
Store your caramel cookies in a metal tin at room temperature, and consume within 3-4 days (if they even last that long!!).
Don’t use a plastic tub if you can help it. Sugar sweats in plastic, and it can quickly ruin all your hard work!
FAQs
Caramel cookies can be lots of different things. But in this case, caramel brittle is smashed and added to cookie dough. Then baked and drizzled in melted chocolate, to form moreish chocolate caramel cookies! Of course the melted chocolate is optional, but it does add to the flavour and makes them look pretty.
Absolutely! Cookies with caramel inside are divine! Whether that’s soft caramel (like in millionaire brownie bars), caramel chocolate chips, or crushed hard caramel like in this caramel cookie recipe.
I wouldn’t personally freeze baked caramel cookies, but you could freeze the unbaked dough balls. Just make sure you wrap them well and use them within 3 months so they don’t get freezer burn.
If you want to bake them straight from the freezer, just add 2-3 minutes onto the cooking time. But keep a close eye on them, just in case.
Loved this recipe? Pin it!


Easy Caramel Cookies Recipe
This easy recipe uses REAL homemade caramel pieces to make the most beautiful caramel cookies! Giving the BEST flavour and texture ever!!
Ingredients
For the caramel
- 100g (1/3 + 1/8 Cup) Caster Sugar
- 3 tbsp Water
For the cookie dough
- 200g (1 Cup) Light Brown Muscovado Sugar
- 150g (2/3 Cup) Unsalted Butter, Room Temp
- 1/2 tsp Salt
- 200g (1 + 1/2 Cups) Plain Flour
- 1 tsp Baking Powder
- 1 tsp Vanilla Extract
To decorate (Optional)
- 100g (3.5 oz) Milk Chocolate
Essential equipment
- Saucepan
- Large Baking Tray
- Silicone Mat OR Baking Paper
- Electric Stand Mixer *
- Cling Film OR Plastic Bag
- Rolling Pin
- Wire Rack
Instructions
For the caramel
- Place the sugar and water into a saucepan and briefly mix together. Then place over a high heat and allow to boil for 5-6 mins. DO NOT STIR. (The bubbles will become smaller than they were at the start, and it will be a nice golden colour.)


- Pour onto a baking tray lined with a silicone mat (or baking paper) and leave to set/cool for at least 10 mins.


For the cookie dough
- Cream together the brown sugar and butter in a stand mixer, until light and fluffy.

- Then add the salt, flour, baking powder and vanilla, and mix until it forms a crumbly dough.

- Wrap the cooled caramel in cling film (or put in a plastic bag) and bash with a rolling pin to create small shards.

- Add the caramel pieces to the dough, then wrap it in clingfilm and refrigerate for at least 30 minutes.


Baking instructions
- Preheat your oven to 170ºC/Fan 160ºC/338ºF. Then divide the dough into 20 pieces, and roll into balls. Space them out evenly on a lined baking tray, allowing room for spreading. (You may have to bake in batches)

- Bake for 14-18 minutes, until cooked through and the edges are golden. Leave on the tray for a few mins to firm up, then transfer to a wire rack to cool completely.


To decorate (optional)
- Melt the chocolate in a microwave in 10 second intervals, then pour into a piping bag. Snip the end and drizzle over the cooled caramel cookies. Leave to set before eating or storing.


Notes
*Or a large Bowl with Electric Hand Whisk.
If you would rather use a more in depth picture recipe, please see the main body of this post. Where you’ll also find lots of extra FAQs and helpful tips, should you need them.
Please note, this recipe includes both UK metric and US Cup measurements.
Storage
Store your caramel cookies in a metal container at room temperature, and consume within 3-4 days.
Tips
- Don’t be tempted to stir when you’re making the caramel. If you do, that’s when sugar crystals form, and the whole thing seizes up.
- Be careful handling freshly made caramel, as it’s incredibly hot. It will burn if it touches your skin.
- Make sure you bring the butter to room temperature before using it, or you will have difficulty creaming it with the sugar.
- Forget to take your butter out the fridge and it’s really hard? Here’s how to soften butter quickly.
- Don’t skip the dough chilling stage! Otherwise your cookies will spread a lot more during baking.
- Don’t be tempted to flatten the dough balls, as they will spread a fair amount during baking anyway.
Recommended Products
As an Amazon Associate and member of other affiliate programs, I earn from qualifying purchases at no extra cost to you.
Nutrition Information:
Yield: 20 Serving Size: 1Amount Per Serving: Calories: 176Total Fat: 8gSaturated Fat: 5gTrans Fat: 0gUnsaturated Fat: 2gCholesterol: 17mgSodium: 88mgCarbohydrates: 26gFiber: 0gSugar: 18gProtein: 1g
Nutritional information on kitchenmason.com should only be used as a general guideline, I am not a certified nutritionist. Please always check labels for allergens where applicable.
I want to see YOUR baking!
Have you made these moreish caramel cookies? I’d love to know if you have! Tag me in your pics on Facebook, Twitter and Instagram or email me at emma@kitchenmason.com.
Other tasty cookie recipes


Experienced British Online Publisher, recipe writer, and home cook, Emma has a background of over 20 years in British cuisine and cooking. Born and bred in the UK, she excels in classic British dishes, is passionate about air frying, and loves sharing her Gran’s old school recipes. She has been featured in popular publications such as Food Network, Cosmopolitan, and The Huffington Post.
Knowledgeable On: Traditional British Cuisine, Recipe Writing, Air Frying, Home Cooking.
Jesse-Gabriel
Wednesday 15th of June 2022
Man kann auch Bonbons zerkleinern und verwenden, klappt super! Grüße, Jesse-Gabriel
Emma
Wednesday 15th of June 2022
Beilliant idea Jesse-Gabriel, thanks for the tip! (geniale idee Jesse-Gabriel, danke für den tipp!) Emma x
njsantacesaria
Monday 3rd of February 2014
These look incredibly tasty! Thanks for posting all the pics along with the recipe - I love to see the process as well as the final product!
Miss KitchenMason
Monday 3rd of February 2014
Aww thank you! Step by step Is one of the things I strive to do with every post. I personally find it much easier to follow a recipe when you can see the whole process from start to finish.
huntfortheverybest
Monday 3rd of February 2014
they look yummy!
Miss KitchenMason
Monday 3rd of February 2014
Thank you!
Baking With Gab
Monday 3rd of February 2014
These look delicious! Haha I love that you're as relieved as I am that the whole "January healthy eating plan" thing is over!
Miss KitchenMason
Monday 3rd of February 2014
Haha thank you! And yes, I've never been one for seriously healthy eating, January is hard on food bloggers with a sweet tooth! X