This post may contain affiliate links. Where I make a small commission on purchased items, at no extra cost to you. See my disclosure for details.
Tired of buying dry tasteless meringues? Want to know how to make meringues that are crisp on the outside, yet chewy in the middle? It’s easier than you think! This chewy meringue recipe is simple to follow, includes step by step pictures, and yields perfect results that are easy to achieve! Keep reading to learn how…

Why you’ll love this chewy meringue recipe
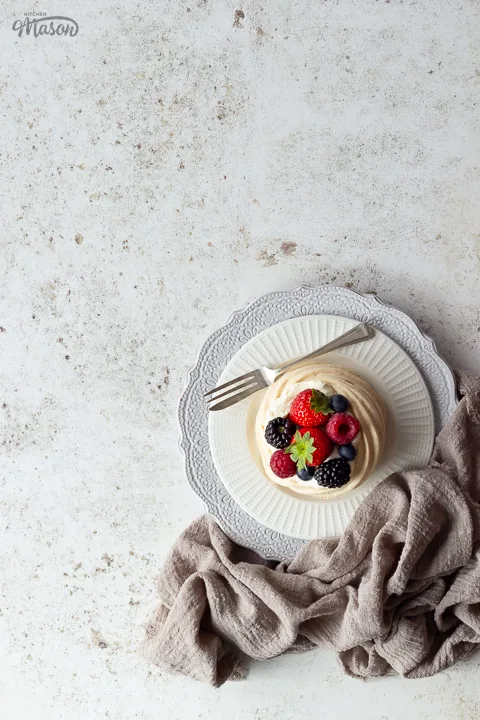
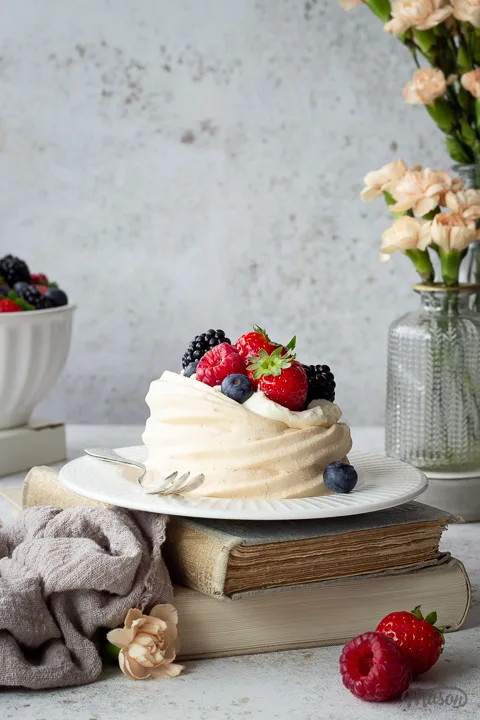
I’ve eaten countless shop bought meringues and, trust me when I tell you, they are NOTHING on the homemade versions! I’ve never been able to find a shop bought variety that is anywhere near as good as homemade. You know… Those gorgeous chewy meringues, that are crisp on the outside, and go perfectly with whipped cream and berries?!
This chewy meringue recipe was actually born of me trying to create a new air fryer recipe, but I haven’t perfected that one just yet. However, as a happy accident, I managed to develop this perfect oven baked chewy meringues recipe instead!

How to make meringue chewy
Basic meringues require just 2 ingredients. Fresh eggs and sugar. But to make them chewy, we need to add a little cornflour and some cream of tartar. Both of those extra ingredients help to stabilise the egg whites (which can be temperamental at the best of times!), but the cornflour really helps to get that chewy marshmallowy centre that we want.

Should you use cold or room temperature egg whites?
If you have the time, using room temperature egg whites is always best. Using cold egg whites inhibits the expansion of the air bubbles. Whereas room temperature egg whites can take in more air, much more easily.
And if you’re short on time? There are ways you can bring eggs to room temperature quickly.

Ingredients
Confused about what ingredients to buy? Not sure about a substitution? Here’s what you need to know before making this chewy meringue recipe…
- Eggs – For less headaches, use the freshest eggs you can get. This helps prevent lots of potential disappointments.
- Sugar – Use caster sugar (superfine in the US), NOT granulated. Granulated sugar can take much longer to dissolve into the egg whites. Which can result in over whipping, and sunken meringues.
- Cornflour – Don’t leave this out or substitute the cornflour. This is key to getting those pillowy chewy middles!
- Cream of Tartar – Adding stability, cream of tartar is a good helping hand in making sure those egg whites behave. Don’t omit this.
I highly recommend you don’t substitute any of these ingredients. Meringues require a delicate balance of ingredients to bake properly, and it’s best not to mess with that if you want to avoid disappointment.
Emma’s top tips
Here are a few tips you might find helpful when making chewy meringues…
- Weigh your sugar out into a small bowl or jug before you begin. This will make it easier to gradually add it into the egg whites when they’re ready.
- Don’t over beat the egg whites, as this can result in sunken meringues. Use the step by step picture recipe to see exactly what things should look like at each stage to help.
- Don’t get egg yolk (or anything else) into the whites before you whisk them. The addition of any fat will stop the egg from taking in air as well, and it can ruin the entire batch.
- You can use a piping bag or nozzle to make your nests look fancy, or simply use a spoon to scoop and spread them out. Neither method cooks better than the other, and they will both taste great!
- These meringues will puff up/spread slightly during cooking. So make sure you allow a little room between each one.
- Meringues haven’t turned out as well as you’d hoped? Smash them up and make Eton mess instead!
Timings
Have limited time? Struggle with recipe timings? Or juggling around other things? Here’s some time managing info to make your life easier.
- It will take anywhere between 3-5 minutes to whisk the egg whites and cream of tartar to stiff peaks. (Possibly longer if you’re using cold eggs.)
- It should take around 4-8 minutes to gradually whisk in the sugar and cornflour.
- Piping or spooning out your meringues will take no more than 5 minutes.
- Baking the meringues will take about 70 minutes.
- Depending on if it’s a hot or cold day, they will take up to an hour to completely cool.
Chewy Meringue Recipe UK – Step by Step Picture Recipe
(For a printer friendly version, see the recipe card at the end of this post)
Please note, this recipe includes both UK metric and US Cup measurements.
Ingredients
Here is what you will need to make 6-8.
- 2 x Large Egg Whites, room temperature
- 1/8 tsp Cream of Tartar
- 3/4 tsp Cornflour
- 130g (1/2 Cup + 1 tbsp) Caster Sugar
Essential equipment
- Large Baking Tray
- Baking Paper
- Large Mixing Bowl
- Electric Hand Whisk
- Piping Bag (optional)
- Piping Nozzle (optional)
Whisking instructions
Preheat your oven to 110ºC (230ºF) and line a large baking tray with baking paper.
Add the egg whites (x 2) and cream of tartar (1/8 tsp) to a large mixing bowl, and plug in your electric hand whisk.

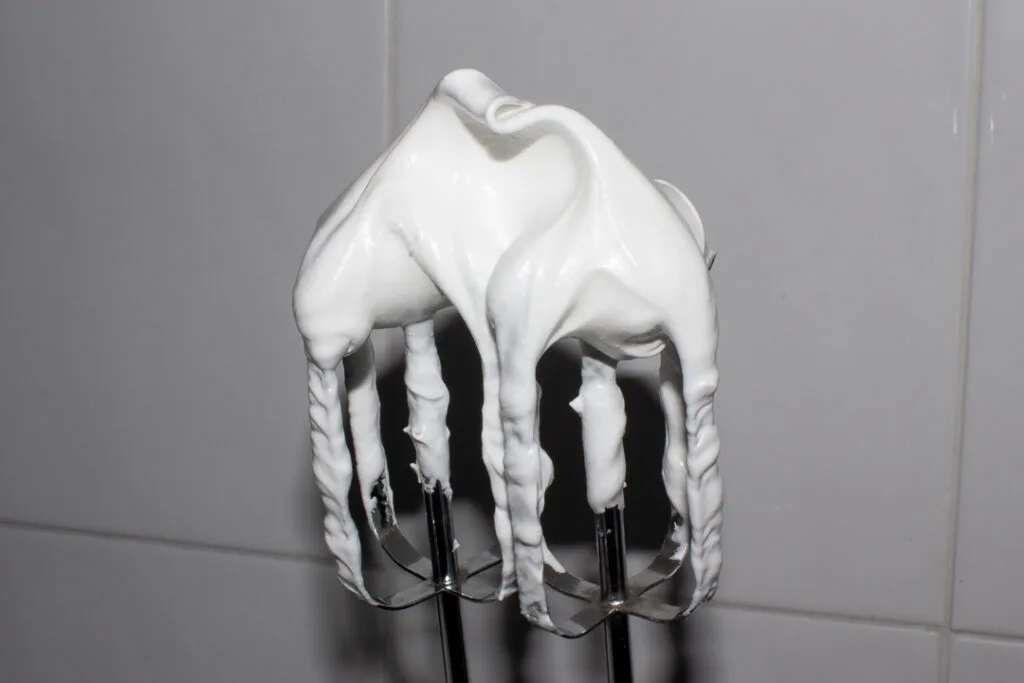
Whisk the mixture until it forms stiff peaks. It will take around 3-5 mins, and the peaks should hold their shape when you pull the whisk out of the bowl (see images below).
I like to keep my whisk on a medium speed, rather than going any faster. That way you can keep a close eye on things, and you’re less likely to over whisk the eggs… which will result in deflated meringues.
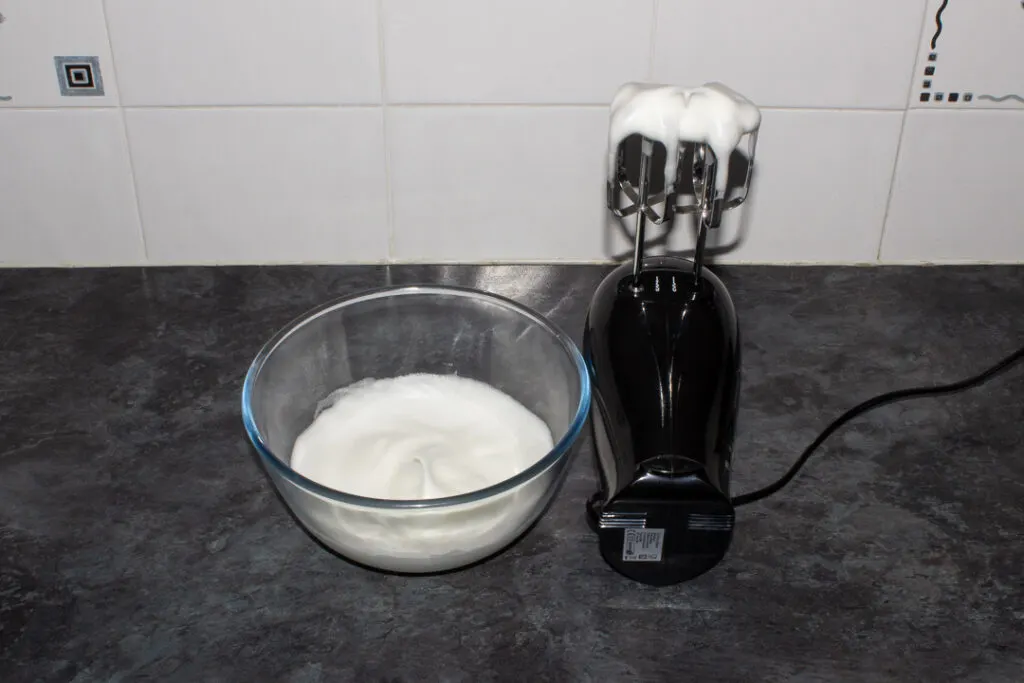

Next, sprinkle over the cornflour (3/4 tsp) and briefly whisk it in.
Now it’s time to gradually incorporate the sugar (130g | 1/2 Cup + 1 tbsp). About 1 tsp at a time, add the sugar into the egg whites and whisk for about 10 seconds after each addition.
Repeat until all the sugar has been used, and the mixture is very thick and shiny. It should hold it’s shape with a little softness to the peaks when pulled out of the bowl.
Don’t try to add more sugar in at once, or speed things up. This has to be done gradually for your meringues to work.

Shaping and baking instructions
If you are piping your meringues, load a piping bag with your nozzle of choice (I used a 3M open star nozzle), then fill with your meringue mixture. Otherwise, just use two spoons to scoop and spread straight from the mixing bowl.
Pipe/spoon your meringues out onto your lined baking tray. I usually get between 6-8, and they are about 7cm in diameter by 3cm tall. Though I leave the middles thinner, so you can fill them with cream and berries after.
Do allow a little room between each one, as they tend to spread/puff up a little during baking.
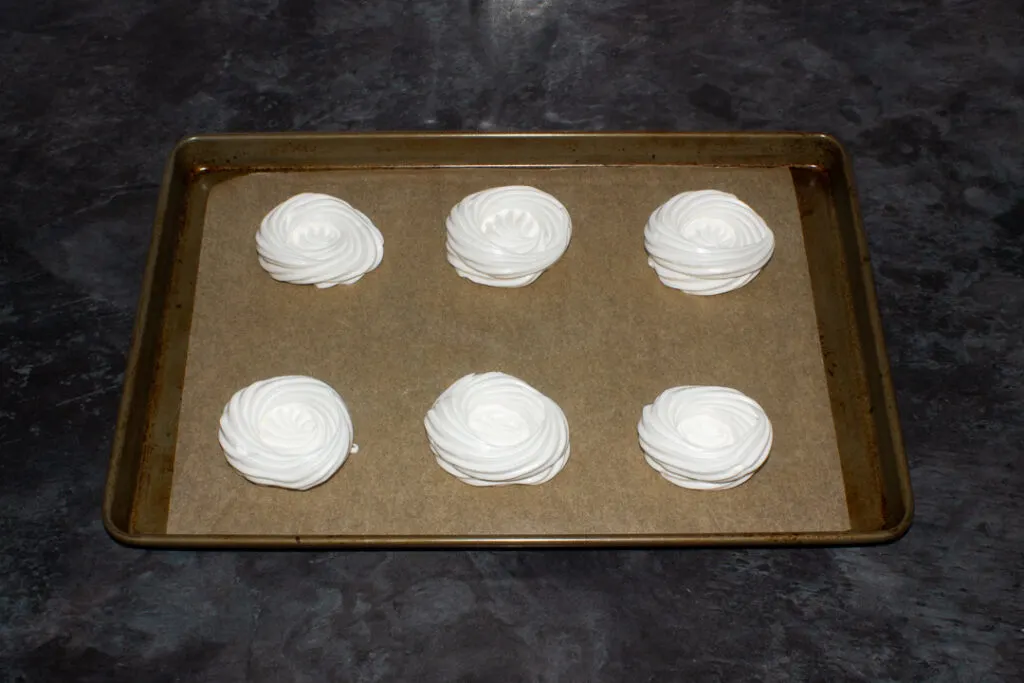
Bake in your preheated oven for 70 minutes. They will be crisp on the outside and underneath, and perfectly chewy in the middle.
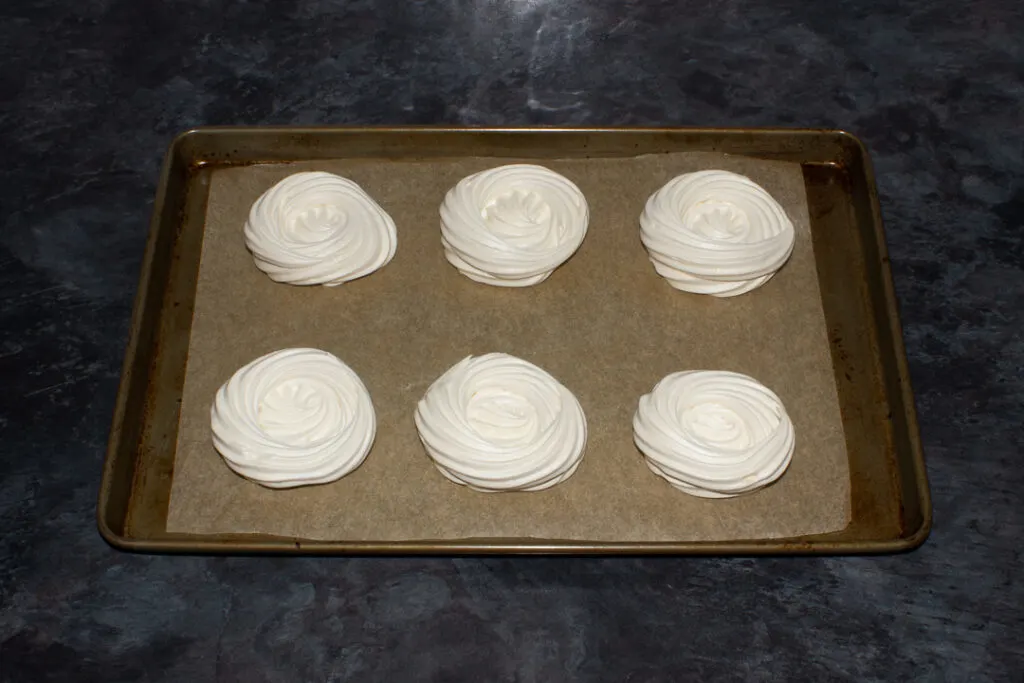
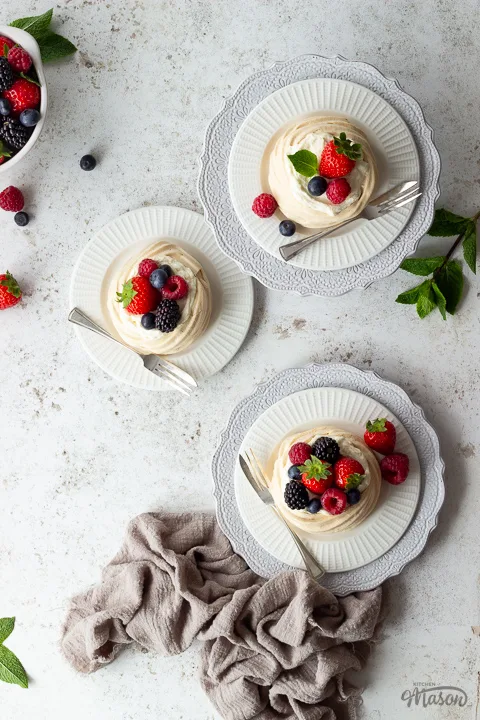
Allow to cool completely, then serve with sweetened whipped cream and berries. Or any way that takes your fancy!

FAQs
Store your meringues in a metal container at room temperature. They should keep pretty well for about 7 days or so.
Vinegar does help to stabilise the egg whites in meringue. However, as we’re already using cream of tartar (which is also acidic), we don’t need the addition of vinegar as well.

This recipe uses French meringue. It’s the most commonly used method, and the easiest one to make. The Italian and Swiss methods, although delicious, are a little tricker to make. As they require certain ingredients to be hot/cooked throughout the whisking process.
Personally, I don’t like to mess with the delicate balance of ingredients in meringue, as it’s not worked well for me before. There are so many ways to add flavour to your meringues after they’ve cooked though, that I really don’t think of this as a negative.
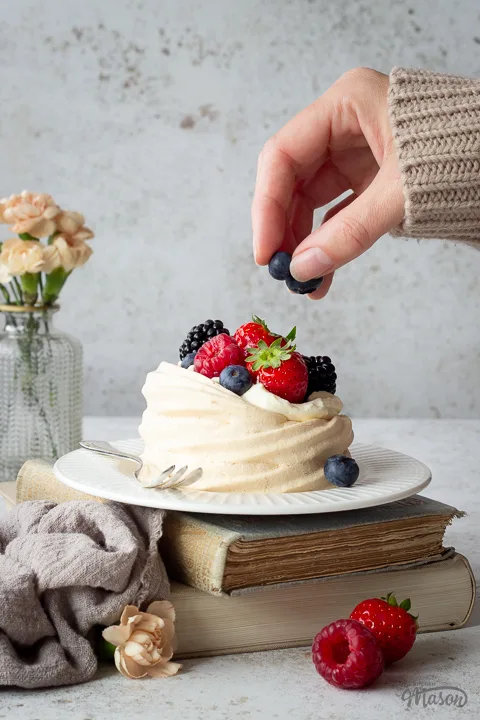
They do taste great on their own, but you can use meringues as part of lots of delicious recipes! They make a wonderful dessert base to add other ingredients to, and you can utilise them for pretty much any occasion. For example, you can use them to make a cheat Christmas pavlova, Halloween meringue ghosts, or even Easter meringue nests!
So long as you whisk your eggs to proper stiff peaks, it’ll be fine. If you haven’t done this before, and you’re unsure, use the Step by Step Picture Recipe, as this has images for every stage. So you will be able to clearly see what your egg whites should look like.
The addition of cornflour and cream of tartar will also help to add stability to the whipped egg whites. Which will make your life a little easier.
So long as you whisk the egg whites to stiff peaks properly and add the sugar gradually, it should be fine. The addition of the cornflour and cream of tartar will also help to stabilise things. Just make sure you don’t over whisk, as this can destabilise the eggs.
Dramatic temperature change can also crack your meringues. So if it is a particularly cold day, you might want to open the oven door when the cooking time is over, and leave them in the oven for a little while. So they cool down gradually.
Just keep an eye on them if you do. I left the door open once, and my cat actually stole one straight from the oven!! He is called Naughty Noodle though, so it’s to be expected I guess, haha!

Loved this chewy meringue recipe? Pin it!


Chewy Meringues Recipe (UK)
This chewy meringue recipe is simple to follow, and yields perfect results that are EASY to achieve!
Ingredients
- 2 x Large Egg Whites, room temperature
- 1/8 tsp Cream of Tartar
- 3/4 tsp Cornflour
- 130g (1/2 Cup + 1 tbsp) Caster Sugar
Essential Equipment
- Large Baking Tray
- Baking Paper
- Large Mixing Bowl
- Electric Hand Whisk
- Piping Bag (optional)
- Piping Nozzle (optional)
Instructions
- Preheat your oven to 110ºC (230ºF) and line a large baking tray with baking paper. Add the egg whites and cream of tartar into a large bowl, and whisk to stiff peaks using an electric hand whisk.


- Sprinkle in the cornflour and briefly whisk in. Now gradually add the sugar, 1 tsp at a time. Whisking for about 10 seconds between every addition. Continue until all the sugar has been added, and your meringue mixture is very thick and shiny.


- Load a piping bag with your chosen nozzle, followed by the meringue mixture. Pipe nests approx 7cm in diameter by 3cm tall. (Alternatively, you can just spoon it onto the baking tray in mounds.) Leave a little space between each one for spreading.

- Bake in your preheated oven for 70mins, until the outside and underneath are crisp, and the insides are chewy. Allow to cool completely.

Notes
If you would rather use a more in depth picture recipe, please see the main body of this post. Where you’ll also find lots of extra FAQs and helpful tips, should you need them.
Please note, this recipe includes both UK metric and US Cup measurements.
Serving suggestion
Serve your chewy meringue nests with sweetened whipped cream and mixed berries.
Tips
- Weigh your sugar out into a small bowl or jug before you begin. This will make it easier to gradually add it into the egg whites when they’re ready.
- Don’t over beat the egg whites, as this can result in sunken meringues. Use the step by step picture recipe to see exactly what things should look like at each stage to help.
- Don’t get egg yolk (or anything else) into the whites before you whisk them. The addition of any fat will stop the egg from taking in air as well, and it can ruin the entire batch.
- You can use a piping bag or nozzle to make your nests look fancy, or simply use a spoon to scoop and spread them out. Neither method cooks better than the other, and they will both taste great!
- These meringues will puff up/spread slightly during cooking. So make sure you allow a little room between each one.
- Meringues haven’t turned out as well as you’d hoped? Smash them up and make Eton mess instead!
Recommended Products
As an Amazon Associate and member of other affiliate programs, I earn from qualifying purchases at no extra cost to you.
Nutrition Information:
Yield: 8 Serving Size: 1Amount Per Serving: Calories: 67Sodium: 14mgCarbohydrates: 16gSugar: 16gProtein: 0.9g
If you like this chewy meringue recipe…
…you might also like:
I want to see YOUR baking!
Have you used this chewy meringue recipe? I’d love to know if you have! Tag me in your pics on Facebook, Twitter and Instagram or email me at emma@kitchenmason.com.

Experienced British Online Publisher, recipe writer, and home cook, Emma has a background of over 20 years in British cuisine and cooking. Born and bred in the UK, she excels in classic British dishes, is passionate about air frying, and loves sharing her Gran’s old school recipes. She has been featured in popular publications such as Food Network, Cosmopolitan, and The Huffington Post.
Knowledgeable On: Traditional British Cuisine, Recipe Writing, Air Frying, Home Cooking.


Jan
Sunday 10th of November 2024
Great detailed recipe, just wondering if I can use carton/bottled egg whites
Emma
Sunday 10th of November 2024
Hi Jean. Thank you! I have only made this with fresh eggs, so I’m not 100% sure if I’m honest. Sorry I can’t be more help this time. Emma x